


How to Use Lightroom on Chromebook (+ 3 Workarounds)
Using Lightroom CC on a Chromebook is a fun way to free yourself from the inconveniences of photo editing on a desktop computer. Here's how to do it.
If you’re wondering how to use Lightroom on a Chromebook, look no further. This article will guide you through installing and using the photo editing tool.
The Lightroom option available for Chromebook is user-friendly and ideal for beginner photographers. That said, you likely won’t be able to access Lightroom Classic without a few workarounds.
Stick around to learn more about using Lightroom on Chromebook.
How Can You Use Adobe Lightroom on Chromebook?
Lightroom is an essential tool when in photo editing. The editing software developed by Adobe can help you retouch, enhance, and filter your images.
Fortunately, you can use Lightroom on your Chromebook. Nonetheless, you can’t directly download the Lightroom Classic version on Chromebook, only the Lightroom CC or mobile version. Here’s how.
Step 1: Installing Lightroom On a Chromebook
When installing Lightroom on your Chromebook, ensure that the latter can run Android apps. You’ll be downloading Adobe Lightroom through the Google Play Store. But first, here’s what you got to do.
- Navigate to the “Settings.”
- Click on the “Apps” panel.
- Go to the “Google Apps Store.” If your Chromebook doesn’t have that option, that means you can’t run Android apps on it.
- Search for Adobe Lightroom.
- Install the application and sign in.
Now, if your Chromebook can’t run Android apps, you’ll need to make sure you’re operating on the latest Chrome OS. Next, follow the steps below.
- Go to the “Settings.”
- Press “Turn On” next to “Install apps and games from Google Play on your Chromebook.”
- A prompt window will open. Click “more,”
- Agree to the terms and conditions.
Step 2: Logging In and Syncing
To log in to your Adobe Creative Cloud account, key in your Adobe ID. If it’s an already existing account, your cloud-stored data should be available.
Syncing your photos involves navigating to the cloud icon in the top right corner of the software. It’ll show you whether you’re synced or not.
Step 3: Navigating Lightroom’s Interface
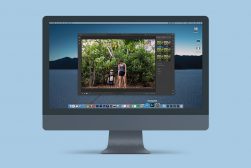
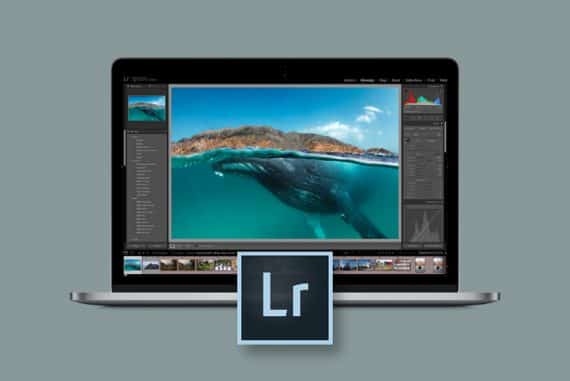
In the Adobe Lightroom interface, you’ll find a panel to your right that contains the “develop” module. It allows you to make adjustments to your image in terms of light, optics, color, geometry, effects, and detail.
You’ll also find a cropping option, where you can adjust the aspect ratio of the image. Under the cropping option, there are the presets. It lets you choose between pre-saved photo editing enhancements.
Next, you’ll find the healing tool. It helps you remove imperfections from an image, such as blemishes.
In the bottom right corner, you’ll find the metadata icon that allows you to rate and flag the images. Additionally, you can add keywords to help you filter through the images quicker.
To export the image, you can click on the share icon in the upper right corner of the screen. It’ll allow you to save the file.
Meanwhile, the left side has the Folder panel, where you can manage files or import images.
Step 4: Importing and Organizing Photos
When importing images, you can do so through an SD card, cloud storage, or local storage. For the prior, you can connect the card to your Chromebook directly. Besides that, you can connect your camera to your Chromebook using a USB cable.
To organize files, you can go to the left panel and create an album or folder. The option also allows you to sort the files based on album names or photo counts.
Step 5: Editing and Enhancing Photos
Lightroom offers multiple photo editing options, such as image saturation, light exposure, HSL, shadows, colors, and effects.
You can also enhance image details, such as visual noise and sharpness. The software also allows you to modify the image’s aspect ratio and position, whether you want to move it vertically or horizontally.
Step 6: Exporting and Sharing Photos
You can export your images through JPEG, DNG, and TIFF. In terms of resolution, you can choose between 10%-100%.
When it comes to metadata, users can share it during export, and it’ll show information such as the camera type and image settings. Alternatively, you can pick the copyright option to keep the metadata out of the public domain.
Utilizing Lightroom Mobile and Web
Lightroom on Chromebook is available in both mobile and web-based formats. You can access your edited images in the Lightroom Catalog option.
To sync, you need to ensure that you have an Adobe Cloud account accessed throughout all your devices. Afterward, click on the cloud icon in the top right corner and “Start Syncing.”
Tips and Tricks Using Lightroom On Chromebook
- You can remove synced images to manage storage limitations on your Chromebook.
- Use the heal tool to smoothen distractions.
- Make use of the “Selective” photo editing tools to fix a portion of the image’s lighting.
What are the Limitations of Running Lightroom on a Chromebook?
You can’t run Lightroom Classic on Chromebook. The advanced photo editor option isn’t available on Android or Linux apps as well. That said, Chromebooks have lower processing power and limited storage capabilities compared to other laptops.
In addition, GPU performance is also not as up to par, and you’re more likely to run the risk of insufficient RAM.
Does Lightroom Classic Work On a Chromebook?
Lightroom Classic doesn’t directly run on a Chromebook. Using the workarounds typically doesn’t offer the same performance as well.
Does Photoshop Work On a Chromebook?
Like Lightroom CC, you can install Adobe Photoshop on Chromebook from the Google Play Store.
What Adobe Software Works On Chromebook? (Can I Install Adobe Apps On Chromebook?)
You can use multiple Adobe software tools like Photoshop Lightroom Express, Adobe Comp CC, and Adobe XD, among other options.
What Is a Free Lightroom Alternative for Chromebook?

- Pixlr: The application is ideal to edit photos as a beginner thanks to its user-friendly interface.
- Polarr: The software offers basic adjustments, deep color corrections, and a wide array of tools.
- Canva: Not only can you use Canva as a basic photo editing tool, but you can create presentations, posters, and resumes as well from their vast collection of templates.
You can find more great Lightroom replacements here.
Are Chromebooks Good for Photo Editing?
Check out the pros and cons of using a Chromebook for editing.
Pros
- Beginner-friendly
- User-friendly interface options
- Lots of photo editor application options are available
Cons
- Not suitable for professionals looking for advanced features
- Limited storage options
- Some editing features require more RAM so may be sluggish
Tips on How to Run Adobe Photoshop Lightroom Effectively on a Chromebook
Using Adobe Lightroom on a Chromebook requires some special consideration, especially because Chromebooks often have limited local storage, and Lightroom is a resource-intensive application.
To optimize your Chromebook for effective Adobe Photoshop & Lightroom use:
- Ensure Compatibility:
- Not all Chromebooks can run Android apps smoothly. Make sure your Chromebook is compatible and can run Android apps like Lightroom.
- Maximize Storage:
- Use an external SD card or USB drive for storing photos. Lightroom needs to cache images locally for editing, so ensure you have ample free space on your Chromebook.
- Regularly backup and offload finished or unused files to cloud storage or an external hard drive.
- Limit Background Processes:
- Close unused apps and tabs. Lightroom can be resource-intensive, and freeing up RAM can help it run more smoothly.
- Keep Your System and Apps Updated:
- Regularly check for Chrome OS updates and app updates from the Google Play Store. Updates can bring performance improvements and bug fixes.
- Optimize Lightroom Settings:
- Inside Lightroom, use Smart Previews for editing. This will use smaller, proxy files rather than full-resolution files, making editing faster.
- Regularly clear Lightroom’s cache from the settings to free up space and keep the app running smoothly.
- Utilize Cloud Storage:
- Adobe Creative Cloud offers storage options. Use this to sync your work and avoid storing everything locally.
- Stay Connected:
- A good internet connection is crucial, especially if you’re syncing your work with Adobe’s cloud services.
- Consider External Peripherals:
- Use an external mouse for more precise editing.
- Calibrate your screen for color accuracy if you’re doing professional or print work.
- Power Settings:
- Ensure your Chromebook is set to high-performance mode if available.
- Plug your Chromebook into a power source when editing to prevent it from entering power-saving modes which can slow performance.
- Reset & Clean Install:
- If Lightroom is consistently sluggish, consider performing a factory reset on your Chromebook. This will remove any potential software conflicts or bloated caches. Just make sure to back up your data first.
If all else fails and you can’t run Lightroom on your Chromebook without it lagging, consider upgrading to one of the best budget laptops for photo editing instead.
Final Thoughts
To conclude, you can use Lightroom on Chromebook. Nonetheless, it won’t provide you with the professional and advanced features of Windows or Mac operating systems.
That said, it’s perfect for novice photographers looking for quick alterations and photo enhancements.
 Best Video Editing Software for Chromebook (Free and Paid)
 What’s the BEST Way to Buy Lightroom in 2023? (For All Budgets)
 12 Best Adobe Lightroom Alternatives in 2023 [User Tested]
 Lightroom CC Mobile Guide
 Adobe Lightroom Review – Still the Best Image Editor in 2023?
 Best Online Photo Storage Service in 2023 (Free & Paid)

WELCOME TO SHOTKIT
Enter your email to be sent
today's Welcome Gift:
19 Photography Tools
🔥 Popular NOW:


Shotkit may earn a commission on affiliate links. Learn more.