


Best Camera Inserts for Bags & Backpacks in 2023
Looking for a way to carry your camera gear in a bag you already own? Here's our guide to the best camera inserts and dividers to stay organised.
This guide to the best camera inserts for bags and backpacks will help you to choose the optimal storage system for your camera gear.
Versatile and customizable, camera bag inserts can be used in a wide range of traditional bags for safe and secure camera storage.
Customizable, durable and lightweight - the ideal bag insert for camera gear.
I’ve tested a range of camera bag inserts in a variety of scenarios, from casual days out to long treks in the countryside.
The beauty of camera bag inserts lies in their bespoke setup, tailoring the dividers to match the shape and size of your camera and lenses.
In this guide, I’ll break down a selection of camera inserts based on budget, build quality, and the scope of their application.
Table of Contents
What is the Best Camera Insert in 2023?
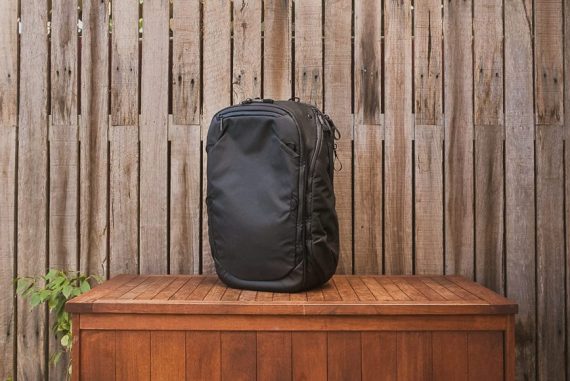
Peak Design Travel Camera Cube (Editor’s Choice)
- Highly customizable design
- Multiple access points
- Fully waterproofed
- Also compatible with the Peak Design Travel Backpack
- Messenger mode could be better
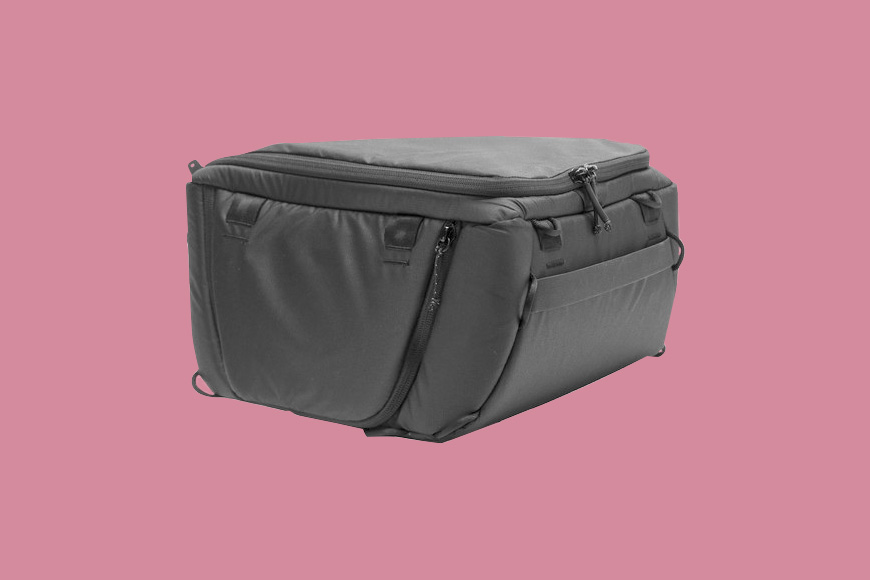
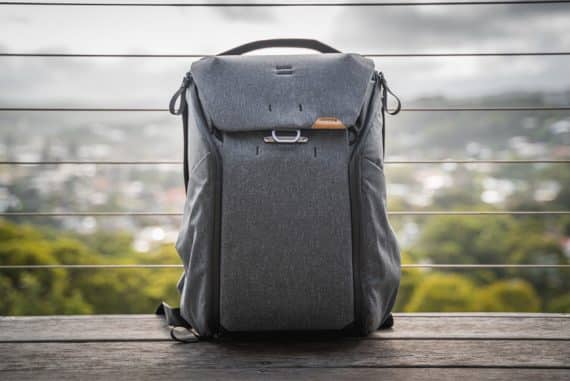
Peak Design has established its reputation as the go-to brand for photographers looking for the best camera bags for their gear.
The Peak Design Travel Camera Cube blends high-quality waterproof nylon canvas and a DWR coating with a waterproof zipper for protection against the elements.
There are several external attachment points for straps, as well as clips, so you can attach it to a larger bag such as the hugely popular Peak Design Travel Backpack.
Peak Design
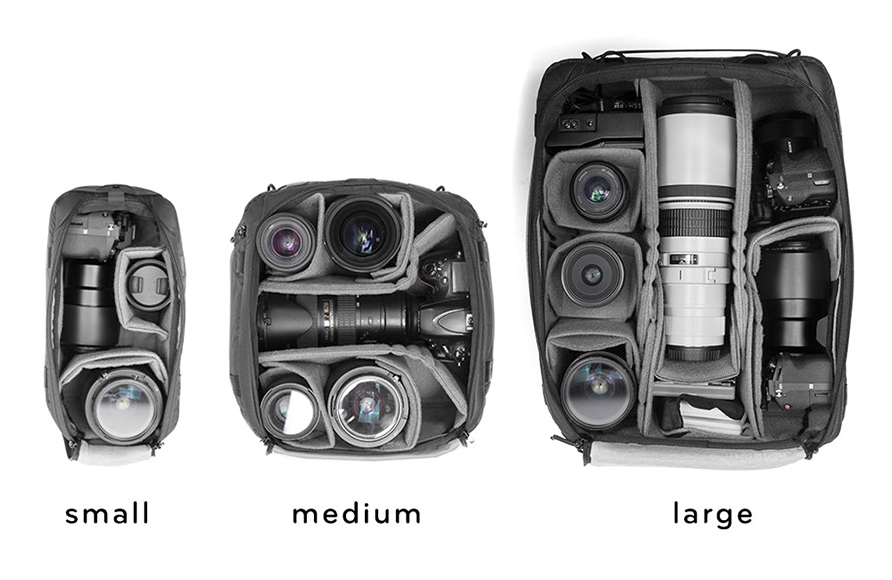
It comes with plenty of customizable space for camera gear, with adjustable bag inserts and shelves with origami-style dividers.
Indeed, the options here are more versatile than competitors, such as the Tenba BYOB series, with convenient access to your camera gear with dual side access design.
Available in three sizes (shown above), the Travel Camera Cube camera bag inserts offer support and protection with seamless integration with their other high-end products.
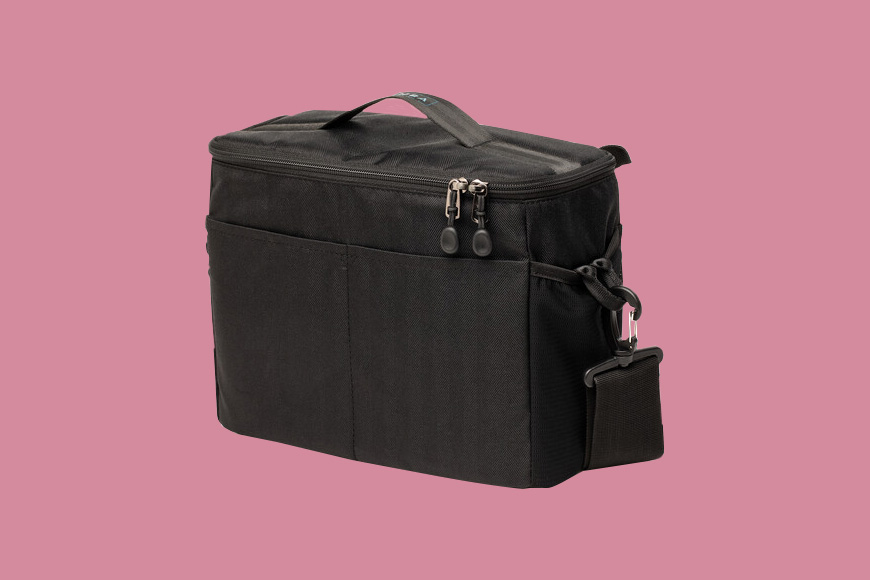
Tenba BYOB Series (Top Rated)
- Travel-friendly size
- Simple customization
- Adapts to a large range of standard bags
- Excellent build quality
- Unsuitable for lots of gear
The Tenba BYOB series of camera bag inserts present an affordable alternative with excellent build quality along with a high degree of flexibility to match your own bag.
Easy to modify to conform to your camera gear, the adjustable dividers can be reshaped by folding and compressing them to fit snugly in your bag of choice.
The BYOB series is more affordable than the f-stop ICU series of camera bag inserts but without skimping on durability and ease of use, whether using a backpack or shoulder bag.
There’s plenty of interior space to stow your DSLR camera inside the bag inserts while quickly switching between different bags without the need to alter the bag inserts in the process.
A stretchy mesh exterior pocket is also available for holding a tripod or water bottle for quick access, while a removable shoulder strap allows you to convert it into a messenger-style bag.
Available in a variety of colours, the Tenba BYOB series delivers impressive versatility and can transform any traditional bag into a camera bag with impressive potential for customization.
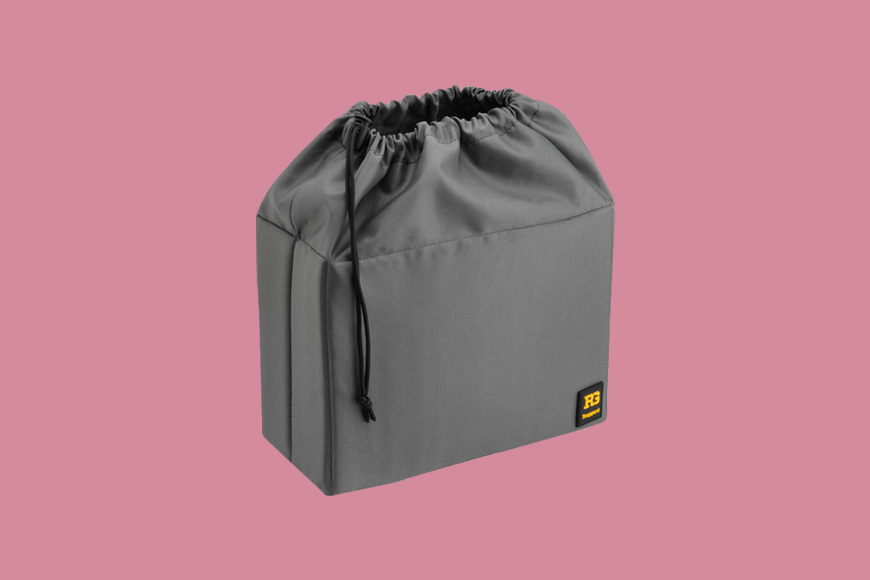
Ruggard Camera Insert (Best Budget)
- Compatible with a wide range of standard bags
- Ideal for traveling light
- Versatile camera bag dividers
- Budget-friendly option
- Limited application for professional photographers
- Relatively lightweight construction
Choosing the best camera insert for your needs doesn’t have to be expensive, and for more casual photographers with limited camera gear, there’s the budget-friendly Ruggard Camera Insert.
This low-price alternative still delivers capable interior bag inserts that can be tailored to your requirements with flexibility that allows them to be used in a wide range of other bags.
While the nylon padding isn’t as robust as more expensive camera bag inserts, it’s nevertheless capable of offering effective protection and reliable accessibility to your gear.
You can quickly change the layout to the form factor that suits your equipment, with its low profile and weight, minimizing the amount of wasted space thanks to its pared-back padding.
While it lacks the removable shoulder strap feature of its pricier competitors, this drawback is less problematic for casual photographers with smaller cameras and lenses to stow.
A simple yet highly effective storage solution for those on a tight budget, the Rugged Camera Insert delivers plenty of options without compromising versatility and security.
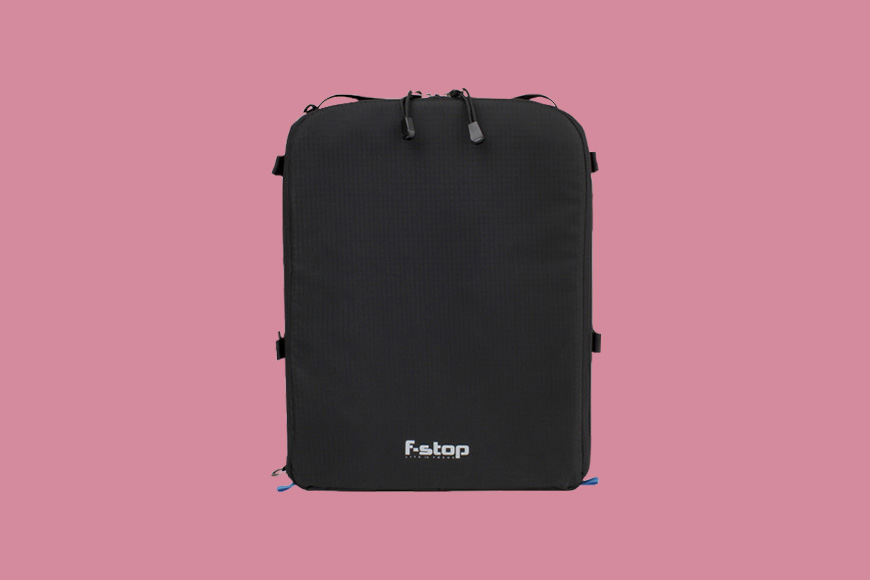
F-Stop PRO ICU (Best High Capacity)
- Exceptional customization options
- Top-tier build quality
- High-capacity storage space
- Durable and water-resistant shell material
- Expensive
If you’re a professional photographer with multiple lenses using an expensive DSLR or mirrorless camera, the F-Stop PRO ICU is a camera bag insert well worth considering.
Delivering plenty of space and customizable compartments, it’s capable of storing a comprehensive selection of cameras, lenses, and accessories of large sizes.
With enough room to fit a 150-600mm super-telephoto zoom lens, it’s ideal for pros who shoot for long periods of time at sporting events or birds and animals out in the wilderness.
It’s also compatible across the entire F-Stop ICU series, with its fully modular system allowing for quick and simple adjustments of compartments reflecting different shooting scenarios.
Additionally, the F-Stop PRO ICU is compatible with a broad selection of hiking rucksacks, whether you’re on a day trip in a city or venturing on a long camping expedition.
While the size may be overkill for casual use, dedicated photographers with larger lenses will benefit from the exceptional protection and storage space offered by the F-Stop PRO ICU.
How to Choose Camera Bag Dividers (aka Camera Inserts)

You can put all manner of things in your camera bag | Roberto Nickson
Choosing the right camera insert for your bag involves considering the size, protection level, accessibility, and customization options of the insert.
Here’s a step-by-step guide:
- Determine Your Gear Size:
- List all gear (camera bodies, lenses, flash, etc.) you plan to carry.
- Measure the dimensions of your largest items.
- Check Backpack Dimensions:
- Measure the internal dimensions of your backpack.
- Ensure the insert will fit comfortably inside.
- Protection Level:
- Look for padded, thick walls for shock absorption.
- Water-resistant or waterproof material is a plus.
- Customizability:
- Seek inserts with adjustable dividers for different gear setups.
- Velcro dividers are usually versatile.
- Accessibility:
- Top-loading inserts provide quick access but may be less secure.
- Side-loading might be more secure but could slow down gear retrieval.
- Material & Build Quality:
- High-quality stitching ensures longevity.
- Check for durable, rip-resistant fabrics.
- Weight:
- Lightweight inserts add less burden, especially for longer treks.
- Extra Features:
- External pockets for accessories.
- Carry handles for using the insert as a standalone bag.
- Reviews & Recommendations:
- Check reviews and recommendations online.
- Photographers often share insights on what works (or doesn’t) for them.
- Budget:
- Set a budget and find the best insert that fits within it.
- More expensive doesn’t always mean better.
How Do You Make a Camera Bag Insert?
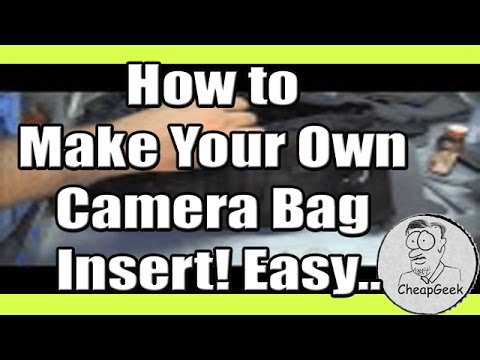
If you’d rather not spend money on a camera bag insert for your mirrorless or DSLR camera, spare batteries, and other accessories, you can make your own bag on a budget.
One way to do this is to take an old messenger bag or rucksack and refurbish it to use with your camera and additional lenses and keep them safe and protected.
The first thing you’ll need to do is create a template for the camera insert based on your camera body and lenses, using this template to build the main compartments.
This template should match the interior space of the messenger bag or backpack you wish to use for the camera bag insert.
You can use pieces of felt and foam and even use cardboard for the reinforced sections where your DSLR camera and lenses will be stored.
Once you’ve cut the foam pieces into the front, back, sides, and bottom sections, you can make the grab handles and attach these to the top of the camera bag dividers.
Next, attach velcro to the sides of the camera bag inserts so that when they lift up, they correctly attach to the main supports surrounding the camera and lenses.
If you wish, you can also add any additional exterior pockets or side pockets before you begin sewing the outer foam elements around the main supports.
Lift up each side and pin and stitch them together around the central storage area, trimming any excess foam from the corners and sides.
Your inserts should then drop tightly into the compartment, where they can be secured using Velcro strips with space to store the camera inside comfortably.
Now your camera bag insert is ready to be housed in the messenger bag or backpack, giving you convenient access and enough space to keep your gear safe.
Camera Bag Inserts for Camera Gear: FAQs
What is a camera insert?
A camera insert (aka camera bag dividers) is a protective shell in a camera bag that surrounds your equipment with padded dividers to prevent it from moving around in transit.
These inserts are often adjustable so that you can remove and reposition them depending on the size of your camera, lenses, and other accessory storage requirements.
Camera inserts are complemented with a zipper closure, such as YKK zippers, for additional protection, with weatherproofed outer shells.
Can you put a camera in a normal bag?
While dedicated camera bags and inserts are the optimal method for carrying cameras, you can use a regular bag or backpack if you don’t have a camera bag.
If you do use a regular bag, you should ensure it is protected by using any clothing you have in the bag to encase the camera and prevent it from jolting around.
You can also make your own camera bag insert and use this in your rucksack or other bag that includes a shoulder strap to bring additional protection when out and about.
Do I need a camera insert?
While it’s possible to get away without using a camera insert, if you have a reasonable collection of equipment, you’ll want peace of mind and the proper protection.
Camera inserts are modular in design, meaning you can tailor the layout to fit your specific cameras and lenses, along with accessories such as memory cards and spare batteries.
They can also include exterior pockets for water bottles, tripods, and other accessories you may need to access without having to open up the bag.
What can I use instead of a camera bag?
There are several alternatives you using a camera bag, from the aforementioned use of a rucksack with a camera insert to simply carrying your camera around your neck on its strap.
Additional options include using a camera cube for travel photography or a camera holster, which can be fitted on your hip for ease of access.
There’s also the option of using a camera vest, which allows you to store your gear across your body and frees up your arms for other tasks.
What is the best way to carry camera equipment?
A great camera bag with a shoulder strap is the go-to mode used by many photographers for carrying their camera equipment since this is secure and offers quick access for taking shots.
With that said, for more casual photography or in situations where you want fast access to your camera, using a holster or removable shoulder strap is often preferred.
You should tailor the way you carry your camera equipment to your shooting style and the number of lenses and other accessories you’re taking on a shoot.


Andy Dilks is an experienced landscape photographer and former games industry veteran. When he isn’t taking photos or reviewing the latest tech gadgets, you can find him hiking and wild camping in the Peak District.

WELCOME TO SHOTKIT
Enter your email to be sent
today's Welcome Gift:
19 Photography Tools
🔥 Popular NOW:


Shotkit may earn a commission on affiliate links. Learn more.