


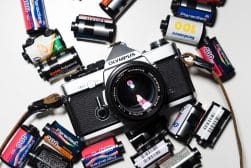
How to Develop Film at Home
Learn how to develop film at home with this simple, step-by-step guide! Covers all you need to know, from materials to pro tips for the best results.
Turning to film photography can be fun and beneficial for your photography skills. But what about getting your films developed? Can you develop film at home?
The answer is yes, and it’s totally worth it!
In this age of digital photograph and instant gratification, taking your time to take photos with a film camera, then develop them yourself can be incredibly rewarding.
This guide is how to develop film for beginners – even if you’ve never tried it yourself before, you should find the steps simple and fun.
So load the film into your camera, take some fun snaps, and then let’s dive right into the process!
Table of Contents
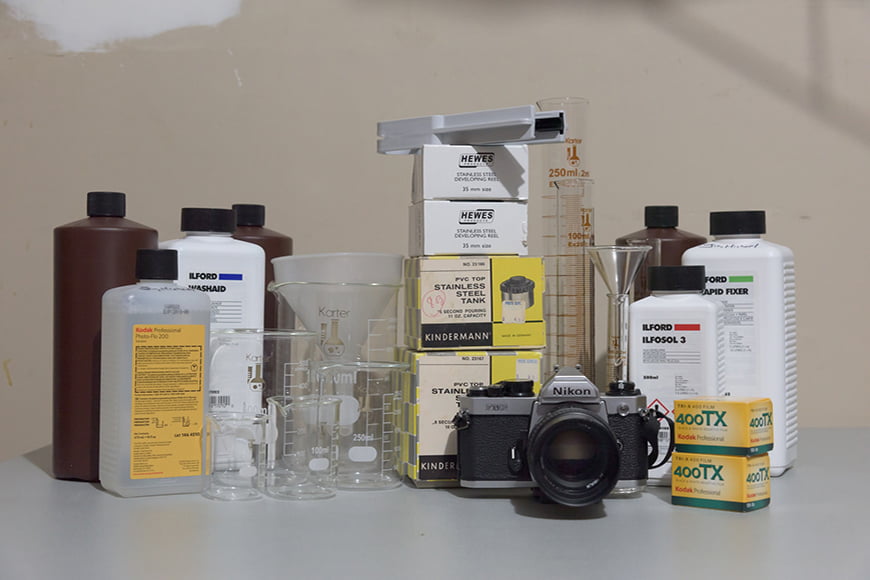
What Do You Need to Develop Film?
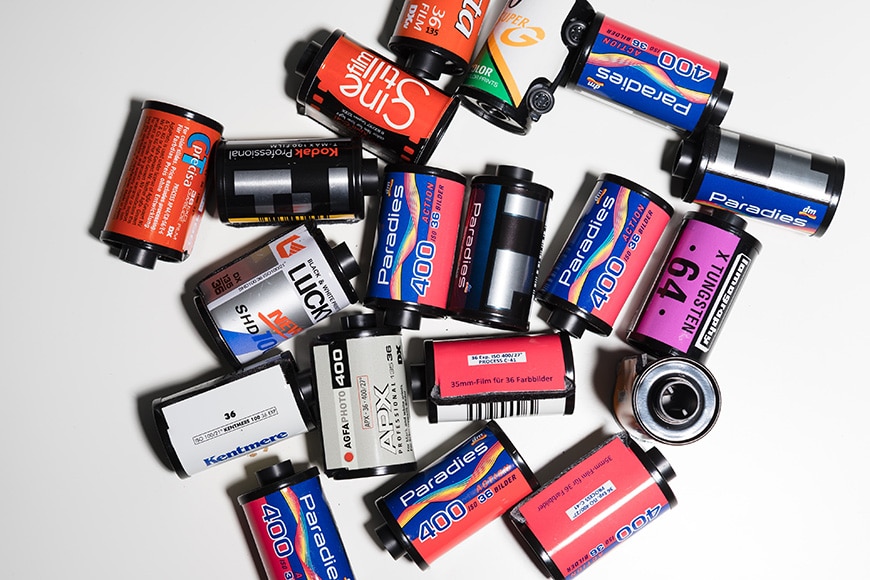
There are three types of film that you can develop at home: black and white negative film, color negative film, and slide film.
Each one of them has a different process and uses different chemicals. In this article, I’m going to focus on the 35mm black and white panchromatic film developing process.
This is because it’s the easiest one to do at home. All you need is a place with running water. At home, this usually means the kitchen or the bathroom.
Find yourself a working table to handle the materials. It’s a good idea to cover it with something first: this will prevent it from being damaged by the chemicals, and also protect it from contamination (super important if you’re working in the kitchen, as you wouldn’t want to eat or prepare your food where you manage toxic substances).
Developing Black & White Film
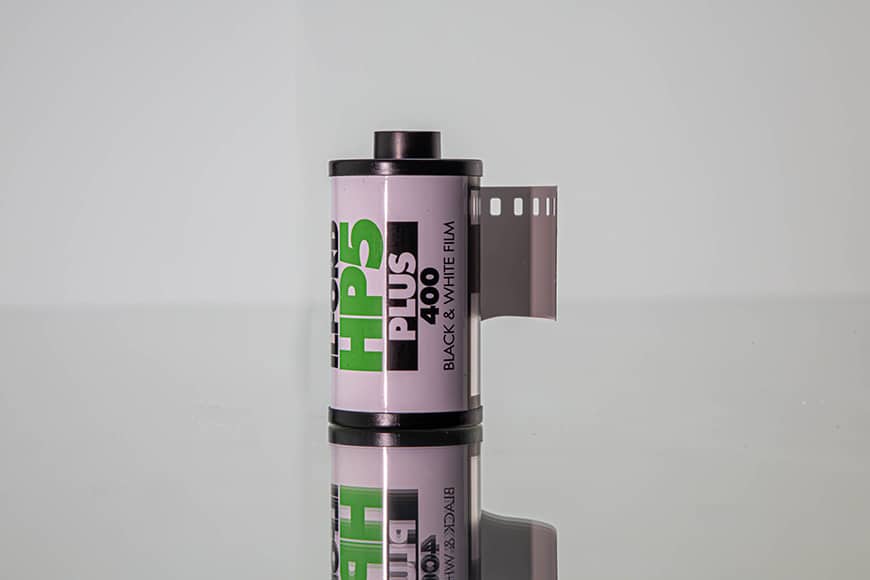
Popular film stock for black and white photography include Ilford Hp5, Ilford Delta 3200 and Kodak P3200 TMAC – you can learn more about film stock here.
Here’s what you’ll need to develop black and white film at home:
- Developer – There are different developers on the market for black and white film. Some of them are liquids, some others are powders you need to dilute. There are also solvent and non-solvent options. Your choice of the developer will have an impact on the contrast of your images. Also, grain and sharpness will be different. I’ll talk more in-depth about this later.
- Stop bath – This is an optional product. Some people use water to stop the developing process.
- Fixer – This chemical is used to stabilize the film after developing.
- Photo Flo – This is another optional. You can skip it without any substitutions, however, using it will help you avoid any water spots in the film and it will accelerate the drying process.
- Changing bag – Photographic film is sensitive to light; that’s how the image gets imprinted. Therefore, you need to protect it when you take it out to develop it. Some black and white films are orthochromatic which means they can be handled safely with a red light. Most of them though (and all the color ones) are panchromatic, so they need to be handled in complete darkness. A changing bag is a good solution to achieve this without the need for a dark room.
- Spiral / Reels – This is where you load your film after you take it out of the canister. These reels allow you to roll the film leaving space between twirls so the chemicals can pass through. There are two different types, the metal ones which are (in my opinion) harder to load, and the plastic ones which have a ball-bearing system that allows for the film to scroll in.
- Developing tank – This is a light-tight container that won’t allow any light in while you develop your film. You can use single reel tanks to develop one film at a time, or a bigger tank to load multiple reels into it.
- Thermometer – Developing chemicals are temperature sensitive, so you’ll need a thermometer to ensure the correct result.
- Timer – There’s no rule for this: it can be a stop-watch, a wall clock, or a special timer. The important thing is that you can count the seconds for the shaking pattern for the developer.
- Bottle opener – If you’re using commercial 35 mm rolls that come in metal canisters, you’ll need a bottle opener. If you buy your film in 100’ cans and make your rolls then you don’t need this.
- Scissors – To cut out the film from the spool.
- Graduated containers or beakers – To measure and mix the chemicals.
- Film clips/clamps – These are helpful to hang the film and let it dry.
- Acid-free plastic film sleeves – After developing your film you’ll need a way to safely store it.
- Gloves – They’re not mandatory and not everybody uses them, but safety should always come first, and using gloves to handle chemicals is recommended.
- Squeegee – This is completely optional in case you want to remove the excess water from the film before hanging it to dry. Some photographers discourage its use. It’s a personal choice.
Need some ideas of what to shoot with your B&W film? Check out this inspirational black and white portrait photography to get your creative juices flowing!
Notes on Developing Color Film
Unlike the black and white process, color film only has two choices. To develop color negative film you use a process known as C-41, and for slides film you use E-6.
Both cases are much more complicated than any of the black and white ones, which is why I don’t recommend them to start.
You need more chemicals, and they’re extremely sensitive to temperature. That’s why you would need special equipment to keep the right temperature throughout the process.
Having said this, you can give it a go once you feel confident with the techniques.
If all else fails, you can still develop film cheaply at Walmart or Walgreens.
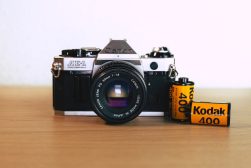
Step by Step Guide to Developing Film
Once you have everything ready, it’s time to start developing your film. If this is your first time, you might want to do a trial run with a film that doesn’t have super important pictures on it.
In case something goes wrong and while you get the hang of it, you shouldn’t risk a once-in-a-lifetime shot.
1. Prepare the chemicals
Credit: Michael Jin
This is the step where you need to be more aware of safety as you’ll be handling chemicals. Find a ventilated place, cover the table where you’re going to be working, and put on some rubber gloves. Wearing safety glasses as well would be ideal.
Developer – As the name says, this is what develops the film. In other words, what makes the image visible.
There are many developers for you to choose from. The first choice is between powder and liquid. The difference between these two is more practical than anything else because there’s not much impact on the images.
Powder developers can be mixed only in part. So, if you don’t have many tanks to process, this will avoid unnecessary waste. These also have a longer lifespan.
Liquid developers are easier to mix. So, if you’re a beginner at developing film, you should probably start with these.
The next decision regarding developers is whether you want to use a solvent or non-solvent.
Some of the most common solvent developers are D-76 or XTOL. With them, you’ll get fine grain images. This creates a nice and smooth effect but it can lower the sharpness.
Non-solvents like HC-110 or Rodinal will give you sharper images with more noticeable grain.
Of course, these rules are just a starting point: if you start making different concentrations and experimenting with timings, you’ll achieve different results.
However, I don’t suggest you start doing this until you’re familiar with the basics. For now, choose the one that you think fits your needs best and prepare it following the instructions on the package.
Stop bath: This helps to stop the process of developing. Since the results can vary depending on the amount of time you leave the developer to act on the film, this will give you more control and avoid overdeveloping.
You need to dilute this product with water. Just adhere to the proportions indicated in the package.
Fixer: This product fixes the image in the film, so it’s important to have the right concentration. Again, it’s just a matter of following the instructions.
Photo Flo: If you’re going to use Photo Flo, which is optional, you should get it ready as well before you start.
Since the use of this product is to avoid watermarks, the right proportion depends on the quality of the water. You can start by following the recommended amount from the manufacturer to get a sense of it and then experiment.
The harder the water, the more you need. If you’re using distilled water you can use a more diluted solution.
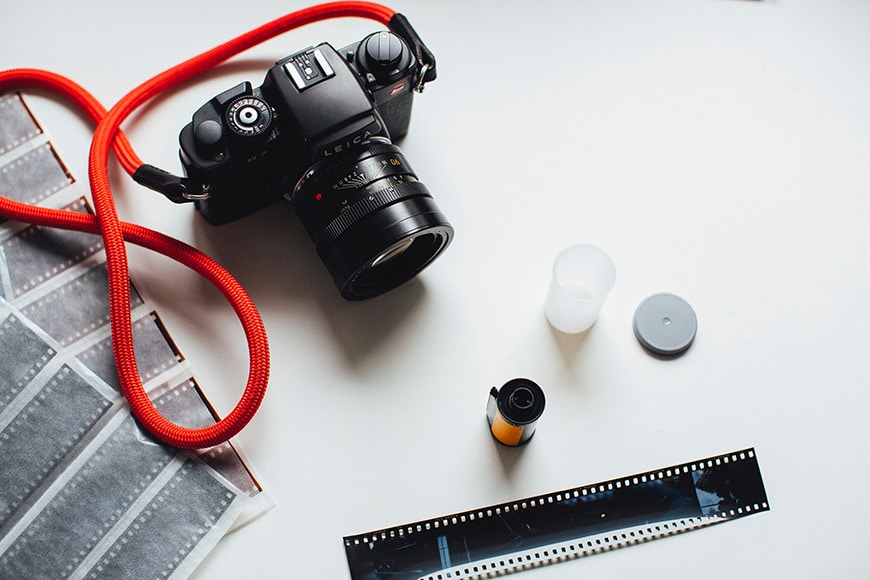
2. Get the film into the tank
Credit: Markus Spiske
This is where things get tricky. You can’t expose the film to the light before developing it, so you’ll have to do this part in the dark.
If you have a completely dark room that’s great. If not, you can use a changing bag. This is a lightproof bag with sleeves.
Inside, you need to put the film roll (or rolls if you’re doing it by batch), the bottle opener (if it’s a commercial roll), the scissors, the developing tank, and the spiral reel(s).
Now close the changing bag and put your hands in the sleeves. It’s important to pull the sleeves up to the elbow to avoid any light leak.
Now pick the film canister and take off the lid (unscrew it if it was made by you, or use the bottle opener for the metallic cap from commercial ones).
Next, take out the spool, unroll the film to the end and use the scissors to separate the film from the spool. Be careful not to cut yourself, nor any other part of the film – you want to avoid ruining any of the pictures.
Take one of the ends of the fill and load the film into the spiral reel. If you’re using a plastic one the process should be easier.
Just feed the tip into the reel and then start winding it. Make sure that you follow the same rolling direction from the spool. This way the natural curve of the film will ease the process and avoid any creases.
Take your time while doing this; there’s no rush, and getting anxious won’t help (I tell you from personal experience).
Once the film is loaded, place it in the developing tank. If you’re doing one film in a single-reel tank there’s no problem.
If you’re using a multiple-reel tank for only one film, make sure that you still place the other spirals inside. Even if they’re empty, they will keep the one with your film firmly in place.
When everything is in place, you can put the lid on the tank, and only then can you take your arms out from the bag.
Open the bag and take out the tank for the rest of the process.
3. Pre-soak
Fill the developing tank with lukewarm water. Use the special light-trap lid for this, you shouldn’t open it completely before the end of the process.
Once the tank is full just let it sit for 3-4 minutes. Nothing will happen if you leave it a little extra time. But from here on the timer will be helpful because, unlike this one, the next steps are time-sensitive.
4. Pour the developer
Credit: Joshua Sukoff
Pour out the water from the previous step and fill the tank with the developer. Make sure it’s at the right temperature.
This information should be printed on the package together with the shaking times and patterns.
To check the temperature of your chemicals, you can use the thermometer. If it’s too cold, place the beaker in warm water on the sink. Use cold water if you need to bring the temperature down.
Once the developer is in the tank, it might need to be shaken in a specific way. For example, every 30 seconds. Others work by staying still. It depends on which one you’re using.
If you need to shake the tank, do it slowly. Turn it upside down and then back up, don’t agitate it in a way that could create bubbles.
5. Stop the developer
Once you reached the developing time, pour out the developer and immediately fill the tank with the stop bath and leave it for the recommended duration that’s printed on the bottle.
If you decide not to use the stop bath, then you can use lukewarm water. You should leave it for about 2 minutes.
6. Pour the fixer
Pour the fixer into the developing tank. This is to stabilize the process and fix the image into the film.
You should never skip this step or get impatient and skimp on the time. While you don’t see any immediate reaction, it can still be causing damage to your images.
7. Rinse the film
The next step is to fill the tank with water to rinse the film.
Now that the image is developed and fixed, the light can’t cause any damage. As such, you can open the tank after you fill it with water, and leave the water running for a bit so it washes off any residual chemicals. Five or ten minutes should do.
8. Add Photo Flo (optional)
This step is completely optional. If the water is too hard, it can leave drop marks on the film when it dries. To avoid this you can use Photo Flo to finish off the developing process.
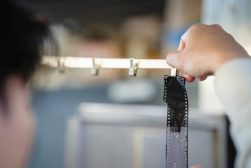
9. Take out your film and dry it
Credit: David Bartus
Congratulations, you’ve successfully developed your black and white 35mm film at home! Now it’s time to find out how everything worked out.
Remove the reels (or unload the film, depending on the type of spiral you’re using) and have a look at your film.
At this point, you should be able to see your images in negative. Once you’ve assessed the results you can put them to dry.
Some photographers like to use squeegee tweezers to eliminate excess water. Others just pass the negative in between the fingers to get the same effect.
Then, place a clamp on one of the ends and hang it in a dust-free environment. The shower can be a good place.
Place another clamp on the bottom to prevent the film from curling as it dries. Then, wait a few hours before taking it down.
10. Store your film
Good storage practices can ensure a longer life for your films. I like to place mine in acid-free plastic sleeves.
11. Print or scan your images

Credit: cottonbro
Your negatives are now ready for you to use as you please.
Now that you know how to develop film by yourself, you can print your images (at home or in a lab) or you can scan them to have the digital files (see how to digitize thousands of photos). The choice is yours.
3 Tips for Developing Film at Home
By now, you should know enough about how to develop film at home to get out there and get started. Here are three quick tips to keep in mind:
1. Practice
Practice loading the film in the light using an already developed film. This way it will be much easier to do when you’re not looking.
2. Head start
Start pouring the developer out of the tank a few seconds before the time is up. By the time you do that and put in the stop bath, you’ll have reached the recommended time.
3. Don’t pollute
Developing films requires chemicals, and pouring these down the sink can pollute gallons of water. To avoid harming the environment, talk to your local administration, and ask how can you dispose of them safely.
Why Develop Film at Home?
Credit: Markus Winkler
Just in case you’re second-guessing your decision to turn your bathroom into a makeshift darkroom, I’ll give you some arguments on why you should develop film at home.
- For the same reason you learn photography instead of shooting in auto: to take control of the result of your images.
- To make your own darkroom effects like cross-processing or solarization.
- To have a deeper understanding of photography with hands-on experience.
- To save time and money – sending the film out to be developed is not as cheap or easy as it used to be – see Where can I send my film to develop?
- Because developing film at home is cheaper and easier than you might think.
- Because it’s fun and rewarding.
How to Develop Film FAQ
Where can you develop film? (Who develops film still?)
If you don’t have enough room or time to develop film at home, you might find some local shops that can still develop films for you (depending on where you live).
Otherwise, some labs offer the option to send your film via mail and received it back at your door once it’s been developed.
Here are some mail-in labs:
- The Darkroom is based in California, US. They have 40 years of experience and offer film developing, scan to DVD, and web upload.
- Fotoimpex is based in Berlin and their promise is “You send us the film, we do the rest”. A nice slogan that harks back to the early days of photography when Kodak made it accessible to all amateurs.
- Fitzgerald Photo is based in Australia and has been processing film since 1967. They also process medium format film and large format plates.
- ORMS Print Room & Framing is based in South Africa and offers a turnaround time of 2-3 working days. They develop all films and formats and do scanning and printing too.
How long does undeveloped film last?
It depends on the type of film and how it’s stored. Black and white film lasts longer, especially if it’s kept under the right conditions.
Most films have an ‘expiration date’ of two years. However in general they long outlast this prediction.
How can you tell if 35mm film has been used?
As a rule of thumb, if there’s no film strip outside the film canister, it’s a used roll. Manufacturers leave a tab of film out of the canister for you to load it into the camera.
Once you finish the roll and rewind the film everything goes back in, including the tab.
If you want to be strict about it though, the only way to know for sure is by developing the film.
Does Kodak still make film?
Yes, they do. Actually, film photography is making a comeback and getting stronger each year, so Kodak has even re-introduced some films that were discontinued.
Can old film still be developed?
Yes, you can always develop a film. The quality of the images will depend on how old it is and how it was stored, however.
Final Words on Film Development
I hope you liked this article and found in helpful in your quest to learn how to develop film at home.
As I said above, developing film is really a fun and rewarding process. So make sure you try it out and enjoy it!
Feel free to share your experience in the comments section and let us know how you went.
 Where to Develop Film in 2023 (In Person and Mail-In)
 Guide to Camera Film Stock: Types, Developing, Examples
 Cheapest Place to Develop Film: How Much Does it Cost?
 CineStill Film: Everything Your Need to Know in 2023
 Useful Tips for Film (Analog) Photography for Beginners
 121 Different Styles & Types of Photography To Try in 2023

Ana Mireles is a Mexican researcher that specializes in photography and communications for the arts and culture sector.


WELCOME TO SHOTKIT
Enter your email to be sent
today's Welcome Gift:
19 Photography Tools
🔥 Popular NOW:


Shotkit may earn a commission on affiliate links. Learn more.