


Glass Prism Photography: Ideas, Techniques & Examples
Have fun with these glass prism photography ideas, techniques, and inspiring examples to create unique and captivating images.
Learn | By Ashley Darrow
Prism photography has a lo-fi appeal that can work for both avant-garde photographers as well as working wedding photographers.
Before you slap a photography prism onto your camera lens, it’s a good idea to get a few tips.
Photography prisms can create mirrored images, a rainbow effect, or even make it look like you’re taking a picture through a kaleidoscope.
This guide is your 101 crash course for prism photography and will cover everything you need whether you’re getting started from scratch or looking for new inspiration.
I’m a big fan of any photographic technique that gets me closer to that lo-fi, lomography style.
It’s no wonder that I like taking a prism or two out when I go shooting just to give me new ways of looking at scenes I might have already shot a dozen times.
Table of Contents
What is Prism Photography?
Prism photography uses glass prisms to bend, refract, and scatter light in a photograph.
The prism can be placed in front of the camera lens for more creative effects or used as a lighting element to scatter rainbow colors across the scene.
Prisms come in a variety of shapes and sizes ranging from glass spheres to more complicated prisms that take on interesting geometric shapes like the dodecahedron.
You can shoot prism photography with everything from an old camera phone all the way up to the most expensive and recent mirrorless cameras.
You can also shoot a prism photograph with a film camera.
There are no hard and fast rules when it comes to prism photography, and that means you’re going to have to rely on your creativity and photographic eye to get the right shot.
What causes the prism effect?
There are two things going on inside of a glass prism that are going to change how your picture comes out.
The first has to do with color. different wavelengths of light travel at different speeds through a glass prism.
This will cause colors to refract and create those rainbow effects that are one of the hallmarks of prism photography.
The unique geometric shapes of prisms also bend light in interesting ways.
This is why spherical prisms invert images and have an interesting magnifying effect while prisms with right angles tend to create kaleidoscopic images.
How Do You Use a Prism for Photography?
Step 1—Buying Your Prisms
The first thing you need to do is buy your prism photography.
You need to look for photography prisms like these ones that come in a variety of shapes which should at least include a sphere and a variety of triangular prisms.
Keep in mind that most of the prisms out there are made from glass rather than crystal. This means they are susceptible to chipping and damage.
I store mine wrapped in a microfiber cloth and in their own section of my camera bag. This way, I’m less likely to break or chip any of my prisms.
Step 2—How to Use Photography Prisms
The best kept secret by prism photographers is that it’s pretty straight forward to get prism effects. The quickest way to get started is to simply put your photography prism in front of your camera lens and start shooting!
Now, you’re going to want to add some variance to how you’re shooting. You can get different prism effects by blocking your lens entirely, covering up only part of the lens, or using the prism to scatter light and create a rainbow effect rather than distorting the image.
Prisms let you create mirror images, capture interesting glass reflections, and best of all this creative photography style can be shot with nearly any camera settings.
Yes, it really is that easy. at the end of the day prism photography is all about placing a prism in front of your camera and seeing what you can catch.
Step 3—Get Creative
Prism photography is going to require a lot of trial and error on your part.
Get ready to shoot the same scene over and over again while you work on getting the shot you’ve been looking for.
A lot of the time, I find that some of my best prism photography shots are happy accidents rather that intentional compositions.
I generally shoot with an idea of the effect I want to get and I keep taking pictures until I’m satisfied with the images.
Are you looking for a little creativity kickstarter? Here’s a few prism photography tips and creative examples.
7 Creative Examples of Prism Photos
You’ve got nearly limitless creativity options when you’re shooting with photography prisms.
Here are a few different ways I like to make the most of prisms and hopefully they’ll get your creative juices flowing as well.
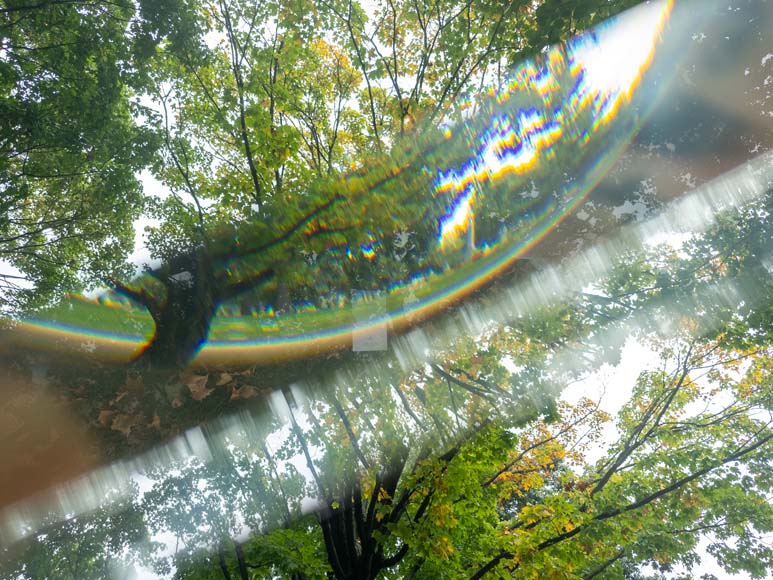
01 Use Prisms to Capture Different Parts of a Scene
I caught this shot largely on accident. I was trying to use photography prisms to capture the way the sunlight was filtering through the leaves of trees, but a friend of mine happened to be in the frame at the right moment.
This show is taken with a long, triangular prism. Those prisms are great for bending light and allowing you to capture several different scenes at once.
As a bonus, if you capture the light and just the right way you’ll get a nice rainbow light effect in your image.
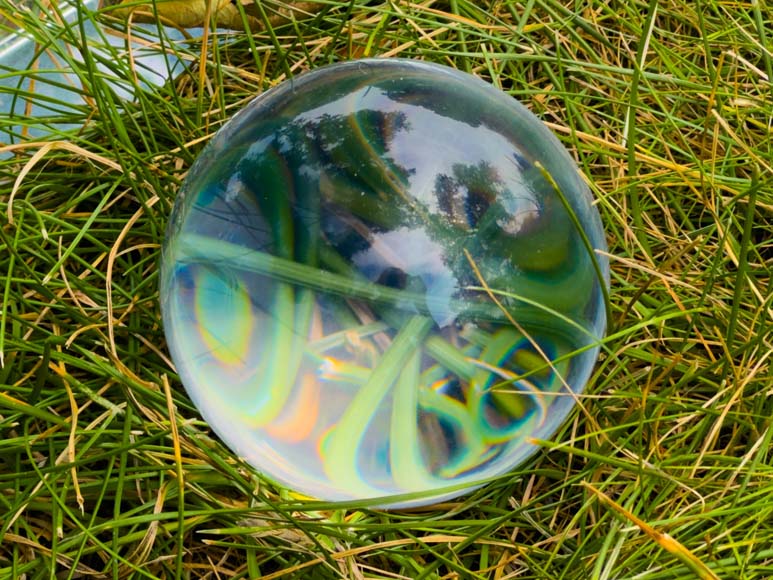
02 Snap Some Prism Ball Photography

The prism ball is your best friend. Get ready to shoot with it however you want!
This is an example of a pretty basic prism ball shot. Just frame up your subject in the center of the sphere and you get an interesting composition with your subject inverted.
Try experimenting with where you place your prism ball, how you frame your shots, and the lighting you shoot with.
This technique works just as well in a studio shoot as it does during nighttime street photography. It’s also very similar to crystal ball photography.
03 Create a Kaleidoscope Effect
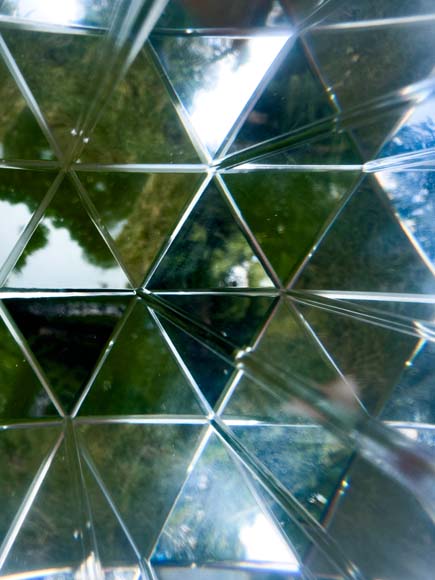
Kaleidoscopic shots really let you push photography prisms to the limit.
To get this fractal photography effect, you need to shoot down the prism lengthwise. This typically works better on mobile photography as that lets you cover the entire lens with the side of the prism.
The best subjects for this style tend to be things that have a lot of diverse and pronounced colors, but if you can frame it right—you can shoot anything like this!
04 Shoot the Prism Itself

Photography prisms are inherently very photogenic. They make great subjects if you’re not feeling trying to use their image-distorting properties.
My triangular prism chipped on the way to this shoot, so I decided to set it down and use it as the subject rather than as a modifier to my lens.
You can even try to capture scenes reflecting in your prism rather than just shooting it head-on.
You can actually see the overcast sky reflected in the bottom of this prism giving the grass some nice contrast!
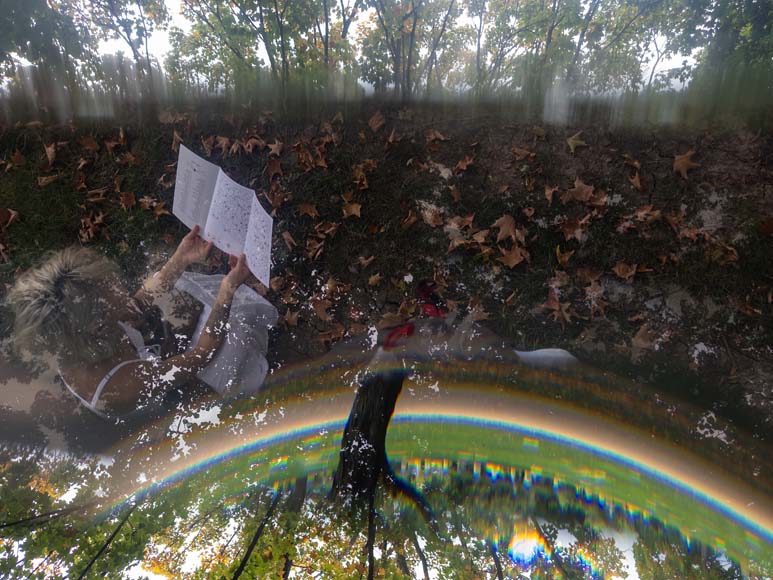
05 Frame Your Subject Within the Prism
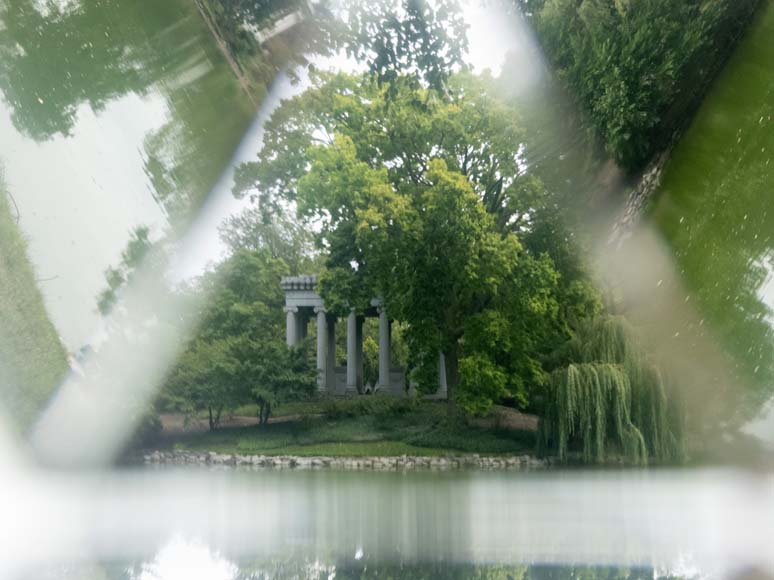
I took this shot by holding my triangular prism right in front of the lens.
The light refracted in an interesting pattern that broke up my scene and framed my subject nicely.
I went for shooting this Romanesque structure, but this technique also works for models and any other type of subject!
06 Shoot Black and White
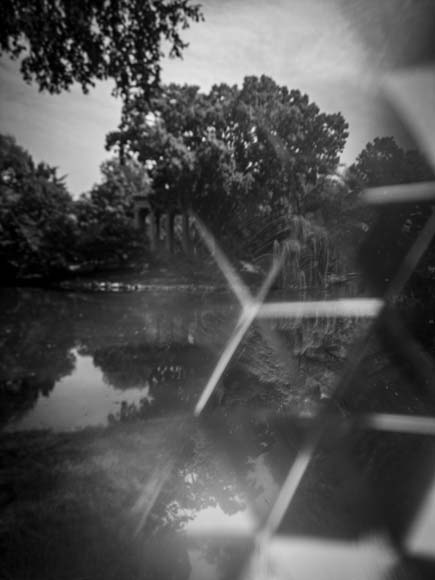
Prism photography doesn’t always have to be about vivid colors. You can also go for a black-and-white shot to better emphasize the shape and form of your composition.
I backed the prism off slightly for this shot giving me an image that balances a clean composition with the prism effect.
I’ll also mention here that, with prism photography, you’re shooting through a lot of glass. That means your final image will lose some quality.
The more glass you put between the sensor and the subject, the more distortion you will pick up along the way.
07 Use Prisms to Shape Light

Image Credit: Lee Starry
Here’s a lovely shot done by photographer Lee Starry.
Lee used a prism to create a stripe of rainbow-colored light which nicely highlights their subject.
Never forget that prisms can be used to accent a light source in addition to creating some mild distortion in your image.
How Do You Make a Glass Prism Effect Using Editing?
Want to shoot prism photos, but don’t have a photography prism on hand? Don’t worry, Photoshop has you covered!
Photoshop can help you create mirrored images and even a complete prism photograph.
Step 1—Open the Photo You Want to Edit
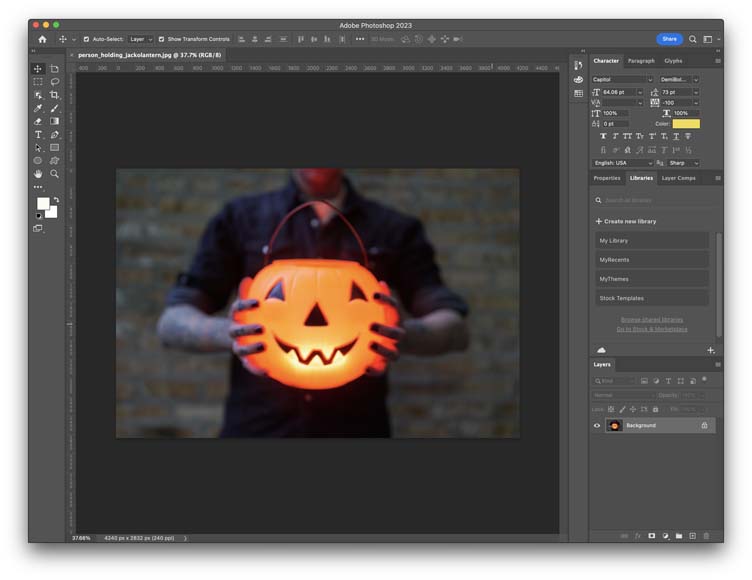
Your main subject should be clear and centered. This edit is going to work best on images free of major distracting elements.
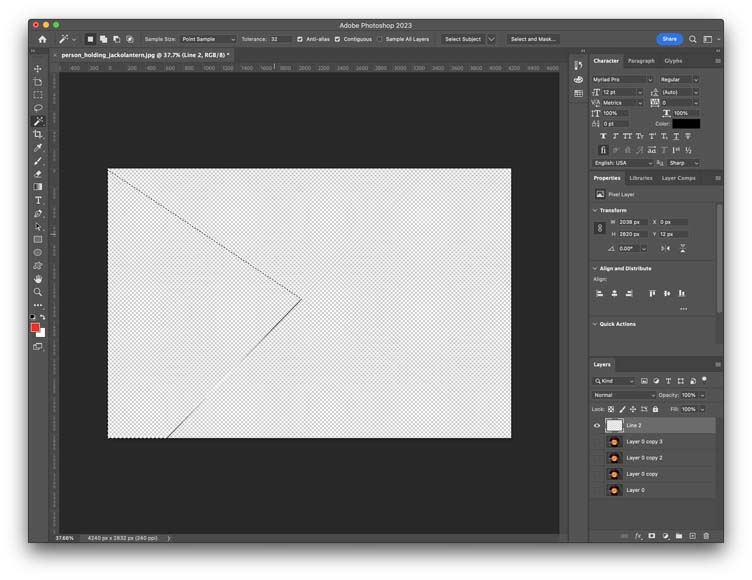
Step 2—Draw Some Lines
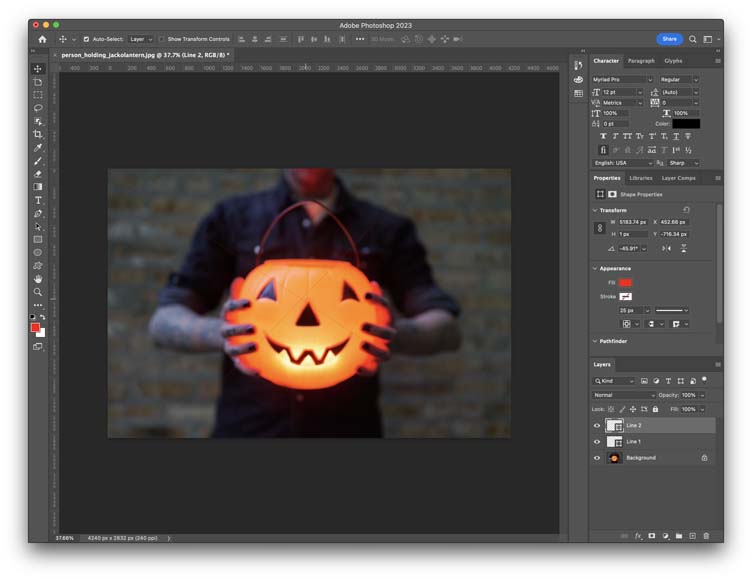
Next, you’re going to draw some lines over your image to create the basic pattern of your prism.
These lines should have a fill color, but no stroke.
Once you’ve drawn your lines, select both shape layers and hit Right Click > Merge Shapes.
Then Rasterize this layer so we can edit it in a future step.
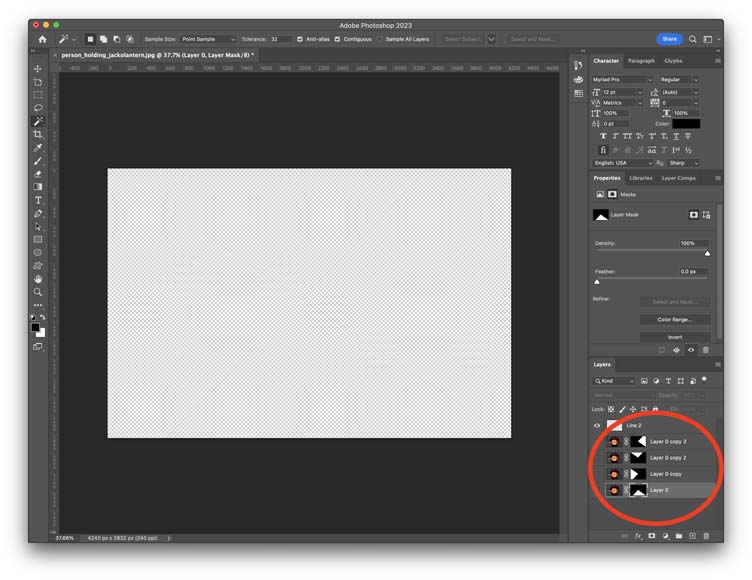
Step 3—Duplicate Your Main Subject

You want to duplicate your main subject layer once for each section of your now subdivided image.
In my case, that means four duplicate layers. Before heading on to the next step, make your main subject layers invisible.
Step 4—Create Masks for Each Layer
Now we’re going to create masks for each section of our soon-to-be prism image.
Use the magic wand to select sections of the rasterized shape layer and then apply those to your main images working your way up until each area is filled—just like you see in the next image!
Step 5—Resize and Tilt Your Layers
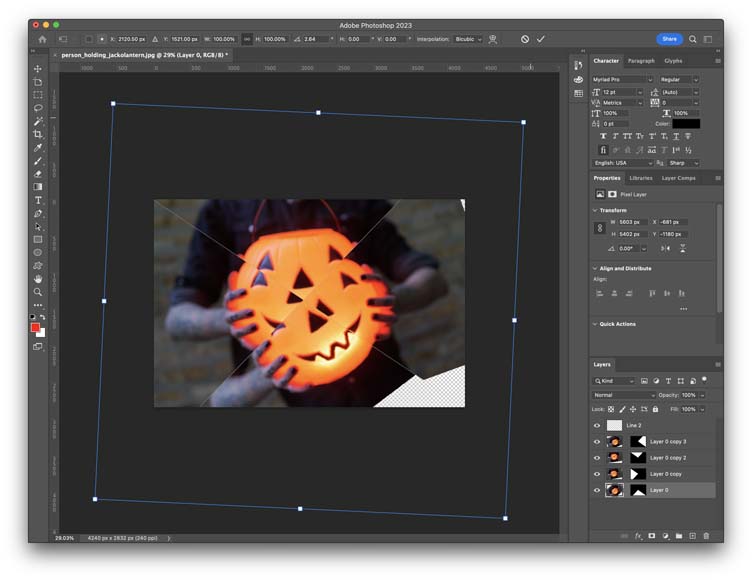
First, click the little chain icon to disconnect the masked layers from each other.
Then, use Command + T to start tilting and resizing your layers. There’s really no wrong way to do this step, just have fun with it!
Step 6—Start Fine Tuning

You’ve got the basics, but it really doesn’t have that fractal filters style effect, does it?
First, group your main image layers into a single group and then add a new solid color fill layer. I made mine orange to play around with the pumpkin’s colors, but you’re free to pick what works for your edit.
Next up, turn that solid fill layer to about 50% opacity and change the blend mode to Vivid Light.
Step 7—Start Moving Layers
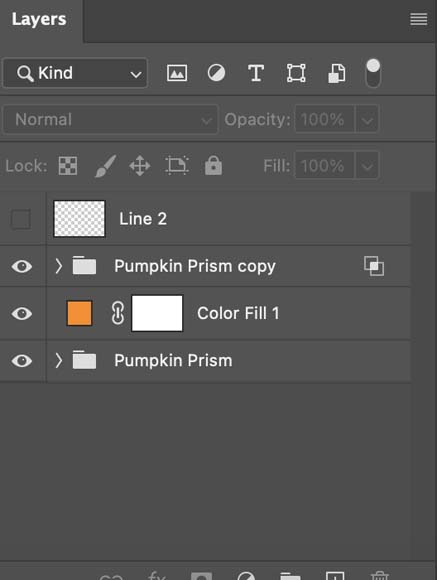
Alright, now it’s finally time to add that prism effect.
First, duplicate your main image group and place the duplicated group above the solid fill layer. I toggled mine to invisible for the editing, but make sure to turn it back on.
You want to want to move each section of the original group around to create some prism effects.
The next step is turning the green channel off on the duplicate group. You can do this by double-clicking the folder icon for that group.
This creates the prismatic color effect we love to see in prisms.
The last step here is to adjust the position of the duplicate group’s layers to really enhance that prism effect.
Step 8—Wrapping Up the Edits
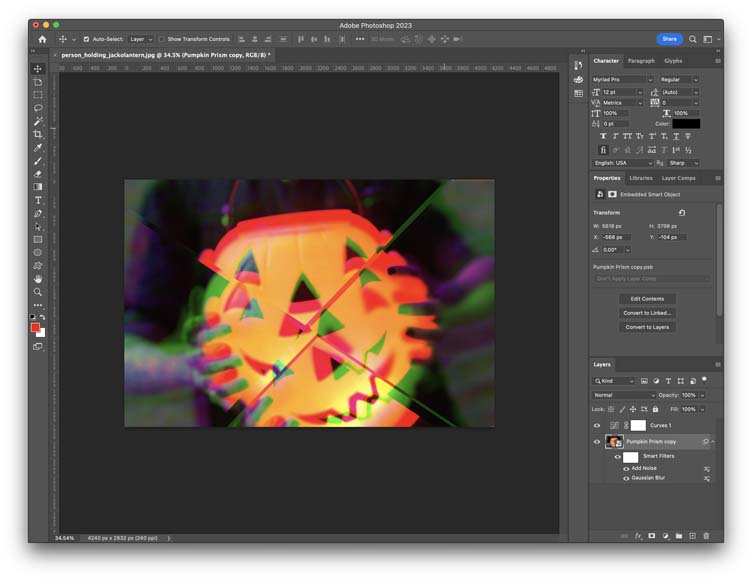
To make final edits easier, let’s convert all of our layers and groups into a single smart object.
I added about a 2.5% Gaussian blur, a 5% noise filter, and added an adjustment layer for the curves to clean up this image.
You’ll notice that I got a little overzealous with my prism effect. This can cause the corners of your image to reveal the transparency.
If this happens to you, just crop and resize to make everything fit just right!
What apps can create a prism effect?
If you’re looking to create more prism effect photos, you can get started today by trying out a convenient prism or kaleidoscope app.
These apps apply a similar visual effect that you could get with the use of a prism or two. Most of these apps are free which makes them a great place to get started if you don’t necessarily want to commit to buying your own set of glass photography prisms.
In no particular order, here’s a few apps you can try out for both Android and iOS devices :
- Crystaliq—This app creates classic prism photo effects without looking too “artificial.” Cstyaliq also works on videos as well
- KaleidaCam—Here’s an app that has a much more dramatic prism effect with the option to purchase additional filters
- Kaleido Lens—Similar to KaleidaCam, but with some more nuanced controls for photographers who want more editing power
- Mirror Lab—This app combines prisms, kaleidoscopes, and tons of other editing features into one app. If you’re looking for a more expansive library of filters, try this app out
FAQs about using a photography prism
What kind of prism should I use for photography?
For photography, a triangular or optical glass prism is typically used because it refracts light in a way that can create interesting effects and reflections in your images.
How does a glass prism affect light in photography?
A glass prism refracts or bends, light that passes through it. This can create a spectrum of colors, mirror-like reflections, or dreamy light leaks in your images.
Can I use a glass prism for portrait photography?
Yes, a glass prism can be used creatively in portrait photography to add unique light effects, reflections, and an artistic touch to your portraits.
What are some creative ways to use a prism in photography?
Some creative ways to use a prism include creating rainbow light effects, mirroring part of your scene, distorting aspects of your image for an artistic effect, and adding a light leak effect for a vintage or ethereal feel.
Does the size of the prism matter in photography?
The size of the prism can affect the type of effects you can create. A larger prism can cover more of the frame and create larger reflections, while a smaller prism can be used for more subtle effects.
Wrapping Up Glass Prism Photography
You’re ready to get out there and start shooting with some photography prisms!
Where are you heading first? The studio to shape some light into rainbows or are you heading outdoors to lend a psychedelic flair to your local cityscape?
Either way, make sure to let me know how your prism photography went down in the comments below!
 Fractal Photography: How to Add Artistic Flair to Your Photos
 How to Use the Clipping Mask in Photoshop (Complete Guide)
 How to Blend Layers in Photoshop
 Best Acrylic & Glass Photo Prints For Your Walls in 2023
 Creative Photography Picture Ideas For Your Inspiration
 How to Merge / Blend Two Images in Photoshop

Ashley is a photographer, writer, and film critic. When Ashley’s not writing essays on photography, cinema, and theory, he’s out taking pictures with retro film cameras.

WELCOME TO SHOTKIT
Enter your email to be sent
today's Welcome Gift:
19 Photography Tools
🔥 Popular NOW:


Shotkit may earn a commission on affiliate links. Learn more.