


Microscope Photography for Beginners (Techniques & Ideas)
Dive into the intricate world of microscope photography, capturing the unseen and magnifying the wonders of the microscopic realm.
Learn | By Judyth Satyn
This is a guide to microscope photography for beginners, plus some techniques & ideas for enthusiasts too.
A microscope reveals an intriguing world. Using a camera we can capture the mysterious terrain hidden from the naked eye.
In this article, you will learn which microscope to use for photography, plus techniques and tips for the best results.
You should also read our guides to scientific photography and micro photography for a broader understanding of the genre.
Table of Contents
What is Microscope Photography?
Microscope photography is photography taken with the use of a microscope. It is also known as a photomicrograph.
Capturing an image with a microscope has traditionally been the terrain of serious science.
Conducted in laboratories using light microscopes and microscope slides. Images captured act as an aid for study or investigation.
Today, photographers can use microscopes as an art form. To capture the intricate beauty of the minuscule world.
What are some applications of microscope photography?
The applications of photography using a microscope are extensive and diverse.
It is used for medical research to investigate cells, tissues and drug development.
Forensics scientists use it to uncover clues hidden from the eye at crime scenes.
Geologists use it to study earth and rock structures on a cellular level.
The Food and Beverage Industry uses it to check for contaminants. At the same time, artists use it to make spectacular abstract art.
How to Choose the Right Microscope for Your Digital Camera
Compound vs. Stereo Microscopes
Compound microscopes are the cheaper and most common of the two light microscopes.
Typically, it comes with four objective lenses, with 4x, 10x, 40x, and 100x magnification.
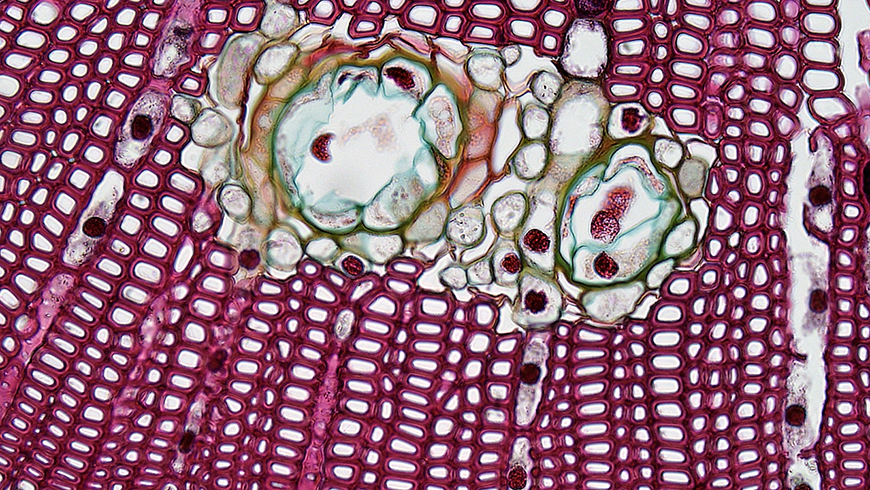
To get a good image, the light of the microscope has to pass through the subject. This means the ideal specimens are small and thin.
A compound microscope is best for capturing flat images. Subject ideas include thin plant and tissue sections, bacteria and water algae.
A stereo microscope is like a powerful magnifying glass. It uses two different viewing angles to create the impression of depth.
These microscopes capture 3-dimensional images depicting the subject’s texture and depth.
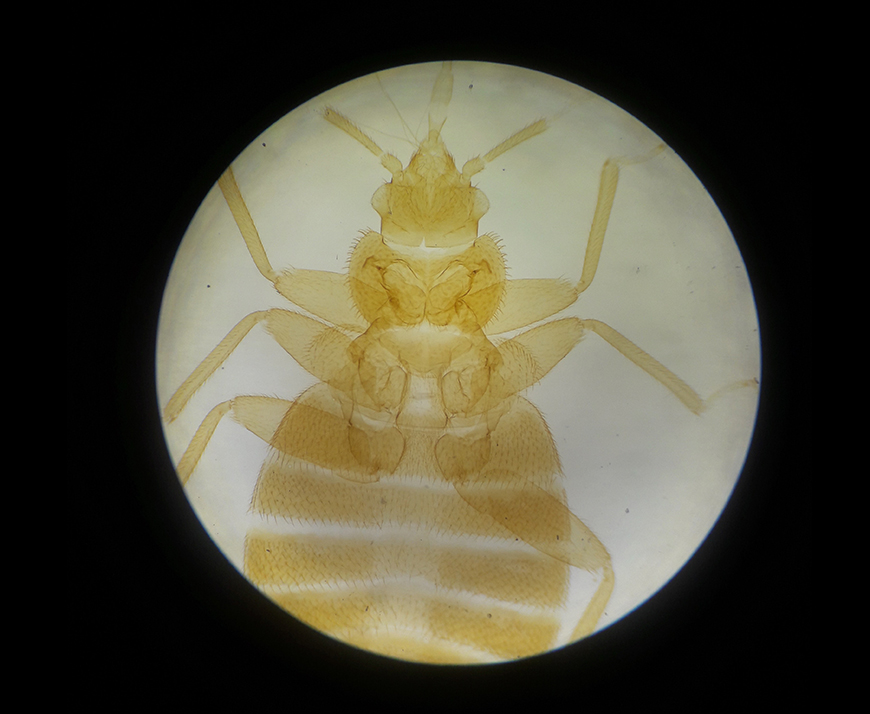
They can photograph larger specimens than the compound microscope, such as insects, twigs, or crystals.
These microscopes offer lower magnification, usually 6.5x -45x magnification.
However, they allow greater flexibility and range of movement within the working space.
Which is best for photography?
Both microscopes have advantages and disadvantages when used for photography.
A stereo microscope is best for photographing larger structures and three-dimensional images.
A compound microscope is better for photographing structures which are flat and transparent.
Which microscope is used will be determined by the photographer’s goals.
Magnification Levels
Understanding objective lenses
The objective lens determines the primary function of an optical light microscope.
The “objective” is the part of the lens located closest to the object. It relays an actual image of the subject back to the eyepiece.
This is the part of the microscope that produces the basic magnification.
The “eyepiece” is the part of the lens closest to the eye. It projects a virtual magnified image of the object.
Microscope Eyepieces
A Monocular microscope has only one eyepiece. A Binocular microscope has two eyepieces, allowing you to view with both your eyes.
A Trinocular microscope has two eyepieces and an additional third eye tube. The eye tube can be used for connecting a microscope camera.
Lighting in Microscopy
Compound microscopes use transmitted light. This microscope light passes through the subject from below.
It is most commonly used for transparent or translucent specimens.
A stereo microscope uses reflected light. The light is directed at the subject from above.
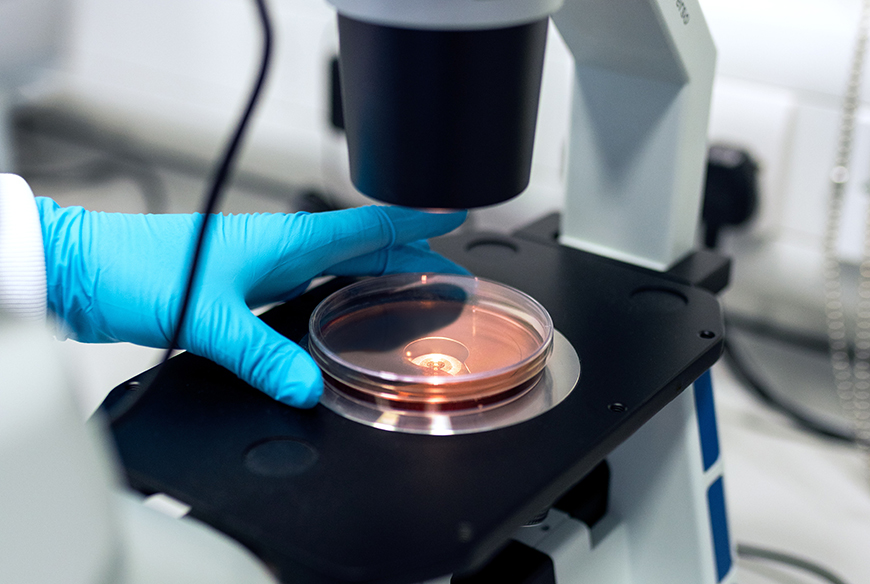
How to Set up Your Camera and Equipment
Dedicated Microscope Cameras vs. DSLRs
Dedicated microscope cameras were designed to be used in conjunction with microscopes.
They are small, and weight isn’t an issue when connecting them to the light microscope.
In contrast, DSLRs can prove cumbersome to attach due to their weight.
A dedicated digital camera plugs directly into a computer. They come with specialized viewing software, which will make live viewing easy.
Dedicated microscope digital cameras typically have a lower resolution than a Digital SLR camera.
However, the option to live view specimens on a large screen will give more precise control.
One disadvantage of this camera is you will need a designated space for the computer screen.
Attach a digital SLR camera to your microscope for the highest-quality image.
DSLR cameras are tricky to attach to microscopes. However, the captured image will have excellent resolution and colour range.
They have a large sensor and a high megapixel count. If you plan to video, DSLR cameras will be your best bet.
They are the best for capturing high-quality video. Microscope cameras can video, but the video quality is low.
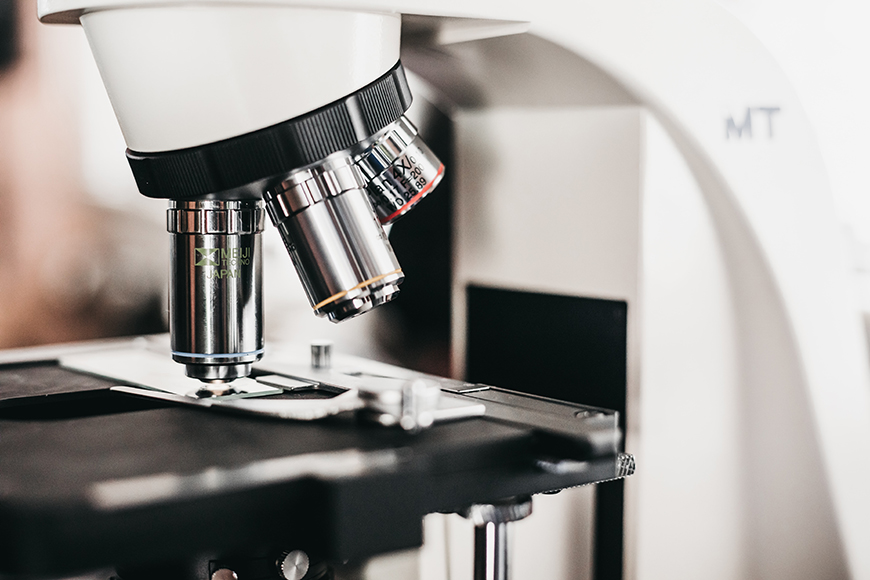
Credit: Justin Case
Adapters and Compatibility
Ideally, use a microscope with a trinocular microscope. Two eyepieces and an eye tube for the camera attachment.
This will allow you to view the specimen while the camera is attached.
C-mount lenses are explicitly designed for microscope photography. The image will be in focus when the eyepiece is in focus.
They usually have a fixed focal length, so the option to zoom is minute. The microscope must have a trinocular head to connect a DSLR to a microscope.
The DSLR can not be connected to an eyepiece on the monocular or binocular microscopes.
You will need a DSLR camera microscope adapter to connect it to the microscope.
If your camera brand and microscope are the same, you will only need a single adapter to connect the two.
Before buying a microscope adaptor, check its compatibility with both your microscope and camera.
If the DSLR camera is a different brand to the microscope you will need a T2 ring adapter to connect them.
You will need to remove the camera lens to connect the DSLR camera to the microscope.
Screw the T2 ring onto the camera (if needed) and attach the microscope adapter.
Then attach the other end of the adapter to the microscope’s phototube. Now you are ready to photograph.
Although it is possible to attach a digital SLR camera to any microscope, it is not always advised.
The weight of a digital SLR camera makes it difficult to stabilize. If you wish to use a DSLR camera, opt for a sturdy microscope with a trinocular head.
Software and Tethering
A dedicated microscope camera will be easy to hook up to a microscope.
Another bonus is that they come with specialized software.
A fantastic feature of microscope cameras is that you can tether them easily to a large screen. Giving a large view of your prospective shot.
This will make it simple to focus on fine details. When the microscope world is unfamiliar a blown-up view is helpful.
Looking through a camera’s LCD screen is not quite the same.
The disadvantage of a dedicated microscope camera is that you can not use it without a computer.
There is powerful focus stacking software on the market, available specifically for microscopes.
The software combines images that have been focused on different parts of the subject.
When the images are stacked into one image it creates depth of field.
Microscope Photography Techniques and Tips
Here are some trade tips to make it easy for those starting on this exciting microscope venture.
1. Achieving Sharp Focus
It can be difficult to focus on subjects at high magnifications.
Autofocus will struggle to focus on the subject at such high magnifications.
Plus, autofocus can jump out of focus when fine-tuning the focus range.
So, instead of using autofocus, opt to use manual focus.
First, use the microscope’s focusing knobs to bring the object into focus.
You can view if the object is in focus through the camera’s viewfinder or on-screen.
Remember that although they may be small, live specimens can wander out of frame.
So don’t be surprised if you find it hard to locate your subject or live specimen.
2. Manual Focus Tip
Start with a lower objective magnification to make focusing easier using high magnification.
This will make it easier to locate and frame your specimen. When the specimen is in focus, switch to a higher magnification lens.
If you start by trying to focus at a high level of magnification, it can prove nearly impossible. You will struggle to locate the subject.
3. Stacking Images for Depth of Field
Finding a depth of field at high magnification levels isn’t easy.
If you want to incorporate depth of field use the focus stacking technique.
Take multiple photos of the same scene at different focus levels. Then combine the images in post-processing to generate a depth of field.
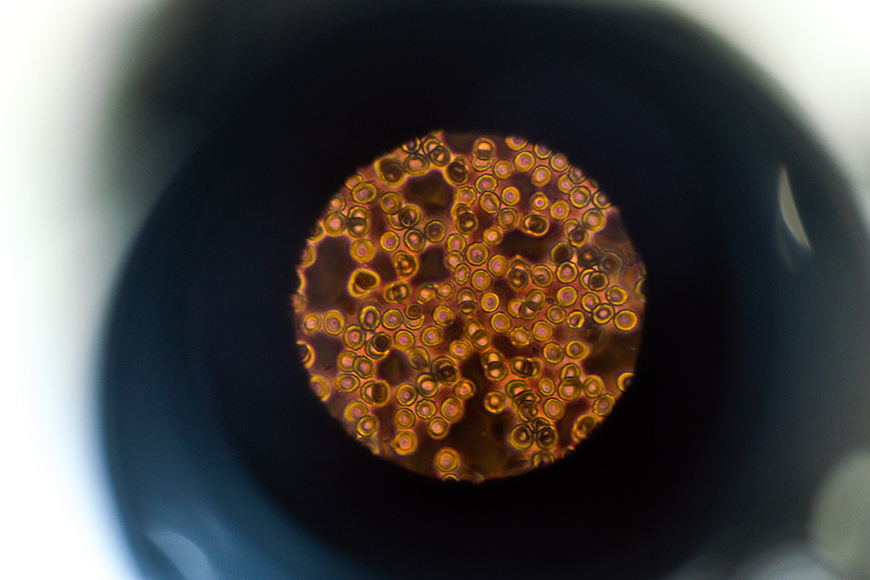
Credit: Andrii Ganzevych
4. Composition in Microscopy
When composing a microscope photo, you will encounter a new set of challenges.
There is no option to shoot from different perspectives or angles.
The objects are too small to be easily repositioned. You can solve this by using a small specimen dish.
This will contain the subject in the view of the microscope. You can move the dish or glass plate to reposition and compose the specimen.
Scale bars can be used for scientific or research microscopic photographs. This will help inform the viewer of the object’s size.
Incorporate the rule of thirds to balance the composition when photographing.
5. Flat Perspective
The more you shoot microscope photography, the more normal “flat” perspective will become.
Just imagine shooting a mural on a wall or a tabletop. There is no perspective, and the image lacks depth.
It’s the same when photographing through a microscope, particularly through a compound microscope.
The magnification is so high there is almost no dimension.
You can use this depthlessness to your creative advantage and focus on shapes and colors. Or utilize stacking software to add depth.
6. Working with Live Specimens
It is worth being cautious when photographing minute live specimens. You want to keep them alive and handle them safely.
Live specimens might not thrive under the microscope. Bright light, heat and even the air can stress them.
They might be averse to being handled. Be mindful of what the specimen you are photographing needs.
Do some research to check what conditions they thrive in. Otherwise, it could end up shortening their life span.
Label all specimens, dishes and glass slides to ensure there is no room for error. Try and avoid cross-contamination by keeping all areas clean and neat.
If the items are poisonous, wear protective clothing and be extra diligent. Remember to dispose of all items in a conscious manner.
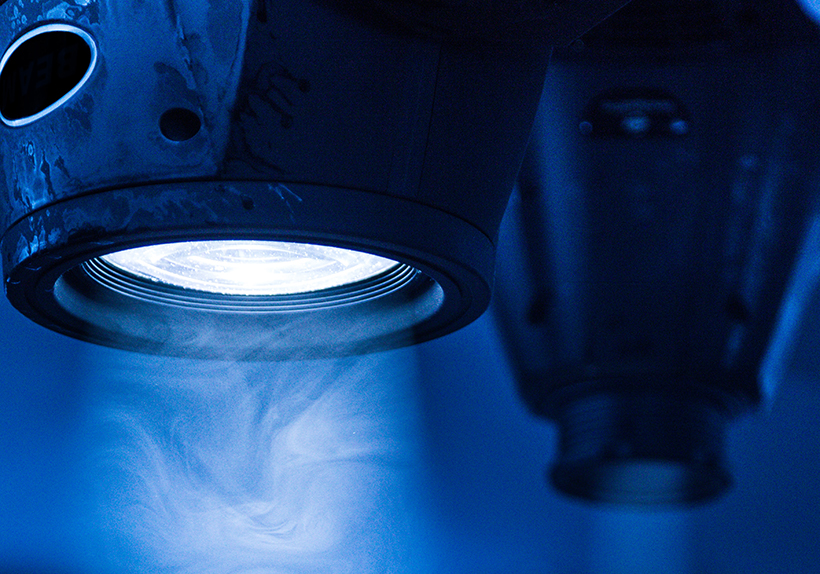
Credit: Arthur Uzoagba
7. Lighting
Lighting is one of the most challenging aspects of microscope photography.
Microscopes have an in-built light that will help illuminate subjects. However, they don’t produce adequate light for high-quality photos.
Use small white reflectors to reflect more light onto the subject. This is an effective way to add extra light without being overwhelming.
Backlighting is a technique that can be used to enhance the borders of a subject. Place a light-colored background under the subject.
A grey background is preferable to a white one. White can flood the border around the specimen, reducing details.
8. ISO and Exposure
When shooting on a microscopic level, it is recommended to use the lowest possible ISO value, 100 – 200.
A low ISO value will give you increased image quality. This will help capture the subject’s finer details.
The photographs will have reduced noise and an accurate, consistent color range.
When photographing stationary objects, you don’t have to worry about potential blur.
You can use a slow shutter speed to allow adequate light for the exposure.
Adjust your camera’s shutter speed and aperture to compensate for the low ISO.
9. Chose the Right Microscope
Decide which microscope suits your photographic project.
The compound microscope is the best for flat translucent subjects. The image captured will be flat.
Use it if you require greater magnification and don’t require a three-dimensional look.
Use the stereo microscope to shoot three-dimensional images with a depth of field. Subjects won’t have to be translucent.
10. Stabilize the Microscope
Using a DSLR combined with a microscope ensures the microscope is stable. You can secure the microscope by clamping it to the table.
You don’t want the weight of the camera’s body to topple mid-shoot. This could damage your camera and the microscope.
An unstable camera could result in minor shakes and tremors. Causing unwanted fuzz and blur to creep into your image.
Credit: Thisisengineering
11. Shoot Microscope Video
Microscopic organisms can move fast, making it difficult to capture good photos.
The best way to capture moving specimens is to use the camera in video mode.
When using a DSLR, the video footage you shoot will be high enough quality to use as a photo.
Focus on the subject before you start filming. You can reposition or refine the lighting while you are shooting the video.
This works well when you are trying to capture fast-moving specimens. However, it’s not advised when you are shooting stationary objects.
The camera will film the specimen moving around the microscope slides.
Later, you can select the best stills from the video to use as an image.
12. Limit the Risk of Camera Shake
Consider locking the camera mirror up before taking a photo using a DSLR.
This will prevent any possible vibrations when the shutter release is triggered.
Another way to reduce camera shake is to invest in a cable release to release the shutter remotely.
13. Patience is a Virtue
Photographing elements that are beyond our scope of vision is very rewarding.
But no one said it would be easy, and there is lots of room for error.
Take your time when photographing. It’s doubtful that the microscopic algae will get up and run away.
You will have ample time to perfect your technique and capture spell-binding images.
14. Post Processing Images Shot Through a Microscope
When you have finished photographing, get ready to do some post-processing.
In editing software, you can disguise blemishes, correct colors and add depth of field.
This will vamp up your microscope images to look incredible.
How to Post-Process & Edit Photos Taken Through a Microscope
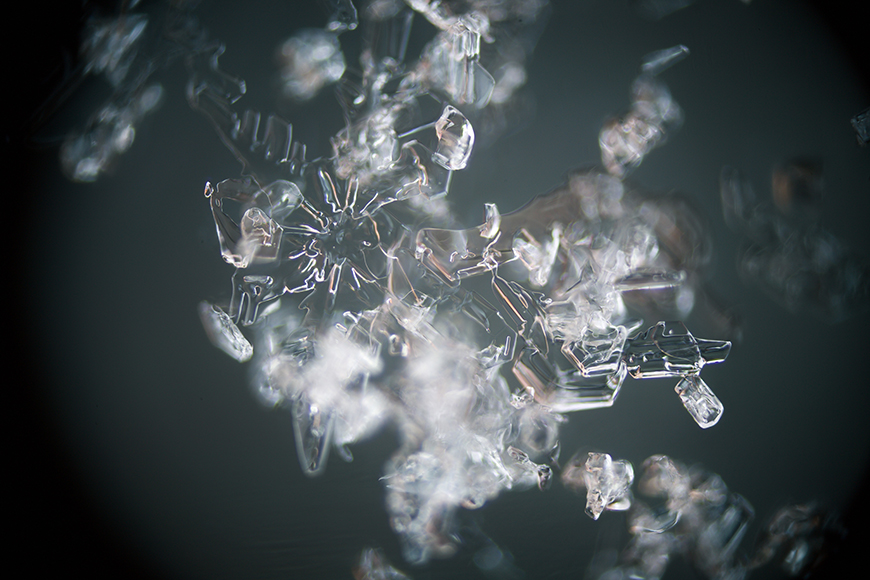
Credit: Fayette Reynolds
Adjusting Contrast and Sharpness
Overcome softness from diffraction by increasing or decreasing contrast.
You can do this using photo editing software. In Photoshop, add a Brightness/Contrast adjustment layer.
Adjust the brightness slider to achieve the correct contrast for the image.
Increasing contrast will make some details of the image more visible.
Adjusting sharpness will enhance the finer details of the captured image.
To adjust sharpness, add a sharpening filter in Photoshop.
Color Correction
In high magnification colors and lighting can shift dramatically.
Use the white balance adjustment in Lightroom or Photoshop if you notice color shifts.
If you want to adjust only a portion of the image, use a selection tool.
Create a selection around the portion of the photo and make adjustments.
Use the color balance tool to enhance or reduce staining colors.
Open the color balance tool in your photo editing software and adjust the colors.
You can select specific colors to increase or decrease vibrancy.
Cleaning Up Artifacts
When photographing at such magnification, unwanted dust or fibres might appear in the composition.
You can remove these using photo editing software. Use Photoshop’s Clone or Smudge tool to conceal unwanted additions.
Safety and Ethical Considerations of Using Microscopes
When working with small specimens, ensure you handle them humanely.
Small endangered insects are worth protecting; be gentle when handling them. Little creatures tend to be fragile.
It can help to research the specimen before the photoshoot.
This will give you information about its ideal living conditions. It lowers the risk of sickness or death.
When photographing potentially poisonous or life-threatening chemicals, take all the necessary precautions.
Wear safety gear, plastic gloves and clothes you can dispose of after the shoot. This will reduce the risk of contamination.
Use disposable equipment when possible, such as dishes the chemicals are held in.
Dispose of the chemicals cautiously. This might mean taking them to the correct disposal facility.
Lastly, familiarize yourself with copyright laws in your field of microscope photography.
Now, you are equipped to capture the intriguing microscopic world.
 Beginner’s Guide to Depth of Field in Photography
 Mirrorless vs DSLR Cameras (18 Differences to Know)
 121 Different Styles & Types of Photography To Try in 2023
 Best Video Editing Software Tools for Movie Making
 Best DSLR Cameras in 2023: Should You Still Buy a DSLR?
 Best Mirrorless Camera in 2023 (User Tested Reviews)

Judyth is an experienced studio photographer and glass artist. When she isn’t Photoshopping comedians into the bellies of sharks, you can find her cooking delicious treats for her guests.

WELCOME TO SHOTKIT
Enter your email to be sent
today's Welcome Gift:
19 Photography Tools
🔥 Popular NOW:


Shotkit may earn a commission on affiliate links. Learn more.