


Soft Lighting Photography: Top Techniques for Dreamy Portraits
Explore soft lighting photography tips and techniques to discover its power to create ethereal, mood-enhancing visuals that captivate and enchant viewers.
Learn | Lighting Guides | By Yatharth Gupta
If you wish to learn soft lighting photography, you’re in the right place. In this guide, you’ll find everything you need to master the art of gentle illumination.
As photographers, we know light is fundamental to photography, whether you’re shooting with a film camera or a mirrorless.
It gives shape and definition to the subject and breathes life into photos.
Whether you want to express a feeling through your photo or achieve a specific mood and tone, the type of your lighting (hard or soft) is the most important factor.
Soft lighting creates an even spread of light that produces soft shadows and a flattering effect in your photos.
(We’ve already discussed hard lighting in another article.)
Whether you’re a seasoned pro or a beginner photographer, learning soft lighting can elevate your photography to the next level.
In this article, I’ll take you through various techniques and tools you need to start creating amazing photos with soft illumination.
Table of Contents
What is Soft Lighting?
Light is the most crucial element for photography. There can’t be a photograph without light hitting the photosensitive material (sensor or film) and projecting the outside scene onto it.
However, it’s not just the presence of light but also the type and quality of light that determines the overall look and feel of a photograph.
Photography lighting can be defined as soft or hard. You can think of soft light as the gentle, diffused light from the sun on overcast days.
The softness of light depends on the size of the light source in comparison to the subject. When the illumination fully wraps the subject, you get a graduated transition between the highlights and the shadows and a gentle light overall.
Soft-lighting is useful in a variety of shooting situations such as portraits, architecture, events, and more.
To understand it better, let’s take a comparative look at both the soft and the hard light.
Hard Light vs. Soft Light
Hard light produces sharp shadows and high contrast between light and dark areas in a photo. It’s often created by using a small light source, such as a flash or a spotlight.
As discussed above, the size of the light source relative to the subject and the field of view determines whether the effect of the light would be soft or hard.
For example, a bare speedlight would always produce hard light because of its relatively small size. Similar is the case with the sun in the afternoon on a cloudless day; even though the sun is huge, it’s a small spot in the sky during noon time.
However, when it’s overcast, the blanket of clouds emits the light of the sun and turns into a very large source that emits soft light.
Even though hard light is great when you are looking to create dramatic and high-contrast photos, it can be too harsh for other shooting scenarios, especially portraits.
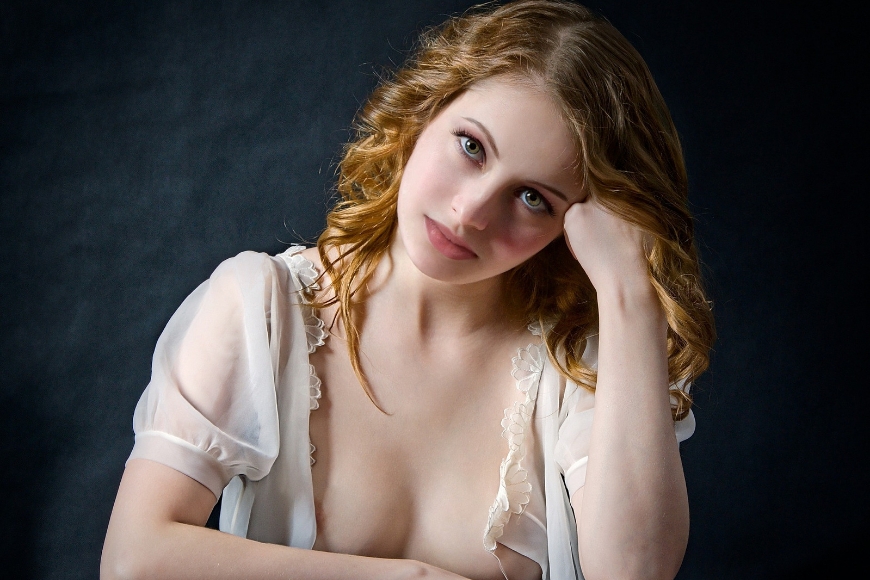
On the other hand, soft light is characterized by gentle illumination as well as low contrast between the highlights and the shadows.
Softness is often the result of using a source of light large enough to wrap the subject in illumination.
Wrapping the subject in illumination is the factor that determines if the given light is soft or hard.
For example, If you’re shooting a small toy and lighting it with a nearly placed speedlight, the lighting would be mostly soft as it would wrap the subject.
On the contrary, if you’re shooting a portrait with a large softbox placed very far from the subject, the intensity and softness of light would be less compared to if it was placed nearby.
Distance affects the relative size of the light and its ability to wrap the subject in an even illumination.
The general guideline about lighting in photography is that if you’re looking for dramatic images with ample saturation and high contrast, hard light is the way to go.
However, If you prefer a natural look in your photos, soft light is the better choice.
There are many ways to create soft lighting in photography which we’ll discuss in the sections below.
How Do You Get Soft Lighting in Photography?
Now that we’ve discussed the definition of soft lighting and the differences between hard and soft light let’s take a deeper look into the ways you can create soft light for your photography.
Soft lighting can be achieved with different techniques using natural light, artificial light, or by combining the two.
Let’s take a look at a few of the common ways to create soft light.
1. Natural Soft Lighting
Natural light is one of the easiest and cheapest ways to work with soft light. Below are a few tips for using natural light to get soft, gentle illumination in your photos.
Shooting on overcast days: The sky is said to be overcast when it is completely blanketed with clouds. Such a cloud cover spreads the light of the sun evenly and serves as a natural diffuser that softens the light and reduces hard shadows.
Shooting on cloudy days: It’s said to be cloudy when there are many clouds scattered throughout the sky. Unlike an overcast sky, when the cloud covers seems like one big cloud, you’ll see the separation in clouds.
Such a sky creates comparatively soft shadows and sometimes ethereal kind of light.
However, the softness depends on if the sun is covered by clouds or shining through the gaps.
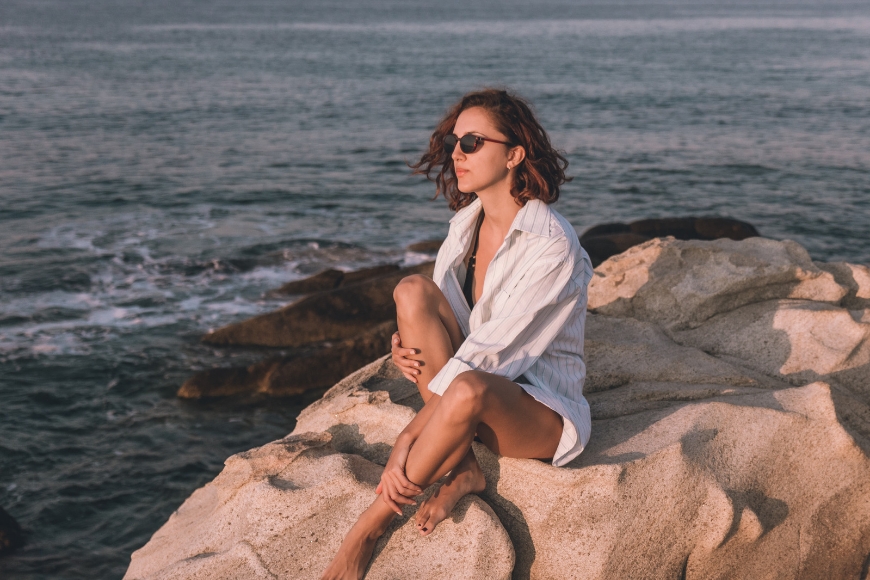
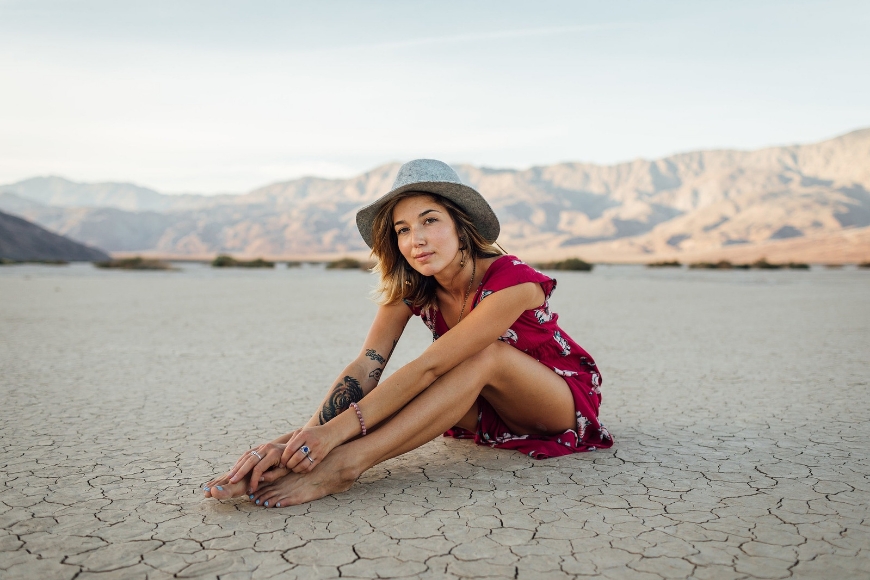
Sun low in the horizon: As the sun lowers towards the horizon, the light gets more diffused due to it traveling through the dense atmosphere.
This makes the sun look larger compared to its spot-like appearance in the afternoon. The light around this time is comparatively soft and flattering.
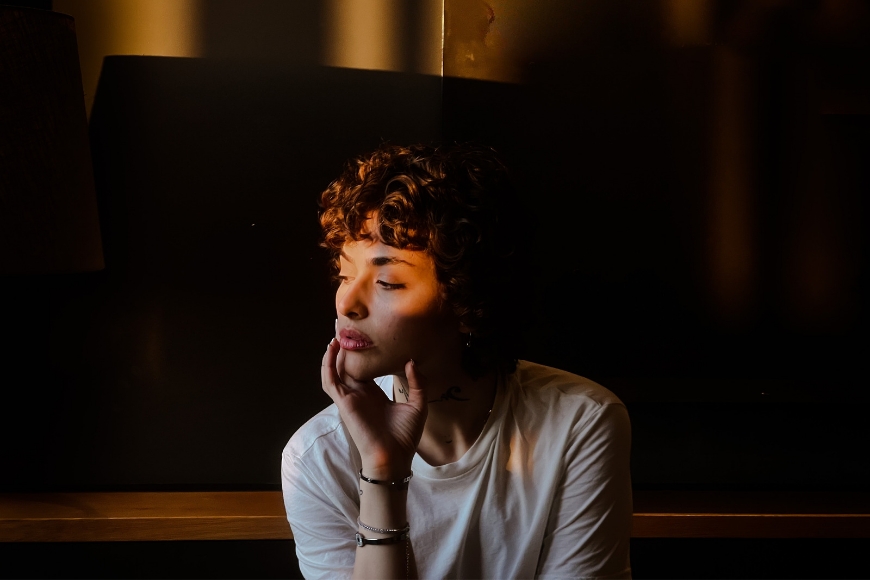
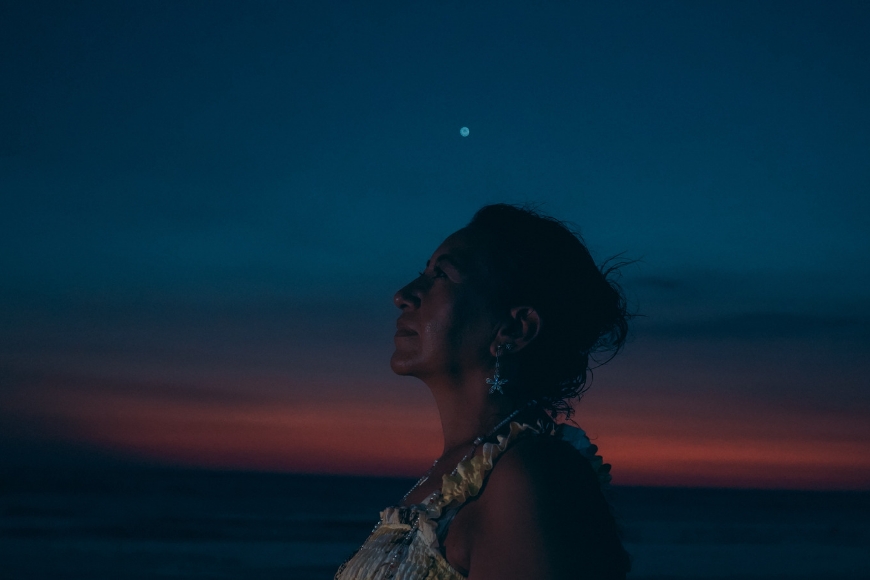
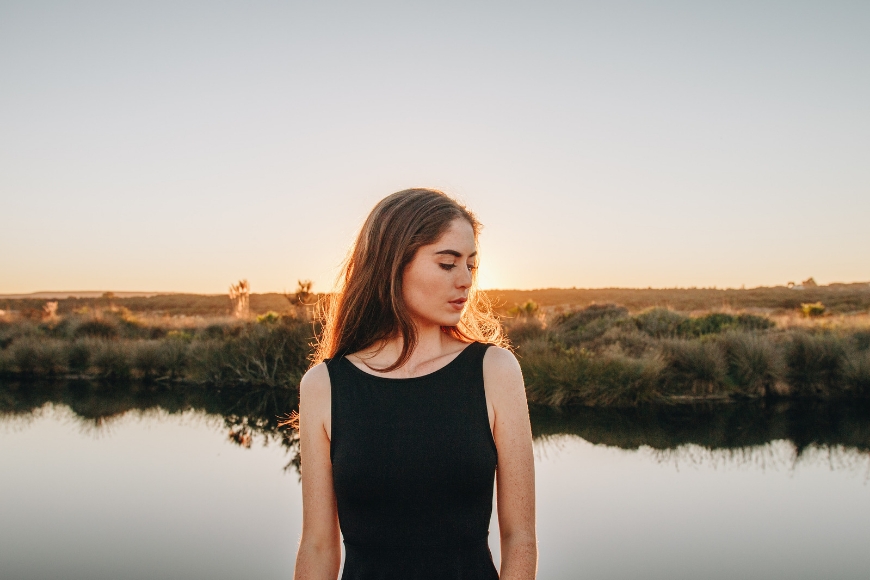
Shooting around golden and blue hour: Golden hour is a small window of time before sunset and after sunrise when the light of the sun is naturally soft and diffused.
Blue hour happens before sunrise and after sunset, both time when the faint illumination of the sun lights up the sky for a few minutes. Both these times are great to shoot for a flattering illumination in your photos.
Diffused window light: When shooting indoors, window light can be a great way to create soft light on your subjects. Depending on the weather conditions, the window light can be very soft to start with.
However, in some scenarios adding a layer of diffusion, such as translucent curtains, can further soften the illumination.
Shade: Shooting outdoors in the afternoon is challenging, especially on the days when the sky is clear. In such scenarios, taking refuge under areas of shade can be a great way to escape the hard light of the sun.
Shade can be created due to foliage, trees, or even man-made structures.
2. Artificial Soft Lighting Techniques
Now that we understand the fact– the larger the light source, the softer the light it will produce– let’s look at some of the ways to create soft illumination with artificial lights such as studio flashes and speedlights.
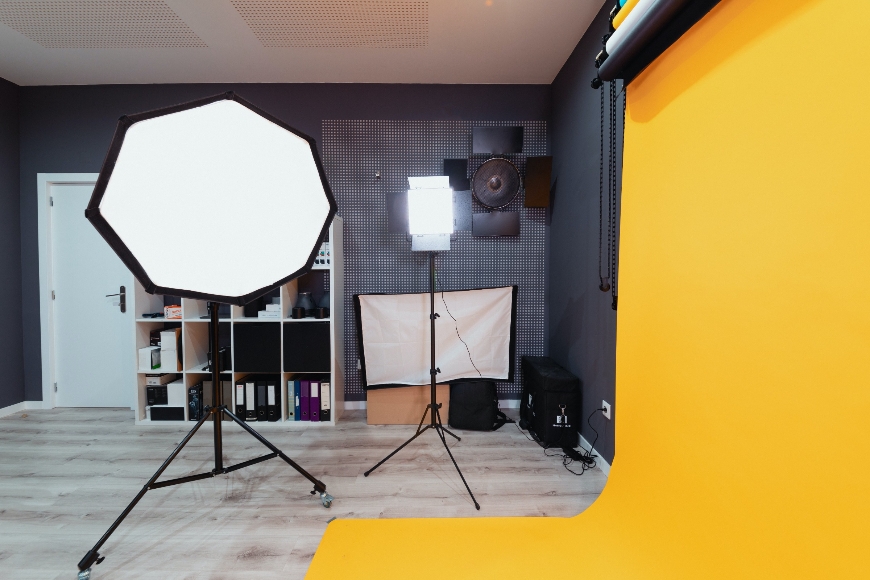
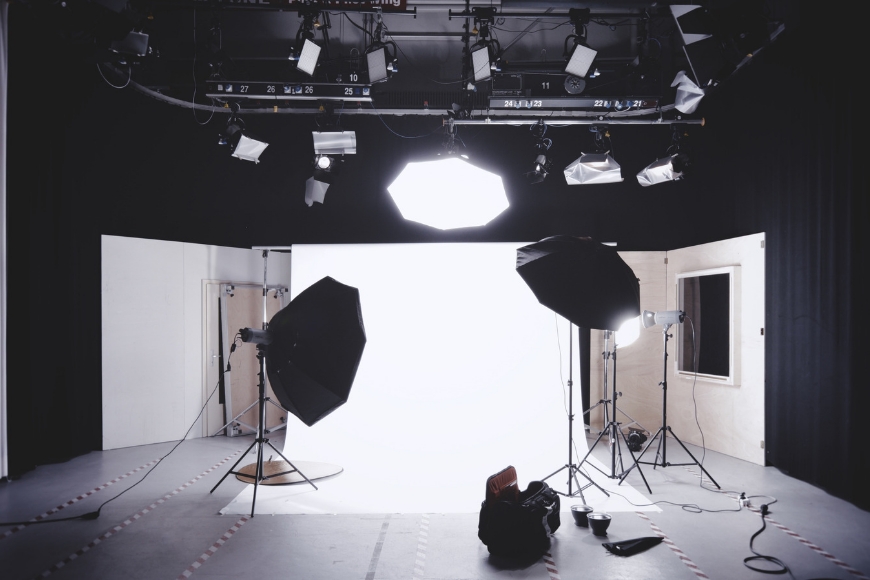
Using light modifiers: Softboxes, umbrellas, and other light modifiers offer an easy approach to increasing the size of a small light source such as studio flashes.
Most of these modifiers come with a reflective surface and diffusion material, which helps amplify the spread of light and soften it. Some of the common options are listed below:
- Standard Softbox: This type of softbox is one of the most common ways of creating soft light in photography. These are square in shape and are lined with reflective material inside and covered with diffusion material that helps to spread the light evenly, creating a soft, diffused glow.
- Octagonal Softbox: An octa softbox is designed similarly to the standard square softbox with a reflective surface and diffuser but has a different shape. The octagonal shape of this type of softbox creates round catchlights in the eyes of the subject that look natural.
- White Umbrella: A white umbrella is one of the most affordable light modifiers for creating soft lighting. The light source is mounted behind the white umbrella and light passes through the shaped diffusion material and creates a soft wrap-around glow on the subject.
- Reflective Umbrella: Reflective umbrellas are similar to the white umbrella, but instead of a diffusing cloth, they are made of opaque fabric with reflective lining on the inside. The light source is placed facing inside, which makes the light bounce from the reflective surface onto the subject, creating a soft, diffused glow. Reflective umbrellas are a great choice for creating soft light for portrait photography.
DIY Solutions: If you’re on a budget or you don’t want to invest in diffusers and modifiers yet, you can choose to utilize one of the many DIY solutions. Below are some of the easiest methods to create soft light on a budget.
- Using white bed sheets or curtains as diffusers
- Creating a DIY softbox using cardboard and white tissue paper
- Using a white shower curtain as a diffuser
- Creating a DIY reflector using aluminum foil and cardboard
3. Combining Natural and Artificial Light
There are situations when natural light is not enough to light the subject, even in situations when the light is soft and gentle. In such cases, combining flash and natural light can be an effective way to maintain the softness while properly lighting the subject.
Fill flash: A light is called fill flash when it is used to illuminate the areas that are in shadows created by the natural light. Such conditions sometimes occur when you are shooting in shade or the light source at a very high angle. Fill flash is a useful way to light up your photos while maintaining the overall softness of light.
Slow sync flash: This technique is useful when the flash is not powerful enough to light up the whole scene. In such scenarios, slow sync flash in combination with a slow shutter speed captures the flash exposure as well as natural light in the same photo. It’s a great way to take advantage of soft natural light in low-light situations like dusk or early dawn.
High-speed sync flash: Flash exposure is limited to the camera’s sync speed which varies in cameras between 1/200 to 1/250. However, when you’re in a situation where you need to increase the shutter speed beyond the sync speed, you can use high-speed sync or HSS to blend the natural light with the flash.
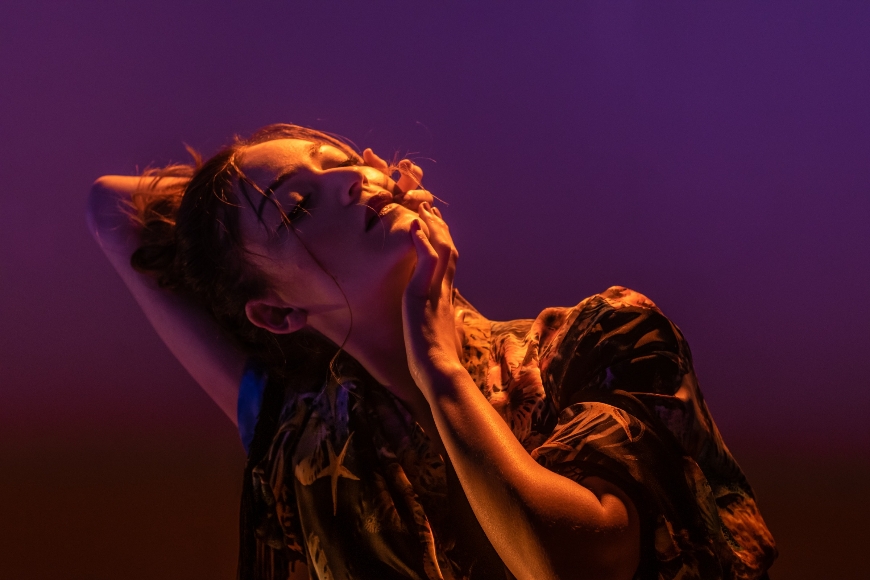
Color gels: These are colored filters that are mounted to the front of the light source to create colored light as well as to correct the contamination or tint in skin tones and other parts of the photo. You can also balance the temperature or color-specific parts of the subject to create drama and mood in your photos.
Recommended Settings and Gear to Create Soft Light
Soft lighting photography comes with its own set of challenges and may require some adjustments in camera settings and lens choices for good results. Let’s take a look at the recommended settings and gear for soft light photography.
When it comes to soft light photography, your camera settings play an important role in the final look of your photo. Below are some recommended settings you should consider:
- ISO: The higher the ISO, the more chances you have of rendering noise and loss of detail in your photos. For that reason, you should keep it at a lower setting (between 100 to 400) and preferably at the native ISO level for your camera.
- Shutter Speed: A faster shutter speed may cut the soft, natural light in your photos. Keeping the exposure time long enough to capture the ambient light is recommended. However, it should be fast enough– ideally not below 1/60– to avoid blurry photos due to camera shake.
- Aperture: A wide aperture value such as f/1.4, f/2.8, or f/4 is recommended for soft lighting photography. The added softness and bokeh that comes with an open aperture add to the softness and create a pleasant effect.
- White Balance: The color temperature of the light source affects the overall mood of the image. Adjusting the white balance allows you to correct the tints and color cast in your photos. It would be recommended to match the color temperature of the light source. However, you can be creative with these settings to create amazing effects.
2. Lenses
The lens and filters can have a great impact on the softness of your photos.
Below are some gear choices to consider for soft light photography.
- Prime lenses: These are the fixed focal length lenses that often come with a wide aperture value such as f/0.95. f/1.2 or f/1.8 etc. They’re ideal for soft light photography because of the added softness the wide aperture brings to the photos. Some of the recommended prime lenses are 35mm, 50mm, 85mm, and 100mm.
- Zoom lenses: When it comes to versatility, nothing can beat the zoom/telephoto lenses. Some of these lenses come with an overall wide maximum aperture, such as f/2.8 or f/4, which can be useful when working with soft light. A 24-70mm f/2.8, 70-200mm f/2.8, or 16-55 f/2.8 are some good lens choices for this purpose.
You can also read our comparison of prime vs zoom lenses.
Making the Most of Composition and Subject in Soft Lighting
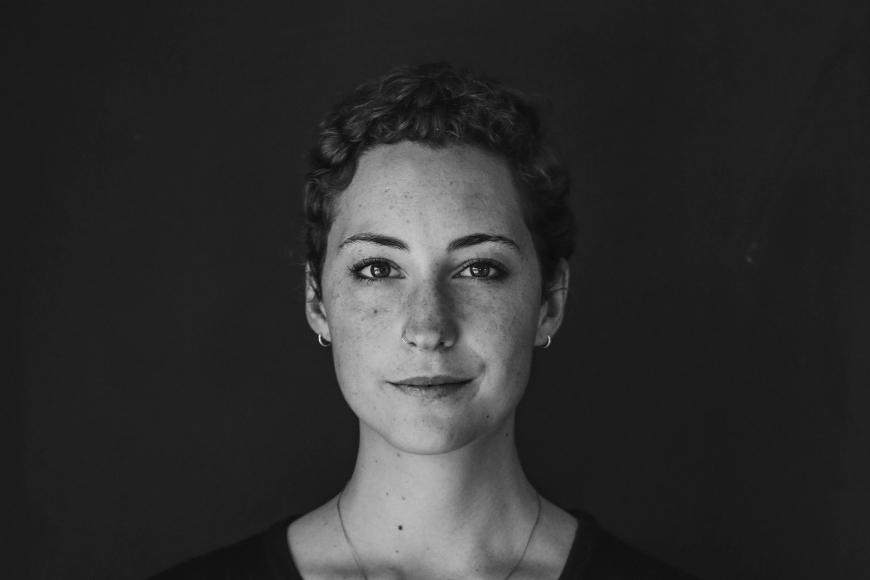
1. Portraiture in Soft Light
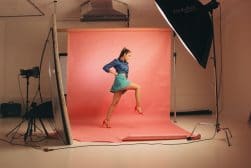
Soft light is often used in portrait photography to achieve a flattering look in the photos. Here are some tips to effectively use soft lighting in portraits:
- Consider your subject’s position: When working with a large source of light, you should position your subject where light wraps around and evenly illuminates him. If you place your light too much on the side, you’ll create a split lighting effect where half of the subject is dark and half-lit. Generally, placing lights at around 45 degrees to your subject creates even lighting with a gradual transition between highlights and shadows.
- Use a reflector: Many times, the key light is not enough to completely light a subject. In such scenarios, using a reflector to fill in the shadows can be a good way to maintain the softness in photos. Additionally, when shooting outdoors, reflectors can be useful in directing the light towards the subject.
- Experiment with camera angles: Every subject is different, and some people have one side more flattering than the other. While working with soft light, it’s important to experiment with different camera angles to find interesting compositions and poses.
2. Still Life and Product Photography
Product and Still Life photography can also benefit from the use of a large light source.
The gentle lighting can help in bringing out the texture of the objects and reduce harsh reflections.
Here are a few tips to improve your product and still-life photos with soft lighting:

- Set up an environment: It’s important to have a controlled environment when shooting product or still-life photos. Everything from lighting, and reflections to background and other variables should be pre-set for good results. For example, you might want to turn off the room lights to prevent light contamination or put the product in a light tent for all-around illumination.
- Use polarizer filter to cut glare: Shooting products with a shiny surface can be challenging due to the glare it produces. That’s where using a circular polarizer lens filter would help you cut the unnecessary glare from your images.
- Block light from unnecessary angles: When lighting small products with large lights, we might create undesirable glare and reflections by letting the light flow from unimportant angles. In such scenarios, you can use a black cardboard paper to block certain angles and prevent the light spill.
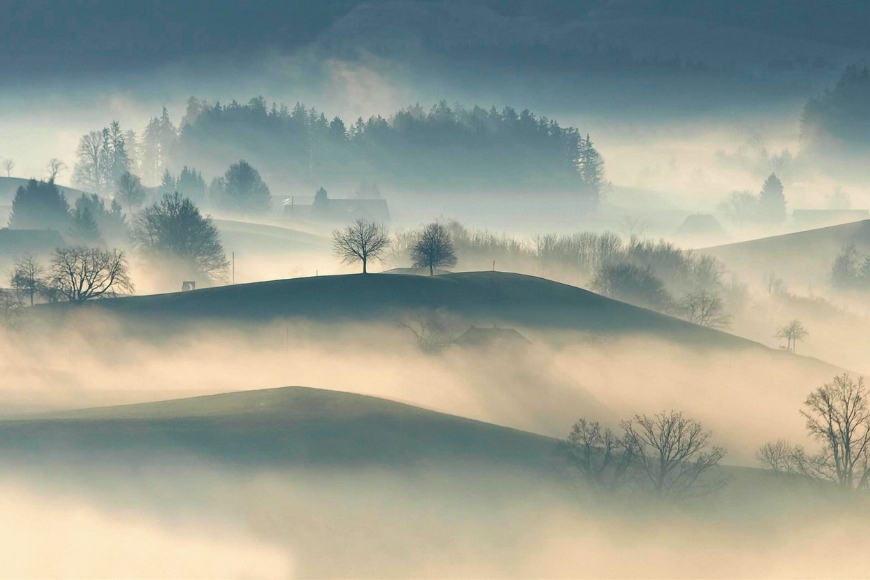
3. Landscapes in Soft Lighting
Finally, soft light can produce amazing results for landscape photography, as it helps create a moody and atmospheric look in the photos.
Below are a few tips to make the most of natural soft light in landscape photography:
- Shoot during Golden or Blue hour: Natural light is the softest around the time of golden hour- a few minutes after sunrise and before sunset and blue hour- a short period of time when the sky becomes blue that happens before sunrise and after sunset.
- Shot during haze or fog: Fog, mist, and haze all act like diffusion for the hard light of the sun. They are a common occurrence in winter in some parts of the world and also happen to be the best conditions to shoot natural landscapes in soft light.
- Use neutral density filters: Another way to soften the impact of light is to use longer exposure times with the help of neutral density filters that cut down a few stops of light to allow for slower shutter speeds.
Challenges and Solutions of Soft Lighting in Photography
1. Overcoming flatness in photos
One of the challenges of working with soft light is that it sometimes makes your subject look flat.
In a two-dimensional medium like photos, shadows play an important role in creating three-dimensionality.
One way to achieve this is by changing the distance and angle of light, which can add definition and depth to your subject.
2. Managing Noise in Low Light
Shooting in low-light situations comes with the risk of adding unwanted noise to your images. However, there are a few ways you can eliminate it to some degree.
You can start by lowering your ISO to the minimum that is possible in the shooting conditions and use a tripod to stabilize the camera and avoid blurry pictures.
In post-processing, you can use tools like Topaz Denoise or Lightroom’s Noise Reduction feature to clean up some of the noise in your photos.
3. Controlling Shadows
Soft lighting produces subtle shadows, which can enhance the depth and dimension of your photographs.
However, it’s crucial to be mindful of the shadow areas and ensure they don’t become distracting or overpowering. One way to address this is by using a reflector or fill-flash to fill in any shadows and achieve a balanced look.
Conclusion
Working with soft light can be challenging at first.
However, once you become proficient, it can take your photography to the next level.
I hope you found this guide useful. If you have any questions or thoughts, please share them in the comments section.
Happy shooting!
 Which Softbox is Best for Photography in 2023? (5 Lighting Kits)
 Camera Flash Diffusers: How to Use Them Effectively
 Expert Guide to On-Camera Flash (How, When & Why to Use)
 Beginners Guide to Photography Lighting Techniques (+Pro Tips)
 Hard Light vs Soft Light (Differences & How to Create them)
Yatharth Gupta is a seasoned portrait and travel photographer based in India. He is also a writer and a blogger and loves to explore new places.

WELCOME TO SHOTKIT
Enter your email to be sent
today's Welcome Gift:
19 Photography Tools
🔥 Popular NOW:


Shotkit may earn a commission on affiliate links. Learn more.