


21 Surf Photography Tips: Epic Shots from Land & Water
Master the art of capturing waves and surfers with our essential surf photography tips, ensuring dynamic shots from the sea or the shoreline.
Learn | By Tammy Danan
These pro surf photography tips will help you capture more epic shots this year.
Popping up in a barrel with an ultra-wide lens is an exhilarating experience, but you need to know what you’re doing.
Taking shots of waves from the comfort of the beach may be easier, but getting up close to the action will yield better results.
The goal is to make the viewer feel the energy of the wave – that’s what all the best surf photographers do.
This guide is for photographing surfers, whether you’re on land or in water.
I’ve also included some safety tips for beginners, as surf photography can be dangerous if you’re not prepared.
Table of Contents
21 Tips for Epic Surf Photography from Land and Water
Surf photography can be challenging, whether you’re photographing from the shore or in the waters.
These surf photography tips will help you capture better surf photos.
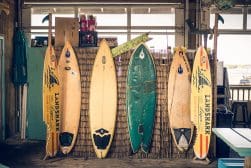
1. Get the right gear for surf photography
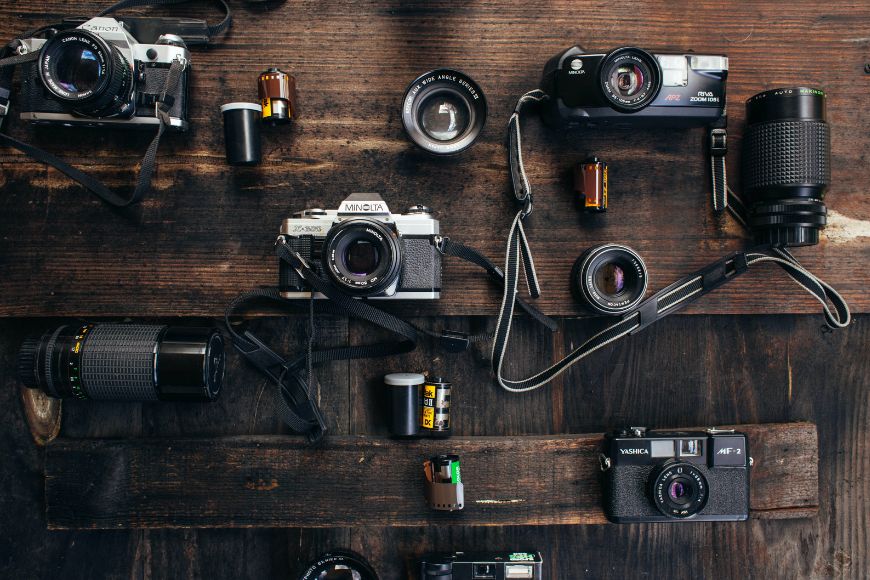
Image Credit: Unsplash
Shopping for new gear can be exciting. But you wouldn’t want to spend thousands of dollars on the wrong items.
The market is so full of cameras, lenses, filters, and other accessories—how do you know which works best?
Camera
For surf photography, the camera you choose should have a fast autofocus system to capture quick-moving subjects and high frame rates for continuous shooting.
A robust build is essential to withstand the harsh marine environment, and water and weather-sealing are crucial.
Additionally, a camera with a high-resolution sensor can capture the intricate details of waves and surfers, while good low-light performance ensures quality shots during early morning or late afternoon sessions.
The Sony A1 is a mirrorless camera that people consider the perfect camera for sports like surfing for many reasons.
With a 50MP full resolution, ISO 50-102400, and BionZ XR engine, this camera boasts speed and sensitivity, making it a solid action camera.
Another is the Canon EOS Rebel T6i, which is considered a pretty good entry-level camera for action sports like surfing.
With features like 24.2MP APS-C CMOS sensor and the Hybrid CMOS AF III focus system, this straightforward camera is easy to learn and can give you pretty solid images.
If you want something that has solid zoom capabilities, Sony RX10 MKiV and its 25x zoom range is what you’re looking for. It’s another high-speed camera that makes image processing a breeze.
Lens
For surf photography, a telephoto lens, typically in the range of 70-200mm or even 100-400mm, is essential to capture distant action from the shore.
A lens with a fast aperture, like f/2.8, allows for quicker shutter speeds to freeze motion and performs better in low light.
Additionally, optical image stabilization can help reduce camera shake, especially when shooting at longer focal lengths. Weather-sealing is also crucial to protect against salt spray and moisture.
Shooting on land, it’s advisable to use a telephoto lens like the Canon RF 100-500mm f/4.5-7.1 L IS USM or Sigma 100-400mm F5-6.3.
Like any Canon product, the RF 100-500mm lens is crafted with the highest standards.
It features a long focal length and 5-stop image stabilization, making it perfect for sports photography.
Sigma’s first-ever ultra-telephoto zoom lens, the 100-400mm F5-6.3 is packed with a full range of features that can deliver crisp images.
The zoom lock feature fixes the zoom ring at the widest end, making it a very handy and unique feature.
When shooting in water, you’d want to opt for a wide-angle lens.
Consider checking the Nikon 10-24mm with a pretty impressive focal length and an extremely wide angle of view.
Another option is the Sigma 10-20mm, which is lauded for its ability to take exceptional images, given it is an ultra-wide angle lens.
Sigma’s F3.5 aperture lets just enough light in, saving you from those too-glaring images.
Camera Housings
Aquatica is one of the most well-known camera housing brands in the market, and they have an array of housings compatible for Canon, Sony, Olympus, Panasonic, and Nikon cameras.
If you’re looking for solid craftsmanship, Aquatica is a brand you can rely on.
Sea&Sea is also a trusted brand and perfect if you want compact but solid housings.
While camera housings are known to be bulky, Sea&Sea makes theirs as compact as possible.
Also a top-notch brand is Ikelite, known for its Dry Lock Port system and intuitive zoom system.
This brand also has a line of camera housings to choose from, but the Ikelite 200DL is one of the most sought-after.
Filters
Circular polarizing filters are the best options for outdoor shooting, like surfing.
It helps deepen colors and reduces scattered light.
Tiffen 77CP Circular Polarizer can be a good start with a 77mm filter thread.
It has a great glass quality, with durable aluminum alloy as its outer frame.
You can also try the Kenko REALPRO C-PL filter that will give you bright colors and polished images.
You don’t have to worry about the reflection of the sun in the water.
Then you have neutral density filters, another type of filter that allows you to shoot at a slow pace without image overexposure.
It also reduces the light that enters the lens.
A good choice for an ND filter is K&F Concept ND1000.
Its long-time exposure tool will provide you with silky water images.
Wet Suits
With surf photography, chances are you will spend lots of time in water. That said, it’s best to wear top-quality wet suits.
This means double-thickness wetsuits since you will be neck-deep submerged underwater for a long time.
Three highly recommended warm wetsuits are:
- Xcel Mens Drylock Hooded 6/5mm Fullsuit – this is lightweight, with ultra-stretch arms and legs that will allow you to move freely in the water.
- O’NEILL 5/4+mm Men’s Hyperfreak Hooded Fullsuit – a perfect warm suit for cold waters. It has a minimal design and has an additional 0.5mm extra thickness to give you warmth.
- Quiksilver Mens 4/3 Sessions LFS Chest Zip Wetsuit – this stretchable and lightweight suit has maximum flexibility. It was also glued and blindstitched for minimal water entry.
Sunscreen
Protecting your face is a must during surf photography, so sunscreen is also essential.
There are lots of sunscreens available in the market, but reef-safe sunscreens are better so as to not harm the corals. Here are some options:
- Sun Bum – Sun Bum is proven to be hypoallergenic and free of chemicals that might harm the coral reefs, like oxybenzone, gluten, etc.
- Babo Botanicals Sheer Mineral – is one of the best sunscreens as it leaves no white cast on the face and body. It’s also fast-absorbing and gives you around 80 minutes of sun protection.
- Badger – non-irritating sunscreen that barely leaves any residue. It gives a smooth finish and has a high concentration of zinc that helps protect your skin from UV rays.
Swim Fins
If you’re diving in the water to catch action photos of surfers, you might need to consider purchasing a solid pair of fins.
DaFins and Churchills are by far the most recommended swim fins.
Dafins is super reliable and comfortable to use. They are stylish and have a variety of colors to choose from.
While Churchills are proven to be durable and very comfortable to wear, they are made of gum rubber materials that make the fins easy to float.
Waterproof Gear Storage
A waterproof camera case is also something to consider.
The Pelican cases are, without a doubt, the most popular standard case used by many photographers. The PelicanAir 1535 case features wheels, carry-on capacity, and padded dividers for safety keeping.
For a more affordable choice, the Amazon Basics hard case comes with customizable foam inserts.
Both come in hard cases that will keep your gear protected and dry.
2. Prepare the best settings for surf photography
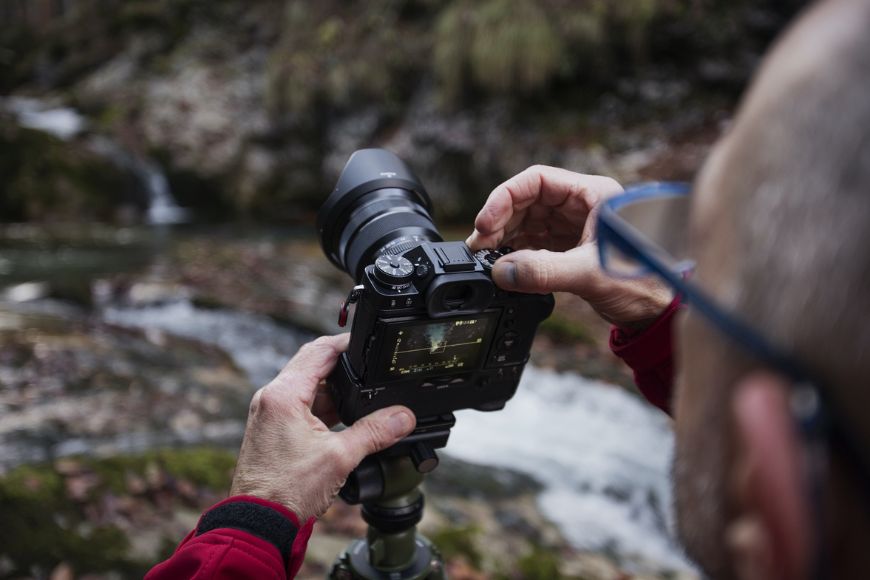
Image Credit: Unsplash
How you set your camera, whether you are on water or land, will pretty much dictate your output.
These are three important settings usually considered to guide you in your next photo session:
Waves are not the easiest subjects. Beginners like you can start with higher shutter speeds at 1/1000th of a second to make sure your images stay sharp.
Once you get the hang of it, you can experiment with different shutter speeds and see which fits your personal photography style.
Aperture
Aperture and shutter speed are like twin sisters in photography. If it’s too bright outside, you’d want a high shutter speed as well as a high F-stop.
The higher the aperture or F-stop, the less light enters your camera.
When starting out and still learning how to perfectly capture the waves at different times of day, you may play around f/5.6-f/8 and go from there.
ISO
Keeping your ISO as low as possible will help you produce good-quality images with less noise or graininess. This depends on the type of camera you’re using, but generally, you can start anywhere between 300 to 400 and increase when necessary.
These three camera settings will help you produce clear, sharp images for capturing face-pacing subjects.
3. Recognise various surfing maneuvers for position and timing
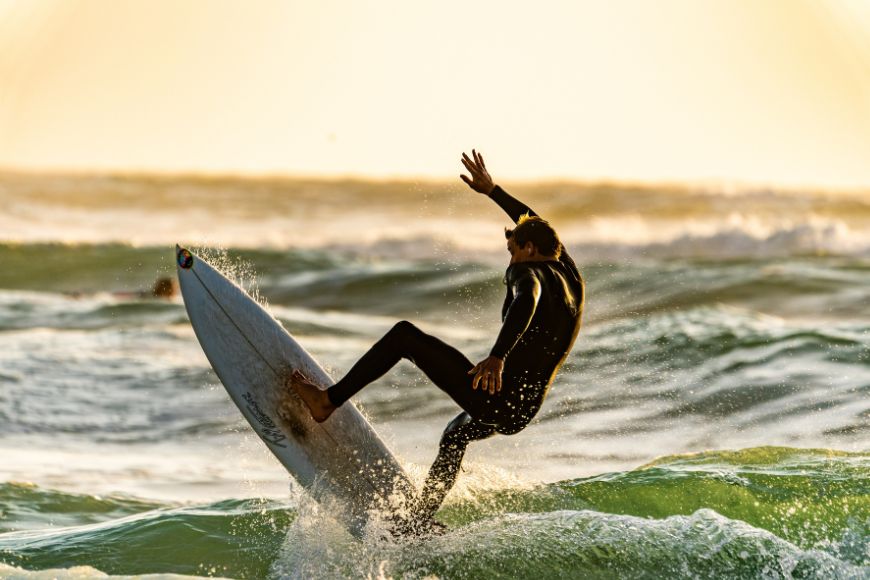
Image Credit: Unsplash
The ocean is full of action, and concentration is a must as you do surf photography.
Recognizing surfing maneuvers will help you know where to position, when to anticipate actions, how to compose shots, how to relay a story visually, and most importantly, how to be safe when shooting.
Here are some maneuvers to be familiar with to position correctly and achieve the perfect timing.
- Bottom Turn – this is when the surfer turns at the bottom of the wave
- Cutback – this is when the surfer changes his direction by turning back to the spot where the wave is breaking
- Snap – this is the quick turn to the top of the wave
- Aerial Maneuver – this gravity-defying trick is like 360, air, and backflip
There are many more maneuvers, and knowing them can make you feel confident for your next shot.
4. Make the most of the golden hours of surfing
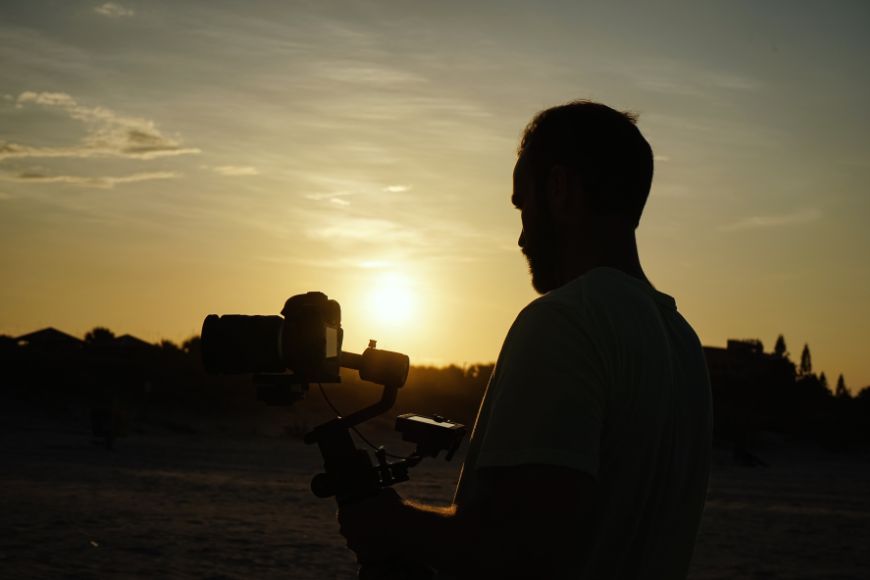
Image Credit: Unsplash
Maximizing the use of golden hours in surf photography is one of the tips photographers usually hear.
Golden hour is a short time, usually an hour after sunrise and again an hour before sunset. This provides a soft yet warm diffused lighting.
Take advantage of this free source of light as it gives a flattering illumination to subjects, such as the surfers and the waves.
It also helps enhance colors, gives a longer shadow that creates a dramatic shot, reduces glare, and provides a warm but gentle quality to images.
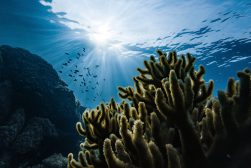
5. Research for surf zones
Image Credit: Unsplash
It’s very important that, prior to the planned surf photography session, you research surf locations.
This is crucial as it will ensure your safety, prepare the right gear, and you can plot out the types of photos you can take.
It will also give you knowledge about wave patterns and tides, allowing you to prepare and create a better photography strategy for those solid surf photos.
Include in your research the local regulations and surf culture in the area to show respect to the locals.
6. For land photography, use a tripod
Image Credit: Unsplash
Stability is essential in surfing photography to be able to capture sharper images.
If your hands are a little bit shaky, don’t plan on shooting from the shore using your camera and bare hands – you need a tripod to give you quality images.
Even if your camera has image stabilization, a tripod can save you from camera shake.
For beginners, a tripod is a portable device that supports, stabilizes, and elevates a camera. It has three legs and a head to carry your camera.
Buying a tripod can be overwhelming since you have a lot to consider. But here’s a quick guide:
- Weight – make sure that the tripod you’ll purchase can support at least 1.5 times the weight of your camera. It will ensure the safety of your gear when you plan to attach a flash or additional batteries.
- Height – ideal tripod height must at least match your height to give you a more comfortable shooting with an eye-level position.
- Construction – the weight of the tripod usually depends on the material used in creating it. The two best materials are carbon fiber, which is very durable and doesn’t rust, though it’s quite expensive, and aluminum is cheaper yet heavier than carbon fiber.
For many surf photographers, a lightweight travel tripod is highly recommended.
7. Play with backlighting effects for a dramatic shot
Image Credit: Unsplash
Taking backlit shots is definitely something you’d want to try!
It is done by taking the dark silhouette of the surfer against a bright background. This will show their form in a very artistic way.
Silhouettes also help in storytelling. It gives a deeper sense of connection between the surfers and the ocean.
Using this tip simplifies the photos and reduces distractions. Few tips:
- The longer the shutter speed, the more light enters through the lens or the sensor, resulting in brighter images.
- Consider using partial metering because this will let you expose the subject without overexposing the background.
- Aperture is your best friend. Don’t be afraid to experiment between f/2.8 to f/5.6 and see what works best for you.
8. Opt for RAW format for flexibility during post-production

Image Credit: Unsplash
Aside from choosing the right shutter speed, make it a point to always capture in RAW format, as this will give you more flexibility during post-processing.
This tip is important in surf photography because it also allows recovery when a certain adjustment is needed, and it gives a sense of creative control as you fine-tune things.
In short, shooting in RAW helps enhance images in the crucial post-production stage.
9. Convey a story through your photographs
Image Credit: Unsplash
A photo tells a story. Make sure your images convey a clear story and encourage viewers to continue that story in their imaginations.
The best photographers tell a story through images that lead to a deep emotional connection, and well-narrated photos make the surf culture known to its viewers and create a lasting impact.
You don’t have to be a natural storyteller, but you need to know that every still frame is a chance to share something from your point of view.
10. Ensure the horizon level
Image Credit: Unsplash
A horizon level is the line or visual boundary that separates the sky and the surface of the earth, whether the land or the water.
Maintaining the horizon level in surf photography is essential as it gives balance and a sense of professionalism to the photos.
The horizon serves as the reference point, giving the viewers an understanding of the surfer’s actions and the wave movements.
The best photographers know how to maximize the use of the horizon level to create an aesthetically pleasing and engaging piece of art.
Here are the three horizon levels you need to be familiar with to create more engaging and well-done images:
- Low Horizon Level – it draws the attention of the viewers to the beauty of the sky. Usually showcasing the radiance, colors, and dramatic scenery of the above surface.
- High Horizon Level – for when the focus is on the foreground of the image. This usually highlights the patterns, textures, or colors of the subjects at the surface of the earth or on land/water.
- Centered Horizon Level – this level usually shows the balance of the sky and the land/water.
11. Make the most of your surroundings
Image Credit: Unsplash
Maximizing your surroundings is one of the ways you, as a surf photographer, can give a deeper context to your photo.
Everything around can enrich the quality of an image when properly used. Play with the elements around, given that you’re shooting outdoors.
And by elements, I don’t just mean the water. I mean the trees, the elevation (if there’s a nearby hill, go there), maybe even the people around.
See what you can use to frame your subject so you avoid producing boring images.
12. Anticipate the surfer’s upcoming maneuver
Image Credit: Unsplash
Visualizing the next movement of the surfer in surf photography is very important as it helps achieve a well-timed photo, highlighting the surfer’s story as they glide through the waters.
This tip will also allow you to strategize your position, the angles to use, and the framing as you capture the surfer’s movement accompanied by the waves.
While it’s not always easy to do, trying to foresee the next move of your subject can help you adjust quickly according to the surfer’s actions.
13. Get ready with backup batteries and memory cards
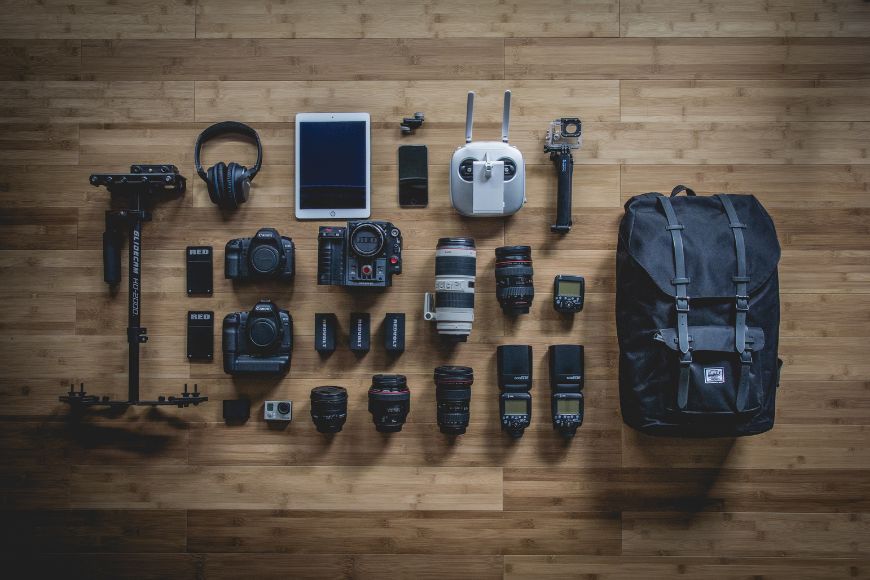
Image Credit: Unsplash
Whether you’re shooting from land or water, having extra batteries, memory cards, and external storage ready are lifesavers.
You don’t want to be interrupted during your shoot or waste your shots because you have your memory full.
Batteries are very important for photographers, not only for their cameras but for a lot of the equipment they bring. There are two types of batteries – disposable and rechargeable.
Underwater photographers usually use rechargeable ones, but most photographers still use disposable batteries because of their voltage and life span.
It is also important to note that using a rechargeable battery is more environmentally friendly.
Spare batteries and an extra charger are essential during surf trips.
On the other hand, memory cards and external storage are temporary spaces to archive the images during shoots.
External hard drives and storage help you properly organize images depending on location, model, or event and will give you enough space to safely keep all your images.
Choosing an external drive might be too confusing, so here is a quick list of the 3 best external storage in the market that you can consider:
- SanDisk Professional 1TB G-DRIVE – durable, rubberized, with triple layer protection (rain and dust resistant).
- Seagate Expansion 16TB Desktop External HDD – the most famous compact external HDD in the market with impressive storage amount and performance.
- LaCie 2TB Rugged Mini USB 3.0 External Hard Drive – apart from having high and fast capturing and transporting of data capacity, it is shock and drop-resistant with a rubber sleeve for additional protection.
14. Consider your composition carefully for shooting surf photography
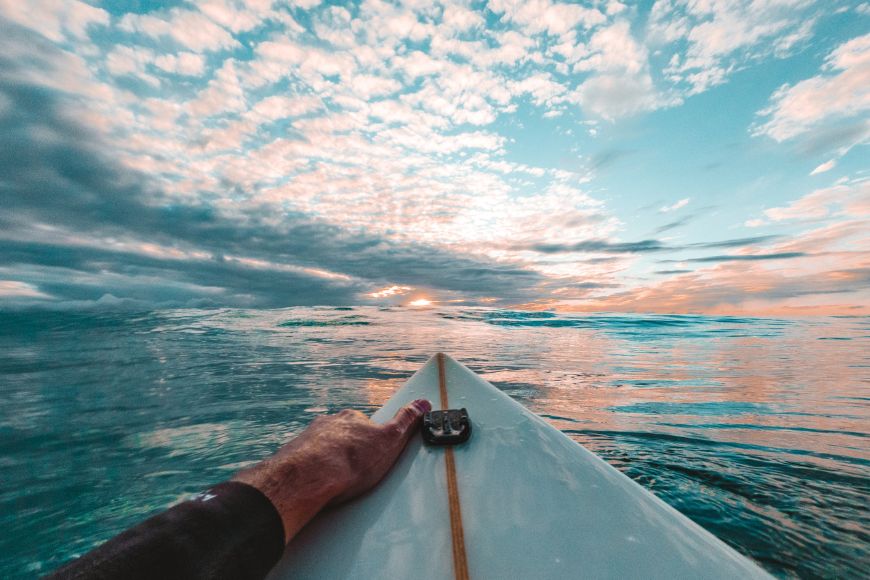
Image Credit: Unsplash
Considering composition in surf photography affects the visual impact of the photos.
Composition is essential in storytelling as it allows you to convey the surf scene from your own unique perspective.
It also ensures that the focal point is still the subject while balancing the other elements in the picture.
Lastly, composition declares the surf photographer’s technical excellence, producing visually compelling still frames.
15. Protect your surf photography gear

Image Credit: Unsplash
Your camera is ready with your chosen lens and filters, but one important thing is still missing. You don’t want to go home with a damaged and wet camera, right?
Choosing the right camera housing will save you not just a lot of headaches but literally will save your most-priced possession – your camera.
For your next purchase of camera housing, you have a choice between a soft case housing and a hard case housing.
A soft case housing can be made from silicone or stiff plastic bags. It is usually a lot cheaper than hard-case housing.
EWA MARINE Water Housings is a good option for beginners, and here are some of its pros and cons:
Pros
- Lightweight
- Easy to carry
- Can go deep to 20-50 m
- Inexpensive
Cons
- Inconvenience in operating some camera buttons
- Less functional using zoom lenses
A hard-case housing is what pro-level surf photographers are using. The most recommended hard-cover housing is the Aquatech Water Housing.
Pros
- Trusted by pro-photographers
- Easy camera in and out because of the system of clamps
- High-quality port
- Universal type of housing
Cons
- Expense price ranges from $1400- $3000
- Large in Size
- Not lightweight
- No full access to all buttons
To make sure you can continue shooting without worrying about your camera, make sure they are protected. Invest in a good quality camera housing.
Keep in mind that as a surf photographer, you’re not just exposed to water but also to harsh waves.
16. Capture surf photos from the shore first
Image Credit: Unsplash
Initiating your surf photography from the shores is a good way to kickstart those creative juices.
I know, given that it’s surf photography, it makes you want to jump right into the water.
But stay by the shore for a minute and play with your camera. Check your shutter speed, aperture, ISO, and other settings.
This also ensures safety as you can spend some time assessing the surroundings and knowing where to position for your land-taken shots.
If you’re new to the place, take time to observe the surf culture.
And lastly, it gives you the flexibility to move according to the situation, whether you’re staying a little longer on land or ready to enter the water.
17. Balance photographing the water and the surfers
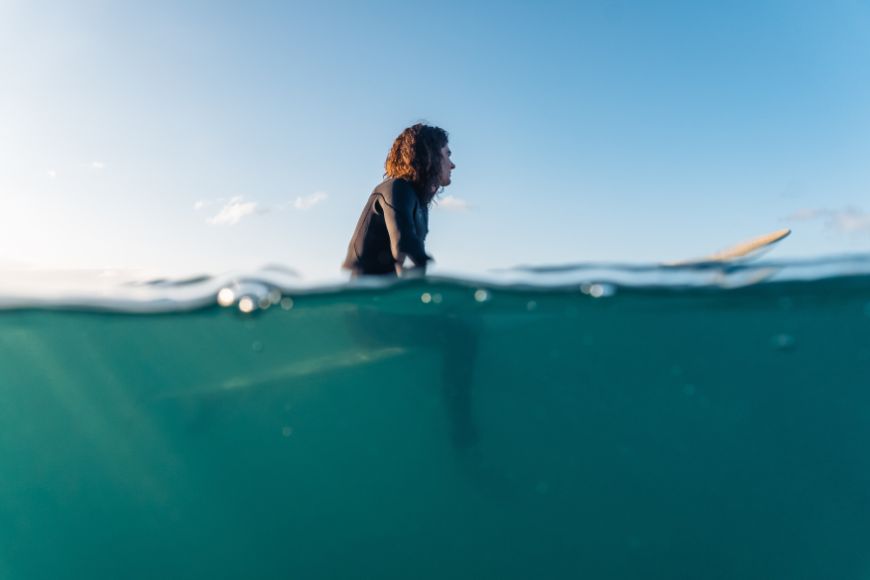
Image Credit: Unsplash
Photographing the water and the surfer are two very different things.
These two sometimes need different camera settings, which is impossible given you’re photographing them at the same time.
That said, practice balancing photographing the water and the person. Experiment with your exposure level to make sure neither of the two subjects is too bright.
18. Opt for a good zoom or move in closer for a dramatic surf photo

Image Credit: Unsplash
Opting for a solid zoom lens or getting closer gives you control over framing and composition.
This usually results in more impactful and more detailed photos, giving viewers a better look at the details, plus it gives you a variety of images differing in distance and perspective.
Bottom line is that zooming in or moving closer helps enhance visual engagement and gives effective storytelling.
19. Familiarize yourself with the surfing etiquette
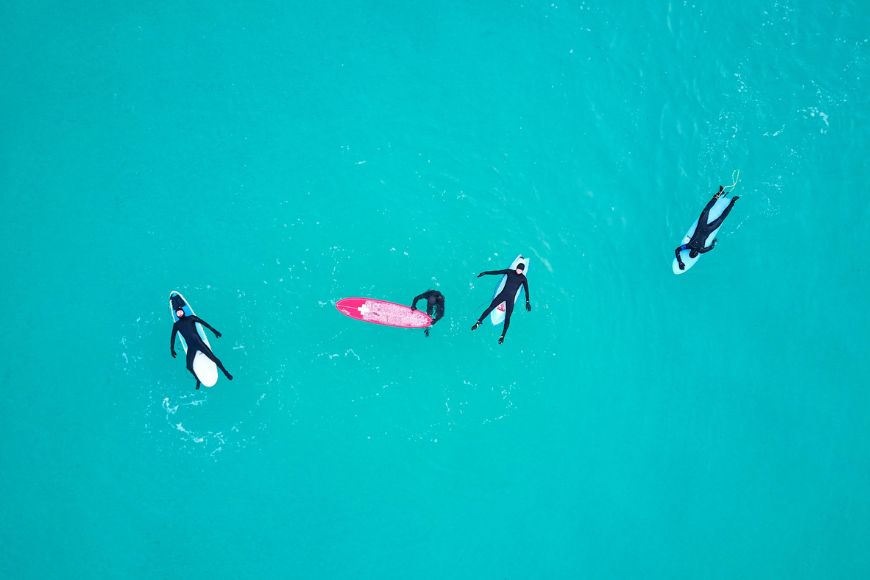
Image Credit: Unsplash
Familiarizing yourself with surfing etiquette is respect, first to the surfers and second to the surfing community.
This will help you get access to surfing locations and potential collaboration in the future. It also shows professionalism, environmental responsibility, and stewardship.
Taking the initiative to learn surfing etiquette will also help to have cultural awareness and sensitivity, leading to more harmonious relationships during your whole surf photography schedule.
20. Leave no trace – be a considerate surf photographer
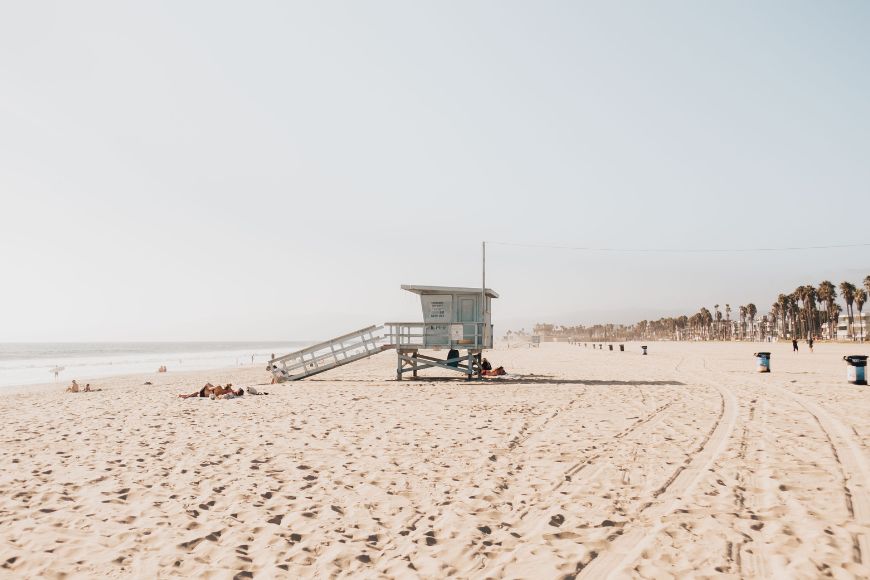
Image Credit: Unsplash
Leave No Trace has become a general guideline for all photographers as it promotes environmental responsibility.
It’s required to maintain the cleanliness of your shooting arena, even cleaner than you found it.
This way, you can help in the preservation of the natural environment.
Photographers who have embraced this behavior are more likely to gain friendships and harmonious connections with people in the community.
21. Lock in the right camera settings before getting started
Image Credit: Unsplash
When starting out, you don’t have to overthink what camera and lens settings you need to produce good-quality surf photos.
These three are what you really have to focus on: ISO, aperture, and shutter speed
Since surf photography involves a lot of actions and movements, you need to be ready for every surfer’s maneuver.
Beginners can start with ISO 400, f-5 to f-11 for your aperture, and shutter speed of 1/1000 to freeze the actions perfectly.
Remember to balance your ISO and aperture to avoid an overexposed photo. Too high an ISO setting will give you grainy images.
It is also important to manage the aperture because this will determine the depth and sharpness of your image. Aperture is simply how the light gets into your camera.
The lower f (value) gives a larger exposure to light, while the higher f (value) blocks more light.
Once you get the hang of it, and you’re equipped with a camera housing you’re also familiar with, you can your camera to manual mode to freely adjust your settings depending on the situation in the water and in accordance with the sunlight.
Surfing Photography Safety Tips: How to Stay Safe in the Water
Just like surfing itself, surf photography can come with its own set of challenges and potential dangers.
Here’s how to keep safe while snagging those epic surf photography shots:
1. Know the Ocean
This isn’t just about getting good shots; it’s about staying safe. The ocean can be unpredictable. Be aware of tides, currents, and even marine life. Maybe pick up a local tide chart or chat with some locals about any known underwater hazards in the area.
2. Use the Buddy System
Like many things in life, surf photography is better (and safer) with a buddy. Not only can you watch each other’s backs, but a friend can also alert you if they see a wave coming your way.
3. Respect the Lineup
If you’re shooting from the water, always be aware of where the surfers are and where they’ll be riding. Stay out of their way to ensure their safety and yours. Nobody wants to crash into a photographer while they’re trying to catch a wave!
4. Gear Up Right
Waterproof housings for cameras are a must, not just to protect your gear but to ensure no bits and pieces come loose in the water. Also, consider wearing water shoes or fins for better maneuverability and a wetsuit if you’ll be spending extended time in cooler waters.
5. Stay Visible
If you’re in the water, use high-visibility vests or caps. It makes it easier for surfers to spot you, especially during early morning or late afternoon sessions when lighting can be tricky.
6. Know Your Limits
Listen, if the waves are monstrous and you’re not comfortable, there’s no shame in sitting a session out. It’s always better to prioritize safety over getting that one shot.
7. Connect with Surfers
Before heading into the water, chat with the surfers you’ll be photographing. Building rapport can help with communication in the water and ensure everyone is on the same page.
7. Connect with Experienced Surf Photographers
Whether it’s understanding rip currents in specific spots, recognizing warning signs of changing weather, or getting advice on emergency equipment to have on hand, their experiences can serve as crucial lessons for you.
Experienced surf photographers can also give you the lowdown on the best spots, the quirks of local wave patterns, and even some gear tips that might not be in the regular guides.


Tammy Danan is a freelance storyteller and the founder of Moss Content Studio. She’s a highly visual person who loves exploring how the art of photography intersects with our everyday lives.

WELCOME TO SHOTKIT
Enter your email to be sent
today's Welcome Gift:
19 Photography Tools
🔥 Popular NOW:


Shotkit may earn a commission on affiliate links. Learn more.