


Canon Auto Lighting Optimizer: How to Get Perfect Results
Learn what the Canon Auto Lighting Optimizer does, when to use it, when not to use it, and 3 useful tips and tricks for getting the best results.
Learn | By Ana Mireles
Have you heard about the Auto Lighting Optimizer feature on Canon cameras?
It’s been around for almost 15 years, but not many people use it or even know about it.
The ‘ALO’ is an in-camera processing feature designed for capturing beautifully detailed photos even in high-contrast situations.
This way, you won’t need any photo editing software.
If you want to know more about what it is and how to get the best results with it, keep on reading!
Table of Contents
What Is the Canon Auto Lighting Optimizer (ALO)?
All Canon EOS cameras released after 2008 have a feature called Auto Lighting Optimizer (ALO). This includes mirrorless cameras and DSLRs. ALO was introduced on the Canon 450D.
Canon’s Auto Lighting Optimizer does some in-camera processing to reduce excessive contrast by selectively adjusting areas in your photos.
Unlike the exposure compensation feature, it only adjusts the highlights and shadows – it doesn’t affect the global exposure of your photo.
ALO makes a selected exposure compensation, if you will. Basically, it applies a tone curve adjustment so you can have better exposure.
As it reduces contrast, you’ll get more detail and minimise loss on the brightest and darker areas of your photograph.
The ALO system can detect faces. So, it’s particularly useful if you’re doing portrait photography with backlit subjects.
To help you keep your own creative flair, you can set the Auto Lighting Optimizer effect to three different strengths – Low, Standard, and Strong. Or you can disable it.
By default, the ALO feature is disabled when you use Manual mode. This is because you have full control of the exposure settings, and the effect could skew the resulting image.
If you use other exposure modes such as Program, Shutter, or Aperture priority, the default setting is Standard. However, you can change it in the menu.
It’s also easy to access in the Quick menu. Simply press the Q button and look for the ALO icon. You can recognize it because it’s a frame with a person inside it, where the left half is dark, and the right half is white.
It may have the Off word on it if it’s disabled. Otherwise, it has three bars that increase in height. Each bar represents one level of strength from low to strong.
So, tap on the icon and choose your preferred setting.
It’s worth noticing that using the Auto Lighting Optimizer on raw images is pointless. You’ll get a higher dynamic range just by using raw.
Plus, the effect is not embedded in the file – so post-processing programs like Photoshop wouldn’t apply it.
Auto Lighting Optimizer is better used for everyday photography if you shoot JPEGs and don’t want to spend much time in post-processing.
However, in the next section, I’ll go into more detail about the best uses for Auto Lighting Optimizer and when it’s better to turn it off.
When Should I Use the Auto Lighting Optimizer?

Credit: Daniel Xavier
Like any feature, the ALO system can be very helpful, it can be useless, or it can even work against you. So, it’s important to know when to use it and when it’s better to turn it off.
Let’s start by saying that AOL is only useful for JPEG images. If you have a raw file, you don’t need it – you can do the tone curve adjustment manually.
You can also achieve the same effect by selectively adjusting the Whites, Blacks, Highlights, and Shadows with any photo editing software.
Also, if you do post-processing on a third-party software such as Photoshop, raw files won’t have the AOL effect on them.
Instead, if you use Canon’s raw processing software – Digital Photo Professional, you can toggle it on and off. This means it’s not actually affecting the raw files as you shoot. You’ll have the whole dynamic range with or without the ALO on.
So, the first condition you need to meet to consider using ALO is that you’re shooting in JPG. Now, let’s see the lighting conditions where it’s useful.
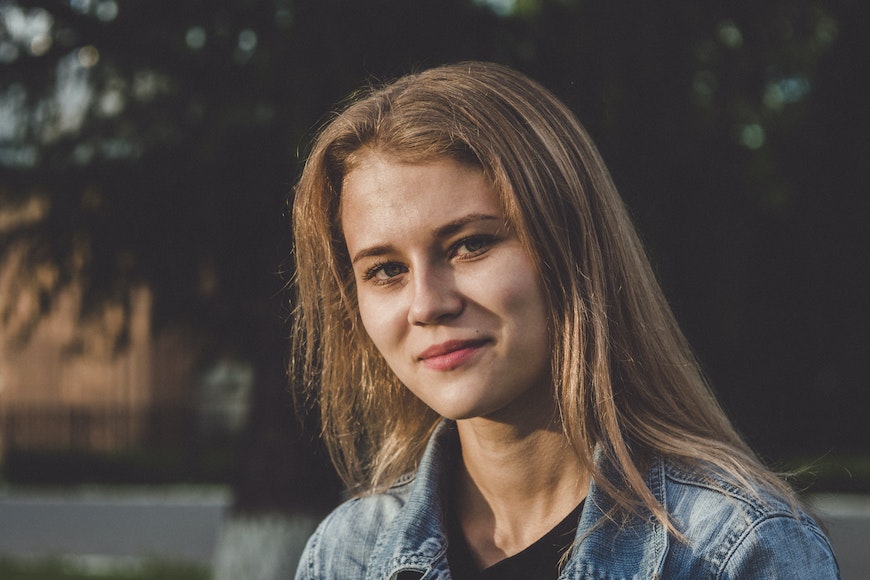
Have you ever taken a photo of someone with the bright sky as background? If so, you know that the subject will be underexposed. Well, this is the perfect situation where you should use ALO.
Canon says that ALO is especially useful when shooting backlit subjects – particularly if they are portraits because it can detect faces.
Credit: Daniel Spase
You can use Canon’s Auto Lighting Optimizer when shooting heavily shadowed subjects. This way, it reduces the contrast, revealing detail in the shadows, and you’ll get a more evenly lit result.
High-contrast images, in general, can benefit from the ALO effect. Canon also recommends enabling the ALO function when you’re using Flash.
This may be because it could brighten dark scenes so that there is less contrast with the subject illuminated with the flash. It may also serve if the flash isn’t so powerful, and you need to brighten the subject even more.
There are a few downsides to using Auto Lighting Optimizer; for example, you can’t use it together with the Highlight Tone Priority.
Also, it’s not advisable to use it when you’re shooting in burst mode. This is because the ALO analyses the contrast of the scene and makes the required adjustments before saving the image.
So it takes longer for the camera to process each shot. As a result, when you use it with burst mode, it will slow down the frame rate.
Last but not least, it can increase the noise in the darker areas of the captured images. This is especially an issue when you shoot with a high ISO.
3 Tips for Using Canon’s Auto Lighting Optimizer
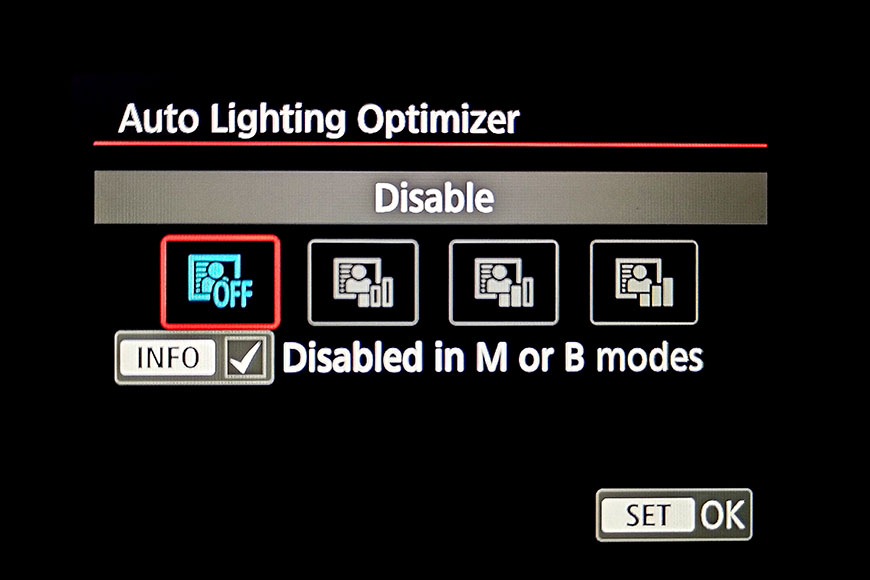
Auto Lighting Optimizer menu on a Canon 90D
Tip 1: Choose the right ALO setting
There are three ALO settings that regulate the intensity of the adjustment – Low, Standard, and Strong.
The low one makes very subtle adjustments. You should use this when you’re worried about over-brightening lighter areas or losing too much contrast.
The Standard can be used as the default setting as it works in most situations where using the ALO is recommended.
Lastly, the Strong setting is useful when you have very strong contrast, such as a heavily backlit subject. Mind that it may introduce noise to the shadows.
Tip 2: Automatically disable ALO in manual
If you like to use the manual exposure settings, you obviously like to keep creative control over the final image. This is why there’s a user-selectable option to tell the camera it should automatically disable ALO when you set the camera in manual exposure mode.
This way, you won’t have the ALO effect applied to your image if you forget to turn it off.
Tip 3: Turn ALO off if you’re using exposure compensation
When you use the camera features exposure compensation or the flash exposure compensation settings, you should disable the ALO feature.
This is because you’re already asking the camera to adjust the exposure with one feature. So, adding the ALO may result in unusually bright images.
etc.
FAQ
What is the difference between auto lighting optimizer and highlight tone priority?
Auto Lighting Optimizer (ALO) adjusts both the shadows and the highlights. Instead, the Highlight tone priority only works on the highlights and doesn’t interfere with the shadows.
Also, you can use ALO with any ISO setting. Instead, Highlight Tone Priority doesn’t allow you to go below 200 ISO.
How do I enable or disable Canon Auto Lighting Optimizer on my camera?
You can use the Quick Control Screen (Q), or you can open the menu screen and navigate to the Shooting settings on page two or three. Most EOS cameras have it here, but if you can’t find it – check the user’s manual to see in which sub-menu it is.
How do I change the default Canon Auto Lighting Optimizer setting on my camera?
By default, the ALO setting is Disabled with Manual exposure mode and Standard with other exposure modes. If you want to change this, simply open the menu by pressing the Q button and clicking on its icon or by going through the full menu. Then, use the dials or touch the screen to choose the setting you want.
How do I use Canon Auto Lighting Optimizer in Digital Photo Professional software?
When you edit raw images on the Digital Photo Professional software, you can turn the ALO effect On and Off. To do so, open the Fine Tune panel on the left side of the screen. Here, you’ll see the Auto Lighting Optimizer feature. You can turn it On by checking the box next to it. Then, you can use the slider to change the ALO settings.


Ana Mireles is a Mexican researcher that specializes in photography and communications for the arts and culture sector.

WELCOME TO SHOTKIT
Enter your email to be sent
today's Welcome Gift:
19 Photography Tools
🔥 Popular NOW:


Shotkit may earn a commission on affiliate links. Learn more.