


Basketball Photography Tips, Ideas & Best Settings
Master the art of basketball photography with our comprehensive guide to innovative ideas, tips and optimal camera settings for dynamic court-side action shots.
Learn | By Judyth Satyn
I’ve curated these basketball photography tips from professional sports photographers and will share them all with you.
From shooting high school basketball to becoming the next NBA photographer, this guide is packed with helpful information.
Basketball photography is tricky since games are usually indoors, where lighting is poor.
You’ll need to select and bring the right camera gear and dial in the best camera settings.
If you’re shooting in the daytime on outdoor courts, you’ll have an easier time, but most people are shooting basketball under artificial light.
Most of these tips relate to sports photography in general, but some are specific to basketball – notably, how to shoot indoor lighting typical of basketball games.
Let’s take a closer look at the tips.
Table of Contents
What Are the Best Camera Settings for Basketball Photography?
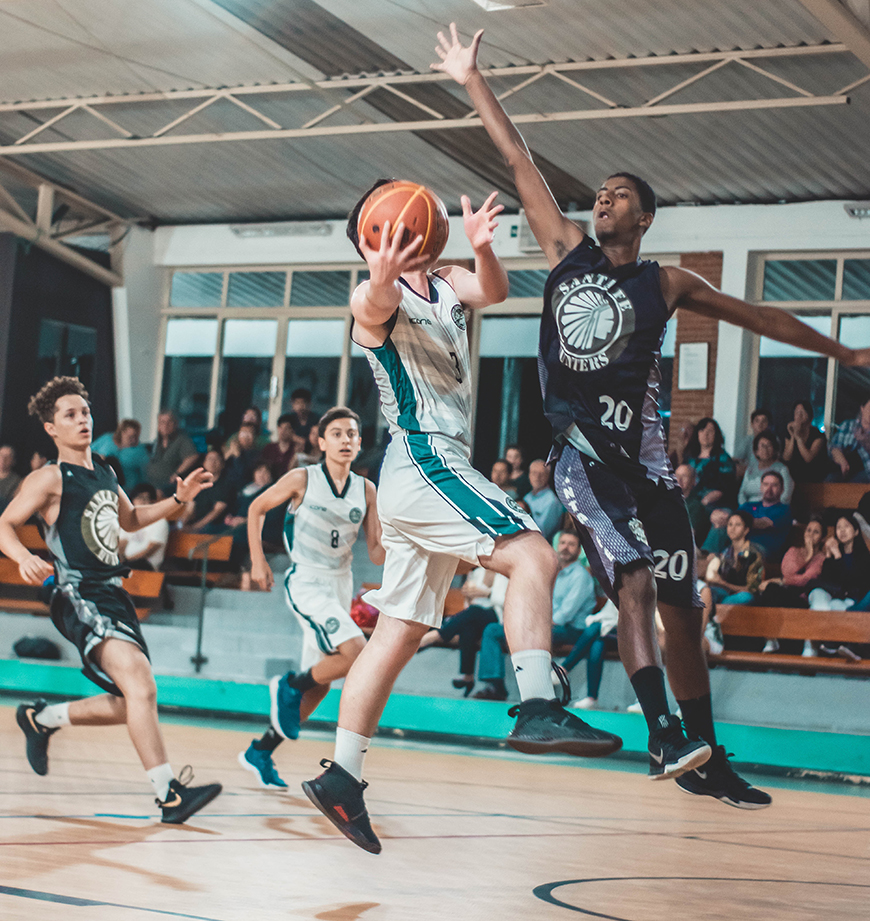
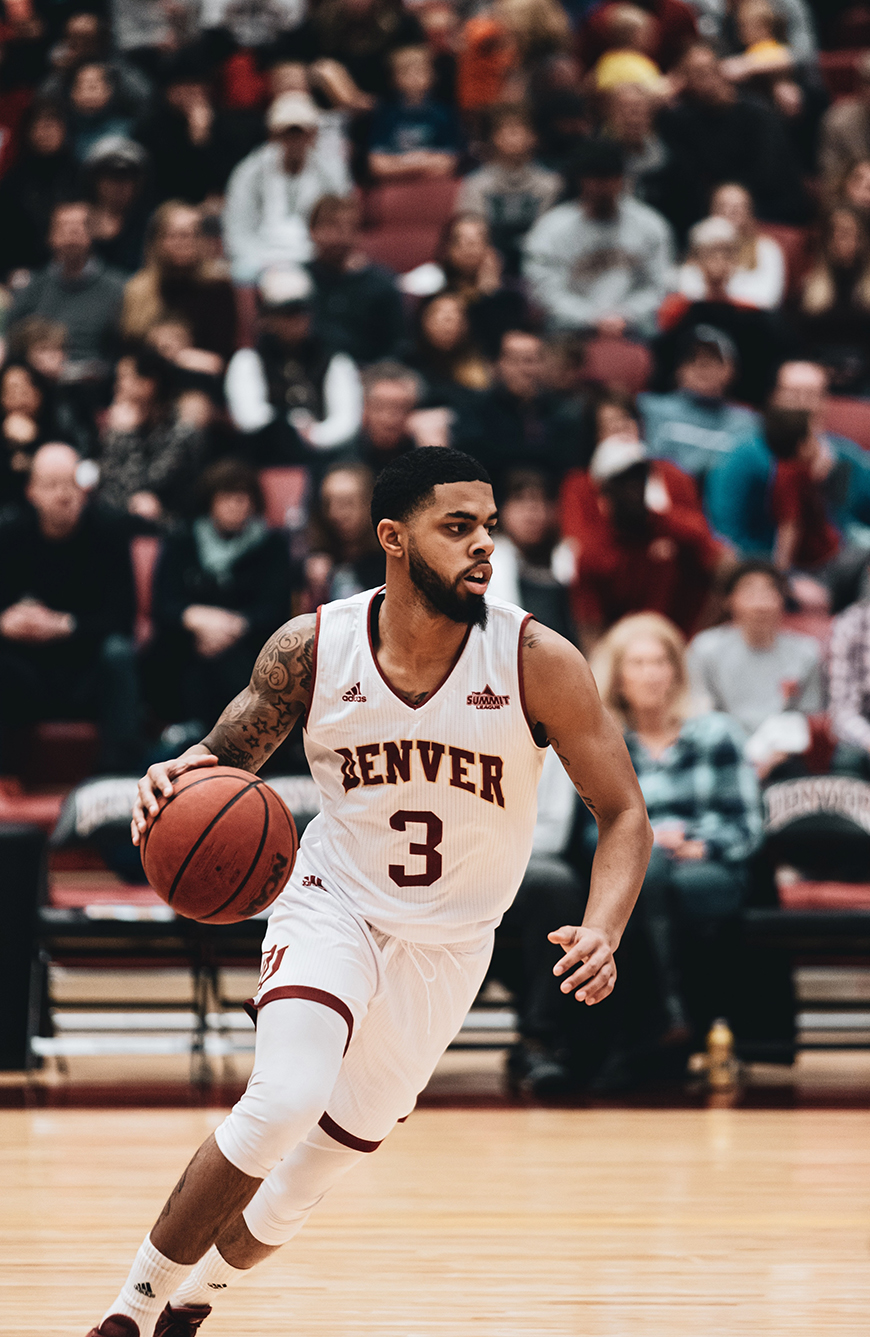
When shooting basketball, it is crucial to capture razor-sharp slices of action.
One of the main challenges in basketball photography is mixed and low lighting.
Here are the best settings for your camera to achieve superior results.
Auto or Manual Focus
If you have fingers as fast as lightning, then you can work speedily enough to use manual mode.
But for the rest of us, autofocus is the king, as it is far quicker than manual focus.
Speed is essential when shooting fast-moving games like basketball.
Autofocus will ensure the photo is razor-sharp and clear. Its advanced technology is quicker at focusing than a human’s capability.
Don’t waste time fiddling with the camera’s focus. The ball will have fallen, and the player will have moved away before you can focus.
The only problem is that in low light situations (as can be the case for indoor games), the camera won’t be able to focus.
Autofocus needs a good range of contrast to ‘grab’ onto a subject.
If your camera is struggling to focus, search for the highest area of contrast to help the camera focus.
Shutter Priority
Shutter priority is a semi-automatic camera mode. It allows the photographer to designate a preferred shutter speed and ISO.
The camera will compensate for changes in light by adapting the aperture settings.
The main aim when shooting basketball is to freeze slices of action and have the subject in focus.
Set a fast shutter speed as the minimal speed so that the camera doesn’t go below this.
The best shutter speed to capture sharp basketball action will be over 1/500th of a second.
Before you begin shooting, test the shutter speed to ensure there is no undesirable blur.
If there is an unwanted blur, set the minimal shutter higher.
Credit: Wallace Chuck
Focus Modes
Autofocus isn’t a case of simply pointing and shooting. There are auto-focusing features that are tailored to specific situations.
Cameras offer up to five focusing modes. Digital manual, manual, auto, single or continuous.
It is a good idea to test the camera’s auto-focus mode before going to photograph a game.
Or you might spend the first quarter of the NBA game fumbling with your camera.
AF area modes will set autofocus to lock onto a player when they enter the court.
Single autofocus mode (AF single) is the simplest mode. However, it won’t track the player around the court.
Every time the player moves, you will need to refocus.
The best focus mode to use is continuous autofocus mode (AF continuous).
AF continuous technology uses AI to adjust the point of focus predicitively.
Using this mode, the camera will track the player as they move around the court.
Shoot in JPEG
I know as a photographer, we have had it drilled into us to shoot RAW, and with good reason.
RAW gives more control over post-processing and generates high-quality results.
However, there are good reasons why sports photographers prefer to shoot in JPEG.
The essence of sports photography is capturing the right shot at the exact moment.
One of the best ways to capture optimum moments in sports photography is quantity. Of course, we want this to be quality quantity.
Shooting in JPEG will give you the freedom to shoot multiple frames.
It allows you to save the most amount of photos possible to your memory card.
It also means that the photos will already be ‘edited’ since the camera imparts its own ‘look’ to the image (unlike with a RAW), which can be further tailored in-camera (often called JPEG ‘styles’).
This means that press photographers on a deadline can turn around pictures to editors right after the basketball game has ended (sometimes even during a game).
If you’re not confident enough to have the white balance ‘baked into’ your JPEGS, by all means, shoot in RAW, but as you get better, a JPEG workflow can be a massive time-saver.
Shoot in Burst Mode
Timing is everything when it comes to sports photography. In less than a second, a ball can disappear from sight.
When shooting in burst mode, one click of the shutter button will run off a sequence of shots.
If you shoot without burst mode, even if you capture one rad slam dunk, you’ll miss many other priceless moments.
Using burst mode, even if you fail to press the shutter at the right moment, the next shots will catch the action.
Some sports photographers don’t use burst mode for the entire game but only for climatic moments.
For the rest of the game, refine your trigger-happy skills and save your battery and memory card.
Credit: Logan Weaver
White Balance
Basketball courts are often played inside and lit using fluorescent or LED lights. This means green tones will filter their way into your photos.
Make sure the camera’s White Balance is set to “White Fluorescent Light” or “AWB” (Auto).
This will help to soften the effect of the fluorescent light’s cooler tones.
If the light in the venue (or outdoors) keeps changing, consider shooting in RAW so that your white balance can be adjusted using editing software after the basketball game.
What is the Best ISO for Basketball Photography?
When shooting in low light, it is tempting to jack up the ISO. However, a high ISO will lead to a grainy image.
The more grain that creeps into your photos, the less professional they will look.
The ideal ISO for photographing basketball sits between roughly 400~800, depending on the size of your camera sensor.
This will compensate for low light without producing too much obvious noise.
But if 400~800 is too low, definitely opt for a higher ISO rather than a slow shutter speed to increase light.
Grain over motion blur is preferable for sports action shots.
There are other ways to increase light and reduce the potential of high ISO grain.
Use faster lenses and full-frame cameras; both aid in capturing more light.
Credit: Chrofit
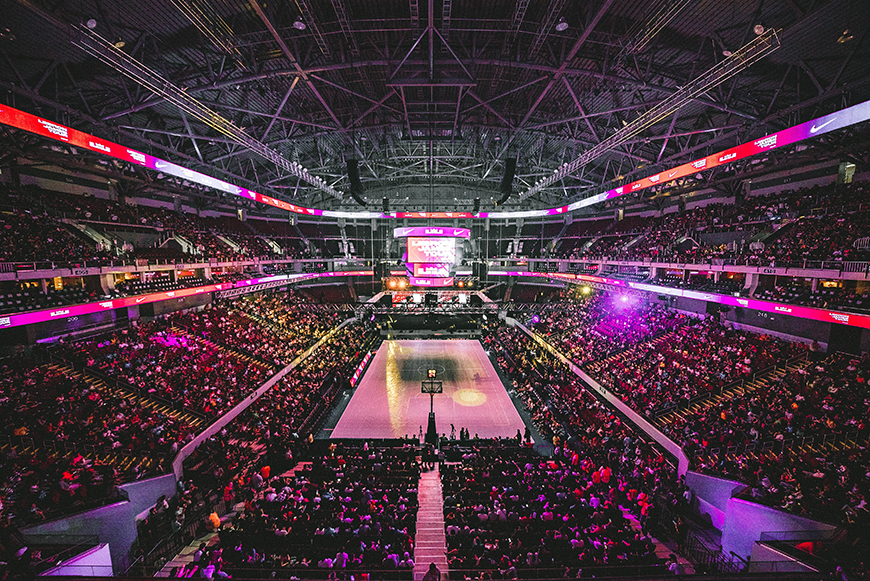
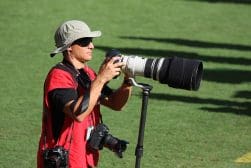
Recommended Camera Gear for Basketball Photography
Are you planning to engage in photographing basketball as a profession or take it up as a serious hobby?
Then you will want to invest in high-quality gear that is suited to the task.
What Cameras are Best for Basketball Photography?
Here are some key features to look for in a camera when photographing basketball.
Fast Autofocus: In action photography, every millisecond counts. So the faster the camera can focus, the sharper the detail you will capture.
High Frame Rate: The more shots the camera can shoot in a short space of time, the greater your capability to capture high-paced action.
Fast Buffer Speed: The ability for your camera to ‘clear’ its buffer quickly is a must when shooting hundreds of images a minute.
High Light Sensitivity: Low lighting in basketball courts can often prove challenging for photographers. To capture the sharpest images, invest in a camera that has high sensitivity to light – ones with full frame sensors are best.
Compact and Durable: Ideally, the camera’s body will be light and compact, making it easier to shoot for long periods if you don’t have access to a monopod.
Here are some of the top basketball camera picks.
- Sony Alpha 6700 is a solid choice for sports photographers. It is capable of rolling off 20 shots a second, with a durable and high light sensitivity. Since it’s got an APS-C sensor, you can take advantage of additional ‘reach’ when using longer lenses for sports photos.
- Nikon Z8, if you are looking for a high-end sports camera, this could be the one for you. A powerful full frame camera with superior performance over APS-C cameras.
- The Canon EOS R8 is another full frame camera worth checking out. Capable of high-speed tracking and continuous shooting. Plus, it has a compact camera body and superior light sensitivity. This makes it ideal for basketball photography.
- Fujifilm X-H2S will smoothly track fast-paced basketball players. Plus, it can run off a succession of high-speed shots, all from a relatively compact body (thanks to its APS-C sensor).
Which Lenses Are Best for Basketball Photography?
When you want to freeze basketball action, a superior lens is crucial. A f/2.8 telephoto lens is perfect to let in as much light as possible.
Shooting with a telephoto lens will give you a long focal range. Use this when you want to take photos on the opposite side of the court.
A zoom lens allows you to zoom in and out of the action on the court.
A prime lens has a fixed focal length but is well suited to low-light shots, offering maximum apertures of f/1.2, f/1.4, f/1.8, f/2 etc.
A wide-angle lens will capture a wider view and include more of the court action in each photo.
Fisheye lenses are sometimes used in sports photography. They provide a 180-degree angle view of the action but lead to distortion at the edges.
Check out these top lenses for basketball games.
- Sony FE 70-200mm F2.8 GM OSS II Lens is great for zooming in on the action of indoor games.
- Nikon 70-200mm f/2.8G ED VR II AF-S Nikkor Zoom Lens will keep f 2.8 aperture for the entire zoom range.
- Canon EF 85 it’s wide aperture of f 1.4 makes it ideal for shooting low-light games.
- Fujifilm XF 16-55mm f2.8 is good for capturing close basketball shots.
Challenges with Lighting in Basketball Games
Credit: August Phlieger
Lighting is one of the main challenges when taking photos of basketball games.
How do you deal with the mixed lighting conditions in indoor courts?
In basketball courts, there are different sources of light resulting in mixed lighting.
This is due to clashing colors from giant TV screens, indoor lighting, and the bright colors of the teams’ shirts.
Mixed lighting usually results in an unprofessional clash of colors in photos.
This is particularly obvious when it comes to skin tones. Correcting skin tones post-production is time-consuming, so compensate for mixed lighting when shooting.
To compensate for the mixed lighting on the court, set the camera’s White Balance to adjust for skin tones.
You can use the Custom White Balance mode and adjust in Kelvins, looking at your rear screen to see how the adjustments look in real time.
If you don’t have a mirrorless camera, you can ‘chimp’, by making an adjustment to WB, taking a photo, checking the results, then readjusting if necessary.
Credit: Wallace Chuck
Are photographers allowed to use flash at basketball games?
The use of a flash is completely forbidden or discouraged during basketball games.
A bright flash can be harassing for basketball players, throwing them off track. It is also distracting for the audience.
What’s the best way to photograph in low-light conditions without a flash?
You need to increase the ISO. This will increase the sensor’s sensitivity to light.
However, it will also increase visible grain and noise in photos when you raise it above a certain number, which is different depending on your camera model.
That’s right – cameras have different sensitivities to light. A camera with high light sensitivity (also known as a camera with great high ISO performance) will ensure your images are not under-exposed.
Full frame sensor cameras have better high ISO performance than APS-C cameras or smartphone cameras.
In general, the more expensive the camera, the better its high ISO capabilities, but there are some outliers too.
When lighting is a challenge, having a top-quality lens will give you a boost up the exposure scale.
Professional sports photographers invest in top-quality lenses with wide apertures and full frame sensor cameras. This helps them capture photos in low light conditions without a flash.
Use a wide aperture when shooting to capture as much light as possible.
8 Tips for Better Basketball Photography
Now you are equipped to hit the basketball court to give sports photography a go.
Check out these eight tips to help hone your photography style.
Research the Players
Don’t go into a game blind; research the basketball players first. Find out who the top players are.
These are the players to photograph as they will pull the most impressive moves.
If you are shooting for a tabloid, knowing the inside scoop on players will make your shots more relevant.
Credit: Logan Weaver
It’s all about Perspective
Explore different shooting angles, don’t restrict your style to one perspective.
Try shooting down low from above or up to the basket hoop. shoot from behind the crowd down onto the game.
If you are not confined to a spot, move around the court to find different perspectives. Diversity is the spice of life.
Capture the Fans
Don’t miss out on prime photos of fans. Fans make interesting subjects and create an atmospheric backdrop to the game.
Include the audience and capture their expressions. This will add to the storyline of the game.
Stay on the Ball
When shooting basketball photography, it is important to stay alert.
Try standing up when photographing. This will help keep you on your toes so you don’t miss any crucial action.
Anticipate the passes and the shots by focusing on the player about to receive the ball, or catch the rebound.
Position is Everything
Don’t buy a random ticket and find yourself seated at the back of the game behind a huge pillar.
No zoom is going to be powerful or clever enough to bend around obstacles.
Ring up before the game to see if there is an allocated spot for photographers to shoot from.
This will give you the best view of the court to catch the heat of the game.
Remote Control Camera
Nothing will get you the most supreme shooting angles, like setting the camera up before the game.
Shooting remote lets you shoot from locations that you would otherwise be inaccessible.
Directly over the basket hoop is a spot that will result in unique images if you can gain access to it without issue of course.
If its a minor high school game or just a friendly match, the organisers may allow you to strap an action camera somewhere above or behind the backboard, for example.
If you are restricted to one side of the court, you can position the remote camera on the opposite side.
This will allow you to capture the best moments of the game on each side.
Credit: JC Gellidon
Post Processing
After the game, edit your photos to improve the quality and composition.
Editing tricks to try include: Cropping, adjusting saturation, fixing exposure and sharpening.
In basketball photography, heavy dark shadows can obscure relevant and intriguing details.
While you will have little control over the game’s lighting, you can fix it post-processing.
Use Lightroom’s shadow slider to soften any harsh shadows. Simply slide it to the left or right to increase or decrease the shaded areas.
Experiment with creative basketball photos
Try experimenting instead of sticking to traditional shots. Frozen action invites awe, but there are other intriguing shots to try.
Try photographing images that incorporate blur. Turn off autofocus and use a slow shutter speed.
You can also take photos of the players as they pause in between the high-tension action of the game.
Who Are Some Famous BasketBall Photographers to Follow?
If you want to get your creative juices flowing, here are some ace photographers to follow.
These famous photographers have spent time capturing legends in the heat of the game.
Andrew D Bernstein has worked photographing NBA games for over 40 years.
He shoots the top action basketball photographs like the NBA top players shoot balls.

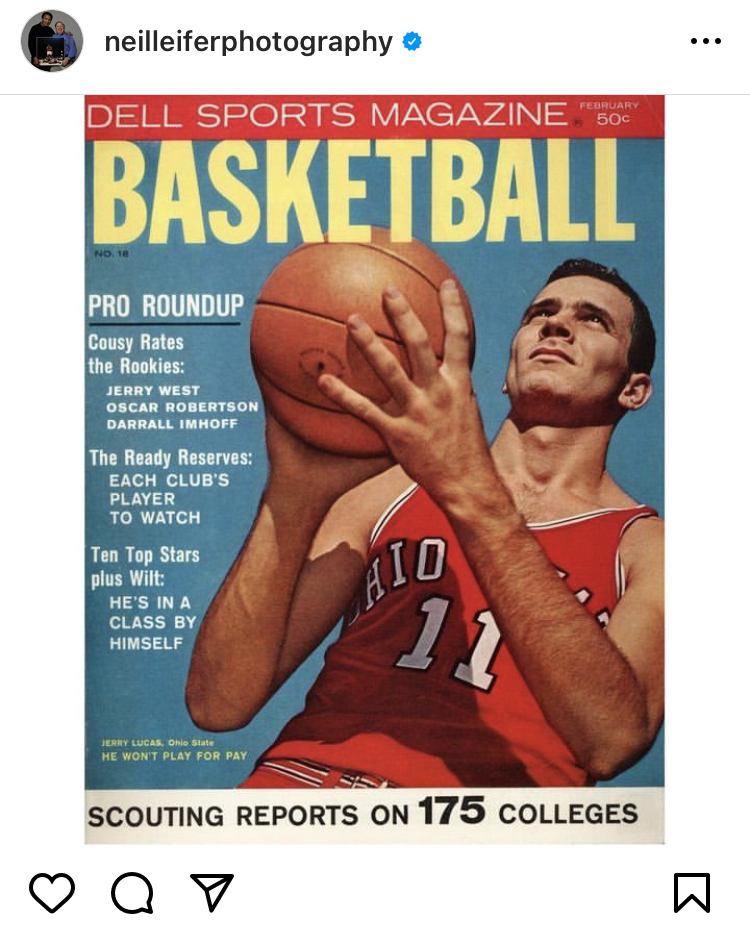
Neil Leifer has been photographing basketball for many decades.
He has reduced his photography workload but still hits the courts to get a slice of the action.
Nathaniel Butler captured many incredible shots when working as a basketball photographer.

How do you become a professional basketball photographer?
One of the best ways to become a professional basketball photographer is to create an awesome portfolio.
Go to games and refine your shooting technique. You can use your best shots to pitch to magazines and newspapers.
You can sell photos to publishers as a freelancer or apply for a job.
Having a college degree in photography is all well and good, but examples of your incredible photography skills will put you ahead of the game.
FAQs
Where should I sit for basketball photography?
First, it would be better not to sit when shooting sports photography.
Standing will keep you alert and give you extra mobility for the best shots.
If you must sit, sitting in the front row close to one of the hoops will give you a good vantage point.
Should I use a flash when shooting basketball photos?
Using a flash is normally not permitted or strongly discouraged when shooting sports photography.
This is true of professional and high school games.
Try increasing your ISO or using a wider aperture to allow for decreased light.
What is the best focal length for basketball photography?
The best lenses to use for close-range photos on the basketball court are the 70-200mm f/2.8 lens and the 24-70mm f/2.8 lens.
To shoot on the opposite side of the court, try a 300mm or 70- 200m f 2.8.
How do you protect your gear from flying balls or colliding players?
Luckily there is only one ball, and you will have your eye it the entire game.
Therefore you will be able to move your camera quickly out of the way to avoid damage.
To protect the rest of your gear, make sure it is positioned safely out of the ball’s range.
How do you capture clear shots through the safety net or glass?
Using a wide aperture to create a shallow depth of field can help blur out obstructions.
Shooting at a right angle to the barrier will minimizes reflections.


Judyth is an experienced studio photographer and glass artist. When she isn’t Photoshopping comedians into the bellies of sharks, you can find her cooking delicious treats for her guests.

WELCOME TO SHOTKIT
Enter your email to be sent
today's Welcome Gift:
19 Photography Tools
🔥 Popular NOW:


Shotkit may earn a commission on affiliate links. Learn more.