


How to Mask in DaVinci Resolve (Best Methods)
Learn how to mask in DaVinci Resolve, so you can apply unique color schemes and exciting effects that take your videos to the next level.
DaVinci Resolve | Software | By Jeff Collier
Learning how to mask in DaVinci Resolve is a crucial skill for anyone looking to improve the overall quality of their video content.
By isolating different elements in a shot, masking enables accurate color grading and adjustment of visual attributes in various ways.
I like using masking to achieve unique color schemes and apply exciting effects that really make my footage pop off the screen.
In this tutorial, I’ll break down the various tools you can use for masking and how you can add effects to multiple masks within a frame.
Table of Contents
How To Mask in DaVinci Resolve – The Key Methods
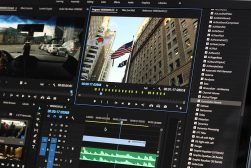
DaVinci Resolve’s mask tools are incredibly versatile and can be used easily in combination with one another to create bespoke masks, whatever your footage is.
I’ll begin by explaining how you can quickly add masks for basic shapes before moving on to techniques for multiple masks and integrating a variety of effects.
Adding basic masks to your video projects
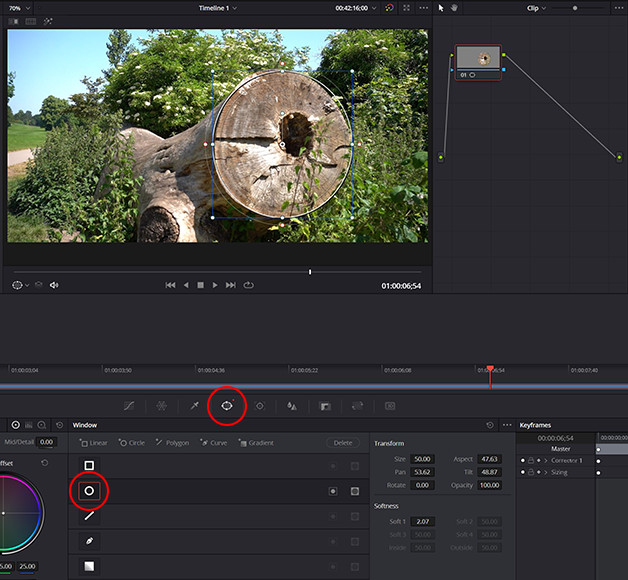
DaVinci Resolve mask options can be viewed by clicking on the Window icon directly beneath the video preview window.
Adding a basic shape mask in DaVinci Resolve is a simple task that anyone familiar with image editing software will master in no time.
To do this:
- Load up the clip you wish to mask. Head to the main menu and select File > Import > Media, then choose your file.
- On the Edit or Cut Page, drag the media file down from the Media Bin and onto your project’s timeline.
- Head to the Color Page and select the Window icon, located directly beneath the video preview window.
- Select the window/mask type you wish to use, for example, Circle or Linear for basic shapes.
- In the video preview window, click and drag around the object you wish to mask in your footage.
- Fine-tune the shape of the mask by clicking and dragging on the anchor points located around the mask.
How to invert a mask
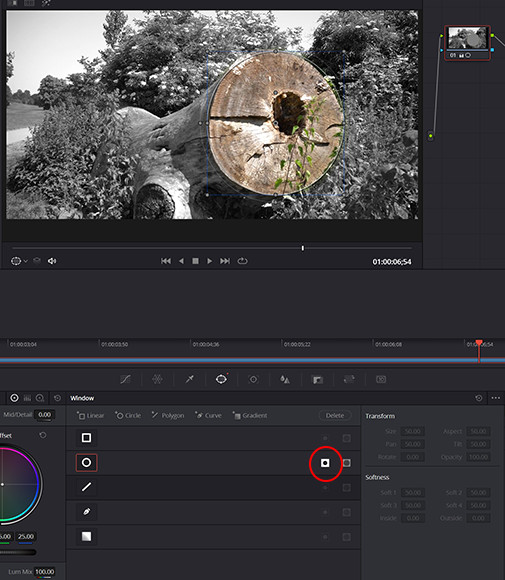
Any masks applied in DaVinci Resolve can be inverted with a single click.
Once you’ve created a mask you’re happy with, it can be inverted so that the surrounding elements of the footage are selected instead.
To achieve this effect, simply click on the mask you wish to invert in the list of available windows at the bottom of the screen, then click the circle icon for this mask beneath the Delete button.
Adding multiple masks to your video
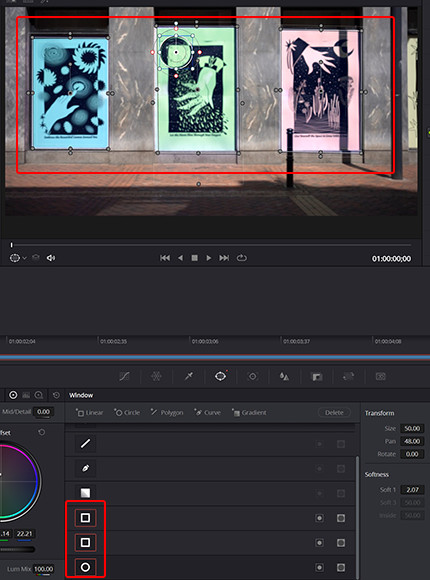
Multiple masks of varying types can be stacked together to adjust different aspects of the footage.
DaVinci Resolve allows users to add multiple masks to their video files, choosing from all available mask types listed.
These are:
- Linear
- Circle
- Polygon
- Curve
- Gradient
To add each new mask, click on the mask type you wish to add, and it will be added to the list in the Window category.
Click on the mask you wish to include in your footage, then edit this in the main video preview window above.
If you wish to add a new mask that can be adjusted independently, click Alt+S, and a new node will be added to your project.
- Read more: How to Zoom in DaVinci Resolve
Adjusting the image attributes to masks
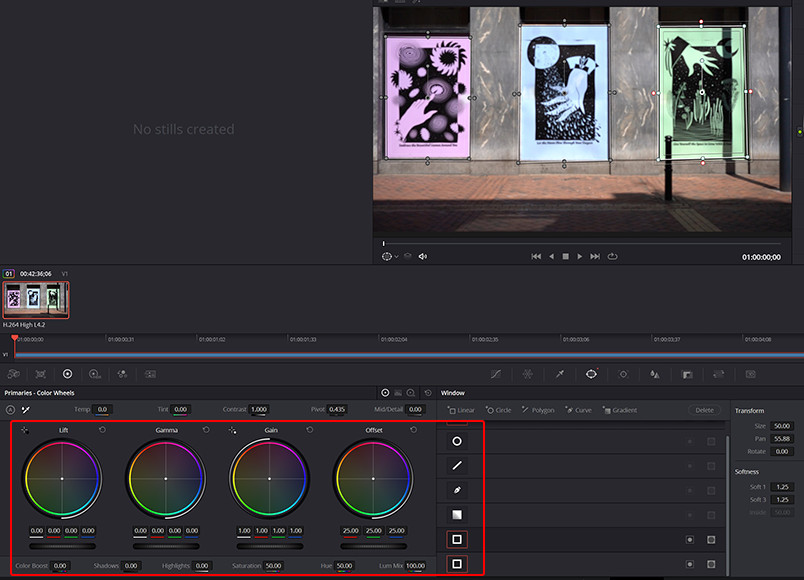
Hue, saturation, and other attributes can be applied to the masked areas when selected.
Any masks you’ve applied to your video footage can be altered in the Color Page attributes and color wheel primaries.
Select the mask in the Window list, then make any adjustments you wish to make to the primaries.
These attributes include:
- Color boost
- Shadows
- Highlights
- Saturation
- Hue
- Lume mix
Using the pen tool for more precise masking
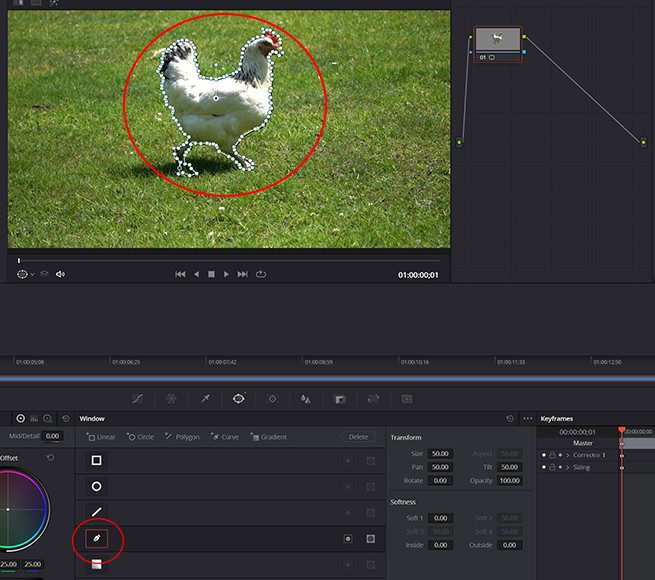
The pen tool allows for more precise fine-tuning of masks for complex objects and features.
The linear and circle masking options are great for masking basic shapes and objects but aren’t sufficient for more complicated on-screen elements.
For more precise masking, for example, of humans and animals, you can use the pen tool to trace accurately around the subject.
To use this tool:
- Select the pen tool from the list of tools in the Window category.
- Begin working around the subject, clicking regularly to add new markers to match its outline.
- If you make a mistake, you can click and drag on any given marker to move it into the desired position.
- For enhanced accuracy, zoom in on the subject using the mouse’s scroll wheel for a closer view.
- To move the footage around while zoomed in, click and hold the mouse wheel and reposition the camera for a clearer view.
- Read more: How to Cut a Video in DaVinci Resolve
Applying effects to masked elements
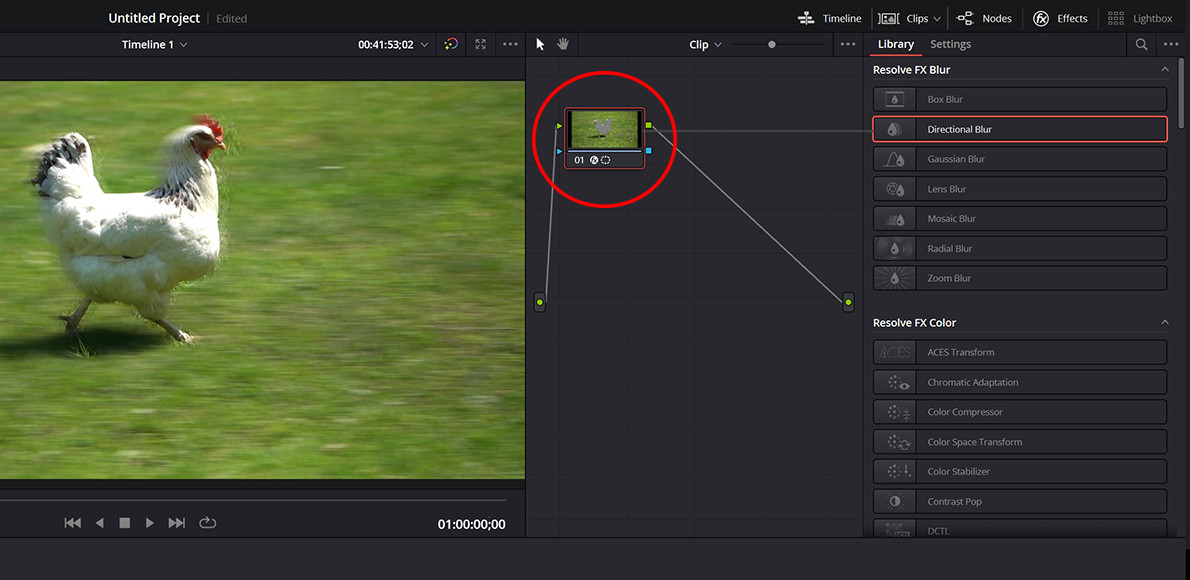
To add an effect to a mask, simply drag it from the Effects list and onto the mask’s node.
DaVinci Resolve not only allows you to make discreet adjustments to the color values of the area you’ve masked, but it also allows you to apply a full range of effects.
To add effects to a masked area of footage:
- Head to the Inspector in the top right-hand corner of the screen.
- Select Effects and view the list of effects in the Library.
- Find the effect you wish to apply, then click and drag it onto the Node located on the left-hand side of the video preview window.
- Make any adjustments to the effect in the settings until it meets your requirements.
How Do You Mask an Object in DaVinci?
Masking an object in DaVinci Resolve is easy to do using the Object Mask option from the Magic Mask panel.
As with the standard masking options, this can be found on the Color Page of the software by clicking the icon to the right of the Tracker tool.
You can improve the quality of the mask by choosing either Faster or Better to increase the level of accuracy of the mask.
The arrow tracking buttons can also be used to track the mask forward and backward to ensure it follows the object throughout the duration of the clip.
FAQs
Removing a white background from DaVinci Resolve can be achieved by selecting the Medialn node in your project’s timeline while on the Fusion tab.
From here, select Luma Keyer and click Add, then adjust the high and low slider of the Luminance section until the background disappears.
Where is the mask tool in DaVinci Resolve?
The mask tool in DaVinci Resolve can be found on the Colour Tab by selecting the Window option underneath the timeline video preview window.
You can add additional masks from the list of options, including linear, circle, and pen to create the relevant masks you need for your project.
You should also learn how to mask in After Effects.
 How to Color Grade Footage in DaVinci Resolve
 How to Use DaVinci Resolve in 2023: Beginner’s Guide
 How to Edit in DaVinci Resolve (Tutorial for Beginners)
 DaVinci Resolve vs Premiere Pro (Key Differences to Know)
 Guide to Image Masking for Photo Editing
 How to Render in DaVinci Resolve (+ Best Export Settings)

WELCOME TO SHOTKIT
Enter your email to be sent
today's Welcome Gift:
19 Photography Tools
🔥 Popular NOW:


Shotkit may earn a commission on affiliate links. Learn more.