


How to use Picsart for Photo Editing & Design
From thumbnails to billboards, create your content with Picsart’s online photo editor and mobile app. We take a closer look at how to use Picsart.
Mobile Apps | Software | By Judyth Satyn
Picsart is the bomb when it comes to creating engaging fresh visual material to captivate an online audience, for business or pleasure.
It has a vast array of awesome photo and video editing options and is incredibly easy for even the novice to use.
Picsart can make your own memes, add intrigue to dated photos, or edit videos.
One thing I love best about PicsArt, making it stand apart from the crowd of editing apps, is the Picsart community and network platform.
Let’s take a look at how Picsart can help you.
Table of Contents
What is Picsart?
- Easy to use on a mobile
- Free version available
- Picsart network for sharing work
- Option for multi-layer editing
- Extensive array of editing options
- PicsArt’s camera offers a preview of filters
- Intuitive and easy for the beginner
- Takes up a lot of storage space
- Slight lag when applying effects
- Overwhelming at first
- No auto object select
- Requires internet connection to work
- Ads on the free mobile version
PicsArt is a powerful online video and photo editor tool, available for mobile devices and desktops.
You can use it for traditional edits, to add some modern punch to a retro image with stickers, to elevate visual interest with freestyle drawings, and much more.
You can sign up for a monthly subscription or use the free version, all plans offer a substantial amount of editing features and tools and are definitely worth investigating.
There are some differences between the online desktop version and the mobile app.
The desktop version gives you the comfort of a larger workspace from which can still share to all your social media platforms and website.
The app gives you the freedom to edit when you are away from home with time to kill, making it easy to knock out some great content from your phone.
The mobile free version is unfortunately ladened with advertisements, whereas the desktop version is free from ads.
The mobile app version has more options for drawing than the desktop version, including the smudge tool, more brush options, and AI Replace.
It is super easy to learn even if you are new to PicsArt and want to reap the benefits of this powerful video and photo-editing tool.
Read on to learn how to edit videos and photos using PicsArt.
Getting started with Picsart
Before you download or sign up for Picsart decide which monthly subscription will suit your design needs best.
Are you printing, using for business, an avid social media marketer, or do you create fun posts to share with family and friends?
Picsart currently offers three subscription options, Gold, Team, and Free.
The Free Picsart plan gives you access to thousands of free templates, images, and powerful editing tools.
The Gold Picsart plan gives you cross-platform access between your mobile app, and website, access to royalty-free stock images, extra storage, use of the background remover, no watermarks, and more.
The Team Picsart subscription includes all the Gold subscription has to offer plus team management.
If unsure which Picsart subscription to choose start with the free version and upgrade if you find you need more.
And if you sign up for a paid subscription and find you don’t need it, no stress you can cancel at any time with no extra cost.
To start using PicsArt on your desktop simply head to the Picsarts website and hit the Login or Sign up button in the top right-hand corner.
You will be prompted to enter your email and a password, and almost immediately you will have access to Picsarts powerful online editing tools.
To use on your device head to the Apple store for iPhones or Google Play for Android users and download the app onto your device.
To personalize your Picsart account you can upload a photo and add a short bio.
The Picsart user interface is remarkably easy to navigate and clearly laid out for smooth intuitive editing.
Hit the Plus icon at the bottom of the screen in the app or hit the New Project button on the desktop version to open the image editing workspace.
In both desktop and mobile versions the editing options will be laid out across the screen.
Read on and we will explore Picsarts editing tools to add visual dynamite to your images.
Editing Photos in Picsart
Picsart has a huge range of powerful editing tools, filters, and effects, and absolutely no previous knowledge of photo editing is needed to start.
Erasers, brushes, masks, frames stickers, cutouts, filters, you name it and you’ll have it at your fingertips or for your design purposes.
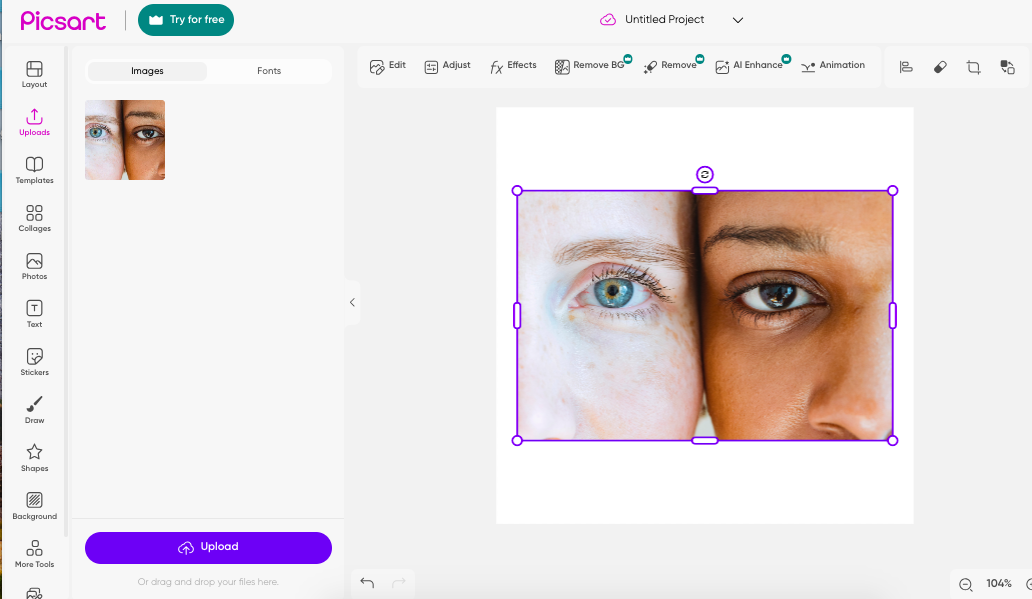
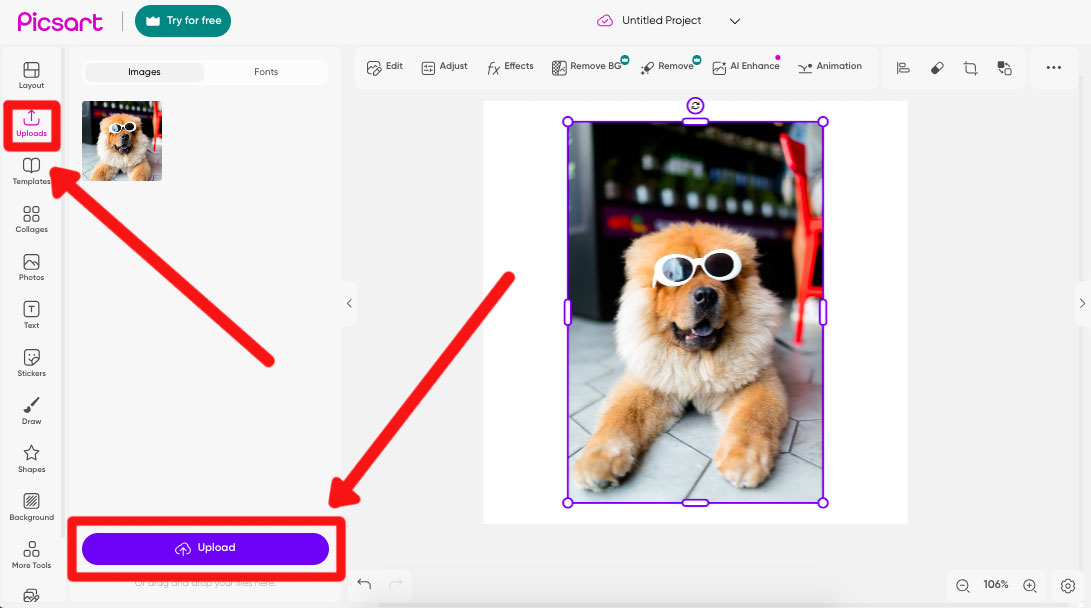
To begin editing in Picsart press the Uploads button in the left-hand vertical menu, when pressed the Uploads panel will open.
Here you will find any previously uploaded images, upload a new image by pressing the Upload button at the bottom of the workspace.
Once uploaded simply click on the photo you wish to select and it will appear in the workspace.
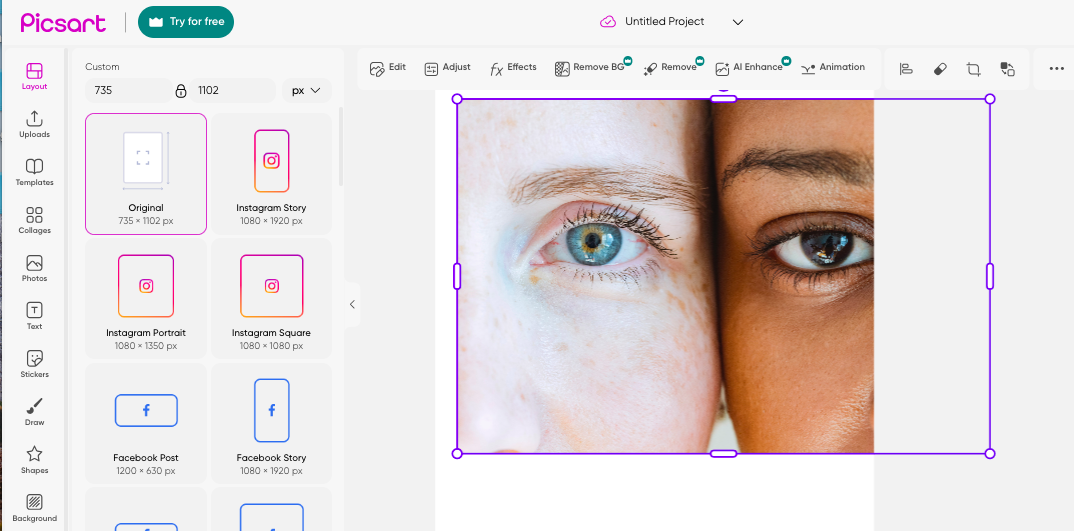
Click the Layout button in the left-hand menu to choose the dimensions for your design, simply click on the dimension you need and your workspace will automatically be changed to this dimension
Resize
Adjust and resize the photo in the new dimensions by dragging the sides of its bounding box with your cursor.
Crop
To crop the image click the Crop icon positioned to the right of the top menu bar, and drag the crop bounding box to crop.
You do not need to save your edit, Picsart will do this automatically for you.
Retouch
Retouch images to bring back vibrance and revive, and hit the Edit button to open Opacity and Blend Modes.
Chose Blend Mode, Normal, Darken, Multiply, Color Burn, or Lighten from the dropdown menu and preview the effect in the preview window.
Adjust the brightness, contrast, or color balance of your image by clicking the Adjust button.
Effects
To add effects click the Effects button, this will open a panel of effects and filters, scroll down through them to find the one you want, then simply click your choice to automatically apply to your photo.
You will find Picsart’s popular effects such as Magic, Sketch, Canvas, Drip, and Glitch.
Erase
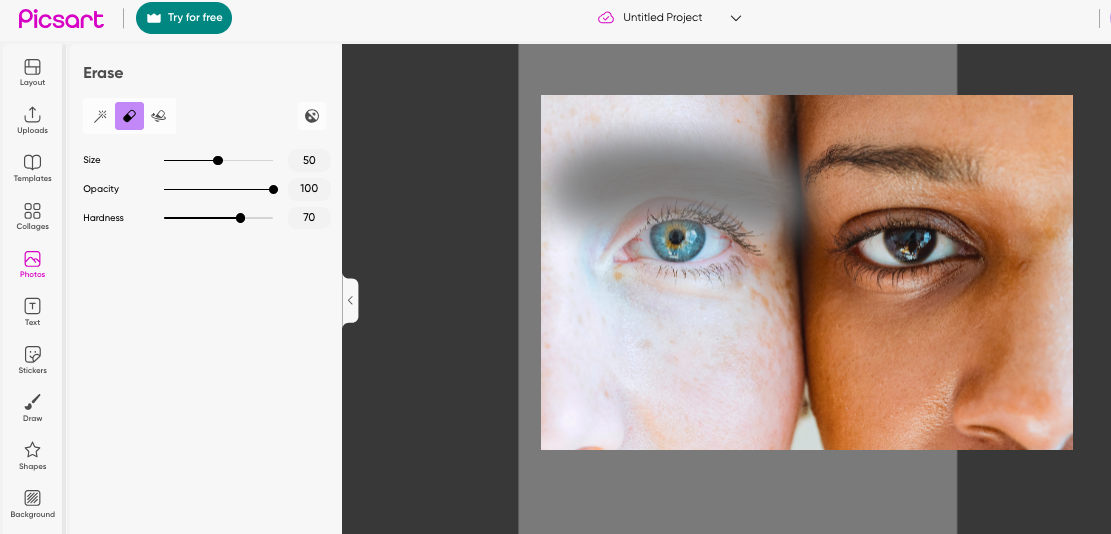
To erase parts of the photo click on the Eraser icon, this will open the eraser tool workspace.
Here you can choose either the Magic Wand or Eraser tool by clicking on an icon.
The Magic Wand will give you the choice of Auto, Person, Clothes, Sky, Hair, or Background, and will automatically remove your selection.
You can set the opacity, size, and hardness of the Eraser tool, then use your cursor to erase sections of your image in the preview window.
Using the Eraser tool or Magic Wand to remove unwanted objects, subjects, or blemishes from your photos.
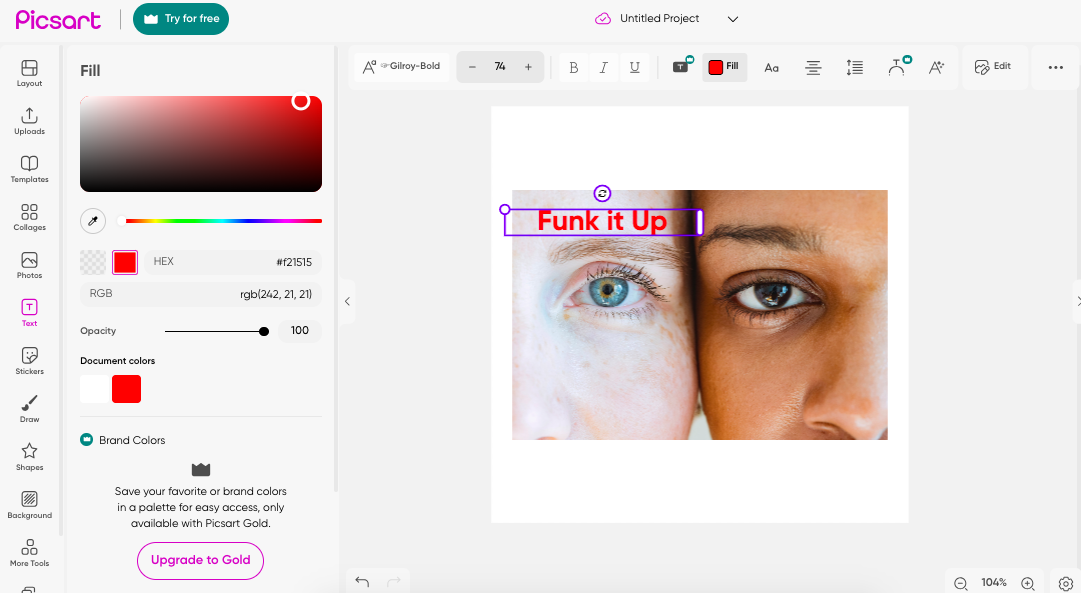
Text
To add text hit the Text button in the left-hand vertical menu.
Once clicked the text editing panel will appear, click on the text option that suits your design purposes, heading, subheading, or text body.
You can adjust the text size by dragging its bounding box and reposition it by dragging and dropping.
Above the workspace, the text editing menu bar will appear, with options to change the font style, opacity, color, or alignment.
You can also bend the text, or change the spacing, Picsart has covered everything.
The amazing thing about editing in Picsart is that it is so simple and straightforward, every edit is only a click away while live previews make it easy to avoid mistakes.
When finished editing export and share by clicking the Export button in the top right-hand corner of your screen.
Creating collages in Picsart
It is easy to elevate interest and add intrigue by combining contrasting images in a collage.
The collage tool can create collages of up to ten photos.
First, have all the images you wish to add to the collage uploaded and ready to go in your Upload folder.
Then hit the Collages button in the left-hand menu.
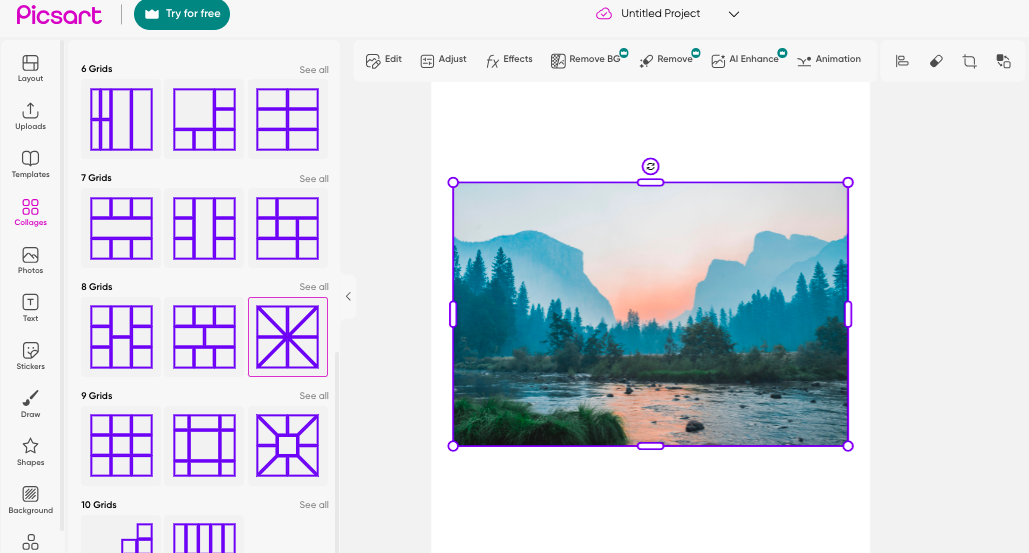
When the Collages button is clicked the collage options will open in a panel, scroll down to pick your preferred collage grid.
Return to your images by clicking the Uploads button in the left-hand menu.
To add images to the collage simply drag and drop each image into the collage grid.
Drag the image from the upload panel, hover the image over the location you wish to position it in, then release it.

When you have dropped the image into place you can resize it to fit the collage by dragging the corners of the image’s bounding box.
Drag and drop all images and viola you have your collage, so unbelievably super easy.
When finished hit Export to download or share.
Drawing and Painting in Picsart
Drawing is a fun way to boost engagement with your posts, it is fresh, funky, and great for gaining followers.
One of the best ways to grab attention and make your photos stand out is to add unique personalized drawings.
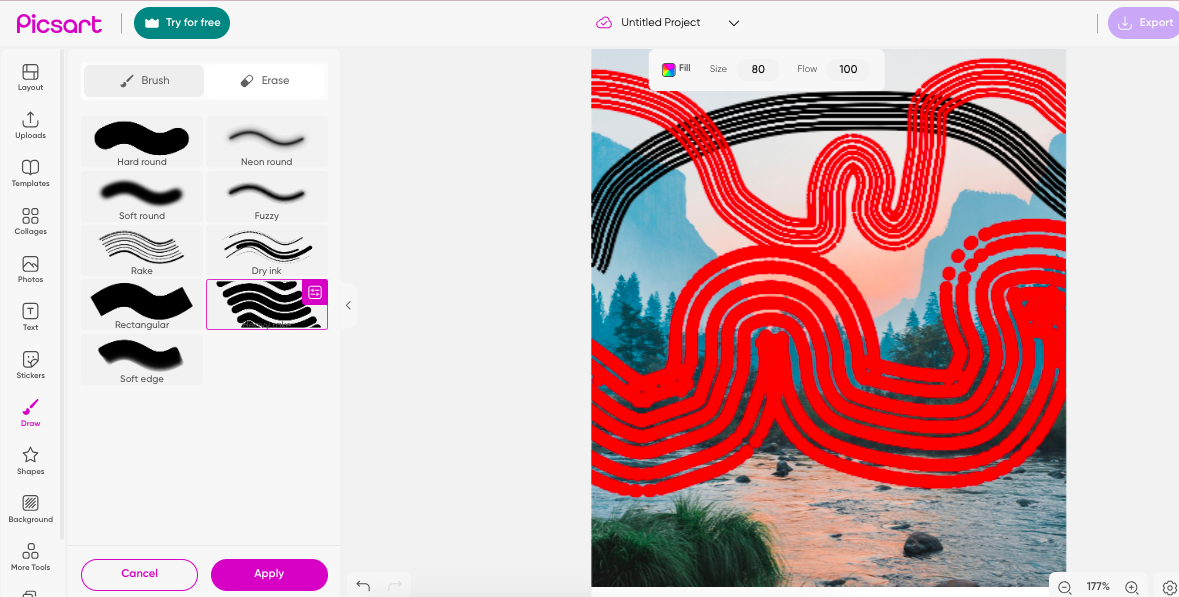
To add freestyle drawing in PicsArt have your image open and ready in the Picsart workspace then click on the Draw tool in the left-hand menu.
Once clicked a selection of brush tools will be opened in your workspace, click a brush to select your tool of choice.
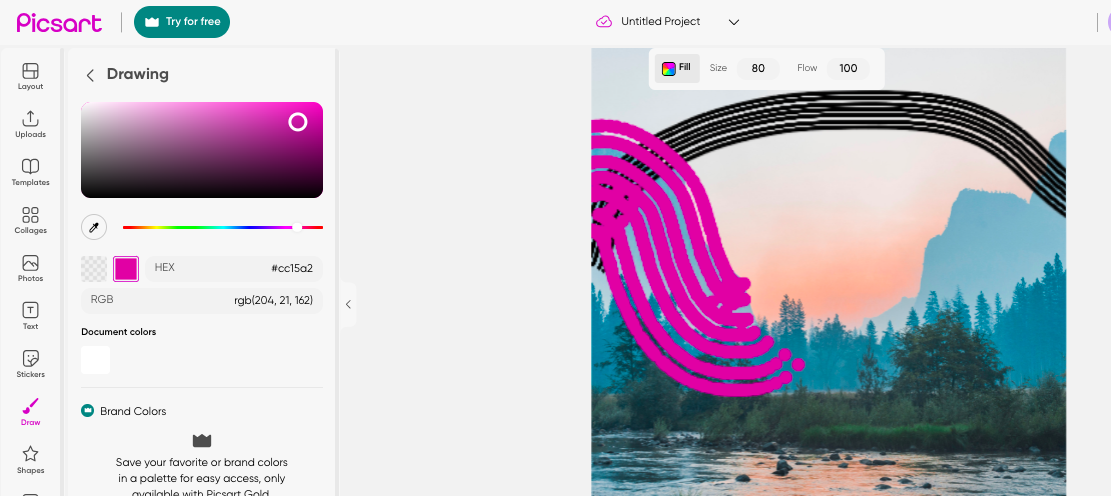
You can adjust the color, the size, and the flow of the brush by hitting the options in the menu bar above the image in the preview window.
When you click the Fill icon a color panel will open to the left of your workspace.
To change your brush’s color simply click on your color preference in the color box with your cursor.
Click Size and a slider will appear, slide to the left or right to increase or decrease the size of your brush.
When you have set your brush preferences you can draw freely using your cursor to create an amazing work of photo art.
To remove any unwanted brush strokes click Eraser above the brush panel.
Using the menu options above the preview window you can change the size and flow of the Eraser tool.
Your cursor will now act as an eraser.
When you are finished hit Apply below the brush tool panel to save your edits, if you don’t hit Apply and leave the drawing preview window your edits will be lost.
Adding stickers and clipart in Picsart
Stickers are no longer restricted to the realm of childhood, now it’s an activity for all ages so why not use stickers to add some modern punch to a retro image?
Go for it, shamelessly cover your image in quirky stickers or select one that represents your branding.
Ok, let’s get to it, how do you add stickers and clip art to photos using Picsart, first upload and open your image in the Picsart workspace.
Upload the image you want to edit to PicsArt by clicking on the Upload button.
Once uploaded drag the image into the Picsart workspace.
Click the Stickers button in the vertical panel to the left of your workspace.
Once clicked the sticker library will appear you can scroll down through the library to view all available Picsart stickers.
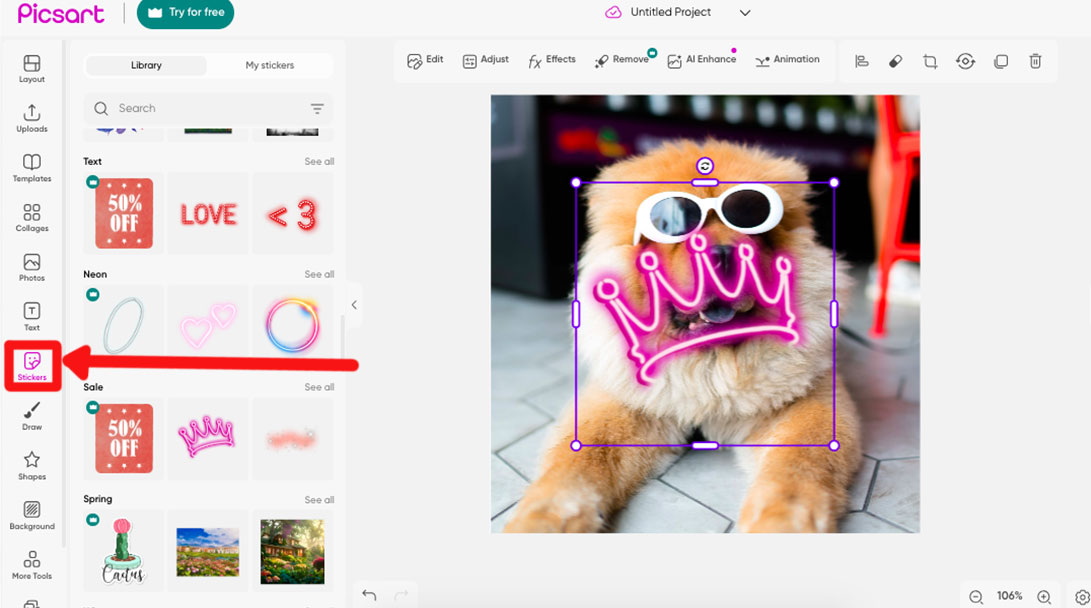
To search for a specifically themed sticker enter a keyword in the search bar above the sticker library.
To add a sticker to your workspace simply drag it from the library onto your image.
You can adjust the position and size of the sticker by dragging the edges of its bounding box.
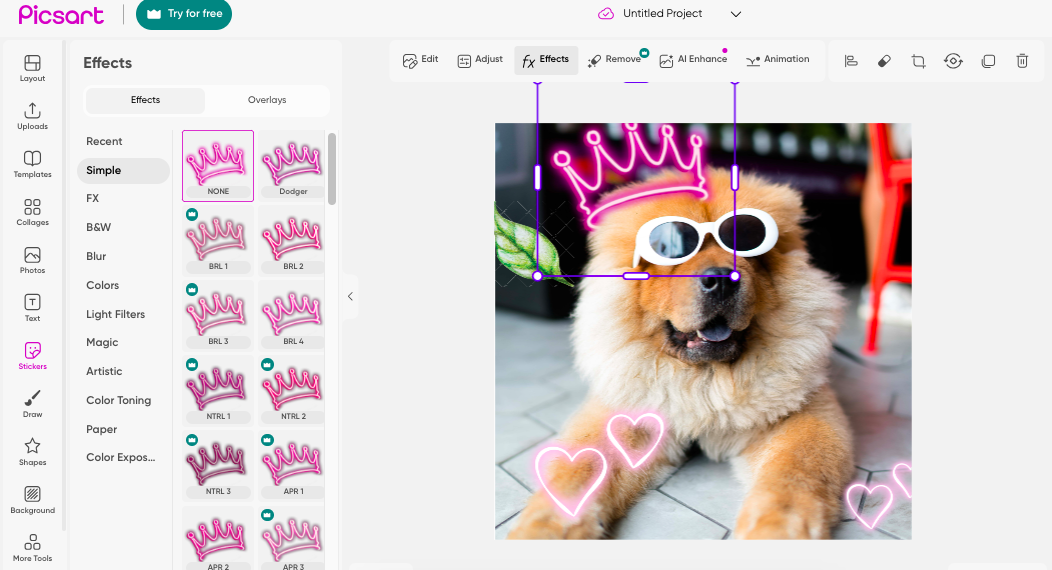
At the top of the workspace an edit bar will appear, click the Effects button to open the Effects panel.
Here you can change the color, toning, and other properties of the sticker.
To animate the sticker click the Animate button and the Animate panel will open.
To select an animation simply click on your choice of animation, such as Enlarger, Spin, or Elevator.
You can save customized stickers to the My Stickers library and they will be easily available for you to use whenever you are editing in PicsArt.
Any stickers you have previously posted to PicsArt will also be stored in the My Stickers library.
To delete a sticker, select the sticker and then click the trashcan icon in the top right-hand corner of the workspace.
Once the trash can has been clicked the sticker will be removed.
Picsart allows you to add up to 30 stickers to your image.
When you are more familiar with Picsart you can create your own custom stickers and use them like you would a logo to brand your images.
Stickers are also very useful for emphasizing an emotion with a cute emoji or adding a direction to help followers, navigate your website.
People can switch off when they see text, it’s a laborious task reading through endless jargon on websites, so opting to add an animated sticker direction instead is a huge plus in your favor.
Using Picsart for Social Media
With Picsart as your editing buddy, you can be sure you will be free to create wild and wonderful social media posts.
Picsart not only gives you the tools to use, the ideas with vast amounts of templates, stickers, and images at your disposal but they make the transition from editing workspace to virtual world smooth.
If you want to share to a specific platform Picsart helps you hone your craft by offering templates with the exact dimensions for each platform.
Nothing is worse than working on an image for hours only to realize that huge swads of it will be cut off by the platform as it isn’t the correct dimensions.
Picsart makes it easy just click on the template of choice for TicToc, Instagram, or FaceBook, be it for a story, reel, or post and the dimensions will be exact.
Creating your unique branding and keeping a consistent theme is also important when sharing on social media.
This way people will recognize you and your branding, making you stand out in the mish-mash of endless images.
Branding your images can be as simple as always adding a distinctive border, filter, sticker, or using the same color combination.
Other ways to create consistency are to always use the same style and theme.
If you are a horse fanatic and suddenly start sharing pictures of cats, you will lose followers.
Keep text to a minimum, people switch off when there is too much text, it is better to use animated commands.
Using Picsart you can animate stickers or photos to create fun commands that will entice people to follow.
Don’t add too much information, less is more.
If you want to optimize your images be mindful of why you are sharing, are you sharing just to put content on the board or is there a reason?
You might need to tweak your image for different social media platforms, so be mindful of this.
Think about the content and how it will be received on different platforms.
Who wants to see what and when, why do you log in to Facebook rather than Linkedin, for a different purpose, to see different content?
The content and posts that you share on Linkedin will not be received in the same way as what you share on TicToc.
But generally, you can share similarly themed posts on Facebook, Instagram, and Pinterest.
Tweaking your image for a different platform could be as simple as changing the dimensions, FaceBook favors landscapes, while Pinterest likes either vertical or portrait.
Another way to optimize your images for social media platforms is to add alt tags, know your keywords and use them in the captions.
Picsart has its own community and network, so why not give it a go and share your work with the Picsart community?
Similarly to Instagram, you can scroll through the feed, like, and comment on people’s images.
You can follow and be followed, get known for your work, or simply interact with people for social pleasure.
A fun aspect of the Picarst community is you can tick the free-to-edit box and allow others to edit your photo, to see how your photo evolves as people add their own artist edits to your photos.
Advanced Features and Techniques in Picsart
Picsart doesn’t know where to stop, they offer countless editing options and then they throw in some more.
The Magic Effects tool is a powerful effect (and magical) that will elevate and add intrigue to any old or outdated photo.
The options are vast, using Picsart you can preview each effect before applying.
Each photo will respond differently to each Magic effect so it is worth trying out a few before settling on your Magic effect of choice.
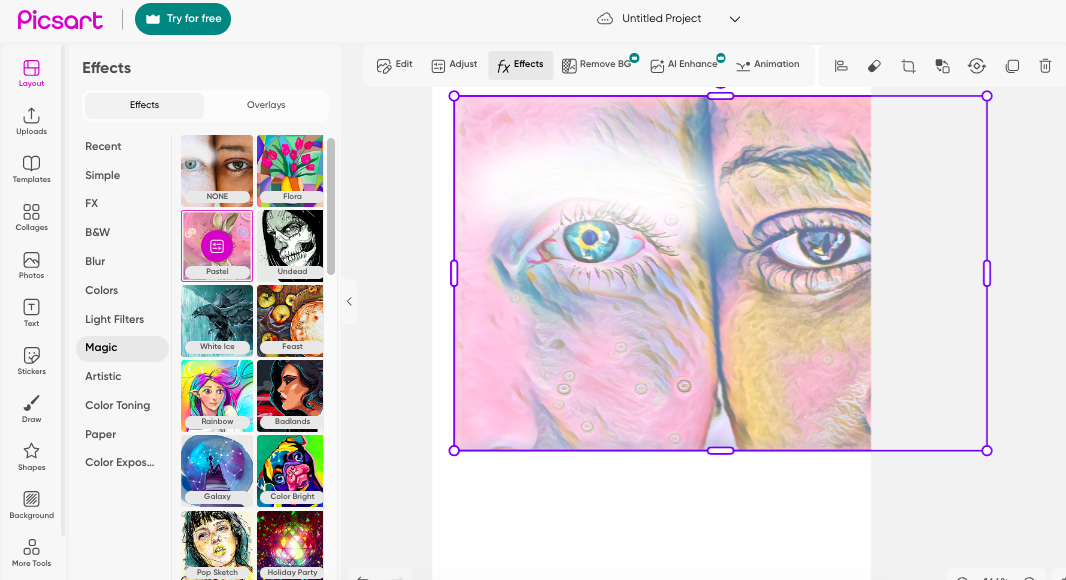
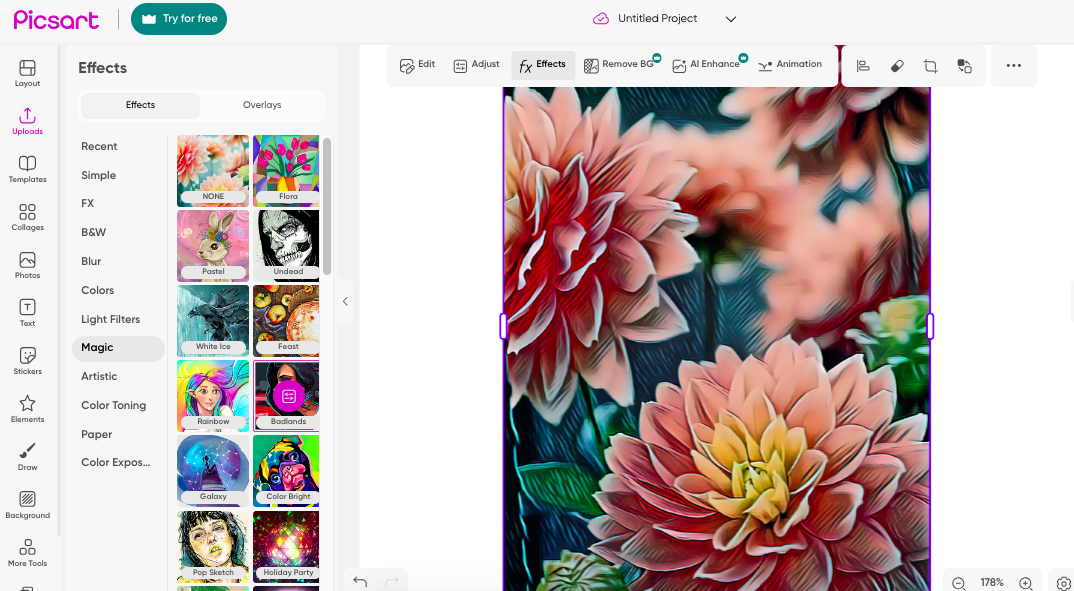
To use the Magic Effects tool have your image open in Picsart and click on the Effects button in the menu bar above the workspace.
Once clicked a panel will open to the left of your workspace, scroll down the options and select Magic.
The Magic effects will open and you can click on any effect to preview it.
Picsart has many Magic effects to choose from, such as Flora, Undead, Rainbow, Galaxy, and more.
Each and every one will be applied to your photo in seconds, giving it a completely unique visual.
There’s nothing like having the option to remove a background from your subject and replace it with something otherworldly.
Wham bam who needs a green screen when you can use a background remover tool?
Picsart has incorporated a Background Removal tool for this purpose.
If you have a fantastic subject that just begs to be seen you can now place them on an impressive backdrop improving the image a billionfold.
Picsarts Background Removal tool is only available to paid subscribers, it you want to give it a try without paying hop on and sign up for a 7-day free trial.
Using Picsarts AI-powered Background Remover tool you won’t have to spend hours picking apart and erasing the background of an image.
It’s easy, first, have your image ready in the Picsart workspace then click on the Remove BG button above the workspace.
The Remove BG preview window will open and the AI-powered tool will work its wonders, quickly removing the image’s background.
When the background is removed you can swap it over with any background, another photo, a drawing, or a giant sticker.
Now that you have the Background Removal tool at your disposal give it a shot, and create a bright and bold vibe to all your images.
Final Words on Picsart
Whether you use the Picsart mobile app or the desktop web version, I hope you found this tutorial helpful.
We live in exciting times when you can use photo editors like Picsart for free in this way.
Leave me a comment below with your thoughts and creations, and have fun!


Judyth is an experienced studio photographer and glass artist. When she isn’t Photoshopping comedians into the bellies of sharks, you can find her cooking delicious treats for her guests.


WELCOME TO SHOTKIT
Enter your email to be sent
today's Welcome Gift:
19 Photography Tools
🔥 Popular NOW:


Shotkit may earn a commission on affiliate links. Learn more.