


How to Outline Images in Photoshop (4 Simple Steps)
Outlines can be used for different graphic effects, to promote products, or create funky art. Learn how to create outlines in Photoshop the easy way.
Photoshop | Software | By Judyth Satyn
Adding an outline to an image in Photoshop is a great way to create a dynamic striking visual.
For example, you can use outlines to highlight an object or subject to bring attention to it.

Download the latest version of Adobe Photoshop to follow along with this simple tutorial.
Start a free 7-day trial today
Outlines in Photoshop can be used for graphic effects, to promote products, or create eye-catching art.
Learn how to outline objects in this Abode Photoshop tutorial, so you can experiment with merging realism with stylized graphics.
Table of Contents
How to Outline Images in Photoshop in 4 Simple Steps
Step 1 – Open the Image
Open the image you wish to outline in Photoshop.
Click on the Lock Icon in the Layers Panel to unlock the image.
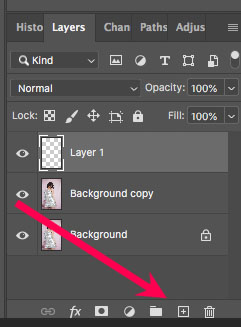
Make a duplicate layer of the image. That way, you’ll have a backup copy if you make any errors.
To duplicate your image, drag the layer onto the Add Layer Icon (the square with the plus symbol inside) in the layer panel.
Step 2 – Select the Subject
To successfully outline an image, you’ll want to select a portion or object, not the entire image.
First, we’ll use a selection tool to select the outline of the object or subject.
When the subject is one block of color contrasting its background, the selection process is going to be smooth sailing. You can use Photoshop’s quick selection tool, such as the Magic Wand Tool, or an Object Selection Tool.
To use the object selection tool, navigate to the top menu bar, and in the drop-down menu under Select click on Subject.
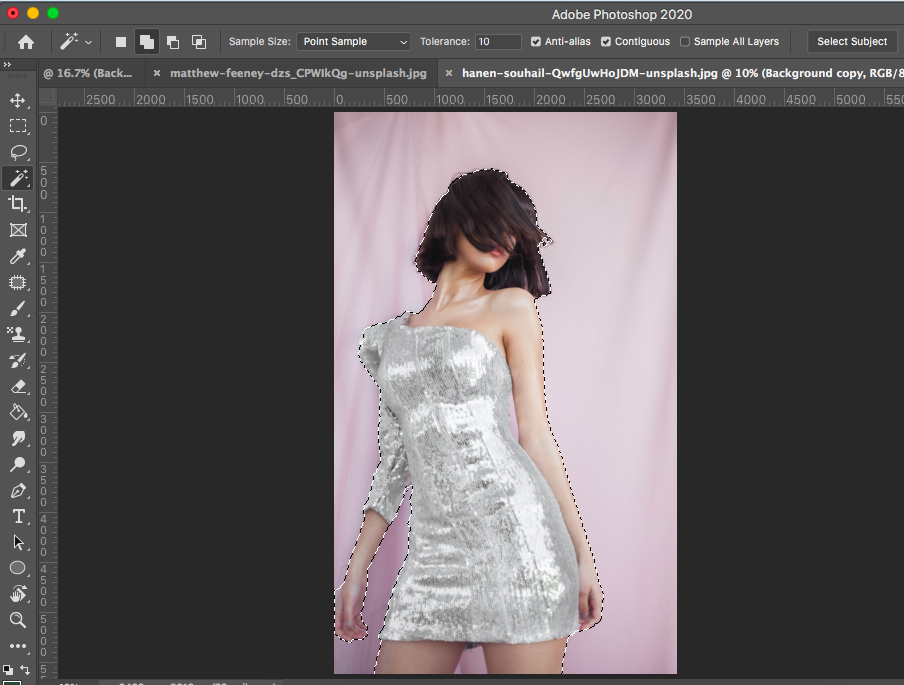
Once clicked, your subject/object will be magically surrounded by marching ants.
Check over the marching ants to see if all the areas you want are included or excluded in the selection path. If all is perfect, you can jump to the next step and create a Stroke Path.
If, however, the selection path excludes or includes areas it shouldn’t, you can fine-tune it using the Magic Wand Tool.
Navigate to the toolbar on the right of your workspace and select the Magic Wand Tool, or use the Keyboard shortcut W.

When you have selected the Magic Wand Tool, the Tool’s Options Bar will appear above your workspace.
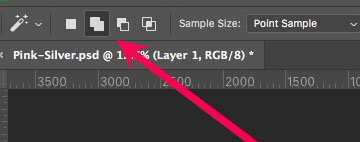
By using the Add or Subtract option for the Magic Wand Tool, you can manually fine-tune your selection area to complete perfection.
To Subtract click on the black and white square icon.
To Add to the selected area, select the double white square icon.
Once the outline is complete, create a New Layer.
From the top menu bar select Layer > New Layer or click on the Add Layer icon at the bottom of the Layers Panel.
Step 3 – Create a Stroke Path
Now you’re ready to create a Stroke Path.
Head to the Paths Panel to the right of your Canvas workspace.
At the bottom of the Paths Panel, click on the fourth icon from the left – Make Work Path from Selection.
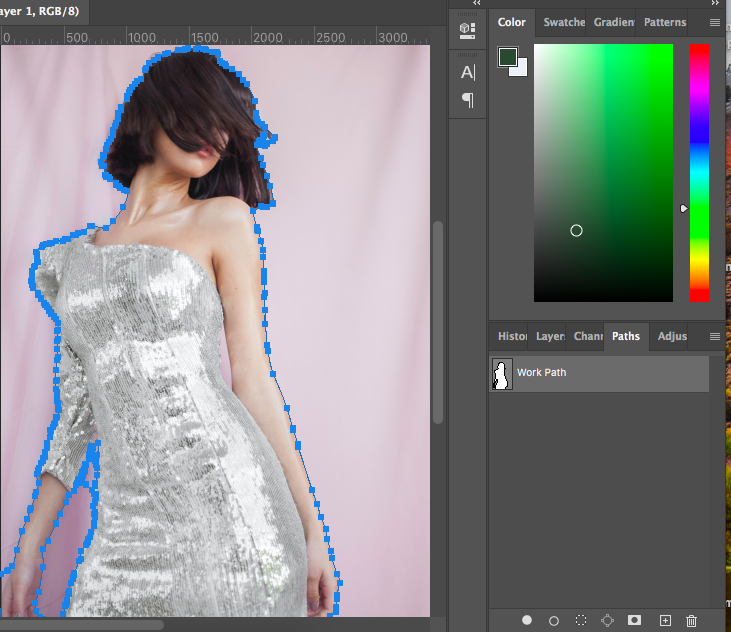
The marching ants will be transformed into a blue line defining the Stroke Path, and a Work Path Layer will appear in the Paths Panel.
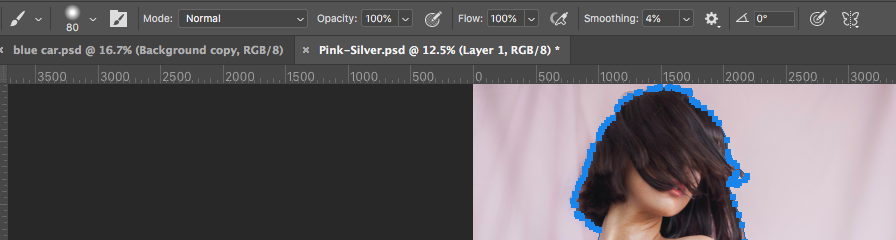
From the Tool Bar, select the Brush Tool, or use the keyboard shortcut B.
In the Brush Tools Options Bar, select the size, opacity, hardness, and color of the outline.
(See how to change your brush size in Photoshop.)
This will determine the thickness, color, and opacity of the line you create.
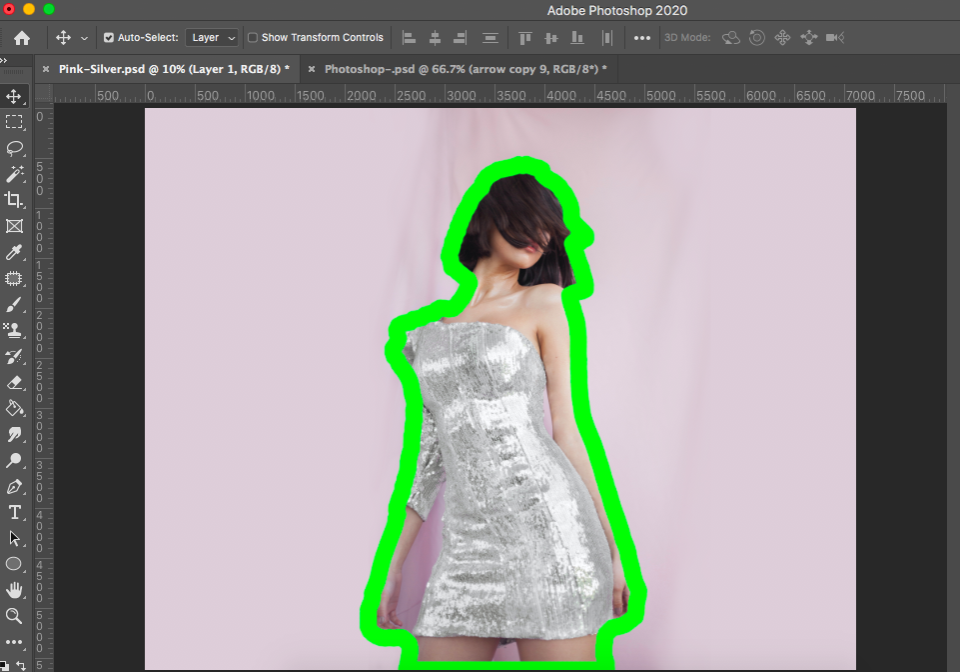
Now click on the second icon from the left, at the bottom of the Paths Panel – Stroke Path with Brush.
Once clicked, a line will appear bordering your subject. The line will be the same color, thickness, and opacity as the brush settings you chose.
(Download some free Photoshop brushes here)

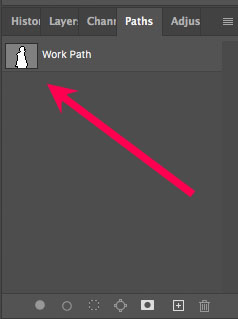
You can now delete the Work Path by simply clicking on the Delete icon at the bottom of the Paths Panel.
Step 4 – How to Outline an Object in Photoshop: Save the Image
Now you have a stroke line bordering your object in a layer separate from the background layer.
Keeping the Photoshop outline selection in a separate layer is useful when you want to edit the properties of the line, add a gradient, or if you want to create duplicates of the border for echoing effects.
Save your image file as a PSD file – this will give you the option to edit or use the outline in future projects.
To save your file, navigate to the top menu bar and select File > Save As.
In the pop-up dialog box that appears, enter a name for your file, choose a location, and hit Save.
Now that you’ve mastered this technique, you can use it to create stunning advertising material or add interesting effects to a family photo.
How to Outline Shapes in Photoshop
Creating outlines for custom shapes is a simple process, with no need to use selection tools to outline the border (see how to make borders in Photoshop).
The first step in learning how to outline in Photoshop is to select the Custom Shape Tool from the toolbar.
From the Custom Shape’s Options Bar, select the shape you wish to work with. (See: how to make a custom shape in Photoshop.)
When you have created the shape, head to the menu bar above your workspace and select Layer > Layer Style > Stroke.
When you click Stroke, the Layer Style Panel will appear.
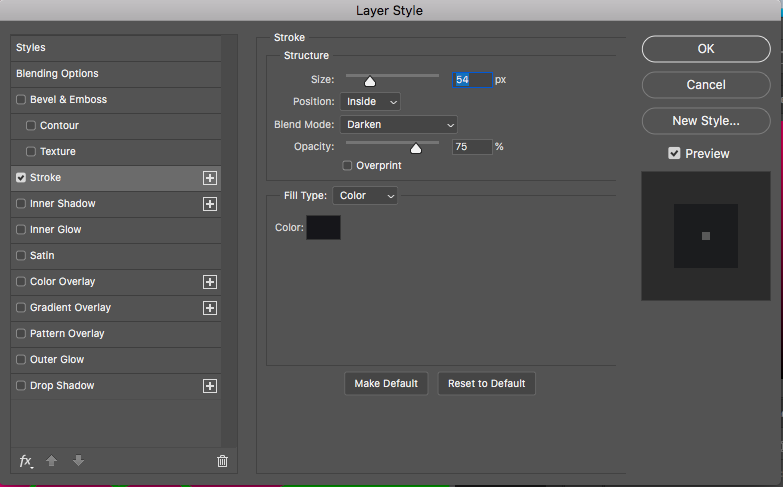
Adjust the Size, Thickness and Color settings of the Stroke in the Layer Styles Panel.
When you click OK your shape will be perfectly outlined.
In the Layer Style Panel, you’ll notice a Layer Style Overlay has been added to your Shape Layer.
Click on this at any time during the editing process to adjust the properties of the shape’s outline.
Did you enjoy this tutorial on how to outline an image in Photoshop? To build up your Photoshop skills further, be sure to check out How to Use the Liquify Tool in Photoshop.
 How to Wrap Text in Photoshop (Three Different Ways)
 How To Make Dotted & Dashed Lines In Photoshop (3 Ways)
 How to Type on a Path in Photoshop (Make Text Follow Shapes)
 How to Draw a Curved Arrow in Photoshop (And Save as a Preset)

Judyth is an experienced studio photographer and glass artist. When she isn’t Photoshopping comedians into the bellies of sharks, you can find her cooking delicious treats for her guests.

WELCOME TO SHOTKIT
Enter your email to be sent
today's Welcome Gift:
19 Photography Tools
🔥 Popular NOW:


Shotkit may earn a commission on affiliate links. Learn more.