How to Use Tone Curves in Lightroom The Right Way
The humble tone curve is actually one of the most effective ways to bring a dull photo to life in Adobe Lightroom. Here's how to use tone curves effectively.
Lightroom | Software | By Ana Mireles
Did you know that the Lightroom Tone Curve is one of the most powerful tools for editing photos?
You can use the Tone Curve to make small adjustments that make a big difference. This is because you have more control over your edits.
The Tone Curve in Lightroom allows you to fix the exposure, adjust contrast, and do color correction.
Popular course reveals the simple tricks to getting incredible results with Lightroom in record time. Give Your Photos The Look They Deserve!
![]()
Unfortunately, the tone curve isn’t the most intuitive tool – but don’t worry!
In this article, I’ll tell you all you need to know to use the Tone Curve effectively in Lightroom.
I’ll explain all the features from the Tone Curve panel and give you an example to show you how to apply everything when you’re editing a photo.
Table of Contents
How to Use Tone Curves in Lightroom Classic
Let’s start by locating the Tone Curve panel. In Lightroom Classic, you’ll find that the Tone Curve has its own panel in the Develop Module. It’s the second one on the list – right below the Basic Panel.
If you’re using Lightroom CC, you’ll find the Tone Curve inside the Light panel. The Tone Curve is almost the same in Lightroom Classic and Lightroom CC, so you can follow along the tutorial regardless of which one you use.
The tone refers to how bright or dark something is. So, the tone curve tool lets you adjust the different areas of your picture based on their brightness. This allows you to work with remarkable precision.
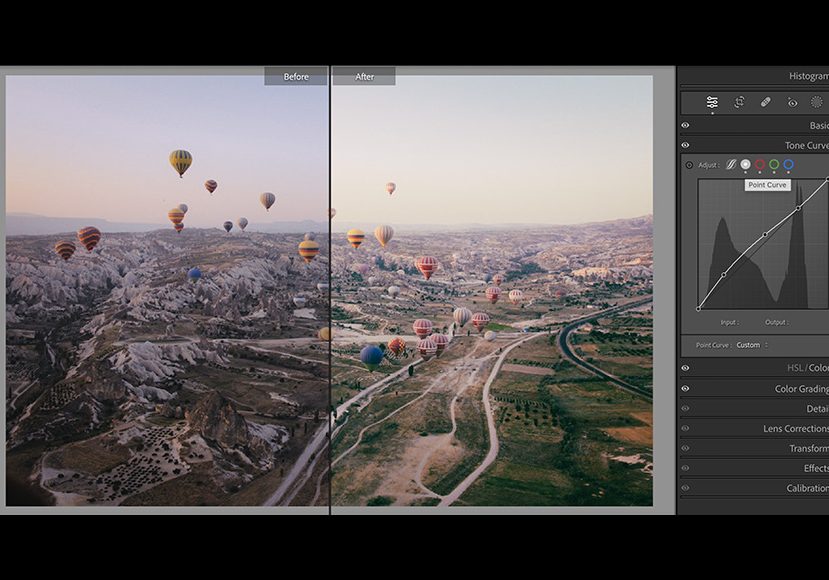
The Lightroom Tone Curve is a graph. When you open the Tone Curve panel, you’ll see the histogram of your picture in the background and the graph on top with a diagonal line.
Moving along the horizontal axis (from left to right), you’ll choose the tone you want to work with. On the left side are the darkest tones, and on the left side you’ll find the highlights.
Instead, moving up and down the vertical axis, you can brighten or darken the specific tones you’re working with.
The Tone Curve also allows you to work with the color channels separately. So, let’s start by explaining the Tone Curve panel so you know how to move in it.
Parametric Curve
The parametric curve setting allows you to make adjustments by zones. There are four zones – Shadows, Darks, Lights, and Highlights.
You can see there are four sliders underneath the graph with those names. That’s because you can adjust the zones by clicking and dragging the graph or the slider, the results are the same.
When you use the Parametric Curve, only the selected zone is affected. You can see how the rest of the curve stays in a straight line.
Point Curve
The next adjustment setting is the Point Curve. Unlike the last one, there aren’t any sliders in this setting, you can only use it by adding curve points along the Tone Curve line.
This way, you target specific tones with extra precision. Then, you can pull them up to light those tones or down to darken them.
On the top left corner of the Tone Curve panel, there’s the targeted adjustment tool. Using it, you don’t have to guess where to put the adjustment points.
Instead, hover over your image and click on the area you want to fix. You can now move the point up and down to make tone curve adjustments.
Also, at the bottom, you’ll find a menu called Point Curve. By default, this is set to Linear which is the diagonal straight line that connects the bottom left corner with the top right corner.
If you open the menu, you’ll find the choices Medium Contrast and Strong Contrast. These two are Tone Curve presets you can use as a starting point – or use them as an auto function if they fix the image on their own.
Both these presets create an S curve which is the traditional adjustment needed to add contrast. However, the S curve for Strong Contrast is more pronounced than the one for Medium Contrast.
Red channel
Next to the Point Curve icon, you’ll see the tools to adjust colors. The first one is the red channel. The tone curve tool works in the same way – simply add a point in the line and pull it up or down.
However, this time you won’t be affecting the luminosity. Instead, when you pull the point up, you’ll be adding red to the tonal values you’re targeting.
When you pull it down, you’ll be removing the red and adding cyan-green which is the opposite tool.
You can also use the targeted adjustment tool while you’re in the color channels of the Lightroom Tone Curve. However, the Point Curve menu won’t affect the red color. If you use it, the effects are done in the luminosity curve that we saw earlier.
Green channel
The green channel is not different from the red one. The only thing that changes are the colors you add or remove when you move a point up or down the Y-axis of the Tone Curve.
In this case, you add green when you pull the point up. Instead, you’ll be removing the green and adding the opposite color – magenta.
Blue channel
The last option of the Lightroom Tone Curve is the blue channel. Just like in the other color channels, you can use the tone curves to add or remove a specific color.
In the blue channel, you can add blue when you pull up one of the points in the curve. Pulling the curve down removes blue and adds yellow.
Edit a photo using the Tone Curve in Lightroom

Credit: Signature Edits
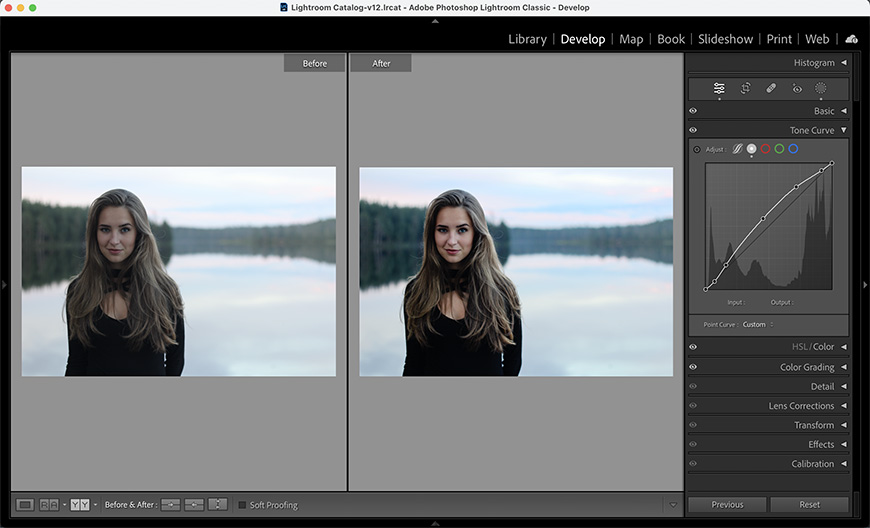
This is an example of how to edit a photo using the Tone Curve in Lightroom Classic.
Start by importing your image into Lightroom. Now, move on to the Develop module and open the Lightroom Tone Curve panel – you can find it under the Basic panel.
You could use one of the Tone Curve Lightroom presets as a starting point. In my case, the highlights are a bit close to the edge. So, adding contrast without full control of the highlights point wouldn’t be a good idea.
Instead, I’ll use the Shadows, Mid-tones, and highlights sliders from the Parametric Curve to make some general adjustments.
Now, I’ll move on to the Point Tone Curve so I can do more precise edits. Here, you can add as many points as you want to control all the tonal points you need.
To add more contrast, I pulled up the Shadows point and adjust the highlights to avoid clippings. Then, I worked with the mid-tones to bring back the punch it needed.
Now, I can also use the Tone Curve to adjust the color values. Simply adjust the Tone Curve on each one of the color channels.
In my case, the highlights needed more blue because it’s the sky area, while the shadows needed more green because of the trees. However, the adjustments may be different in other images.
One of the things that makes the Tone Curve a powerful tool, is that you can combine it with masks. This way, you can adjust the settings in one part without affecting other portions of the image.
On top of all this, you can customize the Tone Curve with Lightroom Presets. Simply apply a preset, and open the Lightroom Tone Curve. Then, move the existing points or add new ones to customize the effect to your liking.
FAQ’S on Tone Curve Adjustments
Where is the tone curve panel in Lightroom CC?
The Tone Curve in Lightroom CC is inside the Light section of the Edit panel. Here, if the Parametric Curve is selected, you’ll see the tool called Tone Curve.
You can still work in zones, but you won’t have the sliders. If you change to any of the other Tone Curve Adjustments, the tool changes to Point Curve. These work just like they do in Lightroom Classic – by adding points along the line.
How do you use the RGB Curve?
In previous versions, the RGB Curve was the default setting for the Lightroom Tone Curve adjustments. The RGB curve affected the whole image.
Otherwise, you could open the drop-down menu to work on the red, green, or blue channels separately. This is not how the Lightroom Tone Curve works anymore. Although, some people use the term RGB tool when referring to the Point Curve.
What is the use of Tone Curve?
You can use the Lightroom Tone Curve to adjust the exposure, contrast, and color of a photograph. You can use one of the presets to automatically add contrast.
Otherwise, you can use the Parametric Curve to work in zones, or the Point Curve to make precise adjustments. The color channels only work with point curves.
Is Tone Curve the same as Point Curve Lightroom?
The Point Curve is one of the settings in which you can use the Lightroom Tone Curve. The Point Curve works by adding anchor points which you can drag up and down the graph to brighten or darken certain tones.
The other setting of the Tone Curve is the Parametric Curve – this works with brightness zones.
Do you need to use the Tone Curve in Lightroom?
No, you don’t need to use it. There are many other tools to edit your images in Lightroom. However, the Tone Curve gives you full control over the areas you want to affect with maximum precision.
It also allows you to adjust brightness and color separately. It’s a powerful tool, but it’s not the most user-friendly. You need to know how to use it and it’s easy to go overboard with it.
Also, consider that you don’t have to use only the Tone Curve. You can use this tool in combination with the many others available in Lightroom.


