


How to Use Photoshop Presets (+ Where to Download)
Learn the advantages of using presets in Adobe Photoshop, plus how to create them, where to find free presets and also understand compatibility issues.
Photoshop | Software | By Judyth Satyn
Photoshop presets are popular for a good reason – they give consistent editing results and save editors valuable time.
In this guide, you will learn the advantages of presets for Adobe Photoshop, where to find fantastic free ones, and how to create your own.
Download Photoshop to follow along and take advantage of a 7 day free trial.
Table of Contents
What are Photoshop Presets?
Presets for Photoshop are a collection of processing steps saved as a batch and can be applied with one click to an image (or multiple images) when editing.
Nobody will deny that editing is a tedious task, so any shortcut is a welcome relief.
Presets in Photoshop, Lightroom or any other photo editing software can speed up the editing process by instantly applying a series of edits so you won’t have to spend valuable time running through them one by one.
For example, if you are editing hundreds of wedding photos and wish to add a particular filter to the shots you can use a Lightroom preset to apply to the entire wedding album.
Lightroom Presets can be advantageous when a uniform consistent style is required for your work, such as a wedding album or advertising material.
Similar to those in Lightroom, presets in Photoshop are beneficial for increasing productivity in your workflow, saving time and effort.
What would normally take 20 minutes can be performed using a preset in 2-3 minutes.
You can create a preset to store a sequence of edits that you might otherwise forget, such as an ambient sunset filter.
Presets can save settings for tools and adjustments so you can speedily use them when you open Photoshop.
What is the difference between actions and presets in Photoshop?
Photoshop Actions and presets are very similar both automate a collection of edits.
One difference between the two is where they are applied in Photoshop.
Actions are applied within the Photoshop interface directly onto the open image.
Whereas presets are applied using Adobe Camera Raw (ACR) within Photoshop.
When Adobe Photoshop starts an action it runs through the script of recorded steps one at a time and is visible in the canvas workspace.
A preset in Photoshop is applied behind the scenes and jumps straight to the end result, thus the editor will complete tasks quicker using them.
Presets can be applied directly to tools and adjustments, but Actions cannot – see how to use Photoshop Actions.
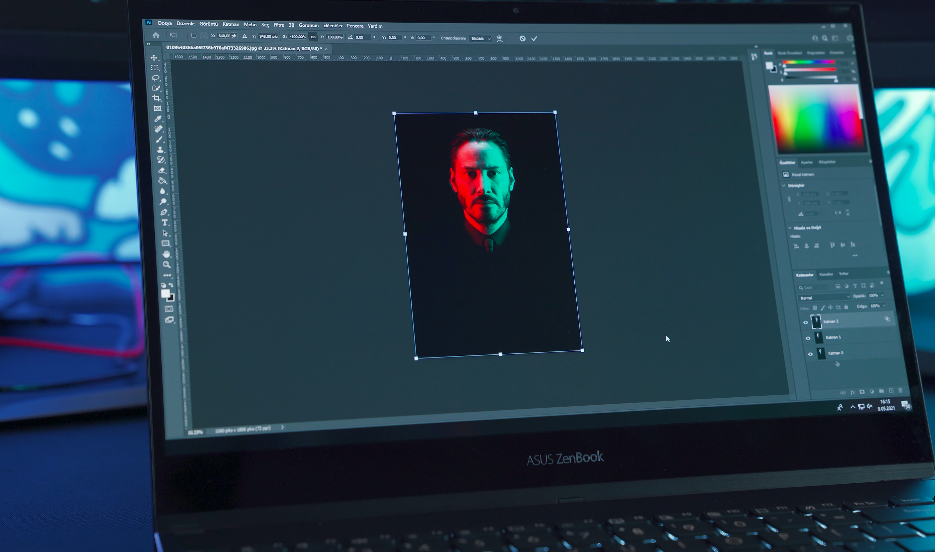
Image: Onur Binay
Actions can only be applied to JPEG files, presets can be applied to both RAW and JPEG files,
When using a preset the edit is applied to the entire image an action can only be applied to an individual layer.
Presets are basic and easy for the beginner to use, actions require a more in-depth knowledge of Photoshop.
What are the types of presets in Photoshop?
Brush Tool Preset
The changes you make to a Photoshop Brush tool’s size, hardness, and opacity when editing will vanish when you close the program.
If there is a brush tool setting that you often use, save it as a preset for easy access.
Tool Presets
It is possible to create presets for other Photoshop tools, such as the Clone tool, Blur tool, Eraser tool, and Patch tool.
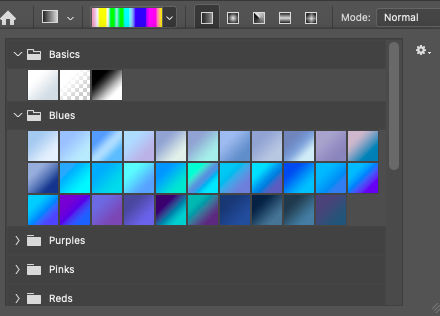
Gradient Presets
A Gradient preset is a gradual change of color effect.
Pattern Presets
Pattern presets are repeated images or tiles that can be increased or decreased in size.
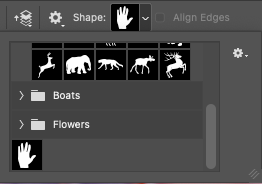
Shapes Preset
Shape Presets are vector images that can be added to photos and scaled up or down.
Style Presets
A layer style is one or more effects that can be applied to an image.
A custom layer style can be saved as a style preset.
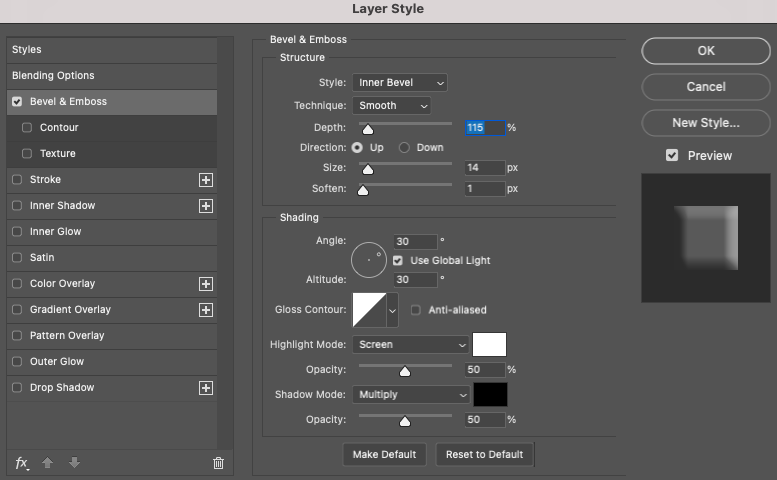
Contours Presets
Contours Presets are preset layer styles, including drop and inner shadows, inner and outer glows, satin effects, Bevel, and Emboss.
Save frequently used settings as presets to streamline your workflow and increase productivity.
How to Use Presets in Adobe Photoshop
Import Presets
To use a new preset you will first need to upload it to Adobe Photoshop.
Navigate to the top menu bar Edit > Export/ Import Presets.

Locate the preset ZIP folder and import.
New presets will be stored in the Preset Manager.
Apply Presets
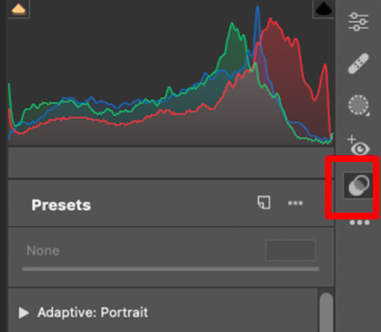
To apply a preset to images open Camera Raw by selecting Filters > Camera Raw Filter.
Click the Preset icon, two overlapping circles in the right-hand panel.
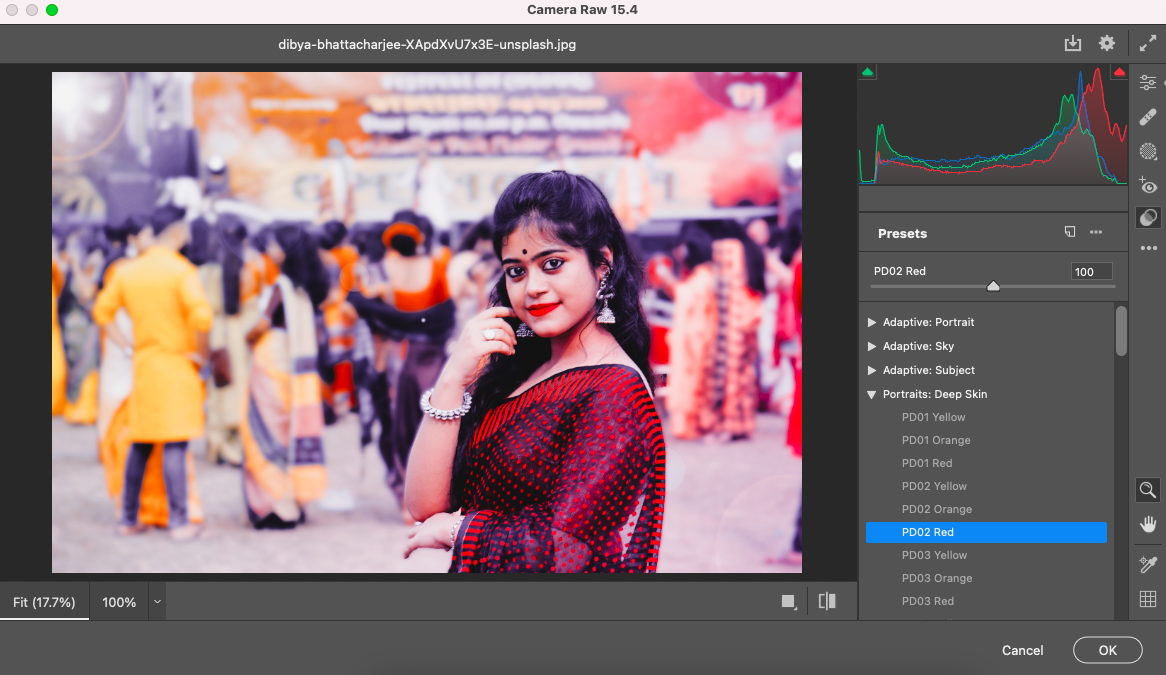
The Preset panel will open from here select the preset you wish to apply.
Edit
To edit the chosen presets adjust the levels in the top right-hand panel of Camera Raw before saving.
Save & Manage Presets
When satisfied with the result click OK and your preset adjustments will be saved.
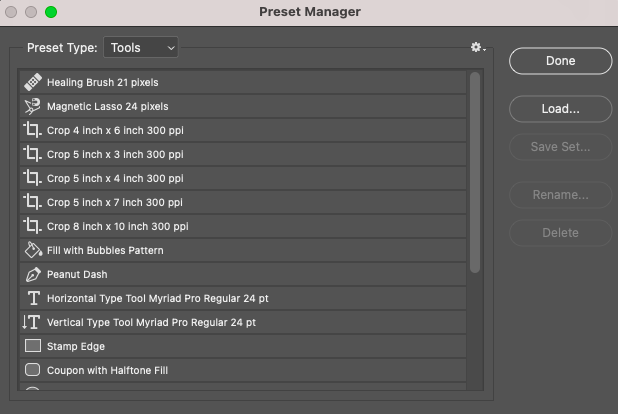
To manage presets navigate to the Preset Manager – Edit > Preset > Preset Manager.
The Preset Manager dialog box will open, in the drop-down box beside Preset Type select Tools.
Once selected the list of the saved tool presets will appear in the Preset Manager dialog box.
Here you can manage presets, rearrange, delete, or adjust them.
How to add presets to camera RAW
- Click Filter > Camera Raw Filter from the top menu bar.
- When the Camera Raw Filter opens click the Preset icon.
- Select Import Files and & Presets from the drop-down menu.
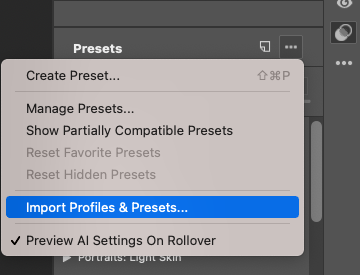
- Now locate the preset ZIP file and import.
How to Create Your Own Presets for Photoshop
When editing in Photoshop any setting you alter of a tool, layer style, or adjustment will be temporary, its properties will default back to its original settings when you have finished using it.
You can save your favorite tool settings as a preset so you can have it readily available when you need it.
Follow these steps and create a Brush tool preset.
Step 1. Open the image in Adobe Photoshop and select the Brush tool from the toolbar.
Step 2. Click the arrow in the Brush tool menubar and the Brush tool property options will appear.
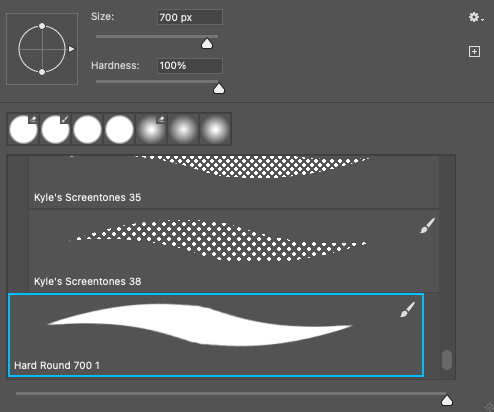
Step 3. Set the Brush tool properties you wish to save as a preset and click the cog icon in the top right of the box.
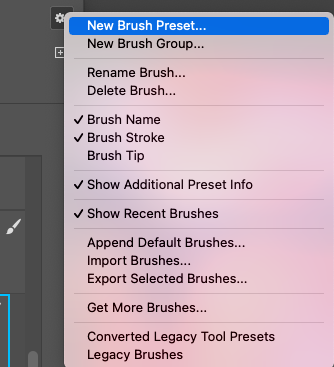
Step 4. Select New Brush Preset from the drop-down menu, and a pop-up box will appear, click OK.
Step 5. The Brush properties will now be saved as a preset for future use.
The process is similar when creating presets for other Adobe Photoshop tools.
Where to Download Free Presets for Adobe Photoshop
Now that you know the wonders of presets, you will be keen to give them a test run.
Many reputable websites offer free actions to download and install in Photoshop but presets are a little more scarce.
Hunt around and you will find some fantastic presets to add to your images.
A word of caution be careful when downloading presets as some websites are not trustworthy and could steal your personal information, so check their integrity.
Behance.com and presetfree.com are two websites that have free presets available for you to download and install into your present manager.
Download some and try them out.
Photoshop Preset Types: Compatibility Issues
There may be inconsistencies in preset results due to incompatibility between old and new versions of Adobe Photoshop or if you are uploading presets from websites.
The compatibility issue might not be so obvious, a sun ray filter has slightly lighter hues, or it might be too dark to use.
Keep an eye on your preset adjustments to ensure you achieve the correct results.
We hope you have found this article informative and have all you need to have fun with presets.


Judyth is an experienced studio photographer and glass artist. When she isn’t Photoshopping comedians into the bellies of sharks, you can find her cooking delicious treats for her guests.

WELCOME TO SHOTKIT
Enter your email to be sent
today's Welcome Gift:
19 Photography Tools
🔥 Popular NOW:


Shotkit may earn a commission on affiliate links. Learn more.