


How to Photoshop Someone Into a Picture
Learning how to paste a missing subject into an image needn't be tricky when you use the right tools. Here's how to Photoshop someone into a picture.
Photoshop | Software | By Judyth Satyn
This guide to how to Photoshop someone into a picture will help you use photo editing techniques to get professional, realistic-looking results.
Did you end up with a nice family picture or a group photo with friends but it’s one person short of perfection?
Or are you trying to have fun with image editing by inserting someone into a funny or fantasy-inspired setting?

Download the latest version of Adobe Photoshop to follow along with this simple tutorial.
Start a free 7-day trial today
You may already know how to Photoshop pictures, but what about adding someone to a picture?
Whether your goal is to reverse the ‘missing’ status of a person or you’re aiming to add someone in front of a creative background, I’m here to help you learn exactly how to do it.
The following steps are simple yet detailed, developed to walk you through the process as smoothly as possible. Let’s jump right into it.
Table of Contents
How to Photoshop a Person into a Picture
Step 1: Choose the Right Picture of the Person
I know you’re eager to dive into action, but the selection step that comes before firing up Photoshop can be the difference between a seamless insertion and a hack job.
Picking out a suitable picture of the person you want to add heavily contributes to the final quality of your Photoshop project.
First, try to choose a picture that most matches the photo you want to add the person to. I’m not just talking about a match in weather or age, but also a similarity in lighting if available.
For example, if you’re transporting a person to a family Christmas photo, it won’t look good (or make sense) to use a photo of the person while wearing hiking gear or from too many years ago.
Otherwise, you’ll be risking an instant giveaway that you’ve altered the picture. It simply won’t look natural no matter how hard you try to tweak it.
To avoid all these issues, consider it a general rule to use a picture of the person that contains the most simple background available.
Fewer people, fewer objects, and fewer patterns in the background correspond to less work at your end because you won’t need to erase or adjust as much of the photo. Photoshop is all about working smart.
The same goes for tone and lighting. While you’ll be modifying these to match the second photo where you’ll insert the person, it’d be a lot easier to start with lighting/tones that aren’t too far off.
So if you’re putting someone into an indoor Christmas photo, choose a picture with the person standing in indoor lighting rather than out in the sun.
The last tip to keep in mind when selecting a photo of the person is to make sure their picture is bigger or as big as the photo you want to put them in.
This puts you in a position where you don’t need to enlarge the person after cutting them out.
As a result, you won’t have to deal with a pixelated insert that looks out of place and can easily clue others into your editing attempt.
Step 2: Cut the Person Out in Photoshop
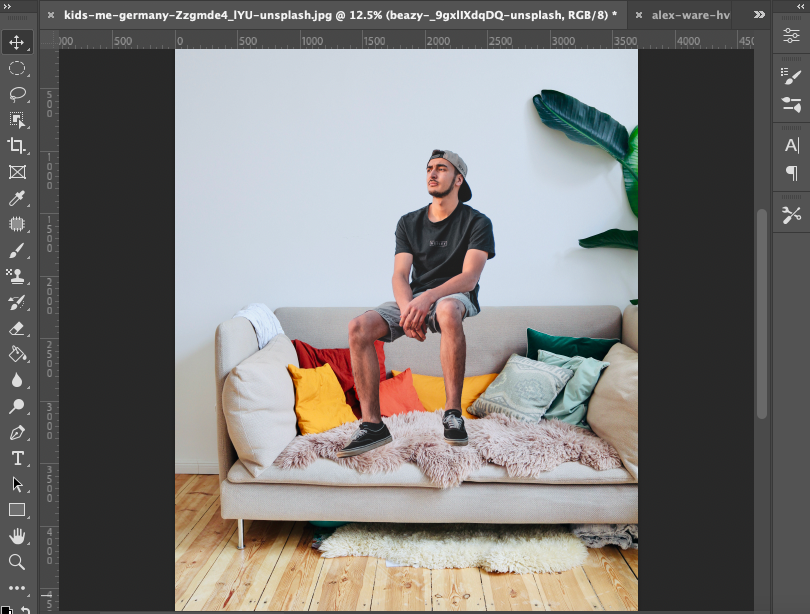
This is where the action starts! It’s time to extract the person you want to add from the picture you’ve chosen in the step above.
The first thing you need to do is open the photo of the person to be added (also known as the subject/model picture) in Photoshop.
Now, you need to select the figure of the person by outlining the shape of their body. There’s more than one way to do this, each with its pros and cons.
Choose the method that best suits your project and skill level as follows:
- Pen Tool
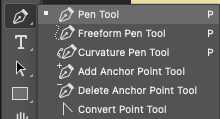
One of the staple tools you can use to select the person is the pen tool. This technique probably produces the most accurate cutouts of objects, or in this case, people.
It is, however, the most challenging to use if you’re a beginner as it involves a certain level of hand stability and knowledge of line maneuverability.
The pen tool draws a path based on the way you draw lines and place anchor points along the edge of the person.
From the toolbar on the left, choos3 the pen tool by clicking the icon looking like the tip of a fountain pen or by pressing P from your keyboard.
After that, place the first anchor point somewhere along the edge of the person. You’ll then continue clicking around the entire body until you make your way to the first anchor point again.
You can tilt and curve the lines as you draw them by holding down the mouse and dragging out bezier handles. Also, don’t worry about the hair and the head in this step, just trace them roughly.
- Quick Selection Tool
This tool has been sitting in Photoshop’s arsenal since 2007, and it’s one of the easiest and most reliable tools you can use for object selection.
All you need to do is choose its icon from the left toolbar (looks like a dotted square or uneven square) and then use your mouse to “paint” over the person’s body.
Be sure to click on all parts of the person’s figure to create a full outline of their body. You’ll see a dashed line surrounding the person to indicate what the selection looks like.
The Quick Selection tool relies on textures and tones to recognize boundaries. It’s fast and works best in the case of contrasting colors.
- Object Selection Tool
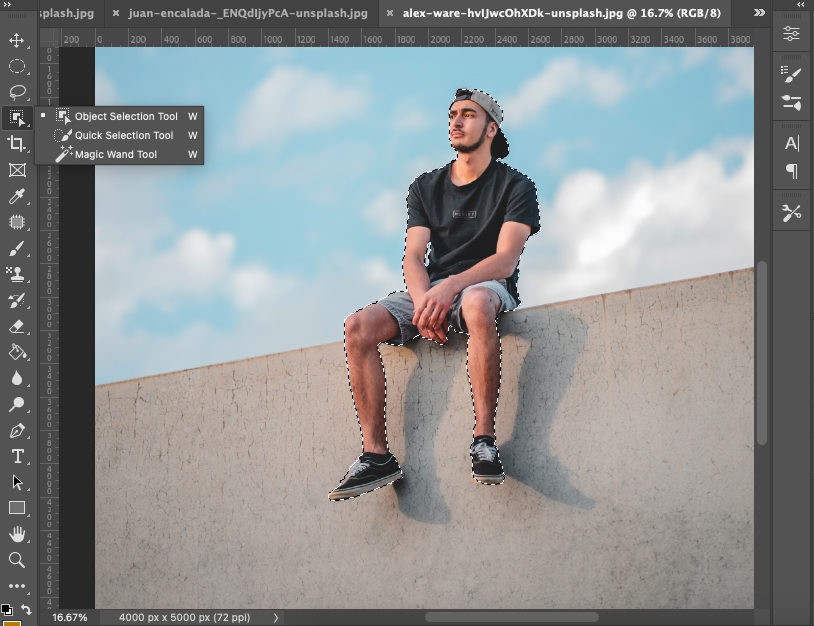
The Object Selection tool is relatively new to the Photoshop scene, introduced around 2019 – 2020. It’s highly accurate, but it takes much longer to use in selection compared to Quick Selection.
You’ll find it when you click the same icon for Quick Selection (dashed square or uneven square). Then, at the top of the window, choose Select Subject.
This action will cause a dashed outline to appear along the edge of the person’s whole body. That’s right – you’re looking at automatic selection.
The more well-defined the boundaries of the person, the better this tool works its magic.
- Lasso Tool
Last but not least, you can turn to the Lasso tool to select the person. It’s more flexible and user-controlled, so its accuracy depends on who’s drawing the lines.
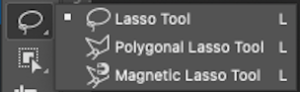
Start by clicking the icon looking like a lasso rope from the left toolbar. Then, begin at a point close to the body and just draw an outline surrounding the body while holding down the left mouse key.
Once you complete the loop around the person, let go of the left mouse key for your selection to appear. It’ll look like dashed lines.
Step 3: Move the Cutout to the Target Picture
After selecting the figure of the person to be added, you now need to transfer the cutout to the target photo, aka the photo you put the person in.
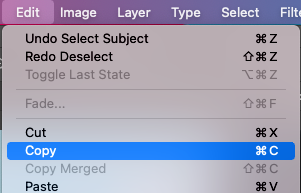
Locate the Edit menu in the top portion of the Photoshop window and click on it.
A pulldown menu will appear with multiple options. Choose Copy.
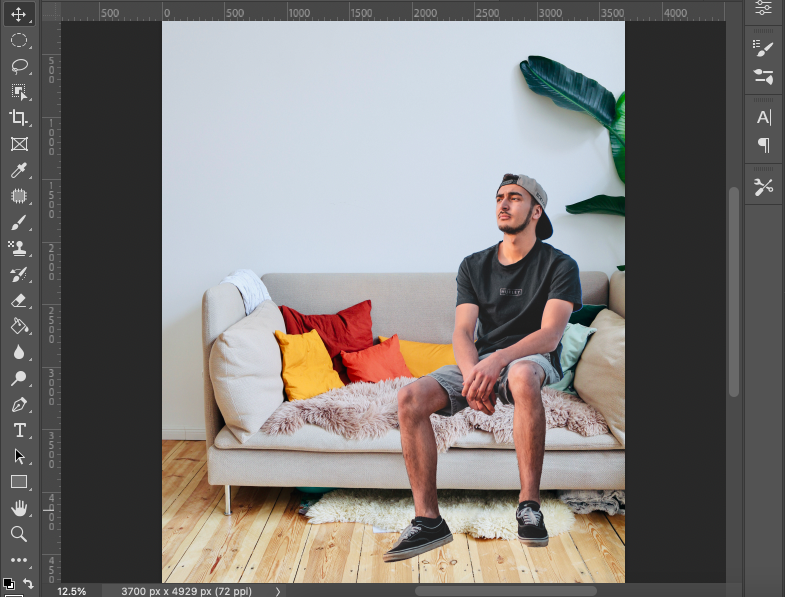
Next, open the target picture in Photoshop the same way you did in Step 1. When it loads up, click on it so it becomes the action site.
Then, open the Edit menu from the top bar once again and click the Paste option from the pulldown menu. This will cause the cutout of the person to show up over the target photo.
If you’re more comfortable using keyboard shortcuts, you can ditch the menu options and click control + C (Windows) or control + C (iOS) to copy the selection while still in the person’s picture.
After that, click control + V (Windows) or control + V (iOS) to paste the cutout in the target photo.
Step 4: Remove the Remaining Background
Your mission now is to make the person look like they’re part of the target picture.
This is why you need to get rid of any lingering bits of the person’s previous background so no foreign elements are visible in the backdrop. You’ll rely on the Eraser tool for this step.
Start by heading to the layer window and clicking on the layer containing the person’s cutout.
Locate and click on the Mask Layer button; typically at the bottom of the window and looks like a circle inside a rectangle.
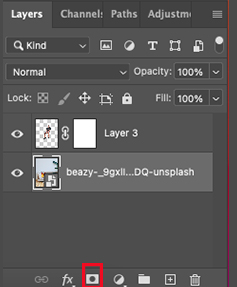
This will isolate the cutout from the layer of the target photo, which means that whatever tool you use on the person’s image won’t affect the photo where you want to insert them.
Engage the Eraser tool from the left toolbar (looks like a rectangular eraser) by clicking on it.
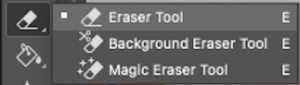
Then, change the size of the eraser from the eraser options at the top of the window. Type the new size or use the arrows to resize; you’re aiming for a smaller size (65 to 75 pixels less).
Before you begin erasing, reduce the hardness of the eraser to 0. This will prevent leaving behind harsh lines.
Don’t zoom in yet. Simply go around the person’s body and get as close as possible to its edge.
- If the remaining background is a solid color, click the Magic Wand tool, select the background color, and choose or press delete. This will isolate and erase the background.
If there are small bits of excess background left after the initial erasing, you can further isolate the person’s figure by:
- Zooming in (change the percentage at the bottom layer window or click +) until you can easily see the person’s edges.
- Reducing the size of the eraser to 25 or 30 pixels.
- Bringing the hardness up to 50 (minimum) for better precision.
- Removing the excess background.
Step 5: Adjust the Person’s Size and Position
Now that your cutout is background-free, it’s time to match its size to the photo you want to add it to.
Go to the layer window and click on the layer containing the person’s cutout.
Click the Mask Layer button at the bottom of the window (the circle inside a rectangle) to isolate the cutout from the layer of the target photo.
After that, open the Edit menu and choose the Free Transform tool or press control + T (Windows) or control + T (iOS). A box will pop up next to the person’s figure.
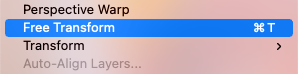
Hold the Shift key and click on the corner of the box with your mouse. Pull the box in to make the person smaller until their size matches the size of other people or reaches a reasonable size.
As you tweak the size of the person’s figure, you’ll need to alter their position relative to the rest of the target picture. You’ll do this with the layer selected.

The Move tool should be on the left toolbar at the very top. Click it then drag the person’s figure to wherever you want to place it while holding the left mouse key.
Step 6: Match the Colors and Lighting
The final step is actually a collection of several small steps that aim to simulate the lighting and tone of the person’s cutout to those of the new background.
This part of the process is probably the biggest hassle, but it’s also the one with the heaviest impact on realism.
Starting with the lighting, make sure the layer containing the figure is selected then click on the icon with the half dark half light circle.
This will open a window from which you’ll choose Curves. The new window that appears will contain lines corresponding to different adjustments such as contrast and brightness.
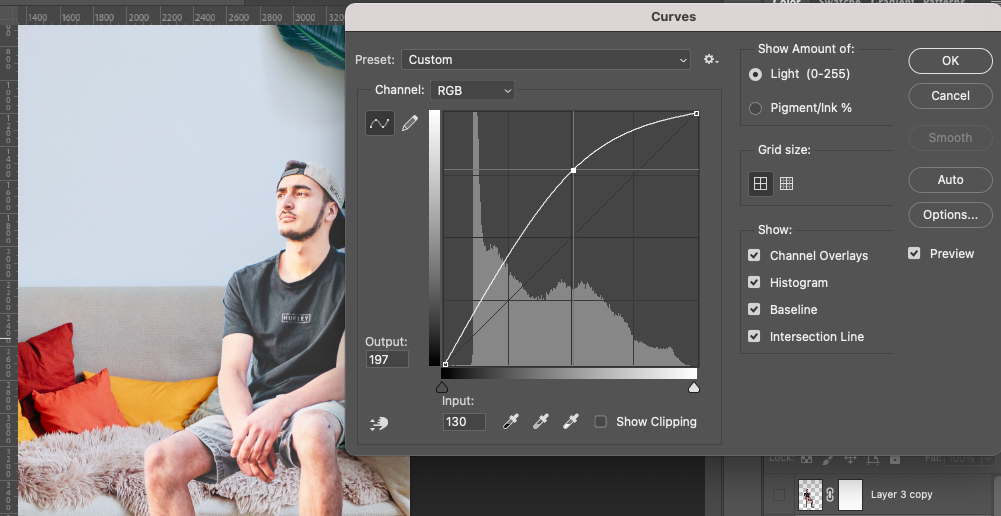
Alternatively, you can modify the contrast and brightness if the lighting is already similar from the Image menu at the top of the screen.
Play around a bit with these levels until you get a match that looks seamless against the target picture.
To alter the tone of the person, select Hue/Saturation from the bi-color circle menu. This will help you change the brightness, concentration, exposure, white balance, and various other tone effects.
Download the latest version of Adobe Photoshop to follow along with this simple tutorial.
Start a free 7-day trial today


Judyth is an experienced studio photographer and glass artist. When she isn’t Photoshopping comedians into the bellies of sharks, you can find her cooking delicious treats for her guests.

WELCOME TO SHOTKIT
Enter your email to be sent
today's Welcome Gift:
19 Photography Tools
🔥 Popular NOW:


Shotkit may earn a commission on affiliate links. Learn more.