


How to Wrap Text in Photoshop (Three Different Ways)
Master the art of wrapping text in Photoshop with our step-by-step guide. Shape your text creatively around designs, ensuring a professional look every time.
Photoshop | Software | By Judyth Satyn
This guide will teach you how to wrap text in Photoshop.
Wrapped text is fantastic for creating visual intrigue and is often used in advertising or promotional material.

Download a free copy of Adobe Photoshop to follow along with this simple tutorial.
Wrapping text around objects in your designs is a great way to bring some visual interest to your creations.
Dive in and learn all you need to know to wrap text in Photoshop.
Table of Contents
How to Wrap Text in Photoshop Using 3 Different Methods
Wrapping text is a fantastic creative solution when you have a lot of text to add to your design and want to be innovative.
You can wrap in a variety of different ways to create interesting design results using Adobe Photoshop.
Wrap text onto a shape or wrap an entire paragraph of text to fit along the form of a shape.
Or you can wrap text around an object using a single line of text to imitate the object’s shape.
Method 1 – How to Wrap Text Around a Shape
Follow this method to wrap text around the edges of a container to simulate a label.
Step 1. Open the Image
Open the image in Photoshop by navigating to the top menu bar and selecting Edit > Open then locate the image.
Navigate to the toolbar and select the Text tool.
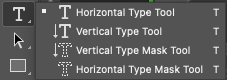
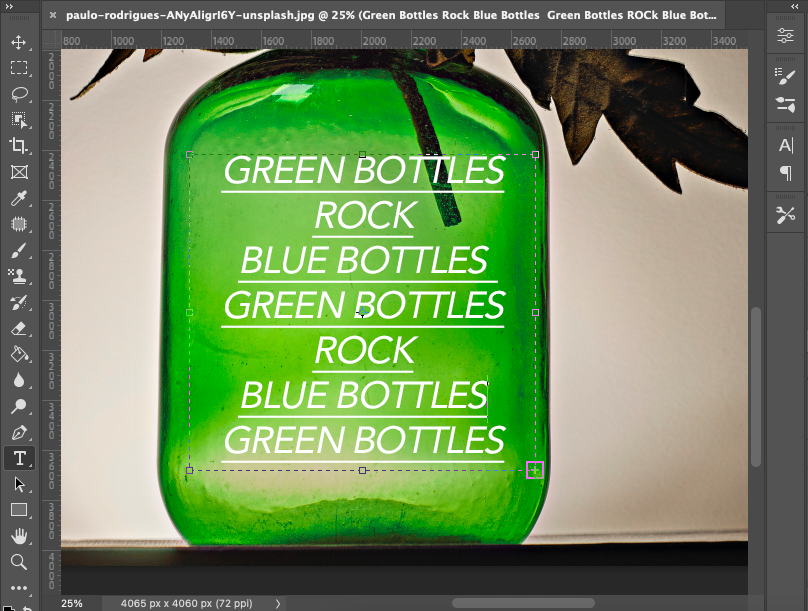
Select the Horizontal Type Tool and create a container text box to define the area you wish to add text.
Do this by clicking and dragging the Text tool across the workspace.
Once you release the cursor a Text box will appear.
As you can see the text in the text box is not wrapped. The text looks like it is resting on a flat glass sheet not wrapping around a round bottle.
Step 2: Customize the Text Properties
Head to the Text tool options bar and change the color, size, transparency, and font to suit your design.
Now write the text you wish to wrap in the text box.
Step 3: Create Wrapped Text
With the text positioned and ready to be wrapped head to the Text tools options bar and select the Wrap Text icon, the T with a curved line beneath.
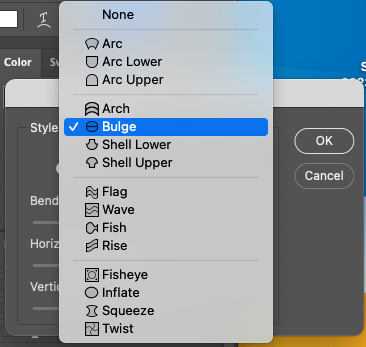
Once you click the Wrapped Text icon the Wrap Text dialog window will appear.
From the Style drop-down menu select Bulge.
Move the Bend slider to the right to create a bottle label wrap effect.
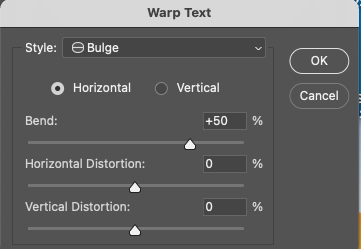
In the workspace you will see the text shape change and wrap as you move the slider.
Slide the Horizontal Distortion and Vertical Distortion if the shape you want to wrap your text around is on an angle.
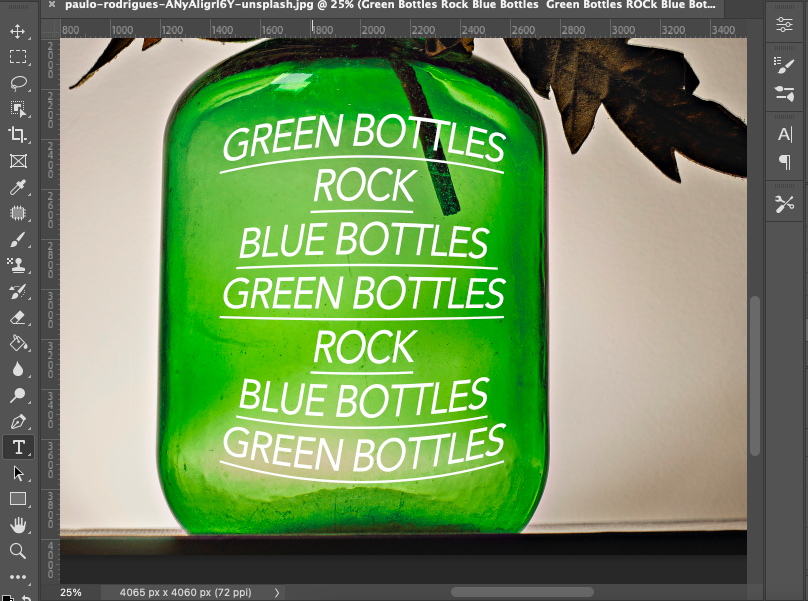
Now you have text wrapped around the bottle’s shape.
The Wrap Text tool is a great quick option for wrapping text as it is quick and easy to use.
But it is only a good option when wrapping text around simple shapes.
The best method for wrapping text around more complex shapes is the Transform Wrap tool.
So let’s take a look at the Transform Wrap tool.
Option 2 – How to Wrap Text to Alter Perspective
Step 1: Open the Image and Text tool
Follow the steps one and two in the steps above.
Open the image of the shape you wish to wrap text around.
Activate the Text tool and write in the text box.
Step 2: Change the Text Layer
The Wrap tool will not work on the text layer.
When working with a text layer the Transform Wrap tool will not open. The Text Wrap tool will open instead.
Although the Text Wrap tool is useful it can be restrictive and won’t allow for the same freedom of edits as the Transform Wrap tool.
To do this we will have to trick Photoshop. To do this we will change the Text layer to an ordinary layer.
Be aware when you change the Text layer to a normal layer you will not be able to edit the layer as a Text layer again. Make sure all the text is correct and finalized for your design purposes.
Create a new layer by clicking on the Add Layer icon at the bottom of the Layers Panel.
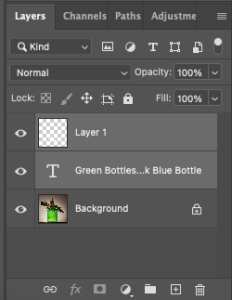
With the new layer active in the Layers Panel hold the Shift key and click the text layer to select it.
Now both layers are active in the Layer Panel click Ctrl plus E (for Windows) or Command plus E (for Macs) to merge the layers.
Step 3: Open the Wrap Tool to Wrap the text
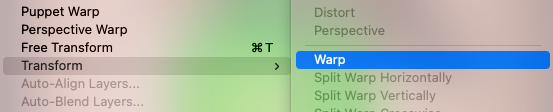
To open the Wrap tool head to the top menu bar and select Edit > Transform > Wrap.
When you hit Wrap a mesh bounding box will appear around the text.
Move the bounding box and drag the control points to manipulate and reposition the text.
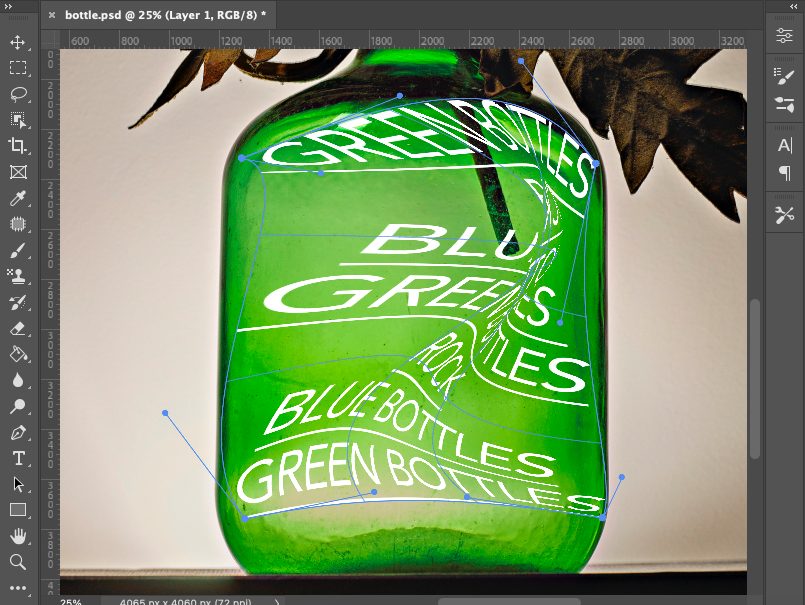
You will have infinitely more control using the Transform Wrap tool and can position the text as you wish.
You can wrap the text around the bottle to give the impression that the bottle is indented.
Option 3 – How to Wrap Text to Follow a Shape
You can wrap the text in Photoshop to simulate a shape or a silhouette.
Instead of a single line following the shape’s outline, the entire text paragraph will fit the same form as the shape.
This is another excellent technique to have up your sleeve if you design posters for marketing purposes.
Step 1. Create a Path
We will create a path to define the outline of the paragraph.
There are a few ways to create a path in Photoshop. I will use the Pen tool you can use your preferred method.
Navigate to the toolbar on the left of your workspace and select the Pen tool.

Using the Pen tool click on your workspace to create anchor points around your shape to outline the work path.
Go as close to the outline as you like and make clear unjagged lines.
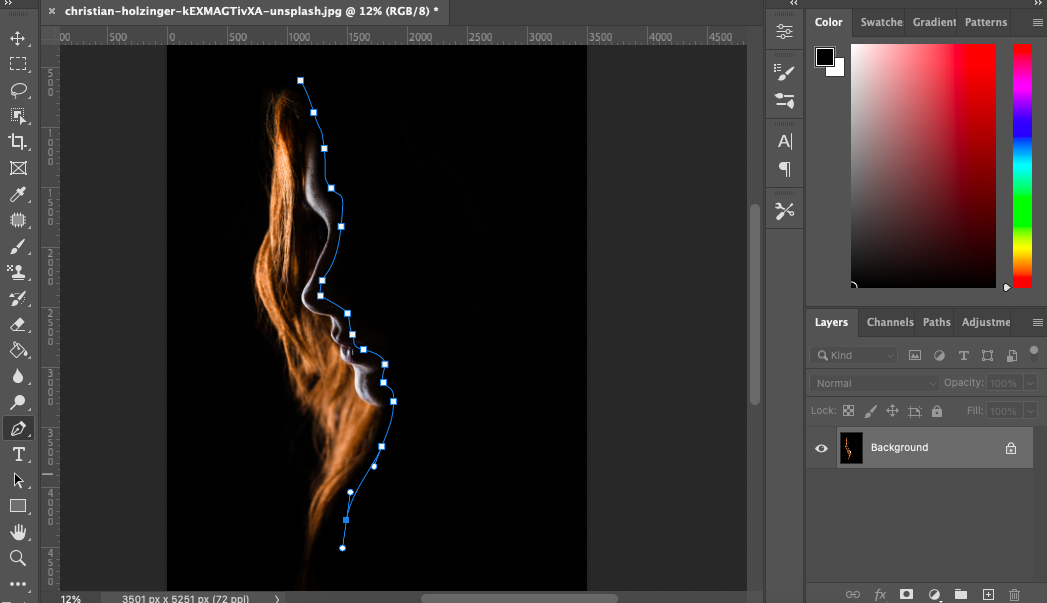
Click, drag, and release the cursor as you draw to curve the path line while you draw.
Alternatively, you can use the Alt key in conjunction with the cursor to add curvature between the anchor points.
For this guide, one side of the text box will be wrapped around the silhouette and the remaining text box will be a uniform rectangle.
Close the path by clicking the final Pen tool anchor point on top of the first anchor point.
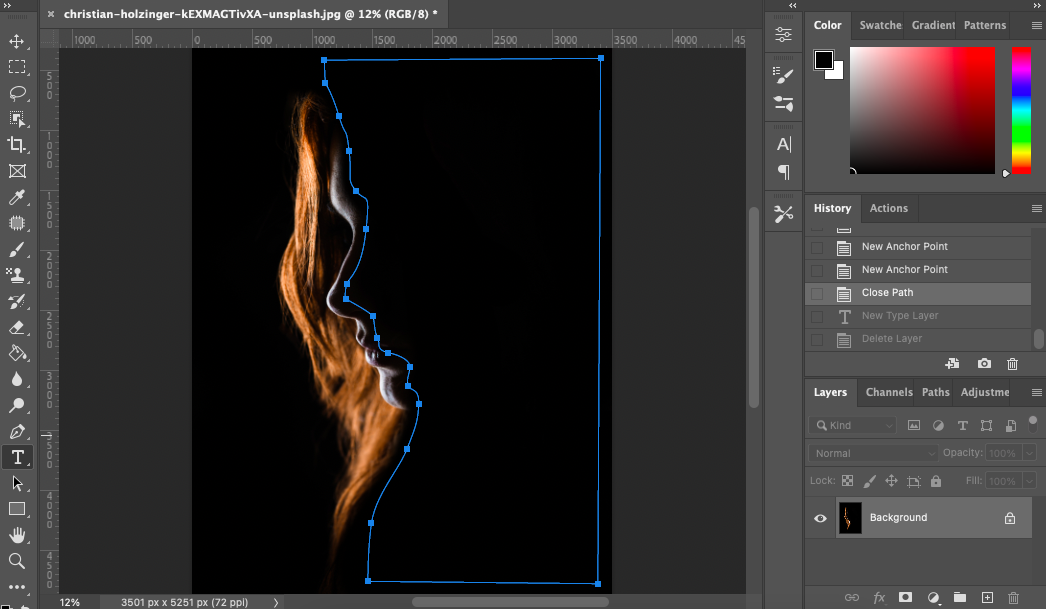
Step 2: Select the Text Tool
Now the path is finished you can select the Text tool from the toolbar.
When the Text tool is active head to the Text tool options bar and set the properties of the text tool.
Change the color, size, transparency, and style of the text to suit your design.
Hover the Text tool over the path in your workspace. When you do this the Text icon will change from a T with a wave to a T with a circle.
When the Text icon is a T with a circle click inside the path and begin to type.
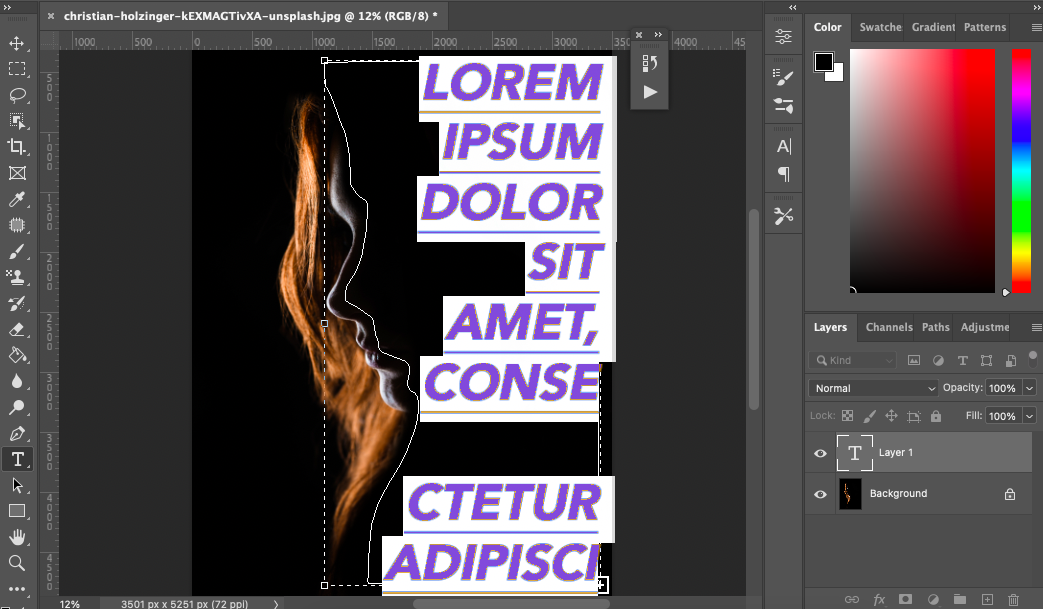
Step 3: Write in the Path
If the font is too large it will fill the entire shape and will not generate a detailed wrapped text shape.
The image below is an example of text that is too large to wrap around the shape.
When you adjust the font size the text will wrap closer to the edge of the path, as in the image below.
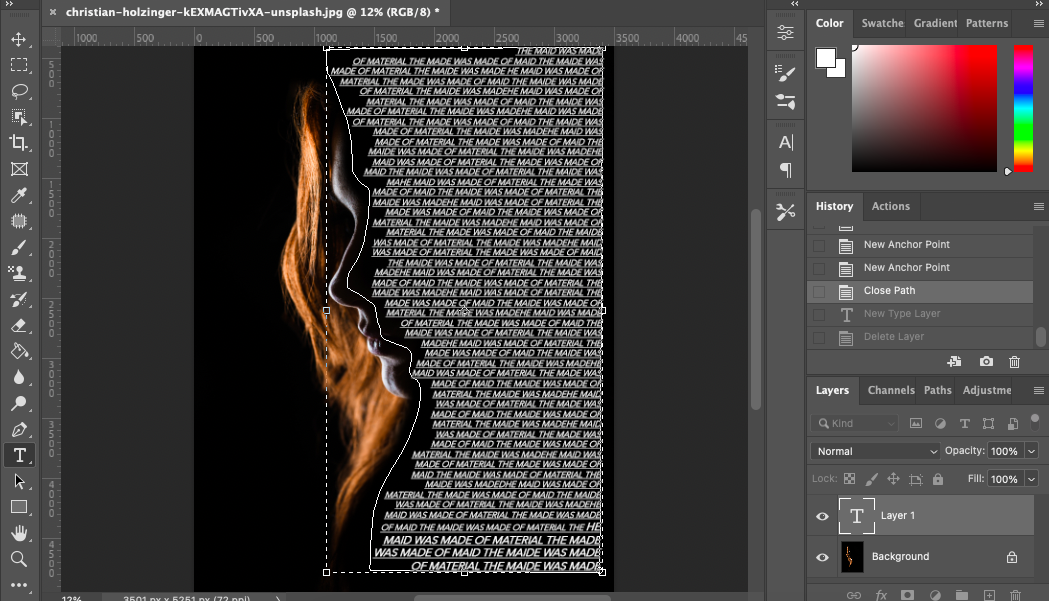
The text follows the line more precisely when reduced in size but it still has not joined the path line.
To make the text follow the curve of the path line more precisely we will change the text alignment in the Text tools option bar.
![]()
When you change the text alignment option the body of text will adjust its contour to follow the line of the silhouette, as in the image below.
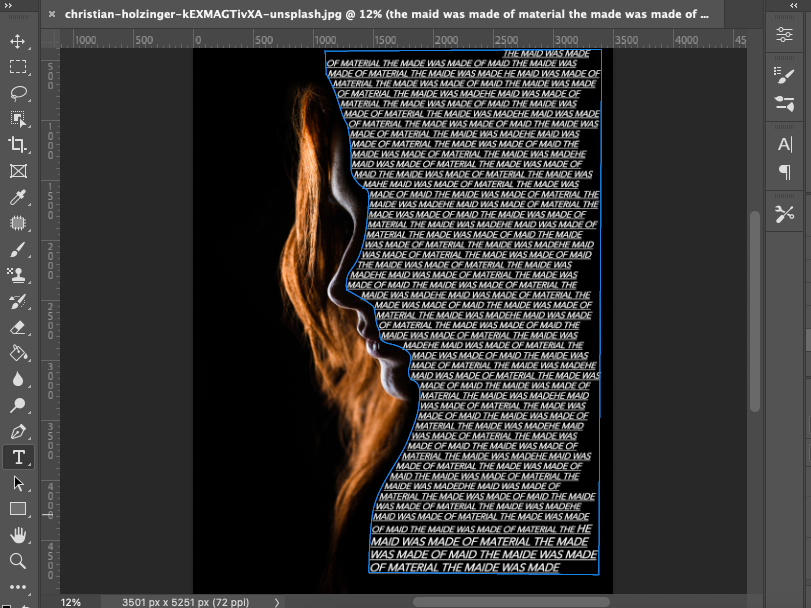
Now you have achieved a beautiful wrap text effect following the line of the lady’s face.
This is a fantastic technique to use when creating posters opening new avenues for creative expression.
Option 4 – How to Wrap Text Around the Edge of a Shape
Another great wrapping text edit trick is to wrap text around the edge of a shape.
This means when you remove the shape the single line of wrapped text will replicate the shape’s outline.
You can have a line of text wrapping to form the shape of a house, a car, or a tree – the choice is yours.
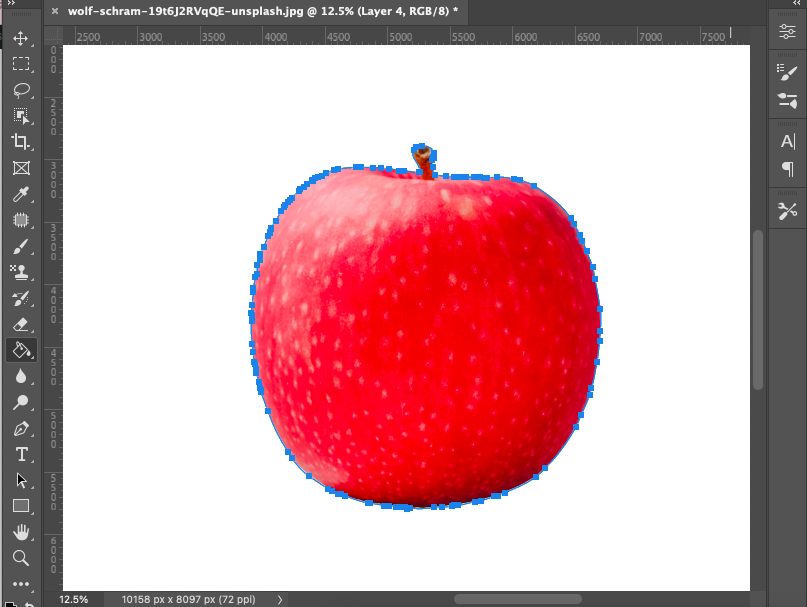
Step 1: Create an Active Selection Around the Shape.
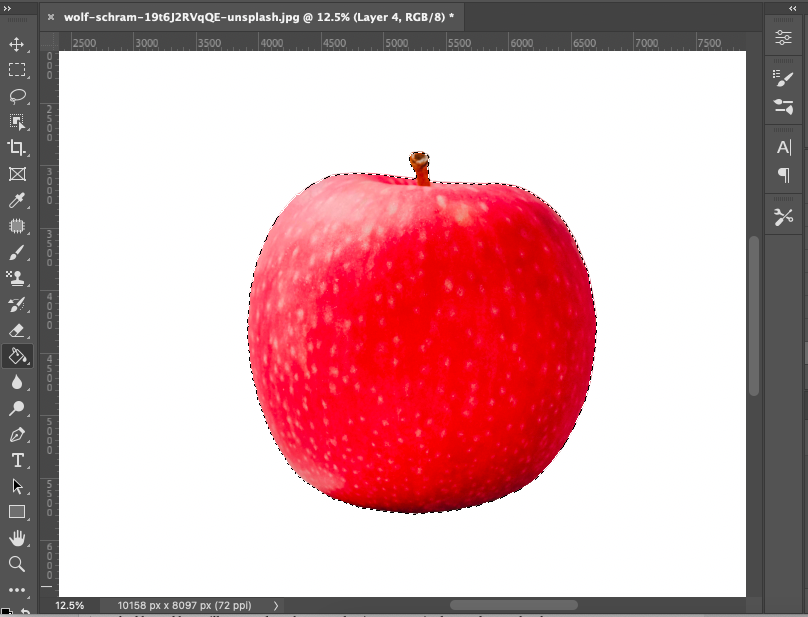
Open the shape in Photoshop and create an active selection around the shape.
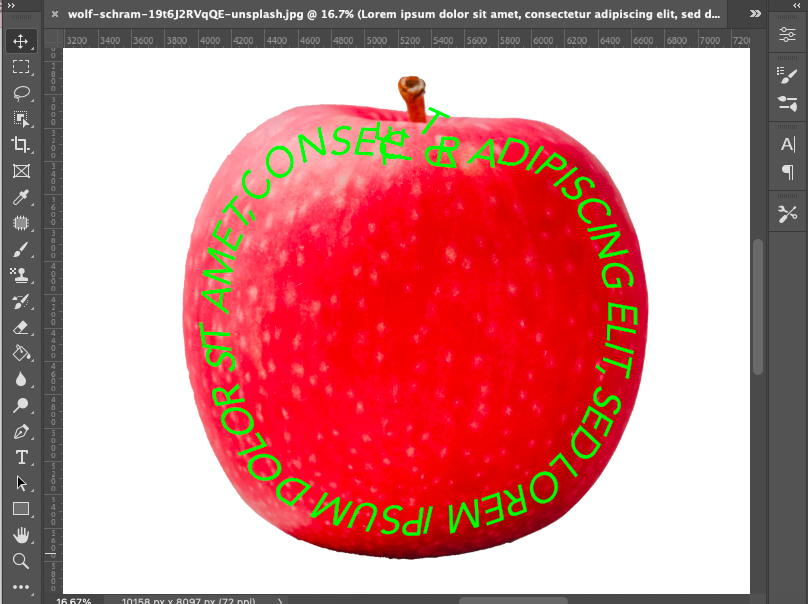
For the purpose of this guide we have chosen an apple to wrap text around.
I will use the Subject Selection tool but you can use your preferred selection tool.
Head to the top menu bar and select Select > Subject.
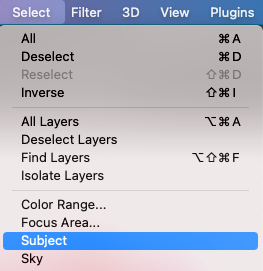
Once clicked Adobe Photoshop will automatically create an active selection around your shape.
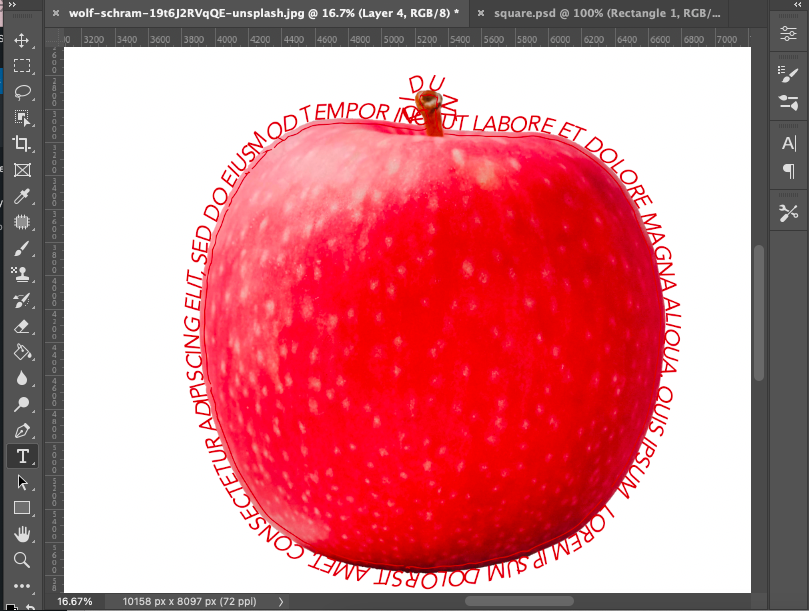
Step 2: Create a Work Path Using the Active Selection
Now head to the Paths Panel to create a work path from the selection.
At the bottom of the Path panel click the work path selection icon, the circle with four dots.
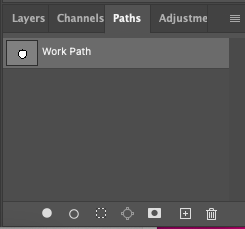
Once clicked a work path will appear in your workspace you can adjust the points of the workspace if needed by activating the Pen tool.
Step 3: Select the Text Tool
Now that you have an active Work Path you can use the Text tool to write.
Select the Text tool from the toolbar and adjust its properties in the tool’s options bar to suit your design.
When you have set the Text tool’s properties hover your cursor over the Work Path.
When the Text tool pointer is positioned over the Work Path a curved line will appear and you can start to type.
And voila, the text will wrap itself along the work path and the outline of the apple shape.
A neat wrap text editing trick is to have your text pre-prepared this way you don’t have to type in Photoshop.
It can be tricky to type and check for mistakes when typing around obscure shapes. So instead, copy and paste the text into your workspace.
Remove or hide the shape’s layer and the wrapped text will create a line of text that will resemble the shape, neat!
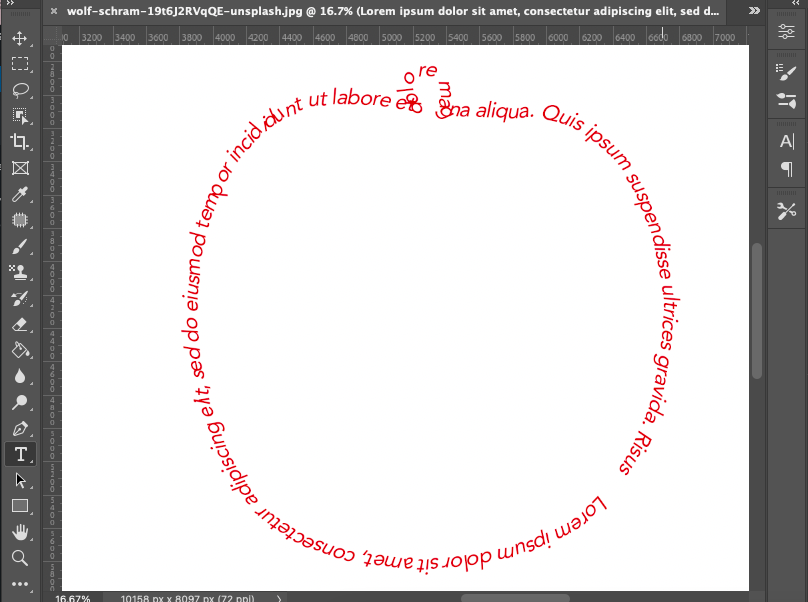
Experiment with the text and font to create different effects, increase the size, and change the color.
The image below is an example of the same wrapped text with altered properties.
When designing posters instead of creating a frame around an object you can generate visual intrigue by wrapping text around the object.
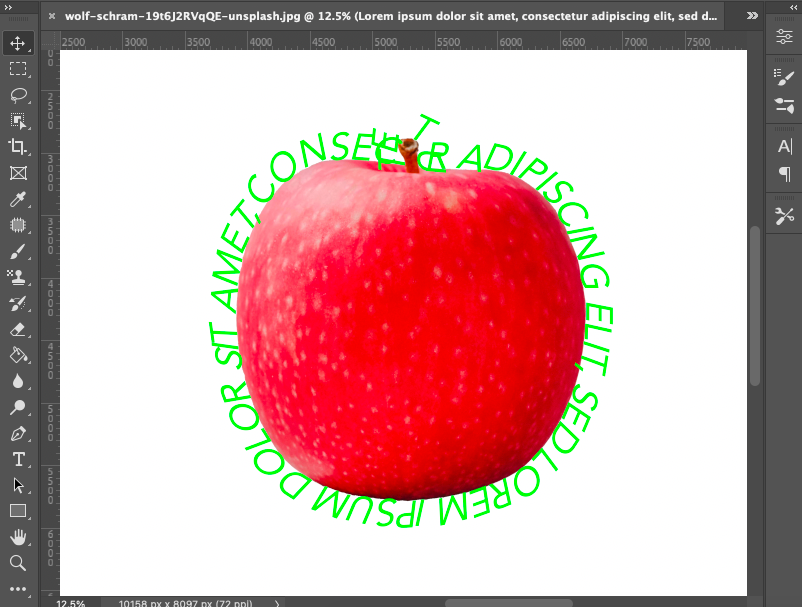
Step 4: Wrap Text on the Inside of a Work Path
There is also a way to position the wrapped text inside the outline of the work path.
With the Text tool layer active select the text by hitting Ctrl plus A (for Windows) or Comand plus A (for Macs).
Continue to hold down the Ctrl or Command key to click and drag the text inside the shape.
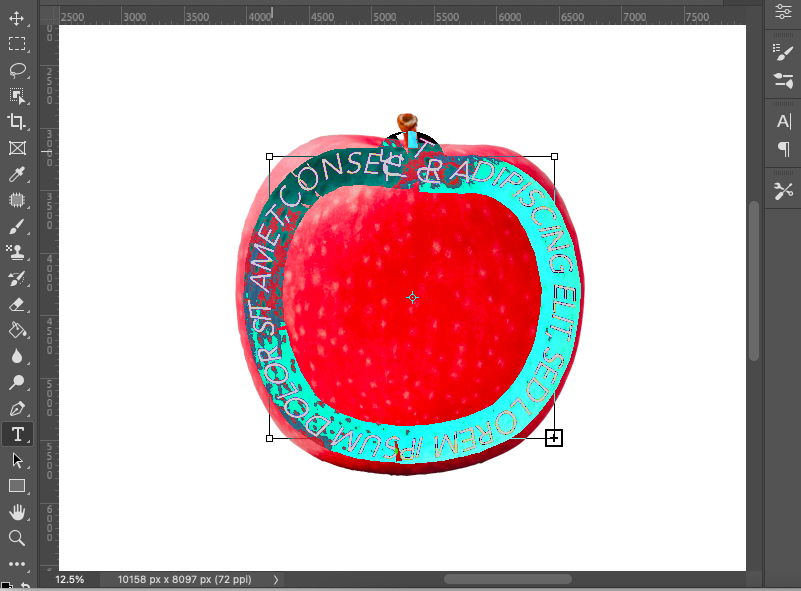
Release the key and the wrapped text will be positioned perfectly inside the shape of the apple.
This is a fantastic text-wrapping method you can use when you want to wrap text around complex shapes.
You can use wrapped text creatively for design purposes to make it easier for viewers to digest information.
When a design is text ladden wrapped text will break up the monotony of repetitive text shapes.
Some simple editing tasks in Photoshop can be laborious and time-consuming.
But wrapping text in Adobe Photoshop is a snitch. It is as if Photoshop likes to encourage creativity.
FAQs on Wrapping Text in Photoshop
How to do wrap in Photoshop?
Using the Free Transform tool you can wrap isolated objects, text, paths, and layers in Photoshop.
Select the layer you wish to wrap and head to Edit > Transform > Wrap.
When the meshed bound box appears drag the control points to manipulate and wrap the shape.
Can you wrap the text in Photoshop?
Yes, you can wrap text in Photoshop follow the steps in the guide above for three different options to wrap text in Photoshop.
What is the Text Wrap tool in Photoshop?
The Text Wrap tool is the tool that will wrap text in Photoshop.
To locate the Text Wrap tool head to the Text tool options bar in the right-hand corner click the Text Wrap tool icon, a T with a curved line beneath.
Once clicked the Text Wrap tool dialog box will open.
What is the wrap tool in Photoshop?
In Adobe Photoshop the Wrap tool is a Transform action used to wrap and manipulate shapes.
To locate the Wrap tool head to the drop-down menu under Edit > Transform > Wrap.


Judyth is an experienced studio photographer and glass artist. When she isn’t Photoshopping comedians into the bellies of sharks, you can find her cooking delicious treats for her guests.

WELCOME TO SHOTKIT
Enter your email to be sent
today's Welcome Gift:
19 Photography Tools
🔥 Popular NOW:


Shotkit may earn a commission on affiliate links. Learn more.