


How to Add an Adjustment Layer in Premiere Pro
Master the steps to add an adjustment layer in Premiere Pro. Enhance video edits, apply effects uniformly, and streamline your post-production process.
Premiere Pro | Software | By Ashley Darrow
Do you want to learn how to add an adjustment layer in Premiere Pro? If so, this quick guide will get you started!
Adjustment layers allow you to create non-destructive edits that affect every clip beneath your adjustment layer.
This is a great video editing hack for color correction or other project-wide edits!
Download the latest version of Adobe Premiere Pro to follow along with this simple tutorial.
Start a free 7-day trial today
I rely on the adjustment layer for everything from testing out new editing tricks to making the final touches on a project.
I’ll kick things off by showing you how to make a single adjustment layer and then throw in some adjustment layer effects!
Table of Contents
How to Add an Adjustment Layer in Premiere Pro
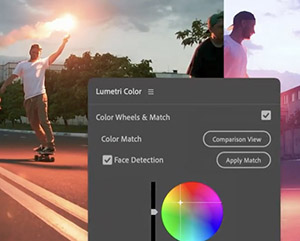
Adjustment layers are great for Lumetri color correction, but they are also an easy way to make non-destructive edits and add special effects much faster than editing individual clips!
Before I get ahead of myself with the exciting world of SFX, I should cover the basics and help you make your first adjustment layer!
Select the Project Panel
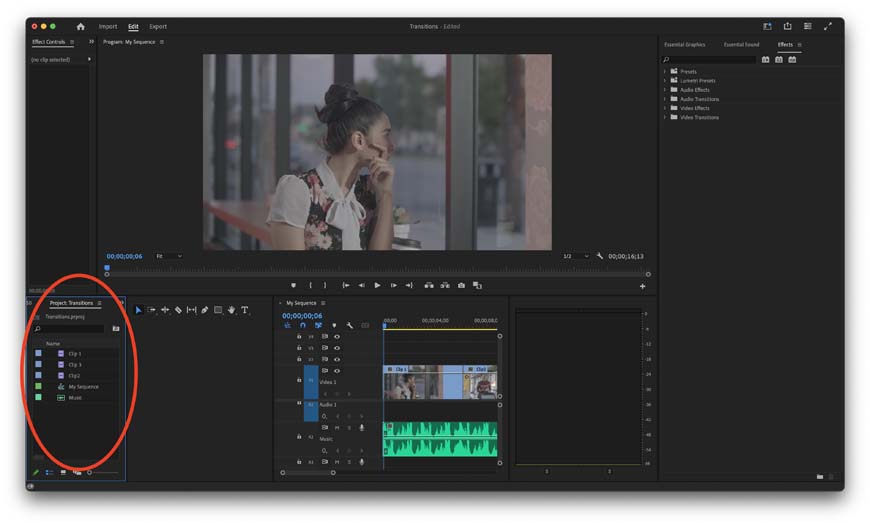
Premiere can get picky, so always make sure you have the right panel selected while editing!
Here’s a step everyone misses at first. You can only make new adjustment layers when you’ve got the Project Panel actively selected.
Just click anywhere in the Project Panel box and you’re good to go!
Create Your Adjustment Layer
This is my go-to way to create an adjustment layer.
Now, you’ve got two ways to make an adjustment layer in Premiere Pro.
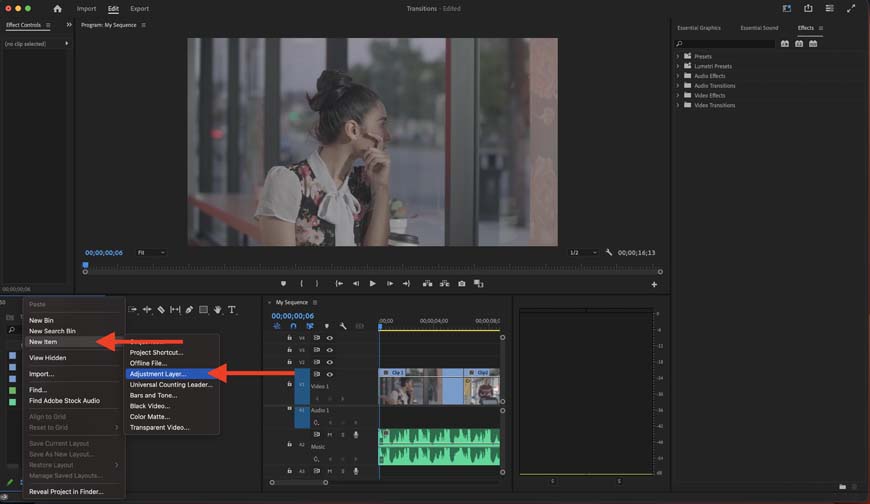
Since we’re in the Project Panel, why not just right-click and make a new adjustment layer here?
Simply right-click inside the project panel > select New Item > then pick the adjustment layer option.
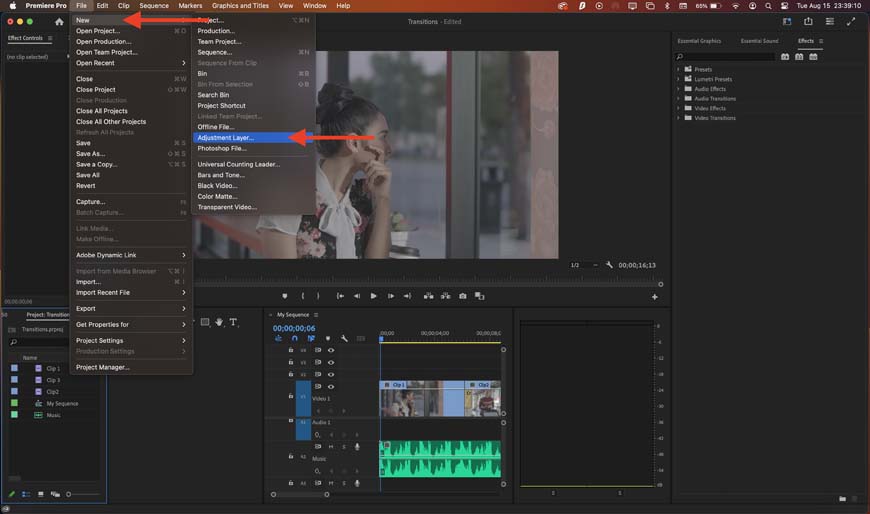
You can also create an adjustment layer from the file menu.
You can also create a new adjustment layer using the menu bar. Just click on File > New > and select adjustment layer.
Remember, no matter which way you make adjustment layers, you need to have the Project Panel selected for it to work.
Select Your Adjustment Layer Options
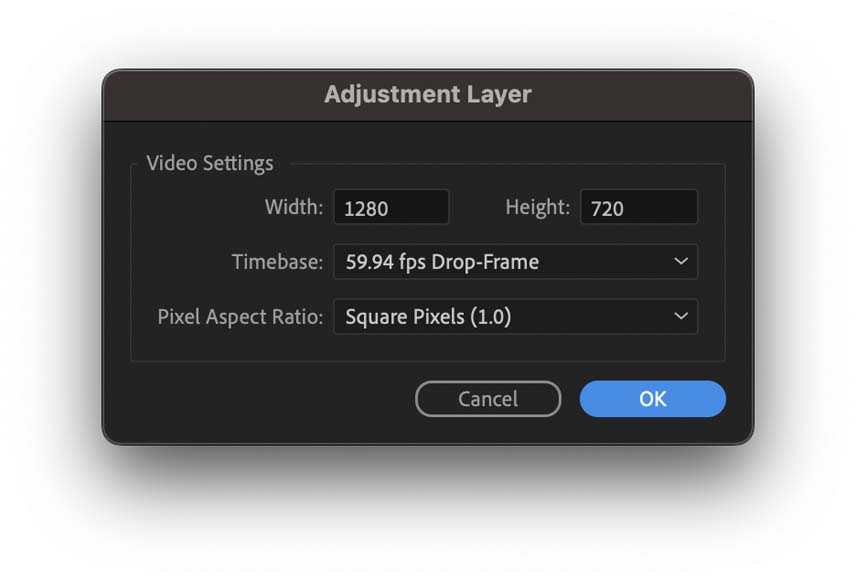
These settings should match the settings of all the clips the layer will be editing.
Your adjustment layer has a few options. These generally cover the size and settings for the layer.
In general, keep your adjustment layer the same as the rest of your project.
Once you’ve picked the options that are right for your project, your new adjustment will appear in your Project Panel alongside your other clips.
Reposition Your Adjustment Layers
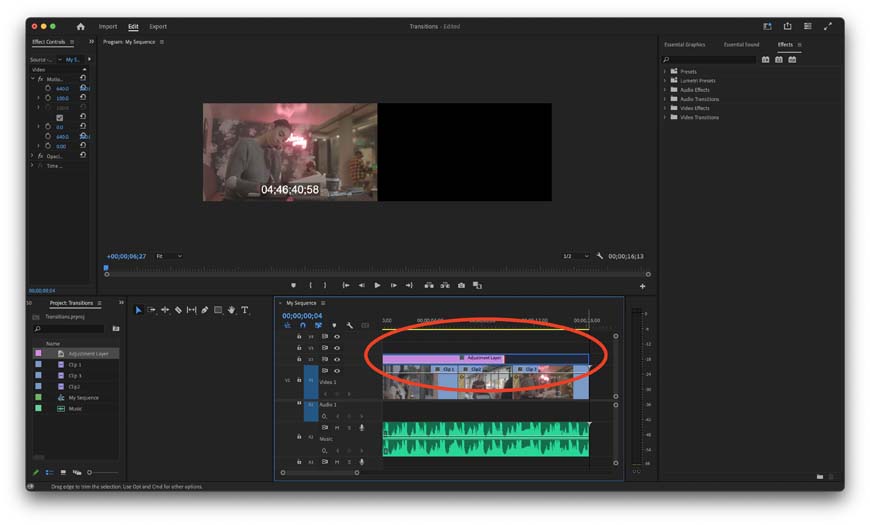
Match your adjustment layer to the entire sequence or just a few video clips.
Your newly created adjustment layer needs to be positioned properly on your editing timeline.
By default, your new adjustment layers will likely be shorter than the length of the rest of your clips. You need to drag and lengthen your adjustment layers to make sure they cover all of the clips you need to edit.
An adjustment layer affects every clip beneath it on your editing timeline. This means that any clips under gaps in your adjustment layers will not have effects applied to them—even if other parts of the clip are under the adjustment layer.
Why can’t I add an adjustment layer in Premiere Pro?
One of the most difficult things about adding a new adjustment layer is that this option is often grayed out and inaccessible in all of the Premiere Pro menus.
The new adjustment layer option is most likely grayed out because you do not have the Project Panel actively selected.
Hey, it’s easy to accidentally click out of the Project Panel when you have to navigate to different parts of the app to create a new adjustment layer. However, I’ve got one trick for you that will make sure you always have the right option selected.

You might have to extend this panel into your project timeline to see this button.
If you expand the project panel, you’ll see some additional buttons start to appear at the bottom of your screen. One of these buttons looks like a piece of paper with a corner folded— this is the new item button.
Clicking on this button will always have the adjustment layer option available. This is because the new item button exists inside of the Project Panel which is perfect for adding new adjustment layers.
Effect Controls Panel Tricks with an Adjustment Layer

At this point in the editing process, you can add color adjustments, video effects, or just adjust effects you’ve already added.
The adjustment layer allows you to add options from the effect controls panel and have them apply through every single clip beneath the adjustment layer.
Here are a few ways you can get started making essential edits with the adjustment layer way faster than you could work clip by clip.
You can take something like color correction from the effects panel and drag it onto your adjustment layer the same way you would with any other clip. Never forget that the adjustment layer is just a clip with some bonus properties—you can pretty much treat this layer like any other clip layer on your timeline.
Another great adjustment layer hack is to use an adjustment layer to apply an effect that needs to cover your entire project. A great example of this is adding some film grain into a digital project.
It’s often best to add effects like that using an adjustment layer rather than attempting to add them individually to each unique clip. There’s nothing more aggravating than finishing a lengthy editing project only to find out you forgot to apply effects to certain clips.
Using an adjustment layer really gets around a lot of the human error that can hold back the efficiency and accuracy of your video editing workflow.
This is just the tip of the iceberg when it comes to what you can do when using adjustment layers.
I recommend getting comfortable using adjustment layers in your editing work even if you’re working with a project that only has a single clip. It’s a non-destructive way of editing and using it on even the most basic projects is a great way to build up your core video editing skills.
Wrapping Up Making the Most of Adjustment Layers in Adobe Premiere Pro
You’re not ready to start making adjustment layers and gaining a higher level of control over your final edits.
Got any questions about how to use adjustment layers or maybe there’s another Premiere question that’s been lingering in the corners of your mind?
Let me know your best Premiere Pro tips down in the comments and ask your most pressing video editing questions—I’ll be sure to cover your topic in my next article!
 Final Cut Pro vs Adobe Premiere in 2023: Which Video Editor?
 Best Video Editing Software Tools for Movie Making
 10 Best Video Editing Software Programs for Youtube
 How to Buy Adobe Premiere Pro in 2023 (Options for all Budgets)
 10 Best Adobe Premiere Pro Alternatives in 2023 (FREE & Online)

Ashley is a photographer, writer, and film critic. When Ashley’s not writing essays on photography, cinema, and theory, he’s out taking pictures with retro film cameras.

WELCOME TO SHOTKIT
Enter your email to be sent
today's Welcome Gift:
19 Photography Tools
🔥 Popular NOW:


Shotkit may earn a commission on affiliate links. Learn more.