


Lightroom vs Affinity Photo (9 Key Differences)
Are you still stuck choosing between Lightroom vs. Affinity Photo? Read on to learn more about the key differences between the two photo editing apps.
Lightroom | Software | By Jeff Collier
Within the extensive market of photo editing tools, you’re now trying to choose between Lightroom vs. Affinity Photo.
Luckily, our comprehensive guide will help you choose the best option for you.
Whether you’re a professional photographer or a photo novice editor, both tools offer multiple features that can cater to your needs.
Upon using the tools, I’ve noticed that Lightroom and Affinity Photo primarily differ in aspects like organization, usage, and pricing plans.
By better grasping each software’s pros, cons, and features, you’ll be more equipped for your photo editing tasks.
Stick around to learn more about the differences between Lightroom and Affinity Photo.
Table of Contents
Lightroom vs Affinity Photo: Key Differences in Image Editing Software
Lightroom and Affinity Photo are exceptional photo editing tools.
Nonetheless, you can differentiate them using factors like editing capabilities, organization, and system performance to find the right one for your needs.
Editing Options
When it comes to editing capabilities, Affinity Photo takes the lead. It offers similar editing features as Adobe Lightroom with the addition of other features.
Layer Editing
Affinity Photo has a layer-based editing option, where you combine multiple images and make a composite.
For instance, I used the tool to combine an image of a newborn and a cloud background to create a more impactful final result.
Lightroom doesn’t allow you to edit effects and adjustments added in layers to an image.
Text Editing
Affinity Photo provides a text editing option. The tool allows you to edit the frame, art, and table text.
You can also create paragraph indents, adjust text properties, add tab stops, and apply different text styles.
Meanwhile, Lightroom doesn’t include text editing tools.
Vector Import
Let’s assume that you’re creating a graphic design or illustration. You’re likely going to need vector images to complete your vision.
In this case, you wouldn’t be able to use Lightroom for this task. Luckily, its competitor, Affinity Photo can support vector files.
Non-Destructive Editing
A non-destructive editing feature allows you to retrace your editing steps so you have the original and newly edited images saved.
You can go back to the unmodified version of your image at any time, which can be a lifesaver for many photographers.
Fortunately, Lightroom and Affinity Photo offer this non-destructive editing feature. Lightroom offers more advanced features for this service compared to Affinity Photo.
Adjustment Tools
In photo editing, adjustment tools can make or break your choice. In this instance, I believe that Affinity Photo is a better option.
The tool allows you to perform almost all the same image retouching and adjustments in Lightroom and more.
Affinity Photo offers masking, layering, split-toning, soft proof, OCIO, and gradient map adjustment features.
Overall, you have more control over your image editing work and flexibility.
If we’re also looking at curves, which help adjust the highlights, shadows, and midtones of an image, Affinity Photo still wins.
It has more precision, especially with tonal range. Meanwhile, Lightroom’s curves tool is easier to use.
With HSL controls that modify Hue, Saturation, and Lightness, Affinity Photo is also more intricate than Lightroom.
Creative Features.
In regards to creative features, Affinity Photo holds more. It’s hard to beat the software with its HDR merging, content-aware fill, and 3D editing capabilities.
Now, that’s not to say that Lightroom doesn’t have its fair share of creative features. The software provides presets, radial filters, and batch editing options.
Overall, Affinity Photo remains a better-suited option if you want to apply more precise and creative edits. On the other hand, Lightroom prioritizes convenience.
AI-Powered Tools
Both Lightroom and Affinity Photo offer AI-powered photo tools. Here’s a brief of each software’s AI features below.
Adobe Lightroom
- Content-Aware Remove: The feature allows you to remove objects from your image.
- Denoise: It removes the noise or graininess in a photo’s luminance or tone.
- Curves: You can adjust the curves on the selected mask.
- Adaptive Presets: The feature highlights specific parts of a photo for a preset application.
- Background Select: It allows AI to change the background, sky, or subject of the image.
Affinity Photo
- Healing Brush: You can retouch images with the healing brush. It’s similar to a texture clone.
- Blemish Removal Tool: It blends the targeted pimple or unsightly area with a sample part to adjust discoloration.
- Red Eye Removal Tool: The feature finds and removes red coloration from a subject’s eye.
File Formats
In terms of file format support, Lightroom and Affinity Photo offer various options. With Lightroom, you can use:
- Digital Negative format (DNG)
- HEIF/HEIC – What’s the difference between HEIC and HEIC files?
- TIFF
- JPEG
- PSD
- Large Document Format (PSB)
- CMYK
- PNG
- Video Files
Meanwhile, Affinity Photo supports the following file formats:
- JPEG
- RAW
- DNG
- PSD
- EPS
- HEIF
- TIFF
- TGA
- Adobe Illustrator (AI)
- SVG
- WEBP
Application Availability
Affinity Photo is available on iPad, but access needs a one-time payment. Plus, it’s only available on the Apple Store.
This is where Lightroom performs better. You can download Lightroom Mobile for free from the Apple and Android stores.
The app provides access to most of the software’s basic photo editing features, perfect for quick retouching of your selfies and other mobile-taken photos.
Hard Drive Storage
Although Lightroom offers an image cataloging feature, that doesn’t mean it stores them within the software. Instead, it gives you a reference point from where they’re stored in the hard drive.
With Affinity Photo, you can save and open files from external hard drives. However, I wouldn’t recommend working on files stored on external drives.
Otherwise, you might deal with broken or lost files.
Performance
Performance primarily revolves around how resource-intensive the program is on your device’s system. In this case, Adobe Lightroom bears a higher burden.
As part of the Adobe Creative Cloud group, installing Lightroom means dealing with 17 other Adobe processes in the background, and that’s when it’s not even open.
When you run the web app, it takes a large portion of your system’s energy. In terms of RAM, Lightroom cashes in approximately 4 GB.
Meanwhile, Affinity Photo is a native app and takes up a lesser and more reasonable 2 GB.
When it comes to storage space, Lightroom can take up over 2 GB of your hard drive space, while Affinity Photo covers only 670 MB.
That being said, system performance typically comes down to your PC’s condition.
If you have an older model, you’re more likely going to struggle with Lightroom Classic, even with 4 GB of space available.
Ease of Usage
Credit: Affinity Photo
As for user-friendliness, both Affinity Photo and Lightroom will take time to fully master before you can fully take advantage of their photo-editing capabilities.
The photo editing tools offer a wide selection of photo editing tools that won’t be easy for beginners to grasp initially.
That said, Lightroom and Affinity Photo are ideal for professional photographers. After using them for a couple of weeks, I was able to easily go through the interface with no issues.
With Adobe Lightroom, you get a more intuitive interface by using the non-Classic version since it has an easier page to navigate through.
I highly recommend using this version if you’re new to photo editing.
The Classic option offers more extended editing tools, making it more difficult to use for novice photo editors.
Meanwhile, Affinity Photo carries the same interface throughout all devices.
Overall, the best method to learn how to use each photo editing software is through basic online tutorials. I suggest taking your time to go through each panel’s functions one by one.
Image Cataloging
While Affinity Photo offers more advantages in system performance and editing capabilities, I’ve noticed that Adobe Lightroom excels in its organizational capabilities.
The Adobe software allows you to create image catalogs, perfect for handling a large image collection. Subsequently, it’s no surprise that lots of professional photographers favor it.
Meanwhile, Affinity Photo has yet to offer this feature. What’s more, is that Lightroom provides ease of access to your image collections thanks to its search option.
On top of that, you can also rate your images and view them side-by-side for comparisons.
The image catalog addition makes the photo editing process more seamless since you don’t have to open another program to access your images.
With Affinity Photo, you’ll have to figure out a different organization workflow or use a tool with digital asset management functionality, such as ACDSee Photo Studio.
Pricing
There’s a prime difference between the software choices. Affinity Photo’s pricing plan works with a one-off payment, while Lightroom has a standard subscription plan.
That said, Affinity Photo charges $18.49 for its iPadOS version. As for macOS and Windows, it’ll set you back $69.99.
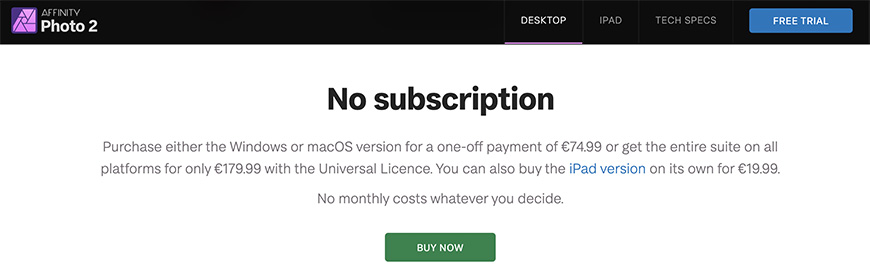
Aside from that, you can opt for the Affinity V2 Universal License worth $164.99.
It grants you access from all devices for all applications, including Affinity Publisher, Affinity, Designer, and Affinity Photo.
For that amount of service, I believe that’s exceptional value for your money.
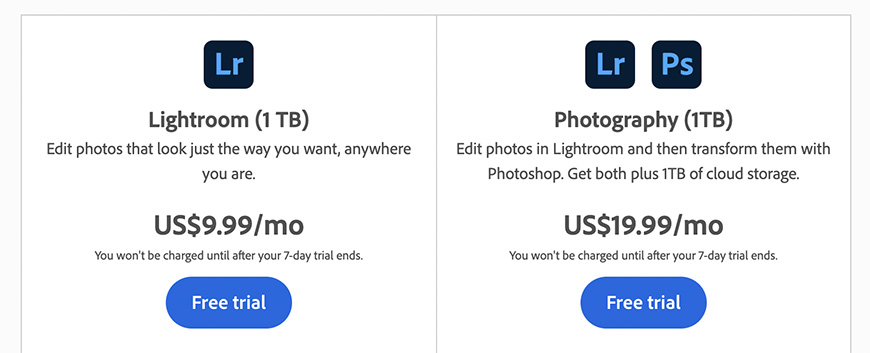
Adobe Lightroom offers two subscription plans. One option is priced at $9.99 per month. It offers mobile and web access and Adobe Portfolio.
The other option known as the Adobe Photography Plan includes Lightroom Classic, valued at $19.99 monthly. It provides you access to all of the software’s services and Adobe Photoshop as well.
In turn, the Lightroom Classic option is more well-suited if you’re a professional photographer.
You’ll be able to finish editing your images in Lightroom and add any necessary retouches in Photoshop.
Learn the differences between Lightroom and Lightroom Classic.
Lightroom vs Affinity Photo: Which Should You Pick?
Adobe Lightroom is a better option for professional photographers looking for more organization and convenience. Plus, with the Classic subscription, you’ll be getting Photoshop access.
Meanwhile, if you want your editing tools all in one platform, then Affinity Photo is a better option.
It also offers more editing capability and doesn’t exert as much resource pressure on your PC as the Adobe Creative Cloud product.
Pros and Cons of Adobe Lightroom
Before deciding on Adobe Lightroom, here are some pros and cons worth evaluating.
Why Choose Adobe Lightroom

Check out the benefits of using Lightroom’s two versions.
User-Friendly Interface
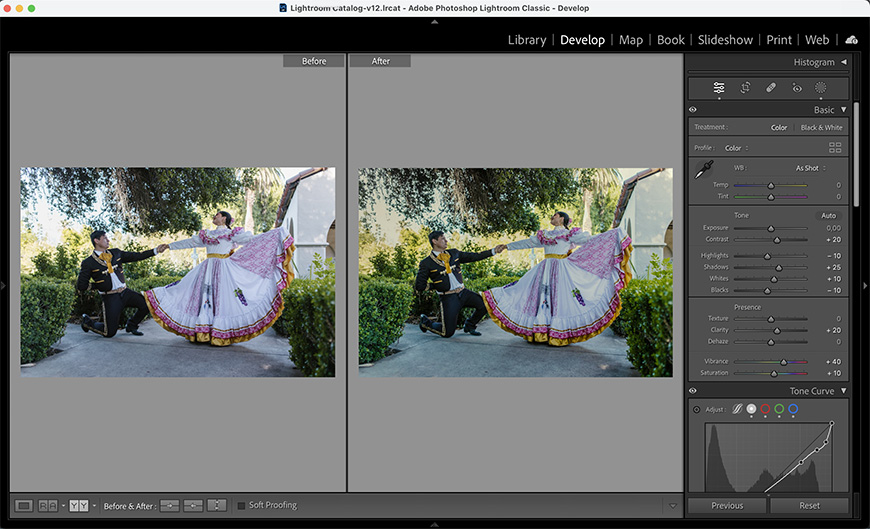
Lightroom’s interface is divided into convenient modules. Unlike Photoshop, you won’t be hit with an overwhelming number of features scattered across the screen.
The Lightroom Classic software has seven different modules, including the histogram, basic, tone curve, split toning, HSL, effects, and lens correction.
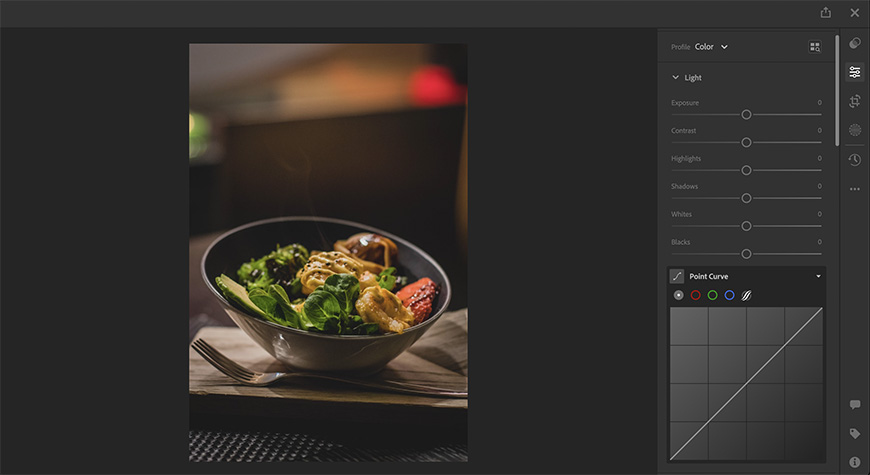
Lightroom’s other version doesn’t have a Develop module. Instead, it offers a more beginner-friendly interface with icons on the left and right sides of the screen.
It creates a progressive disclosure. In turn, as you click through the icons, you’ll notice more advanced tool options.
In Auto Mode, you won’t be able to view all the panels at once, so you can switch to Manual Mode to do so.
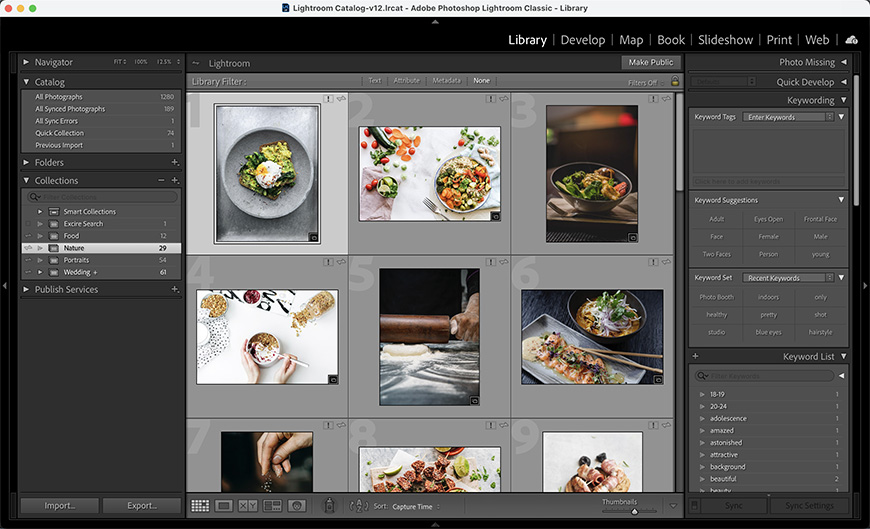
Image Organization
When adding images to your Lightroom working space, you can organize them based on catalogs.
The software goes even further and allows you to label the images with keywords and rate them. You can also easily adjust their destination and apply presets as you import them.
Plus, Lightroom allows you to create an image collection based on a rating or camera lens you used. Overall, the image editing software is unrivaled when it comes to organization.
RAW Editing
When uploading camera RAW images, you can freely adjust them. For instance, you can modify a film image if it’s overexposed or underexposed.
That said, Lightroom has profiles where you can further enhance your photo’s tone and color.
They’re categorized into two groups, creative and raw. You can upload the RAW camera files to Camera Matching and Adobe Raw profiles.
Meanwhile, other photo files like JPG can be uploaded to Adobe Creative options like Artistic B&W, Vintage, Legacy, and Modern.
Subsequently, Lightroom has exceptional advancements in its photo editing tools.
Preset Option
A preset allows you to apply multiple editing enhancements with just a few clicks. You can create your own on Lightroom or find some online.
Besides that, they offer color corrections and filters. You can also use them to apply a watermark when exporting the image.
Batch Editing
Lightroom provides you with an option to edit multiple images at the same time thanks to its batch processing feature.
You can do so by first completing the edits on one image, and then applying them to all the other ones. Alternatively, you can complete the edits on all the images simultaneously.
Extra Features Available
Lightroom offers multiple features including HDR support and tethered capture. By having HDR support, you’ll get enhanced brightness and contrast for your images.
They’ll be more detailed and realistic, giving them more prominence. Meanwhile, with tethered capture, you can connect your camera to a device and view the picture as it’s being taken.
Drawbacks of Adobe Lightroom
Despite the plenty of pros Lightroom may offer, the software still experiences some setbacks.
Takes Up Storage
Lightroom, like most other Adobe products, tends to take up a lot of space on your Mac or PC. In turn, as you run the software, it can exert a lot of resources and impact your system performance.
Lacks Advances Photo Retouching Features
Despite being a photo editing tool, retouching in Lightroom may not measure up as much as other competitors like Affinity Photo.
It’s likely why Adobe offers Photoshop in its subscription package. That way, you can use Lightroom for non-destructive editing and organization, while Photoshop handles the layers and retouching options.
Pricing
Compared to Affinity Photo, Lightroom is the pricier option. Rather than pay a one-time fee, you’ll have to resort to a monthly subscription plan that’ll accumulate more money over time.
Pros and Cons of Affinity Photo
Check out the pros and cons of Affinity Photo to compare them with Lightroom.
Why Choose Affinity Photo
From its low system exertion to its editing capabilities, Affinity Photo has lots to offer.
RAW File Editing
Affinity Photo provides you with non-destructive RAW file editing. It gives users more flexibility and power when working with their images.
In turn, you can save your edits without altering the original RAW image format.
The feature gives you the potential to produce HDR-style images, recover luminance data in parts of the picture that are too dark, and adjust the color grade.
In addition, you can decrease noise, fix lens distortions, modify metadata, and adjust the tone curve.
Large Collection of Visual Effects
Affinity Photo provides users with several visual effects options. One of them includes the Gaussian Blur, which creates a blur effect on your layer.
Other options are the inner and outer glow. They create a glow radiating from the inner and outer layers of the subject’s edges.
Similarly, there are also inner and outer shadows, which add a shadow effect inside and outside the subject’s edges.
You can also benefit from the color and gradient overlay. They apply a solid color or linear gradient effect to your layer’s content.
There are also the 3D, outline, fill-opacity, and emboss effects. You can find an advanced setting for each feature, which is under Layer Effects, found next to the visual effect options.
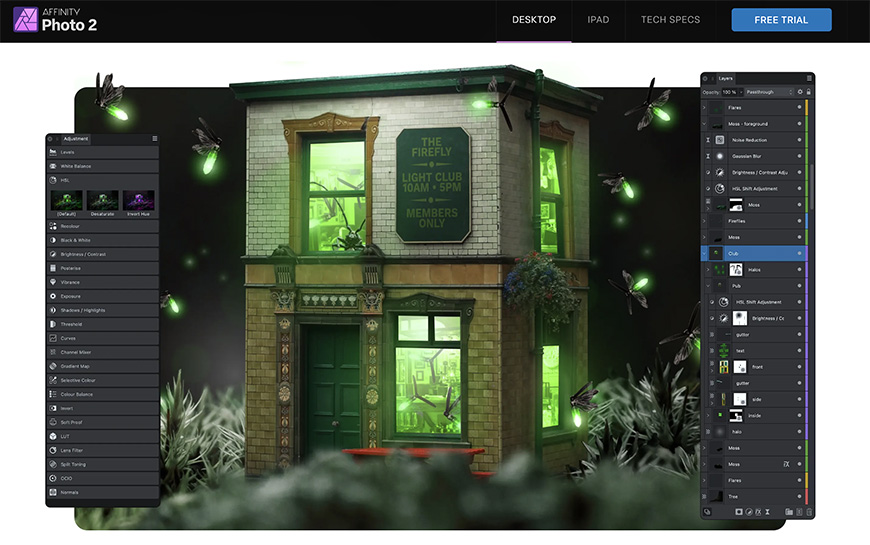
Friendly User-Interface
Affinity Photo’s interface will require some practice to get used to. Nevertheless, once you become well-adjusted, it’ll be a breeze to access the tools you need.
The interface contains panels on the left, right, and top. On the right side, you’ll find the right studio, where you can access editing options like layers, text styles, colors, and effects.
On the top, there are the menu bar, persona bar, toolbar, and context toolbar panels.
Lastly, the left side contains the tools panel. Overall, accessing each setting will take about a week or so to master.
Low-Cost Plan
Unlike several other photo editing tools, Affinity Photo only requires a one-time purchase. You won’t have to worry about a monthly subscription bill.
Drawbacks of Affinity Photo
Here are some cons of Affinity Photo to consider before completing the one-time purchase.
Lacking in Organization
One of the most prominent drawbacks associated with Affinity Photo is that it doesn’t come with an image catalog. In turn, organizing your images will require a third-party website.
This can prove hasslesome, especially if you’re a professional photographer looking to edit and organize a large batch of images.
Lacks Batch Processing
Unlike Adobe Lightroom, Affinity Photo doesn’t have a batch processing feature, where you can edit a collection of images simultaneously.
Other Comparisons of Lightroom and Affinity Photo
If you want to compare Lightroom or Affinity with other image editing software apps, here are some other comparisons we’ve written about.
- Affinity Photo vs Photoshop
- Lightroom vs Photoshop
- Lightroom vs Luminar
- Lightroom vs On1
- Luminar vs Affinity
 12 Best Adobe Lightroom Alternatives in 2023 [User Tested]
 Luminar vs Affinity for Photo Editing: Key Differences
 Affinity Photo 2 Review | Subscription-Free Photo Editor
 Affinity Photo vs Photoshop: What’s the Difference?
 Best Photo Editing Software in 2023 (User Tested)

Jeff Collier is an experienced film photographer who enjoys experimenting with modern digital photography equipment, software and apps. He’s also an ex-world champion triathlete and avid cyclist, clocking hundreds of km each week in the beautiful Tweed Valley of northern NSW, Australia.

WELCOME TO SHOTKIT
Enter your email to be sent
today's Welcome Gift:
19 Photography Tools
🔥 Popular NOW:


Shotkit may earn a commission on affiliate links. Learn more.