


Photoshop Can’t Save as PNG? Here’s The Solution
Resolve the common issue of Photoshop not saving images as PNG with this comprehensive guide, offering step-by-step solutions for smooth editing.
Photoshop | Software | By Leonardo Cavazzana
If you can’t save your file in PNG format in Photoshop, these tips should solve the problem.
Adobe Photoshop is one of the favorite graphic artists’ software when it comes to editing images.
Saving your Photoshop file in PNG format can be very useful, especially when creating a graphic, a transparent background, or just keeping the image quality at a small file size.
But what if the option to save as a PNG isn’t available to you?
The truth is that Photoshop doesn’t always allow you to save the image as a PNG file.
Even though this happening might be annoying, fortunately, this problem is simple to fix.
If this has happened to you, in this article are some solutions you can try to save a file as a PNG.
Read on to fix the problem quickly.
Table of Contents
How Do I Save as a .PNG in Photoshop?
In theory, creating and saving PNG files in Photoshop is very easy. The most basic way is simply to use the “Save As” feature.
Use the Save As Command
Go to the menu bar File > Open > Save As.
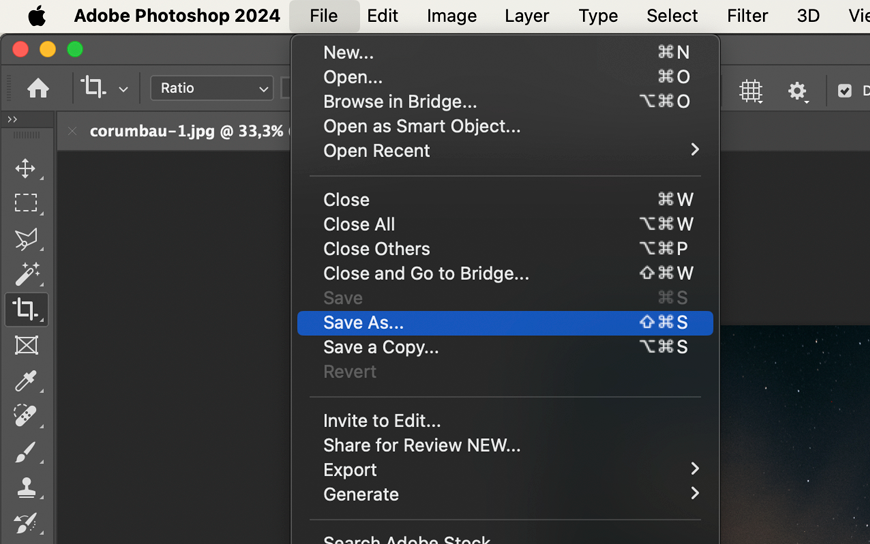
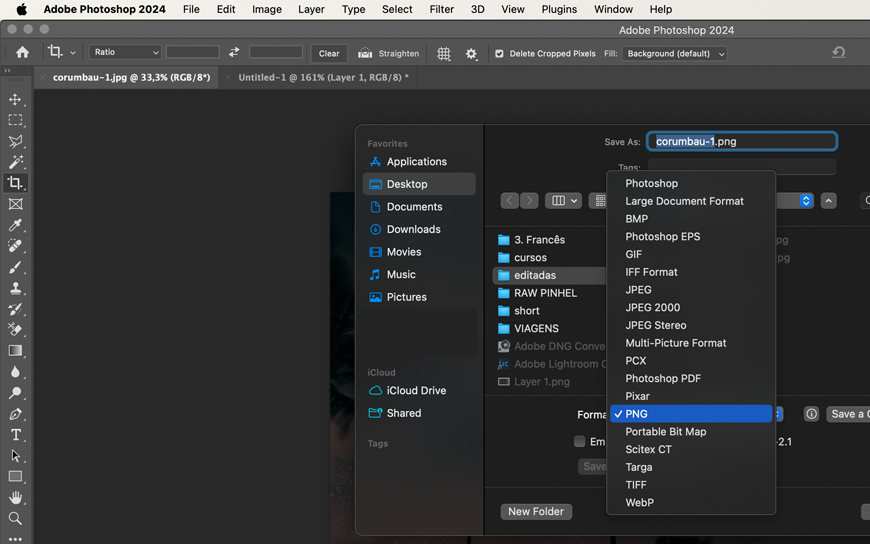
Select PNG from the file formats options menu, and you’re all set.
Use the Export As Command
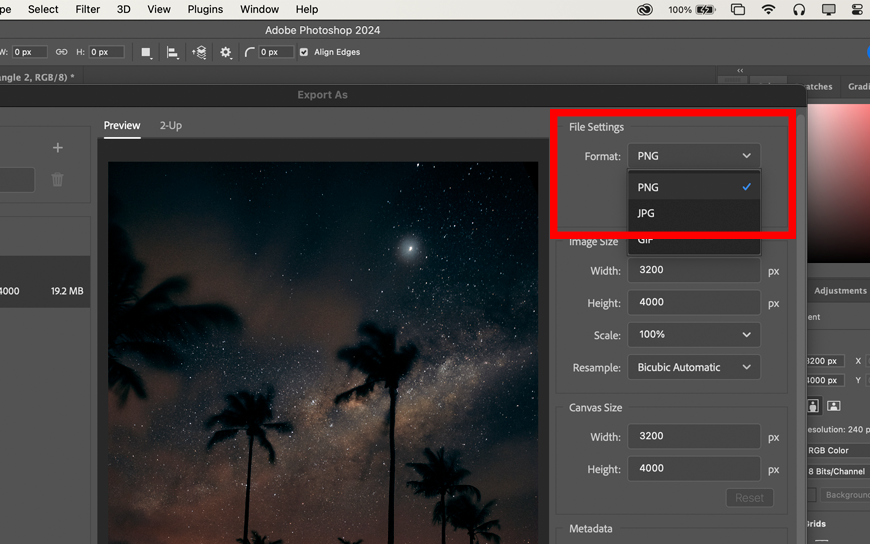
If you want to save your image file as PNG, another way is to go to File > Export > Export as.
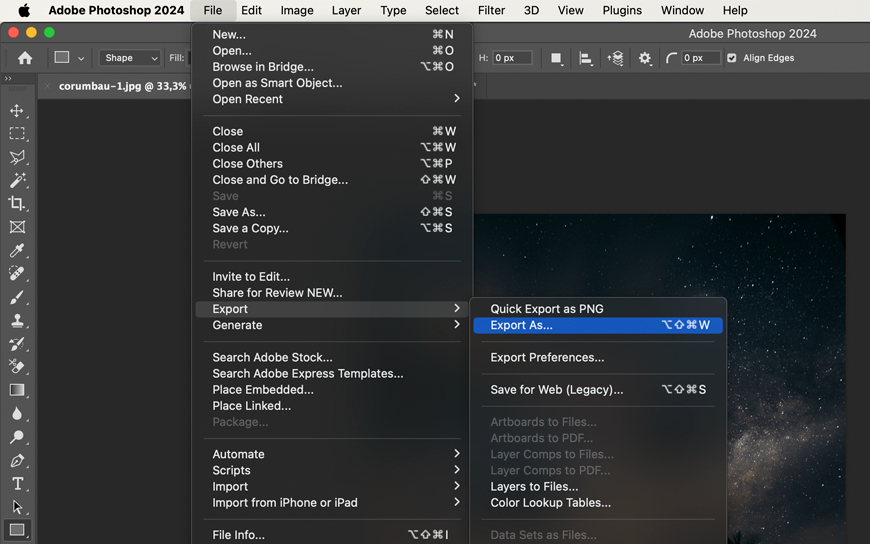
Select PNG format and save the file.
Use the Save For Web Command
If the Save As command doesn’t show the option to save as a PNG file, Save For Web can be a great alternative.
To save your image file this way, simply go ahead and select File menu > Export > Save For Web (Legacy) from the bar at the top of the screen.
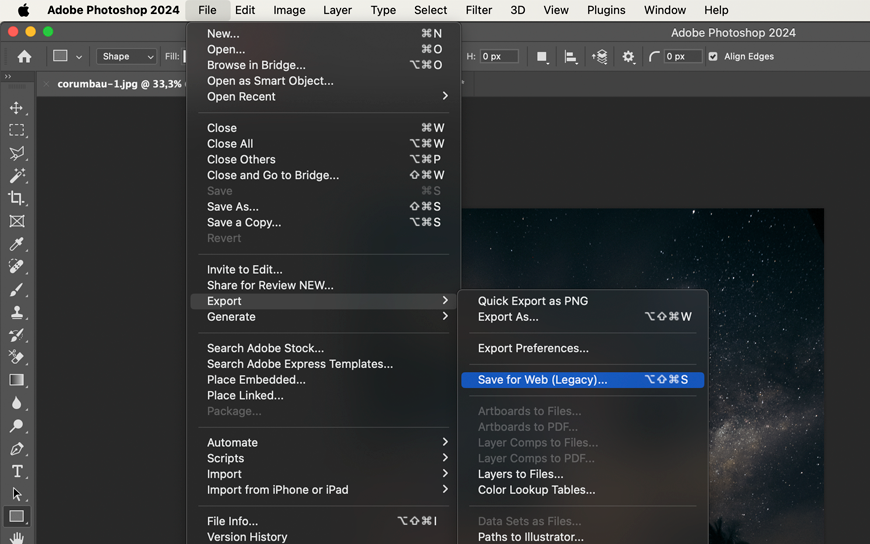
and choose PNG to save a file.
Quick Export as PNG file in Photoshop
A fourth way to export a PNG file in Photoshop is Quick Export as PNG.
To do this, go to File > Export > Quick Export as PNG.
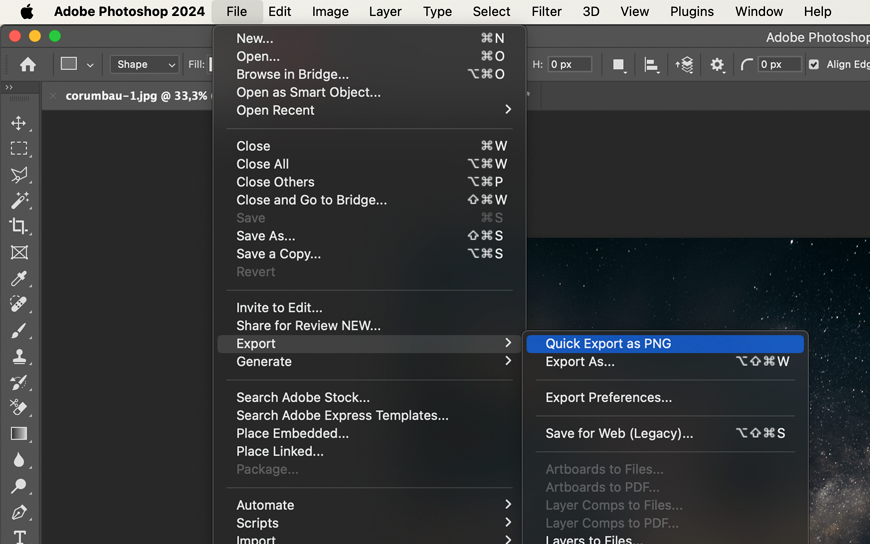
When the window opens, the format is automatically set to PNG, so just click Save.
This method does not give you control over the PNG settings.
But what happens when these ways don’t work? You try to save your file as a PNG, but find that the PNG option doesn’t appear in the drop-down menu.
Fortunately, there are a few things you can try.
Troubleshooting: Why Can’t I Save My File as a PNG in Photoshop?
If, for some reason, Photoshop can’t save as PNG file format, here are some solutions:
1. You Need to Change the Color Mode
The most common reason why Adobe Photoshop doesn’t allow you to save a file as a PNG could be because of information in the document that makes it incompatible with the format.
With the wrong color mode, Photoshop will not make the PNG format available. As its original purpose was to transfer images on the Internet, the file format was not designed to support documents made for printing.
Therefore, if you are working in CMYK mode, Photoshop will not allow you to export the file as a PNG since CMYK color mode is for printing.
To check and make sure you won’t have any problems saving your images in Photoshop, you should use the RGB color mode.
To do this, open the menu Image > Mode > select RGB Color.
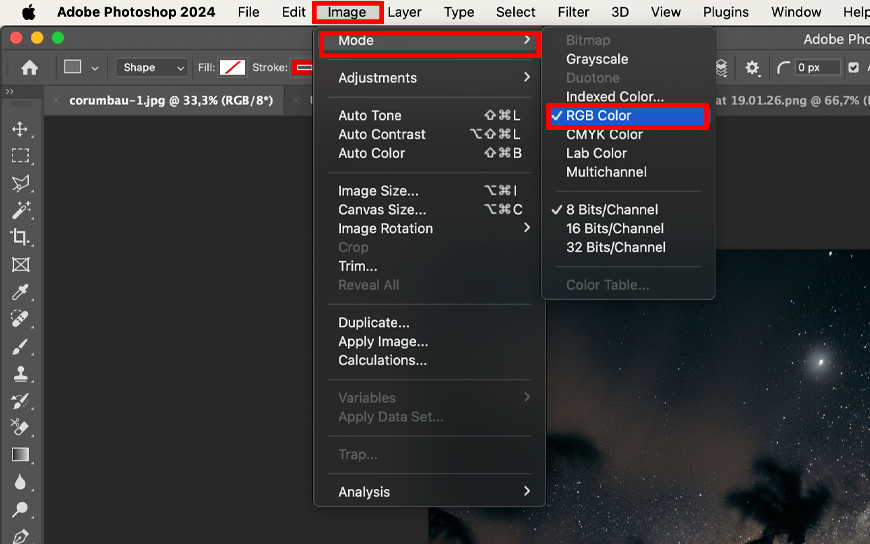
You can now save the file as a PNG or JPEG file.
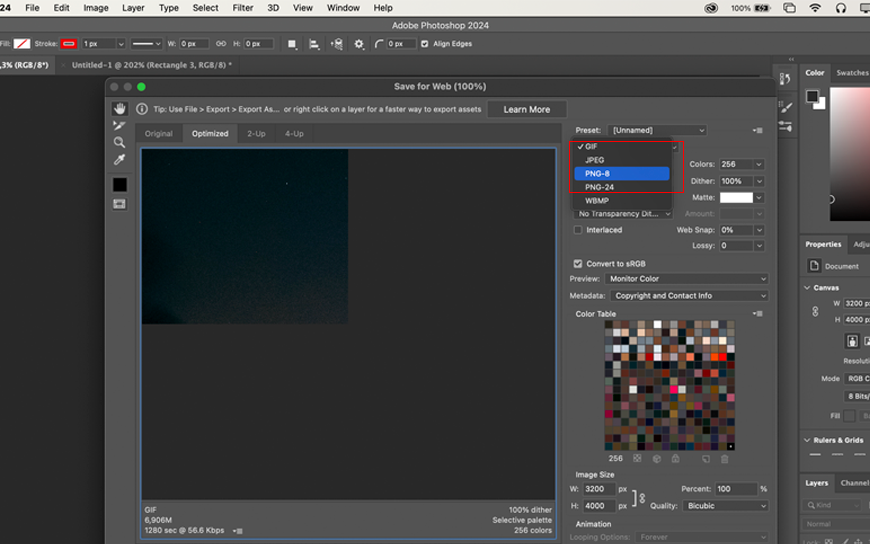
2. The Bit-Depth Is Too High
After changing the color mode to RGB, the PNG format still doesn’t appear when you try to save the image as a PNG, your settings may have been set to the wrong bit depth value.
The bit depth value shows how much data is stored in each color channel, determining the quality of the image. However, if the value is too high, your image may be too large for Photoshop to save.
To see what bit depth (known as bit/channel) your document is set to, go to Image > Mode and you’ll see the values at the bottom.

As the goal is creating PNG files, you should select the 8 Bits/Channel or 16 Bits/Channel option. JPEG files also support 32 bits/channel.
Switching between different bit depth values in the middle of a job will alter the image slightly. Ideally, you should choose the bit channel value at the start of the project.
3. Something in Your Settings/Preferences Needs to Be Changed
If you’ve made both the previous changes, and you still can’t get PNG files, some mysterious settings or preferences have most likely been changed in Photoshop.
It’s going to be very difficult to find out what it is, so the ideal is to reset all the preferences and see if it is able to save the PNG file.
By resetting all preferences, you will lose the customizations you have made. So make sure you save a backup before you reset the preferences of the program.
To reset the preferences, click on Edit > Preferences > General (on Windows) or Photoshop > Preferences > General (on Mac) or press Control + K (Win) or Command + K (Mac).
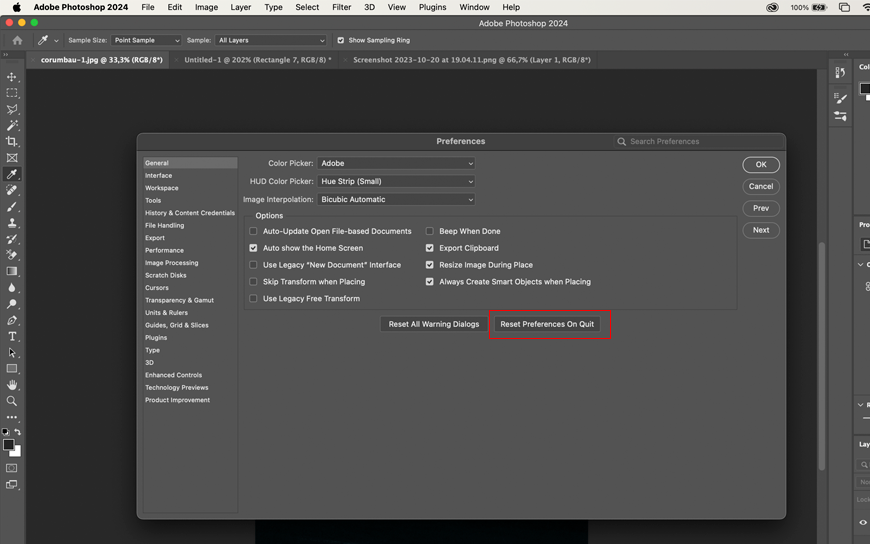
When you restart Photoshop, the preferences and settings will be set to default.
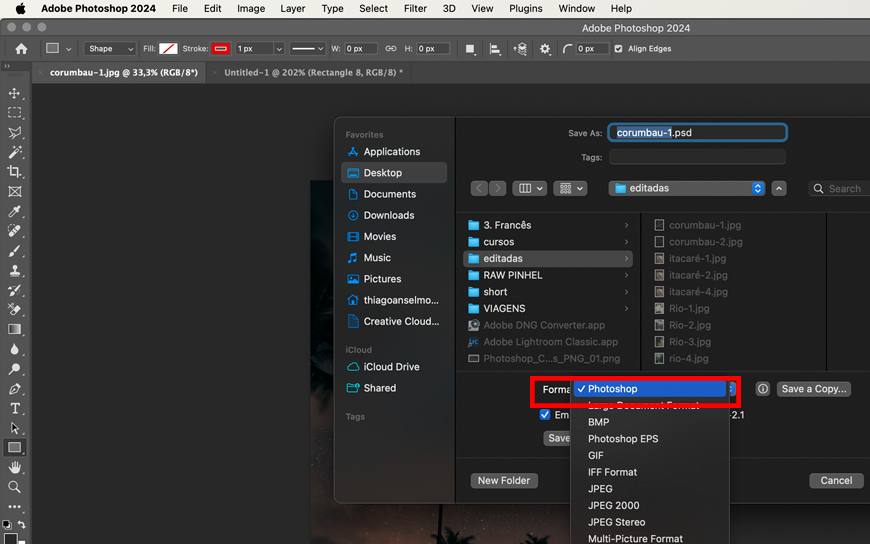
4. Save as PSD Format
To be able to save a PNG file, newer versions of Adobe Photoshop may allow you to do so if you save it as a PSD first. This way, Photoshop will ensure that you don’t lose the editable file if something happens.
So, to save the PSD file, go to File menu > Save As
and choose Photoshop in the format menu to save your file.
So, if you can’t save an image as a PNG, by following the tips in this article, you’ll be able to quickly fix the most common problems and be able to save your work as a PNG.
If none of these tips have helped you, as a last resort, you can uninstall and reinstall the program on your computer.
Advantages of Using a PNG File Format
Portable Network Graphics (PNG) is a popular, patent-free file format, and there are a few reasons why PNG files are useful.
Let’s take a look at them here.
Transparency capability
This file format is particularly loved by web designers for its ability to support transparent backgrounds and semi-transparent images. This is useful for creating logos and different types of dynamic website graphics.
Photographers also often use PNG files to create their watermarks or blend their work with design elements.
With a transparent image, they can place their logo over the image and ensure that the image cannot be stolen without the photographer’s name.
Lossless compression
PNG files employ a lossless compression technique. This means that when you compress an image, it doesn’t lose any data, maintaining its quality.
The PNG option is perfect for resizing images and keeping them as sharp as the originals.
This is another reason why logo designers love this file type. In contrast, the JPEG format has significant losses.
See also: Tiff vs PNG
Working with PNG files
It’s easy to work with PNG formats. They are a common file type and many programs can open them.
This includes basic photo viewing programs as well as pro-level AI photo editing programs such as Lightroom and Adobe Photoshop.


Hello, my name is Leo Cavazzana, I’m a professional photographer and film director. As a photographer, I’ve been photographing our natural world for the past 8 years and worked on assignments with NatGeo, BBC, and UN on all 5 continents. As a film director, I’ve been directing commercials and campaigns for brands for the past 4 years. I’m passionate about sharing about the world and photography with others.

WELCOME TO SHOTKIT
Enter your email to be sent
today's Welcome Gift:
19 Photography Tools
🔥 Popular NOW:


Shotkit may earn a commission on affiliate links. Learn more.