


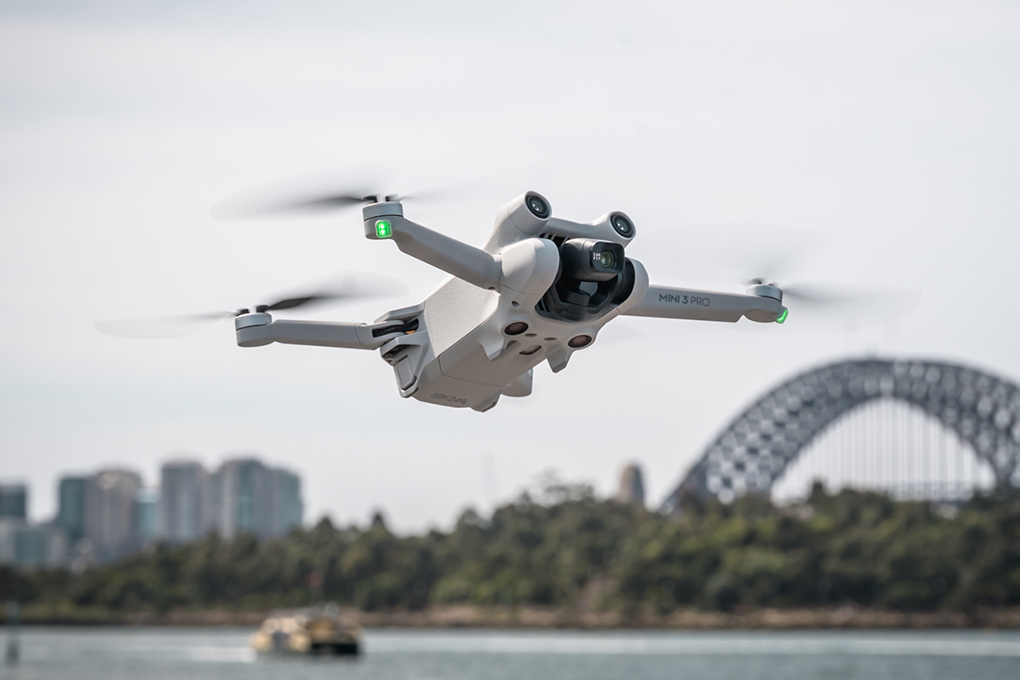
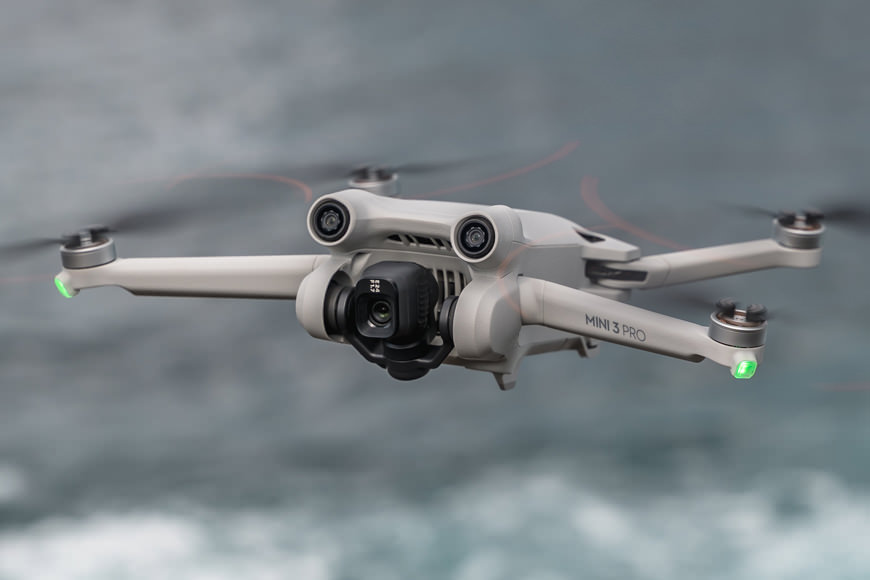
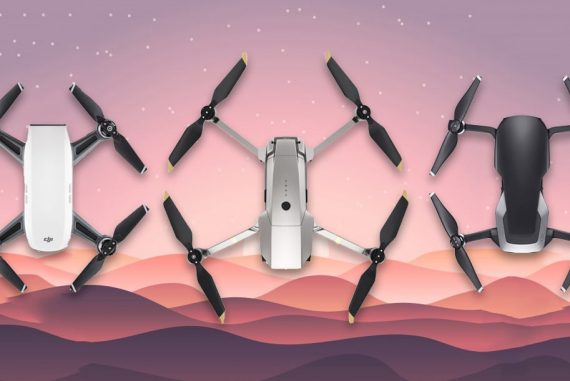
DJI Mini 3 Pro Review: This Tiny Camera Drone Just Got Better
Check out my DJI Mini Pro 3 review to see whether I think this feature-rich, lightweight, pocketable camera drone is worth the money. Spoiler: It definitely is!
Could the DJI Mini 3 Pro be considered the perfect drone for travel? Or is it just a toy? Is it an improvement over the other Mavic Mini’s?
When DJI first announced the original DJI Mavic Mini, they filled a gap in the drone market.
They developed a budget-friendly lightweight drone that was accessible not only to those who were new but usable to those with experience.
Great battery life, excellent images quality, onboard memory and easy to fly, the Mini 3 Pro is small enough to fit in your pocket and light enough to fly without a license.
You could fly it almost anywhere as it sat in the sub <250g class, and it would allow you to capture great tricky shots with the tap of a button.
But for those who really appreciated high-quality photography, it just didn’t quite hit the mark for many of us with higher-level drones at the time. To me, that model felt more like a toy.
But this has now changed with the introduction of the DJI Mini 3 Pro and its larger sensor, paired with the DJI RC, making it one of the best drones with a screen on the contoller.
Let’s take a closer look in my review of the Mavic Mini 3 Pro.
Table of Contents
DJI Mini 3 Pro Specs
- Lightweight (fits under some country regulations)
- Fantastic Camera!
- The small size is great for travel
- Excellent battery life
- Super quick and easy to get up and fly
- Expandable onboard memory
- Smart Controller backs up footage via Micro SD slot
- Susceptible to strong winds
- Body feels rather delicate
- Propellers require a small tool to replace
- RC’s are quite bulky compared to other drones
– 24mm (equiv.) lens with 82.1º FOV and a fixed F1.7 aperture
– 4K/60p video
– Up to 4X digital zoom
– 1.3gb Onboard Memory with up to 512gb expandable by Micro SD
– H.264 and H.265 recording at 150 Mbps
– D-Cinelike and Normal video profiles
– Raw and JPEG image capture
– OcuSync 3.0 (O3) 1080p/30p image transmission (12 km range)
– Three-way obstacle avoidance (front, back, bottom)
– APAS (Advanced Pilot Assistance System) and ActiveTrack 4.0
– ‘MasterShots’ cinematic capture mode
– 47-minute flight time (with Intelligent Flight Plus battery)
– Under 250g at takeoff (with standard battery)
<249g (Intelligent Flight Battery)
<290g (Intelligent Flight Battery Plus)
Dimensions (L×W×H):
Folded: 145 × 90 × 62 mm (5.7″ x 3.5″x 2.4″)
Unfolded: 171 × 245 × 62 mm (6.7″ x 9.6″ x 2.4″)
Unfolded with propellers: 251 × 362 × 70 mm (9.8″ x 14.2″ x 2.7″)
Max Flight Times:
±34 mins (Intelligent Flight Battery)
±47 mins (Intelligent Flight Battery Plus)
Sensors: Front & Rear & Downward
Internal Onboard Storage: 1.3gb (Expand this with a MicroSD card)
Additional MicroSD Compatibility: UHS-I Speed Class 3 or above is required and with a maximum capacity of 512gb
Video Transmission System: DJI O3
Live View Quality: 1080p/30fps
Operating Temperature: -10° to 40° C (14° to 104° F)
Capacity: 2453 mAh
Weight: Approx. 80.5 g
Charging Time (using DJI 30W USB-C Charger):
±64 mins with battery inside Aircraft
±56 mins using DJI Mini 3 Pro Two-Way Charging Hub
Intelligent Flight Battery Plus:
Capacity: 3850 mAh
Weight: Approx. 121 g
Charging Time (using DJI 30W USB-C Charger):
±101 mins with battery inside Aircraft
±78 mins using DJI Mini 3 Pro Two-Way Charging Hub
Mechanical Range:
Tilt: -135° to 80°
Roll: -135° to 45°
Pan: -30° to 30°
Controllable Range:
Tilt: -90° to 60°
Roll: -90° or 0°
Stabilization: 3-axis mechanical gimbal (tilt, roll, and pan)
Camera:
Sensor: 1/1.3-inch CMOS
Effective Pixels: 48 MP
Lens: 24 mm Equivalent (FOV: 82.1°)
Aperture: f/1.7
Focus Range: 1 m to ∞
ISO Range:
Video: 100-6400 (Auto), 100-6400 (Manual)
Photo: 100-6400 (Auto), 100-6400 (Manual)
Shutter Speed: 2-1/8000 s
Max Image Size: 4:3: 8064×6048 (48 MP), 4032×3024 (12 MP) / 16:9: 4032×2268 (12 MP)
Still Photography Modes:
Single Shot
Interval:
JPEG: 2/3/5/7/10/15/20/30/60 s
JPEG + RAW: 2/3/5/7/10/15/20/30/60 s
Auto Exposure Bracketing (AEB): 3/5 bracketed frames at 2/3 EV Bias
Panorama: Sphere, 180°, Wide-angle, and Vertical
Photo Format: JPEG/DNG (RAW)
Video Resolution:
4K: 3840×2160@24/25/30/48/50/60fps
2.7K: 2720×1530@24/25/30/48/50/60fps
FHD: 1920×1080@24/25/30/48/50/60fps
Slow Motion: 1920×1080@120fps
HDR Mode:
Photo: HDR supported in Single Shot mode
Video: HDR supported when shooting at 24/25/30fps
Video Format: MP4/MOV (H.264/H.265)
Max Video Bitrate: 150 Mbps
Zoom Range: 4K: 2x / 2.7K: 3x / FHD: 4x
QuickShot Modes: Dronie, Helix, Rocket, Circle, Boomerang, and Asteroid
Color Profiles: Normal & D-Cinelike
Supported File System: FAT32 (≤32 GB) & exFAT (>32 GB)
Screen Size: 5.5inch
Screen Resolution: 1080p
Dimensions (L×W×H):
Without control sticks: 168 × 123 × 46 mm (6.6″ x 4.8″ x 1.8″)
With control sticks: 168 × 123 × 62 mm (6.6″ x 4.8″ x 2.4″)
Weight: 390g
Max Battery Time: ±4 hrs
MicroSD Compatibility: UHS-I Speed Class 3 or above is required and with a maximum capacity of 512gb
Remote Connection: Wi-Fi and Bluetooth 4.2
Operating Temperature: -10° to 40° C (14° to 104° F)
DJI RC-N1 Remote Controller:
Max Mobile Device Size: 180 x 86 x 10 mm
Weight: 389g (excluding additional mobile phone weight)
Supported Port Types: Lightning, Micro-USB (Type-B), USB-C
Video Transmission System: DJI O3
Max Battery Time:
±6 hrs (without charging any mobile device)
±4 hrs (when charging a mobile device)
Operating Temperature: -10° to 40° C (14° to 104° F)
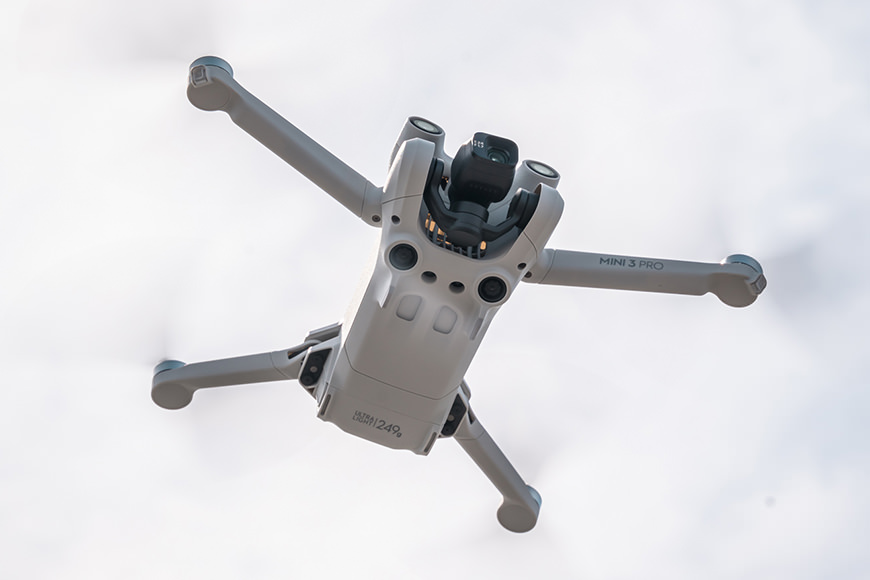
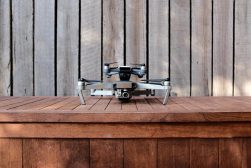
Build & Ergonomics
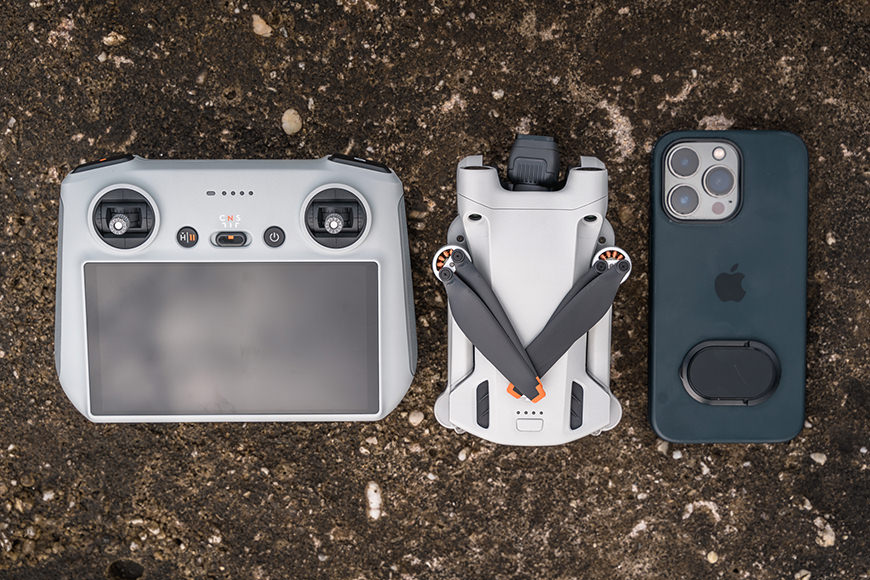
The DJI Mini 3 Pro as compared to the controller and an iPhone 13 Pro.
The original DJI Mini series felt like toys when compared to others in the DJI lineup at the time, and I have to say that has not changed.
But that is understandable because how else would you fit all that technology into a package that weighs under 250g? The higher-end models in the lineup fit different purposes and classes and, as such, are built differently to suit.
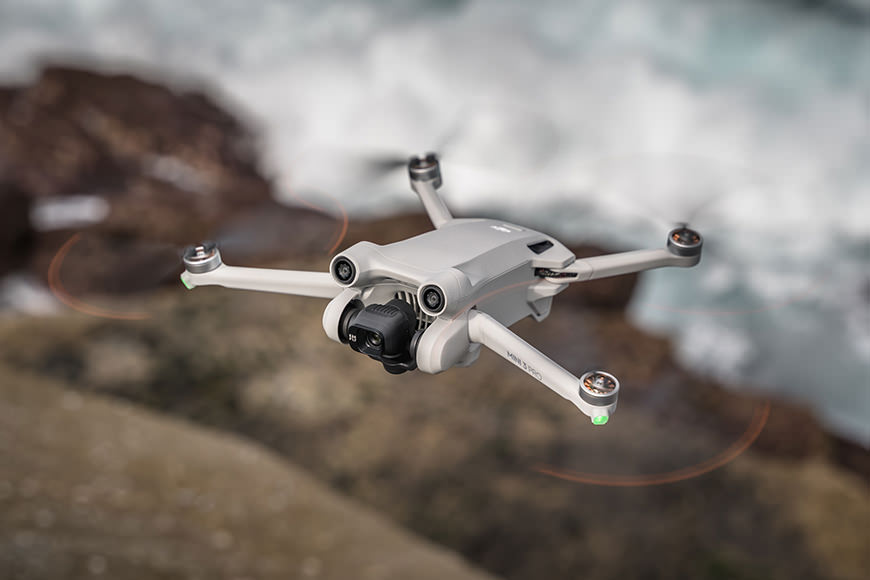
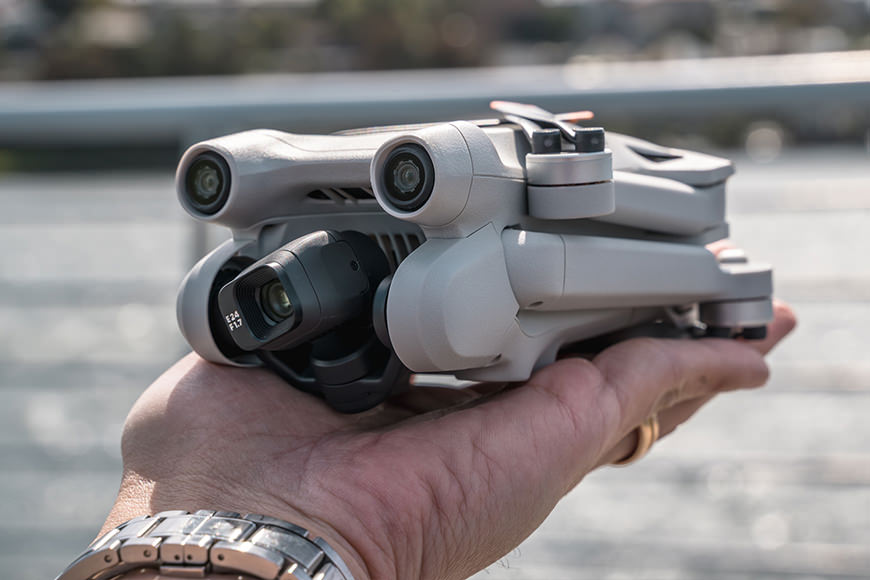
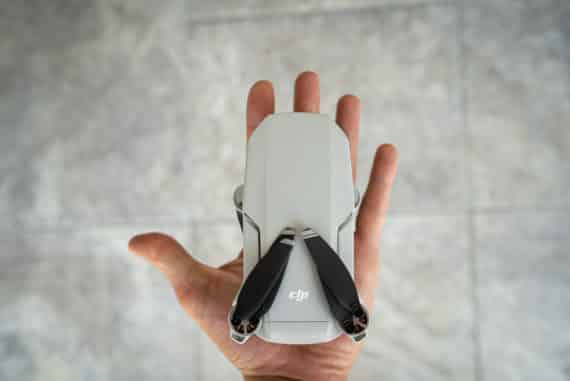
The Mini 3 Pro fits easily within the palm of my hand – it’s similar in size to an iPhone 13 Pro. In fact, you will find that the weight of the DJI Mini 3 Pro with a standard battery is a similar weight to an iPhone 13 Pro Max!
On the flip side, the body of the Mini 3 Pro feels quite delicate, so I feel it would not stand up to sudden impacts with solid objects as a Mavic Pro (or similar) would.
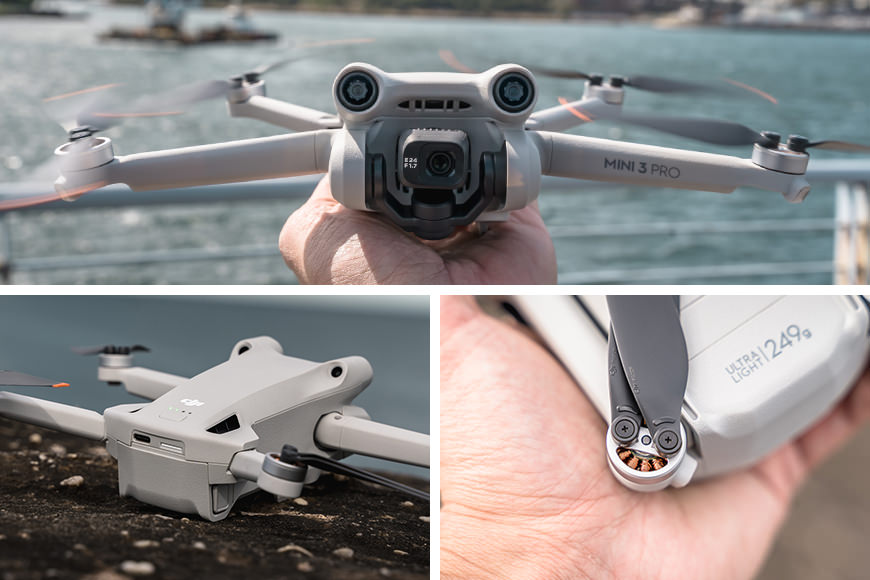
It feels rather light and delicate, as you’d expect from a flying technological marvel that is just shy of 250g!
Attached to the little DJI Mini 3 Pro are 4 small propellers which require an included tool to remove. This is only a problem if you crash the drone into a tree and damage a propeller or 4.
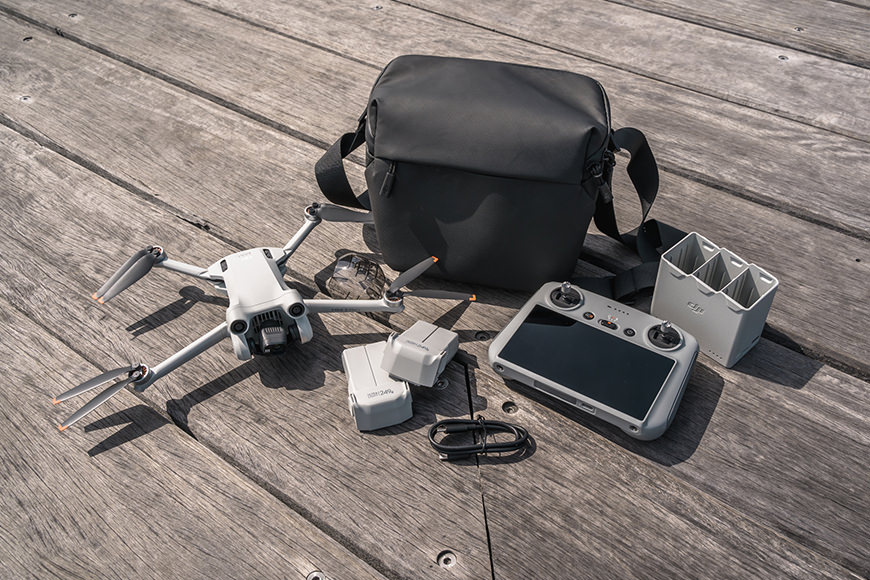
Fortunately, if you purchase the Fly More Kit, the stylish shoulder bag has a pocket in the lid to store said tool along with the rest of your goodies, so you always have it with you!
It’s literally a palm size flying camera with a 48MP 1/1.3-inch CMOS sensor in it! What a great drone the Mini 3 is!
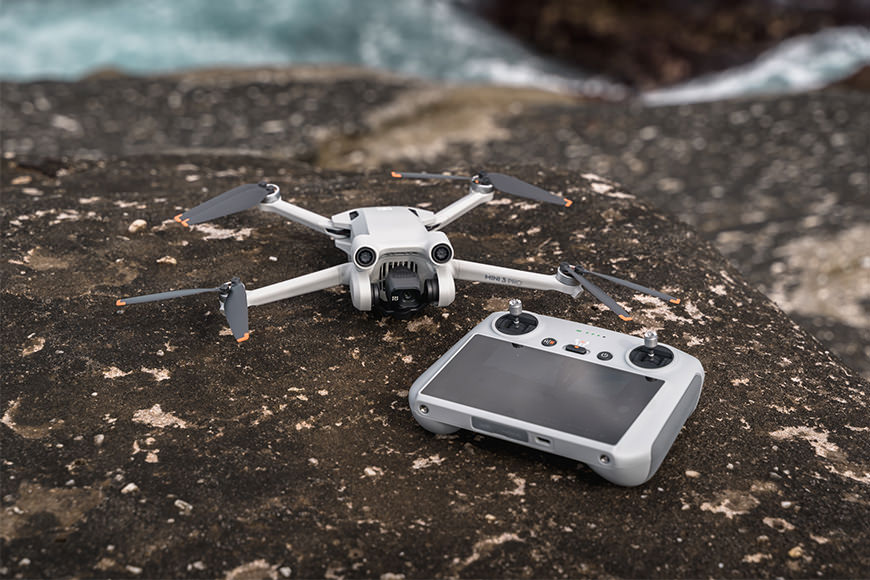
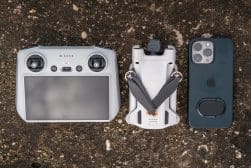
The DJI RC Smart Controller is super comfortable and ergonomic but is noticeably larger and heavier than the Mini 3 Pro. So while the Mini 3 Pro is pocket size and can easily drop into any bag, be mindful of the RC size!
DJI RC (RM330) Smart Controller
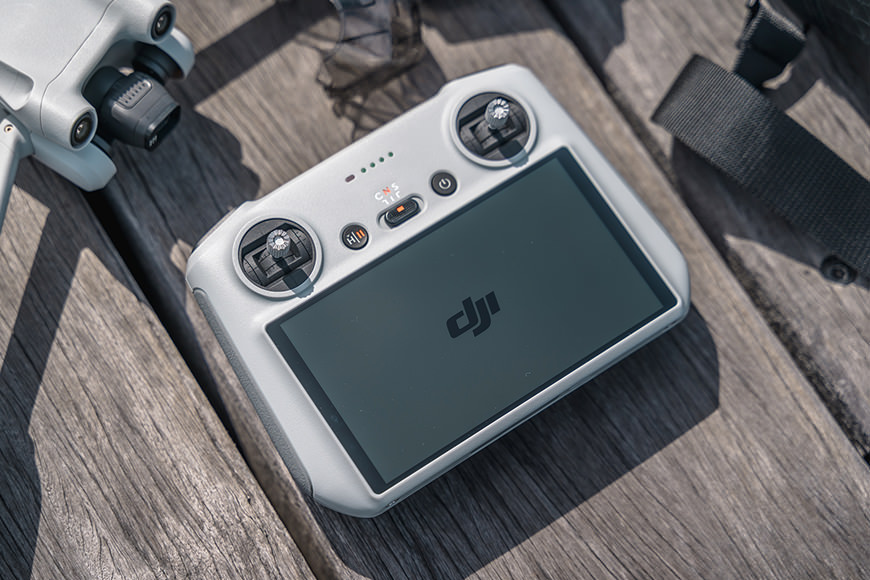
The controller is chunky due to its large monitor, but it’s still ergonomically designed.
The DJI RC Smart Controller is the latest in the range of controllers available for DJI products. Considered to be a watered-down version of the DJI RC Pro Controller, it is a great introduction and has a nice premium feel.
I highly recommend stretching that little bit more to get the DJI RC Controller over the standard N1 when purchasing your Mini 3 Pro. Not having to equip a mobile phone with the controller to fly with vision is so much more convenient.
Booting it up and connecting is quick and easy. All updates and settings for both the Mini 3 Pro and the Controller itself are accessed within the software on the controller.
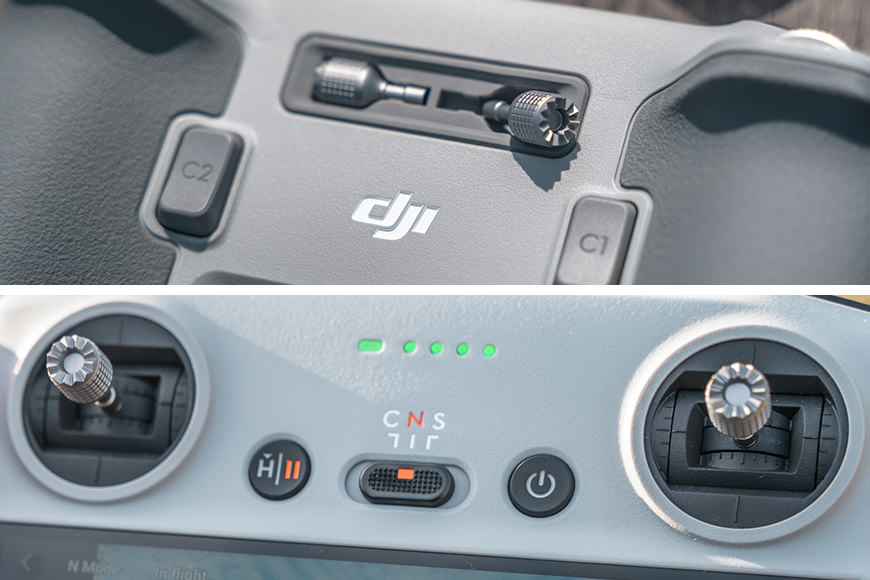
The removable sticks allow it to pack away nicely, but they can very easily go missing! I’ve dropped them a couple of times…
It features removable control sticks and all the additional buttons that you’d expect, making it a comfortable RC controller to use and a slightly slimmer profile to pack up. Just be careful with the sticks, as they’re easy to lose.
If you’ve used DJI Apps in the past, you’ll be quite familiar with the general interface and standard menu system. Just remember to swipe from different sides of the screen to access deeper menus!
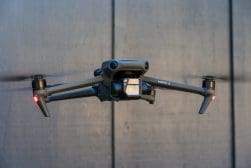
Flight Time & Performance
You’ll get great flight time from any of the battery options you select, more than enough for me with 3 batteries!
DJI has developed two intelligent flight batteries for the Mini 3 Pro with two different weight combinations and maximum flight times.
Based on light conditions as stated by DJI, you’ll have ±34 mins when using the Intelligent Flight Battery and ±47 mins with the Intelligent Flight Battery Plus.
To stay within the sub 250g weight limit, the DJI Mini 3 Pro should be paired with the standard battery. However, if that weight limit isn’t much of a concern for you, pair it with the Plus battery.
Right from the very get-go it’s smooth, responsive, and quick to fly around. Everything is within easy reach on the controller, and the camera quality is fantastic.
It’s a great experience for beginners and great fun for those with experience. It’s quick and stable, while the battery life provides more than enough time to capture some great footage.
The front and bottom sensors work great, but without side or rear sensors, you may need to be careful doing tricky flying.
Due to its lightweight nature, it’s understandably susceptible to strong winds and gusts. While this was less of an issue with my previous larger drones, wind resistance is more of a concern for me now.
However, in the few times I’ve used the Mini 3 Pro, I found it to hold its own pretty well. If the wind gets a bit much, just flick it into sport mode and drop the height down low and zoom it back to you… all while hoping the flight speeds are higher than the oncoming wind speed!
Being so small, it’s also a really quiet drone to fly, especially compared to the larger DJI models. This makes it one of the best drones for real estate work, where a noise like a swarm of angry bees could annoy neighbours!
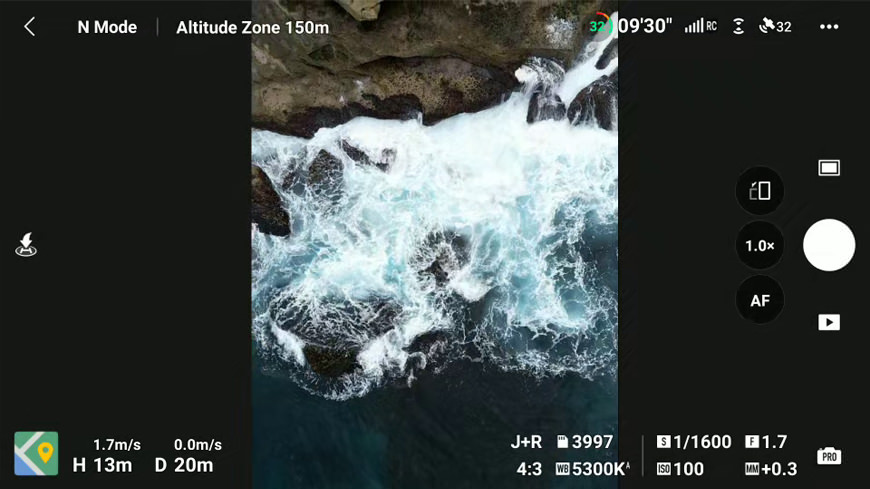
Image Quality
A 3-shot AEB combined into HDR and edited in Lightroom
I dare say one of the main reasons you’re reading about the Mini 3 Pro is because you already feel the image quality must be great. Well, I am here to tell you that it is!
The Mini 3 Pro is undeniably a capable drone, featuring a 10-bit colour profile (after a software update) and dual native ISO.
The 1/1.3-inch CMOS sensor found on the DJI Mini 3 Pro is capable of capturing RAW photography along with 4K HDR video (HDR only at 24/25/30fps).
The lens itself produces a relatively sharp image from its small size. With a fixed aperture of f/1.7 and the equivalent of a 24mm view, you can capture great scenic images from up high.
With the addition of a CPL filter, you’ll get even more dynamic images.
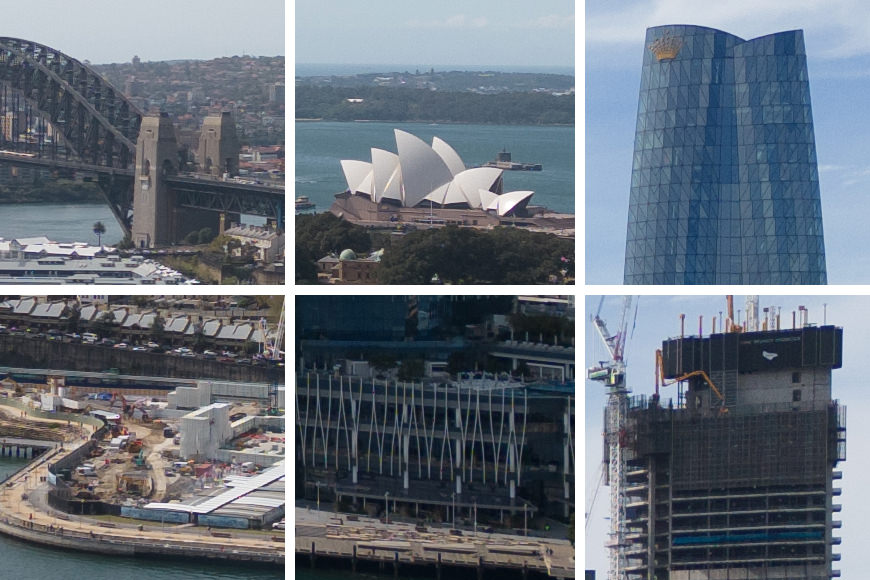
6 sections from a single shot – exported straight from RAW (no editing) and displayed at 100%.
In higher-end models, you can adjust the aperture to more traditional apertures for landscapes, but what you can capture with this little beast is quite good. Especially after post-processing!
If you’re one to shoot video, it can be recorded in both pre-graded for immediate use or D-Cinelike for post-processing colour grading. It’s capable of recording videos up to 60fps in 4K or 120fps in FHD (1080p) for smooth slow-motion footage and with a maximum video bitrate of 150Mbps.
I recommend getting some ND filters if you plan on using the Maviv Mini 3 Pro for video, as the large fixed aperture can be a bit limiting in that regard (it lets in too much light). They’re not particularly expensive online and are highly recommended if you want to shoot at 24fps.
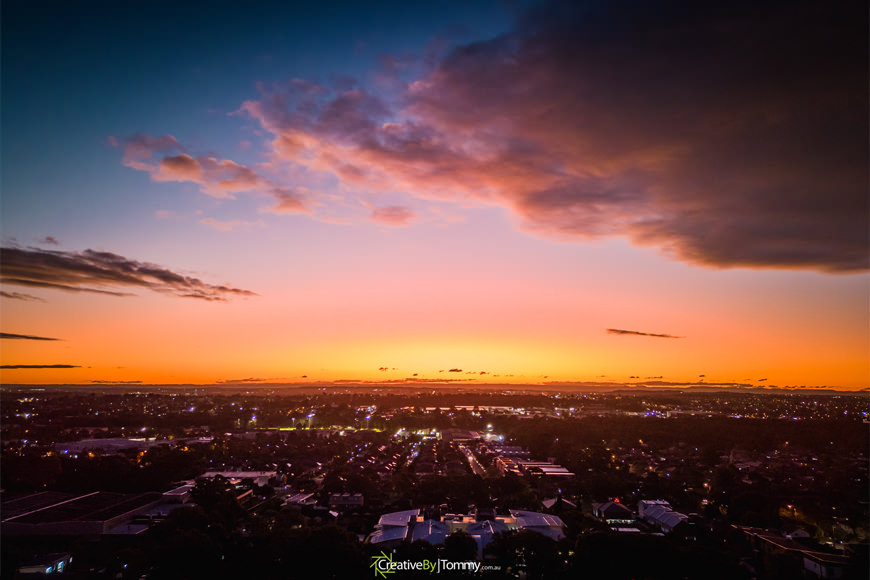
3 shot AEB at dusk and edited in Lightroom
Low-light performance was definitely a pleasant surprise. Being such a small camera on a lightweight drone, therefore also being susceptible to wind conditions, doing long exposures still netted great results.
Sending it up to capture sunsets and dusk photography resulted in relatively nice and sharp images. It, of course, has its limitations, but for the price point compared to higher-end DJI drones, I am quite happy with the results.
With great dynamic range and image quality that was once only available on higher-end drones, DJI has bridged yet another gap in the market with the introduction of the Mini 3 Pro.
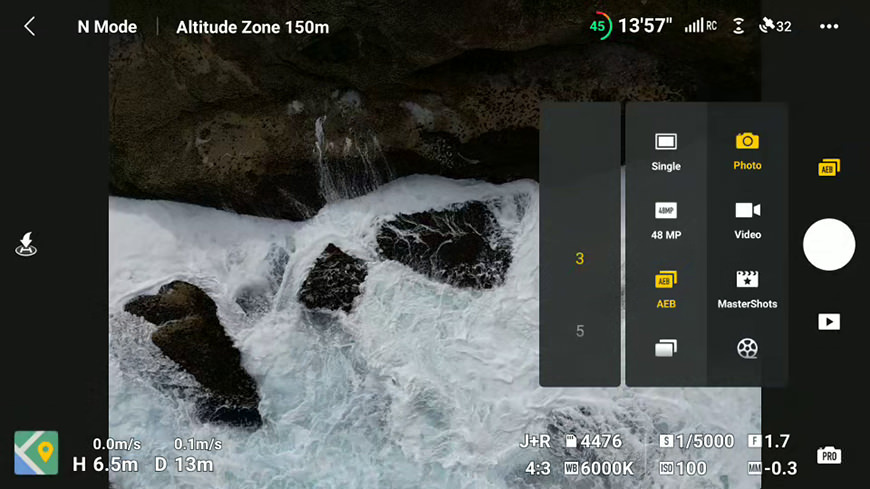
Software and App
Quite a familiar interface with everything easy to see and accessible
If you’ve flown other DJI drones before, you would be quite familiar with the interface of the new software. It’s very similar, but there are some subtle differences. I was very used to DJI Go 4, but so far have found nothing that would be an issue.
The only problem I faced was a silly UX issue. It wasn’t particularly clear that you could swipe from the top down to access further menus, and it took me some time (and Googling) to figure that out. I consider myself tech-savvy, but damn.

Each photo mode saves the previously used camera settings. Great for quick switching on the go!
Modifying your camera settings and modes is a simple tap-and-swipe system; you can also use the dials on the controller body itself to adjust these on the go.
To enable subject tracking is as simple as selecting it from the menu and drawing a box on the screen. The clever software should already have collision avoidance enabled, but be sure to keep watch if it’s flying sideways or backwards.
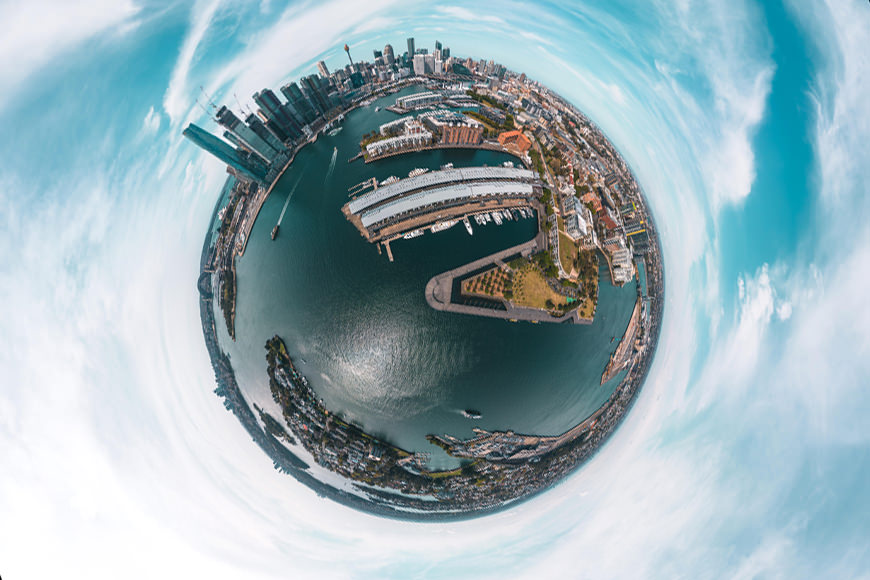
26 Shot Auto 360 Panorama edited in Lightroom and merged in Image Composite Editor v2.0
Also included within the software are other automated flight patterns such as Dronie, Helix, Rocket, Circle, Boomerang, and Asteroid. Enabling any of these and clicking “go” will send the drone off on its own to capture you or your subject without any manual input.
The panorama modes are the ones I like to use the most often, as they are super simple to put together with the right software after some simple editing and lens corrections in Lightroom. Vertical, 180 Degrees, and 360 Degrees (ie, Mini-Planet).
For the above mini-planet panorama, I edited all the images in Lightroom using a preset I created. I then used Microsoft’s recently archived Image Composite Editor v2.0 to compile the images into a Spherical Panorama and rotated the direction into this above image.
Other Useful Features
The camera is set in Portrait mode using the single-click button on the controller
The Mini 3 Pro has built-in onboard memory as well as an extra Micro SD card slot to expand that further (1.8GB!). The RC also has a Micro SD slot for a second backup of your footage (up to 512GB).
This is a much-welcomed addition in a world where so many people lose their drones in the wilderness or water every day.
Having a button that quickly rotates the camera to portrait format shooting is far more convenient than you’d think. I find myself getting vertical shots far more often now. Great for content creators who capture footage for social media.
Some DJI Drones don’t do vertical footage at all, and some have it buried in a menu to toggle. So a quick access button is very welcome!
This is a standard 4:6 vertical shot as displayed within the software
The Mini 3 is well suited to the serious content creator as well as the everyday user just out having a bit of fun.
From simple things like vertical shooting and panoramas to more intricate features like the Advanced Pilot Assistance Systems (APAS 4.0) for obstacle avoidance to Active Track for tracking subjects while the drone flies for you.
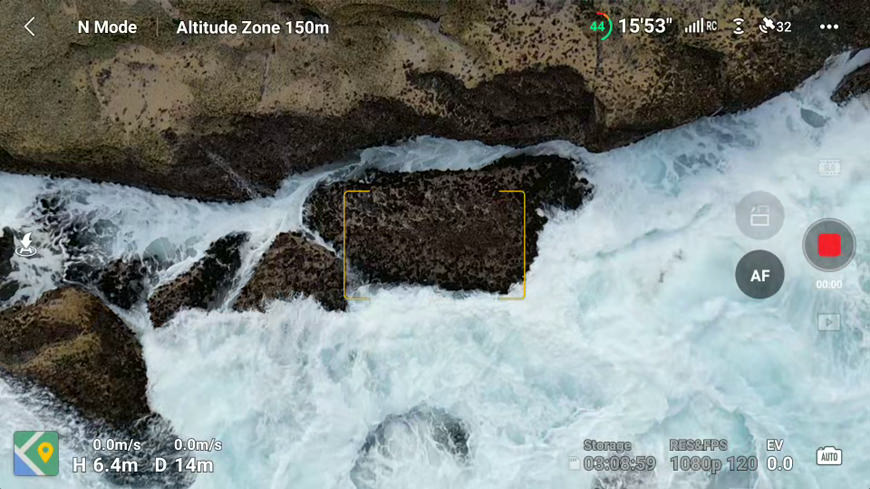
The sensors on the front and bottom of the Mini 3 Pro are super sensitive!
With multiple sensors on the front and bottom of the DJI Mini 3 Pro, you’ll be hard-pressed to crash it unless you’re doing some extra tricky moves (including flying sideways or backwards).
The obstacle avoidance system built into the software does a great job of preventing crashes, but user error or deranged birds is something that cannot always be avoided.
You’ll notice if you try to hand catch the drone, it’ll keep raising itself up, so you need to pull on the down stick while keeping your hand in place. It’ll then begin to automatically land in your hand. Just watch your fingers!
Ease of Use

Hand launching and catching is super easy due to its small size and lightness. But be wary in high winds!
DJI have restricted the Mini 3 Pro from being used until the latest firmware available has been downloaded and applied to both the drone and controller itself.
Be sure to hook up the controller to your Wi-Fi at home and update the software of both the drone and the controller prior to heading out to fly.
Much like the original Mavic Mini, hand launching and catching is easy due to its small size. As previously mentioned, it fits easily in the palm of my hand!
Once all this has been done, it’s super quick and easy to get up and fly. Just flick on the controller and the drone, wait for enough satellites to connect for your home point to be updated, and launch!
Multiple photo and video modes are available at the tap of a button!
If you’re one for a simple “point and shoot” experience, the automatic settings within the software do a great job of applying settings to capture exactly what you see as you see it on the screen. Automatic shooting modes in both video and photo are also available at the tap of a button.
For those who prefer a more manual operation of a camera, you have all the settings you will need – excluding aperture. ISO, White Balance, Shutter Speed, Auto-Bracketing, and flipping the camera sideways can all be adjusted on the screen (with some on the remote).
Alternatives to the Mavic Mini 3 Pro
It’s hard to beat the price and features, especially when considering the small size.
I feel the closest possible compact drone to the DJI Mini 3 Pro would be the DJI Mavic Air 2S rather than other Mavic models. The Mini 3 Pro is more of a “creators” drone; undeniably great for capturing quality content for social media and is extremely portable for travellers.
The Mavic Air 2S (review), on the other hand, would be for the more discerning photographer (or videographer). A step up in quality and flight performance, with a better level of dynamic range and image quality. But that comes at a cost.
Although one could argue it’s not all about the camera specs – it’s also the photographer behind the lens.
The DJI Mini 3 Pro starts at around AU$1200 with the nicer Remote Controller, whereas the Mavic Air 2S is around $1500 with the normal RC-N1 controller. Add a Fly More Kit to either, and you’ll have a cost of around AU$1500 and AU$2000, respectively (or AU$3500 for Air 2S with RC Pro controller).
If you already own a DJI Air 2S and you want something smaller to carry around, you can purchase the Mini 3 Pro without a controller for around AU$980. The RC-N1 that comes with the Air 2S is compatible with the new Mini 3 Pro (it’s the same controller).
I intentionally didn’t compare it to the Mavic 3, as they are upwards of 3x the price and worlds apart in quality and performance. If that was financially viable, I am not sure why you would choose a Mini 3 Pro other than for the extra portability!
Anybody with the other Mini drones will appreciate the upgrade if you want an overall better-performing device.
Value for Money
The Fly More Kit is definitely worth the additional cost on top of the original drone.
For a hobbyist photographer and avid traveller such as myself, the DJI Mini 3 Pro is by far the best choice when considering image quality and portability.
The previous Mavic Mini models (which are still available) just don’t cut the mustard, and the higher-level drones, well, I can’t justify the extra costs for my personal needs.
With a starting price of around AU$1100 for a standard RC-N1 controller or just $100 extra for the Smart Controller. If you already have an RC-N1 controller from another DJI drone, you could buy just the drone itself and link them together, saving you more.
Priced around AU$150 more than the Mini 2 when that first came out, this is certainly great value for what you get.
Be sure to get either Fly More Kit for the DJI Mini 3 Pro. Coming in at Au$250 for the standard package or AU$350 for the “Plus” package (which includes the higher capacity batteries), they’re well worth the extra. Especially for the three-battery charging hub and carry case.
I should probably also mention getting yourself a 30w USB-C wall charger. For some reason, DJI chose to sell this separately from the Fly More Kit, and most phones only come with a 20w wall charger (if one at all nowadays!). This will ensure ideal charging conditions for the DJI Mini 3 Pro and charging hub.
Overall, if you’re looking for one of the best long range drones at this price point that can still fit in your every backpack, the Mini 3 Pro really is excellent value for money.
DJI Mini 3 Pro Review | Conclusion
You’re looking at the latest addition to my usual camera kit. This is going with me everywhere!
The DJI Mini 3 Pro is certainly not a toy. It may initially feel like one, but this is a highly capable device designed to be both accessible and relatively professional.
I’ve since sold my Mavic Pro because, even though it was considered smaller at the time, now having the DJI Mini 3 Pro, I couldn’t justify using it anymore.
It’s hard to say what makes something the “best drone” because the needs of every drone user are different. But right now, it’s the best one for me.
Incredible dynamic range (especially when utilising Auto Exposure Bracketing), smooth 4K videos, a small lightweight package, and a reasonable price point, what’s not to love about this drone? Small drones were never this great!
How do you feel after reading through this DJI Mini 3 Pro review? Do you want one too? Let me know in the comments!
Great battery life, excellent images quality, onboard memory and easy to fly, the Mini 3 Pro is small enough to fit in your pocket and light enough to fly without a license.

Tommy Williams is a travel photographer from Sydney, Australia. He is pretty chill, and admits he really needs to get around to updating his website more often.

WELCOME TO SHOTKIT
Enter your email to be sent
today's Welcome Gift:
19 Photography Tools
🔥 Popular NOW:


Shotkit may earn a commission on affiliate links. Learn more.