


Hollyland Lark M1 Wireless Mic Review
If you're looking for a budget wireless microphone for your next video project, this lav mic from Hollyland may be it. Check out our real-world review.
Sound quality is one of the most important aspects of your videos, and the Hollyland Lark M1 could be the wireless lav mic you’ve been looking for.
Whether you’re filming on your smartphone or a mirrorless camera, the onboard microphone that you have to work with isn’t the best quality.
Upgrading your audio is one of the first steps that filmmakers can take to improve their work.
Offers impressive sound quality, easy setup and a handy charging case, all at an affordable price.
The Lark M1 is an entry-level wireless microphone with some pretty exceptional specs for its price. But is it right for you?
I’ve given the Lark M1 a comprehensive test that’s just short of a full teardown. Here’s how it stacks up.
Table of Contents
What is the Lark M1?
- Outstanding sound quality for the price
- Great results from all the most common lav mic placements
- Stands up in noisy environments
- Great performance on mobile and mirrorless cameras
- Easy plug-n-play use
- Case charges mics when not in use
- Long battery life
- Portable
- Bright LED lights need to be hidden for some shots
- Plastic build could be tougher
- Better options at higher price points – even from Hollyland
The Hollyland Lark M1 is a wireless lavalier mic setup for videographers and filmmakers who’ve been looking for a budget mic.
It’s lightweight, easy to use, and has great audio quality for the price.
This mic costs around $100, but it’s going to significantly improve the sound quality if you’ve been using the onboard mic that’s built into your camera.
There’s no complicated setup that you have to deal with like in more expensive, high-end wireless mics.
This makes it even better for beginners and on-the-go videographers who need something responsive but simple.
Technical Specifications
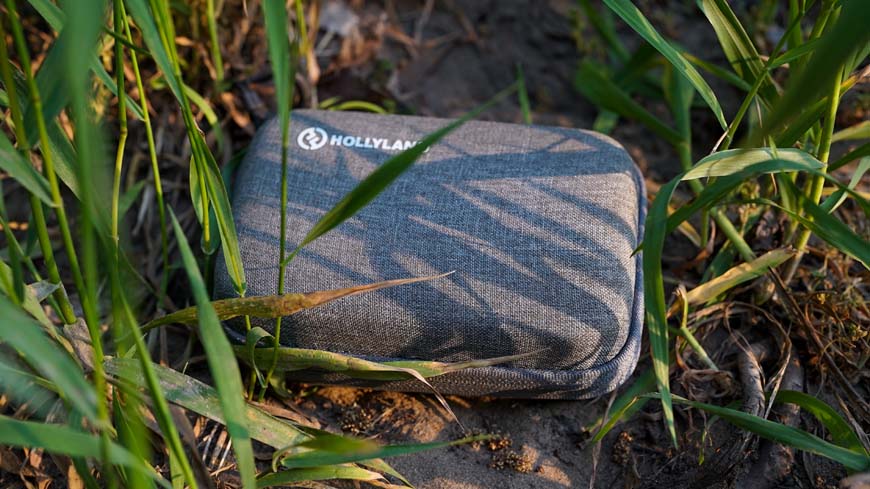
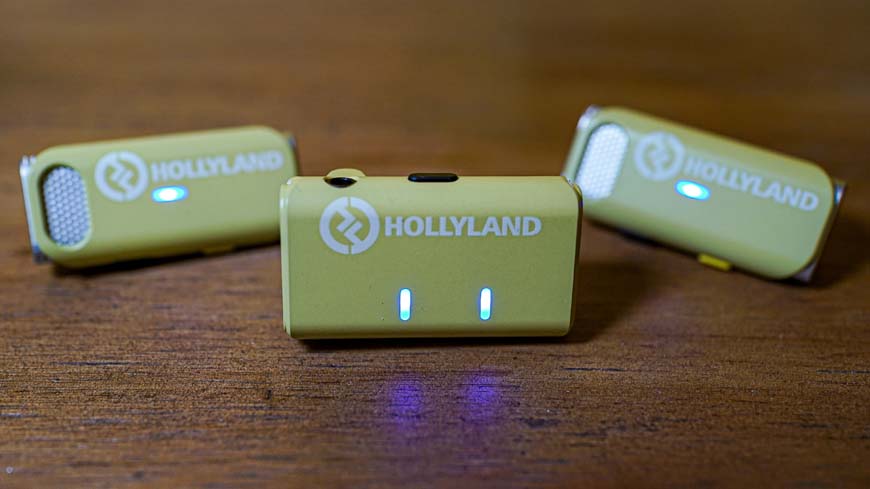
Always nice to see new gear coming in a durable and well-organized case.
| Specification | Details |
| Microphone Type | Lavalier (Clip-On) |
| Transmitter Type | Wireless (2.4 GHz) |
| Receiver Type | USB-C Receiver |
| Wireless Range | Up to 100 meters (328 feet) |
| Frequency Response | 20Hz – 20kHz |
| Signal-to-Noise Ratio | ≥65dB |
| Audio Resolution | 16-bit/48kHz |
| Maximum SPL | 110dB |
| Battery Life | Up to 6 hours |
| Charging Time | Approximately 1.5 hours |
| Power Source | Built-in Rechargeable Lithium Battery |
| Microphone Connector | 3.5mm TRRS |
| Compatibility | iOS, Android, Windows, Mac, DSLR & Mirrorless cameras |
| Weight (Microphone) | Approximately 18g (0.6 oz) |
| Weight (Transmitter) | Approximately 28g (1 oz) |
| Weight (Receiver) | Approximately 14g (0.5 oz) |
| Dimensions (Microphone) | 23mm x 47mm x 11mm (0.9″ x 1.9″ x 0.4″) |
| Dimensions (Transmitter) | 60mm x 30mm x 11mm (2.4″ x 1.2″ x 0.4″) |
| Dimensions (Receiver) | 43mm x 21mm x 12mm (1.7″ x 0.8″ x 0.5″) |
I want to highlight a few of the specifications that really stand out.
The 6-hour battery life is amazing performance, especially with the quick charging case.
I’m often filming my videos entirely solo, and it helps a lot to know that I won’t run out of microphone battery power even when I’m running around moving props and setting up my own shots.
The audio quality is also 16-bit at 48 kilohertz. That’s fantastic quality, especially when we’re considering the low price point of this wireless lav setup.
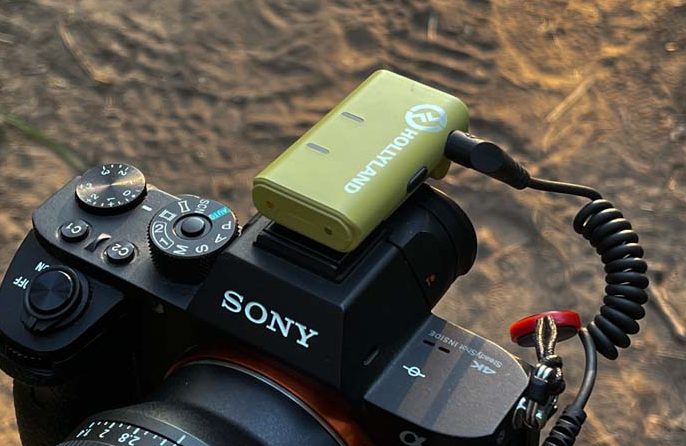
Both the microphones as well as the receiver use USB-C connections.
However, the case comes with USB-C patch cables that can connect you to TRS and TRRS. A lightning port patch cable is also available.
Design and Build Quality
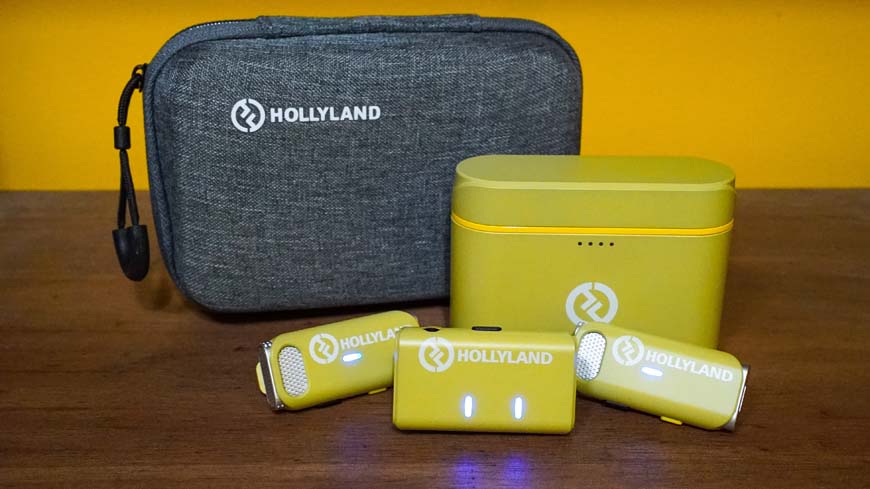
Everything you get with your Lark M1 – the cables are in the case.
The mic, receiver, and charging case all have an acceptable build quality for their budget. They use a very standard feeling plastic, but it would be nice if this had been built out of something a bit more sturdy.
With that said the overall design of the Lark M1 is pretty spot on.
The charging case resembles the same concept as the Apple Airpod case but without the annoying tendency to send your AirPods flying if the case accidentally drops.
I was happy to see a metal grate over the microphone itself. That’s going to help a lot when it comes to audio quality and it’s good to see that Hollyland put quality materials where they matter the most.
Overall, I’m very satisfied with the quality of the Lark M1. Hollyland also has more expensive models with higher build quality, but this one is just right for the price.
Performance and Sound Quality
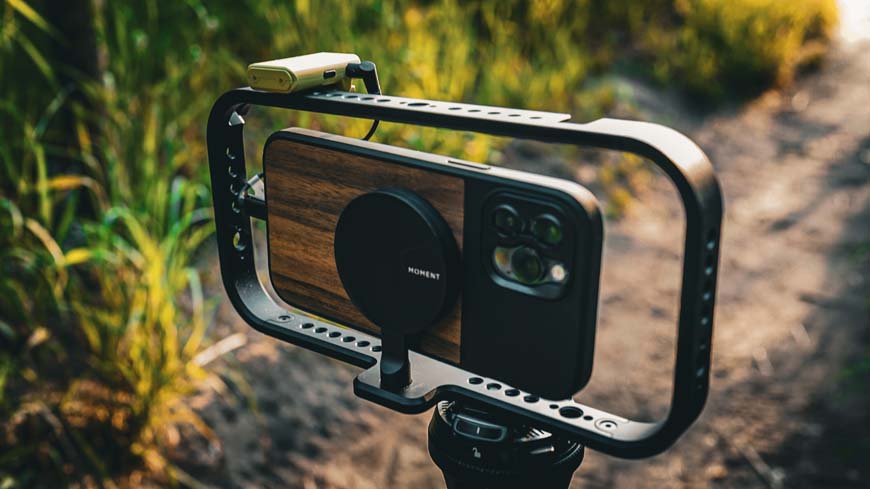
I tested the sound quality of this mic and receiver combination in a few different settings. All of these tests were conducted on both my iPhone as well as my Sony mirrorless camera.
I did my first test in my home office, where I do most of my voice-over and audio recording. It’s definitely not a professional sound studio, but it is an acoustically clean environment where I can get good sound without too much interference.
It’s no surprise that the Lark M1 did great in that environment.
If you’re filming YouTube videos at home or doing talking head interviews on location, the Holyland Lark M1 is a great wireless lav to get you started.
I also wanted to test this mic out in the world. I went and shot some videos out on the beach and just while walking around the city. The audio quality was great in both tests.
The Lark M1 does come with a few features that allow you to improve your audio quality. There are built-in options for noise cancellation, and you can drop the mic volume on your camera to improve your overall audio quality.
I also did a bit of a ridiculous test where I recorded in front of a box fan at full blast. As I expected, there was a lot of noise, but I could still clearly hear my voice even while recording under arguably the worst sound environment I could come up with.
The microphones also come with windshields. These windscreens will go a long way to improve your audio quality if you happen to be in a windy environment.
Wireless Connectivity and Range
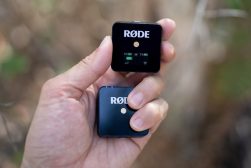
The Lark M1 uses a 2.4 GHz frequency to connect. The connection between the receiver and both lavalier microphone units is automatically synchronized inside the charging case.
You don’t have to worry about pairing the mics together, but there is a manual pairing option if the automatic connection isn’t working.
The Lark M1 also has an incredibly impressive range. It’s advertised as having the lav mics work up to 200 m away from the receiver, which is about 600 ft.
I only tested this up to 100 ft and it worked just fine at that distance. I can’t imagine too many situations where I’ll be 600 ft away from my camera and still need to get crystal-clear audio from my voice, but it’s great to know that I have this much flexibility with the Lark M1.
Battery Life and Power Options
I thought that the battery life for the Lark M1 was fantastic. I easily got all-day use without my wireless lav mics running out of juice.
The charging case also really helps with this. I do a lot of shooting out in the field where there are no power outlets, and it’s good to know I can just throw the mics and the receiver back in the case to power up for another round of shooting.
That’s really all there is to it. The battery life of this wireless lav mic and receiver did everything I needed it to.
This also compares nicely to other budget lav mics. You should expect to get about a day of shooting with a quick recharge, and the Lark M1 delivers.
Ease of Use and Setup
All you really need to do is plug the Lark M1 in and you’re ready to roll.
It really doesn’t get any easier to set up a lav mic than with the Lark M1.
It took me about 5 minutes to get from unboxing this lav mic to running my first audio tests. The only setup that was required was plugging the receiver into my camera and playing around with my camera settings until I liked the sound I was getting.
I also took the Lark M1 through its manual pairing instructions just to see how easy it would be to connect them on my own. It was about as simple as it gets and it worked without any trouble.
The instruction manual that comes with the Lark M1 also offers a few tips on how to get better audio with your DSLR or mirrorless camera.
I found those tips to be pretty spot-on for the settings you should use to get a clean signal.
Price and Value for Money
Powered up and ready to shoot.
Even though this is a cost-effective lav mic, it’s by no means cheap. The value for money I got with this lav mic is pretty fantastic.
I wasn’t expecting to get this much sound quality, ease of use, and general utility from a wireless lav mic costing just over US$100.
The Lark M1 has plenty of competition with similar setups that cost a fraction of the price, but those tend to have less clear audio and a less stable connection.
There are also more expensive alternatives that offer more features, but those can double or triple your price.
The value here is solid. especially if you’re looking to make your first significant upgrade to your sound quality in the videos that you shoot.
How I Tested the Lark M1 Wireless Mic
I wanted to really put the Lark M1 through its paces. So, I tested it in real-world conditions that I would expect any lav mic worth its money to be able to function in.
As I mentioned earlier, I did my test by connecting the receiver to my Apple iPhone 12 Pro Max and my Sony A7s II.
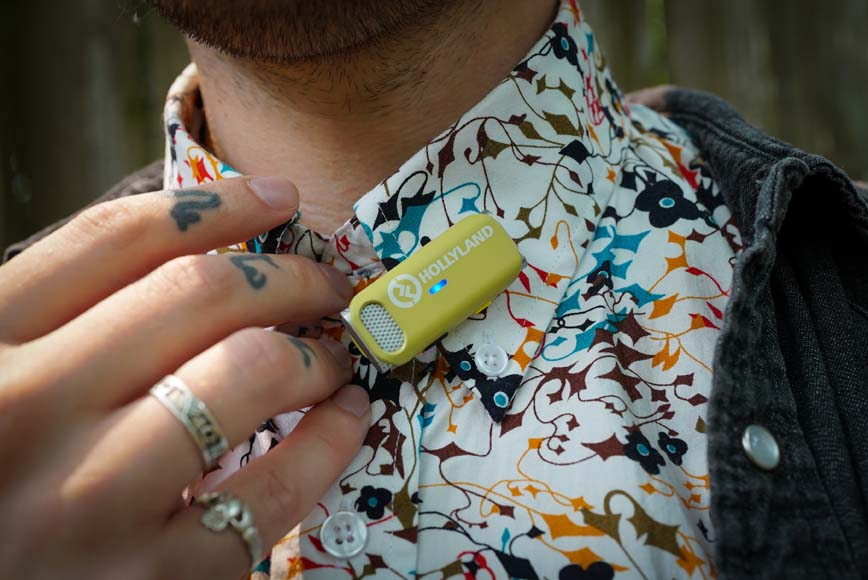
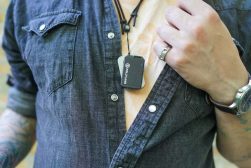
The first test that I did was your standard wireless lav mic placement. These mics are essentially meant to be clipped onto the collar of your shirt.
This is an omnidirectional mic which means it picks up sound from all directions. As long as the microphone is generally in the vicinity of your mouth, you’re going to get a great signal.

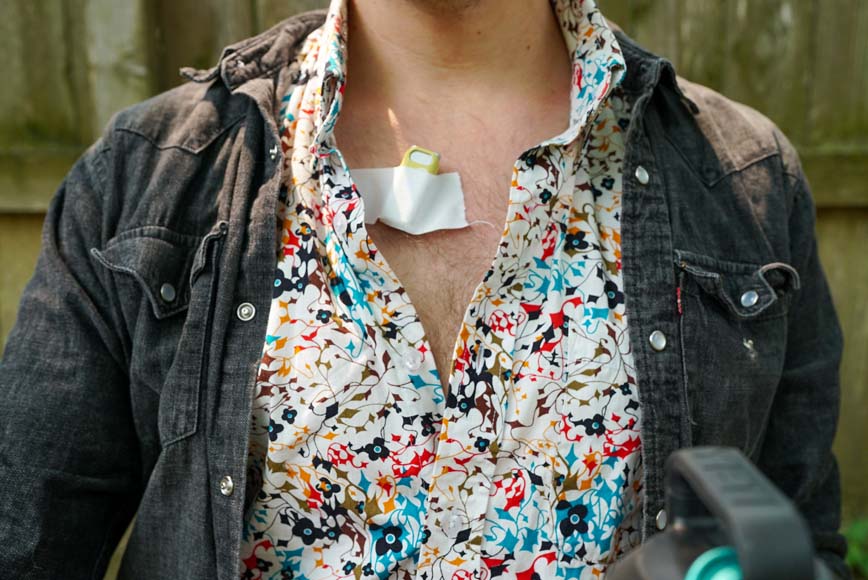
Can you guess where the lav mic is hidden?
However, there are times when you can’t clip a mic to the shirt collar of your talent.
You might need to have the lav mic off of your talent if you’re shooting a beach scene and they aren’t wearing a shirt, the script has them walking out of a shower, or you’re working on a budget and you need two actors to be able to pass a lav back and forth.
One thing that we often do is hide a lav mic on a prop or a piece of set dressing.

Don’t be afraid to get creative with lav mic placement when you need to!
I taped the lav mic to the back of my water bottle for this test. The Lark M1 performed great when hidden on the back of a prop.
My voice still came through nice and clear, even when the mic had to be a little further from my body than I would have liked.
You can really get creative with your lav mic placement and aren’t just restricted to having it hanging off of the collar of your on-screen talent.
This is a great way to get the bright LEDs of the lav mic out of your shot. (Just make sure to button your shirt back up after hiding the mic!)
Another common situation that you might face is having to tape a lav microphone physically onto the body of your on-screen talent.
It’s always good practice to try and conceal a lav mic as best you can within their clothing, but sometimes that just doesn’t work.
I grabbed my handy medical tape and quickly attached the Lark M1 to my chest to test it out.
The size and weight of this lav mic made it a little tricky to get taped on properly, but I wound up getting it to work.
The sound quality was still excellent, as I expected, and the mic stayed in place – although I did need to change the tape once or twice.
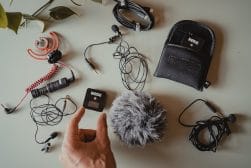
Alternatives to the Lark M1
The world of sound recording is full of options!
You’ve got a lot of options when it comes to recruiting your audio for your video project.
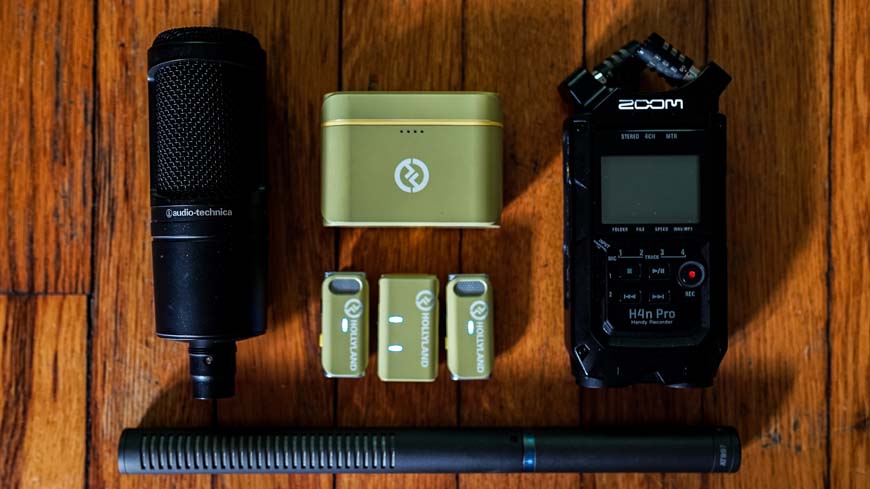
I’m going to leave out options like boom microphones or the Zoom H4N Pro and instead focus on other budget lav mics that you could consider instead of the Lark M1.
I’m also going to leave out the lav mics made by brands like Sennheiser and Sony. If you’re looking at budget options offered by brands like Hollyland, a $1,000 mic is probably out of the question.
- Saramonic UwMic9 – Slightly more expensive, but much more closely resembles the wireless lav setups used by major studio pros.
- Saramonic Blink500 – Longer battery life, shorter range, and a few quality-of-life improvements for about US$100 more than the Lark M1.
- RODE GO Omnidirectional Lavalier Mic – This is a wired lav mic that you physically plug into a receiver. If you happen to already own something like a Zoom H4N Pro, you could just buy a traditional lav mic and record directly into a device like that.
- Rode Wireless GO II – Very similar with a slight boost to options and quality for a higher price. However, no charging case.
- Joby Wavo Air – A streamlined wireless lav from the Joby brand, but at a higher price with a shorter battery life and no charging case.
- DJI Wireless Mic Kit – A slightly higher-end kit with a better build quality, onboard storage, and from the well-known DJI brand. This model competes with the Hollyland Lark 150 or Lark Max.
- Deity Microphones Pocket Wireless System – One microphone and no charging case, but you do get a carry case and windscreen.
FAQ’s
What devices are compatible with Hollyland Lark M1?
The Hollyland Lark M1 is compatible with a wide range of devices, including iPhone, Android laptops, cameras, and camcorders. In general, if your device can handle an audio input, it might be able to connect to the Lark M1.
How do I connect my Hollyland Lark M1 to my laptop?
It’s a simple two-step process to connect your Lark M1 to your laptop. The first thing you need to do is plug your Hollyland Lark M1 into your laptop. Next, change your laptop mic settings so that it recognizes the Lark M1.
How do I connect my Hollyland Lark M1 to my iPhone?
You will need a TRS to lightning patch cable to connect your Lark M1 to your iPhone. All you need to do is plug the Lark M1 receiver into your iPhone and the Lark M1 should automatically work as the default microphone.
Lark M1 Review | Conclusion
I was pleasantly surprised by the Hollyland Lark M1. The audio quality is exceptional, the battery life is fantastic, and it’s rare to find a piece of audio equipment that’s this easy to use.
I definitely plan on using this device whenever I need to record live audio. It’s also got me curious about other devices from Hollyland, like the Lark Max or Lark 150.
Let me know if this review helped you out. If you want more reviews of audio equipment, let me know in the comments what kind of equipment you’d like to see in my next review!
Offers impressive sound quality, easy setup and a handy charging case, all at an affordable price.
 LARK MAX Wireless Microphone Review
 7 Best Wireless Microphones in 2023 for Video Recording
 Best Lavalier Mic in 2023 (for iPhone, YouTube, Podcasts, etc)
 Best External Microphones for Zoom Meetings & Calls in 2023
 5 Best Action Camera Microphone Attachments in 2023

Ashley is a photographer, writer, and film critic. When Ashley’s not writing essays on photography, cinema, and theory, he’s out taking pictures with retro film cameras.

WELCOME TO SHOTKIT
Enter your email to be sent
today's Welcome Gift:
19 Photography Tools
🔥 Popular NOW:


Shotkit may earn a commission on affiliate links. Learn more.