


8 Hand Poses for Portrait Photography
Ever struggled to pose hands? Whether they're your own or your subjects, it's a tricky thing for portrait photography! This guide to 8 hand poses should help!
Learn | Photography Guides | Posing | By Ana Mireles
Ever wondered what to do with hands when posing for pictures?
Whether it’s your hands or your subject’s, hand poses are a tricky topic for portrait photographers!
In this guide, we’ll show you a few tricks to making hands poses look natural, including how models pose their hands to draw attention to their face or accentuate their body.
You’ll also pick up some great tips when directing people who ask what to do with their hands when standing.
Overall, I think you’ll find it a really handy guide… so let’s get stuck in!
Table of Contents
8 Tips for Posing Hands for Photos
1. Relax
One of the most important rules to hand poses is that you should relax them – this refers to the entire hand, from the wrist to the fingers.
If your muscles are doing something they don’t usually do, then it will look awkward. Here are some tips to make your hands look natural.
- Let hands hang naturally
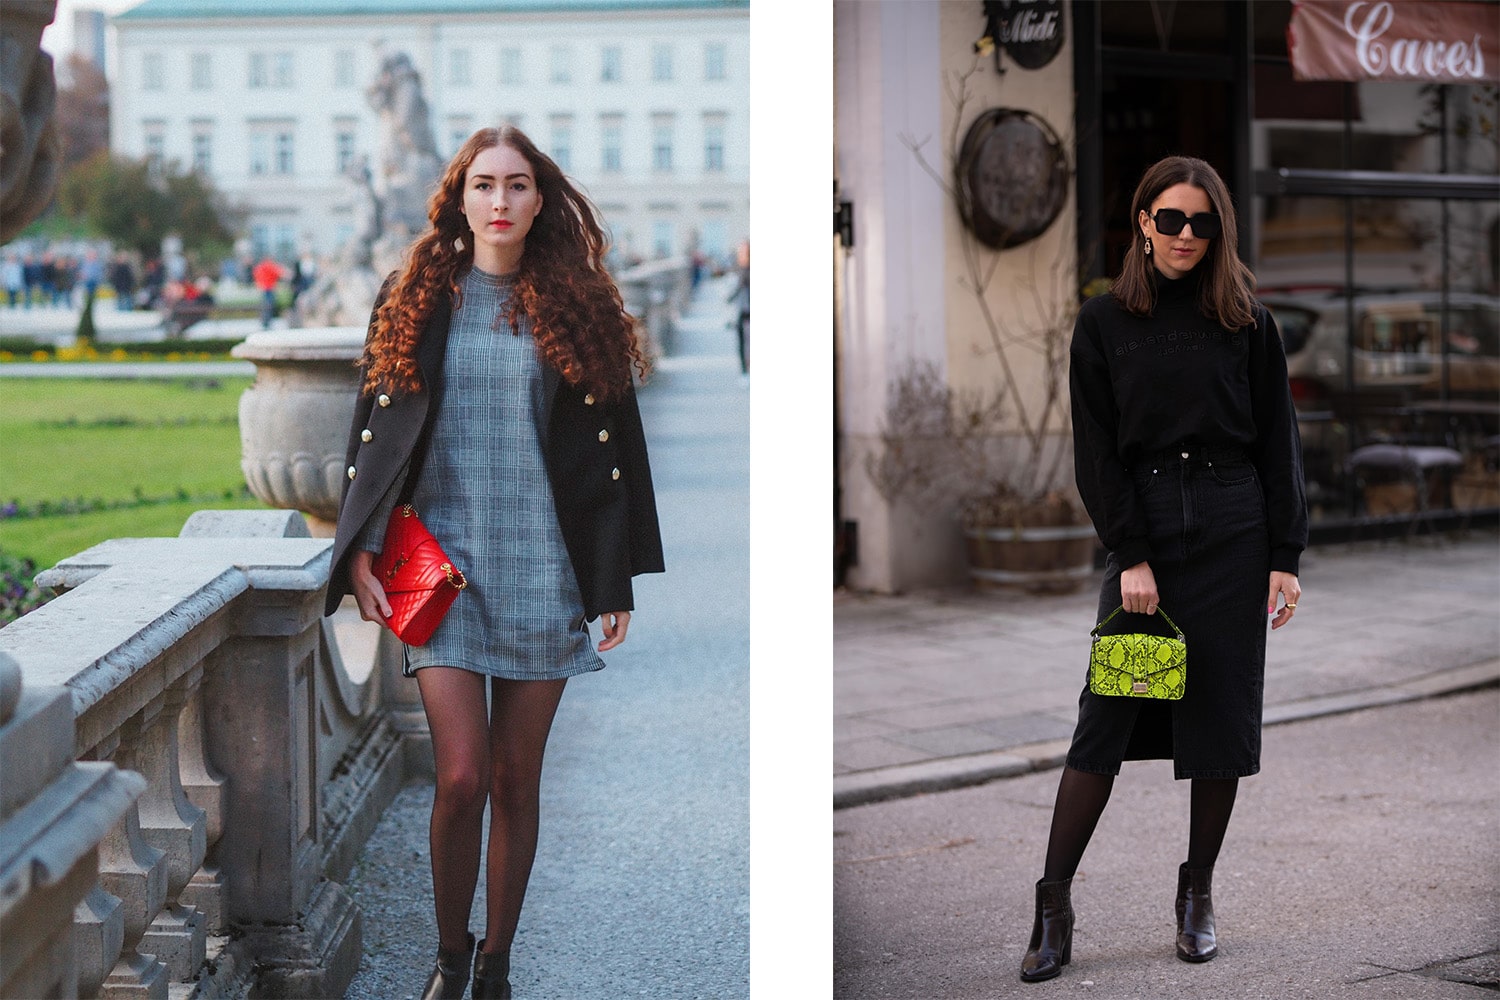
Credit: Laura Chouette / Susanne Neumair
If you’re not doing any specific action with your arms and hands, let them hang naturally on the side.
Leave some space between the arm and the body, this will allow for the elbow to be slightly flexed. This will translate all the way to your hand and fingers that should have a natural curve, so you won’t look like a soldier standing guard.
This rule applies even if it’s just one arm hanging and the other one is holding something or posed in a different way.
- Don’t hold hands tight

Credit: Rohit Rao
On occasions, it’s best to have something on your hand to give it something to do and avoid causing a distraction. I’ll give you some examples of what you can use for these types of hand poses later in the article.
Whatever it is that you decide to hold, don’t do it too tight. Clenched fingers (or any kind of tension in the fingers altogether) would be a giveaway that you are nervous in front of the camera – as opposed to how you should look which is relaxed and confident.
This tip is so simple but will have an enormous effect when posing people for photos – just keep reminding them to relax their hands and fingers.
- Touch the body – don’t grab it

Credit: Artem Kniaz
Other portrait poses suggest that you pose your hand on different parts of your body – I’ll suggest some of these poses in the next section.
When you’re doing this, make sure you’re gently brushing the body. If you grab it too strongly, aside from looking tense, you can create bumps of the skin or make it too red or other unflattering side effects.
2. Highlight different bodyparts
Unless you’re doing a close-up of the model’s hands, you don’t really try to highlight them. At most, you try to make them look natural or make sure they don’t draw attention.
Instead of being something that should go unnoticed, why not use the hands to your advantage and draw the viewer’s attention.
It’s not that you want to have people looking at the hands specifically, but rather, you want to use them as a guide towards other parts of the body.
Here are some examples of hand poses and how you can use the hands to highlight various other body parts.
- Hand on the chin
Credit: Julian Myles
With this hand pose, you’re not only giving your hand something to do – you’re also directing the attention towards the model’s face.
To avoid having the hand look tense or awkward, you can try doing encouraging some gentle movements.
For example, place the right hand against the left cheek. Then, slowly slide it down, as if it was caressing the cheek and then stop when your model reaches the chin.
That way, the hand will already be in a natural position as it was following the movement flow.
Another way to go is to put the thumb under the chin, the index finger extended on the cheek and bend the other three fingers – as exemplified in the photo above.
This ties in to the notion of always giving the hands something to do with your hand poses – allowing the model to touch their chin kills two birds with one stone – you highlight their pretty face, and you give give the hand(s) something to do.
- Frame your face with your hands
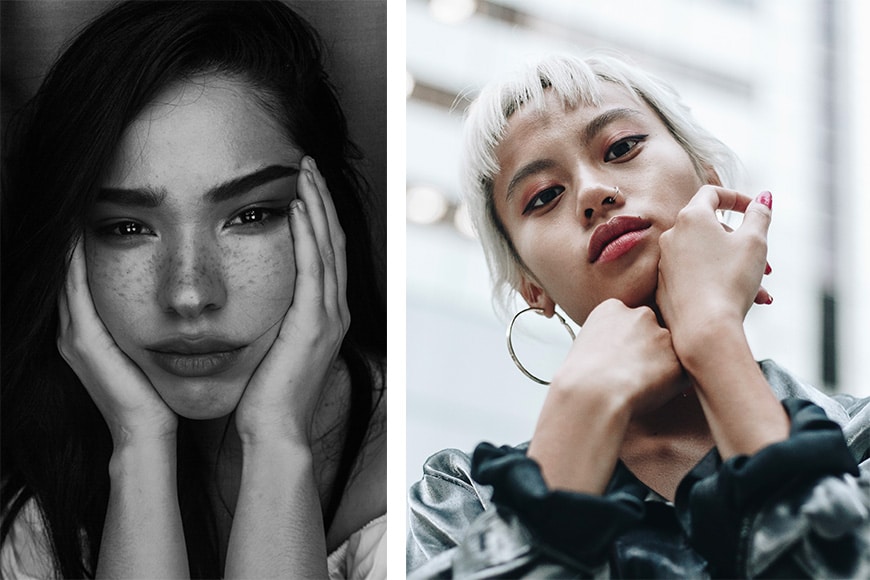
IMAGE: Zulmaury Saavedra / Oladimeji Odunsi
A variation of the hands on the chin is to have the hands on the cheeks. This is perfect to frame your face and make it the focal point of the portrait.
Alternatively, you can mix both positions and have one hand on the cheek and the other one on the chin. Either way, you’re drawing attention to the face.
- Put your hand on your waist
Credit: Matt Moloney
This is one of the most well-known hand poses – especially for women. When you put your hand on your waist, you’re highlighting the natural curves of your body.
There are different variations of this pose. You can put both hands on the waist or just one. Also, there are some models that prefer to have four fingers in front and the thumb on the back while others prefer it the other way around.
Choose the one that you feel more comfortable with – or make several photos trying all the various hand poses described above and pick the best looking one at the end.
Another way of doing it whether you’re a man or a woman is to put the hand on the waist with the thumb passing through the belt loop. This has the additional benefit of elongating the fingers, which can be especially attractive when posing females.
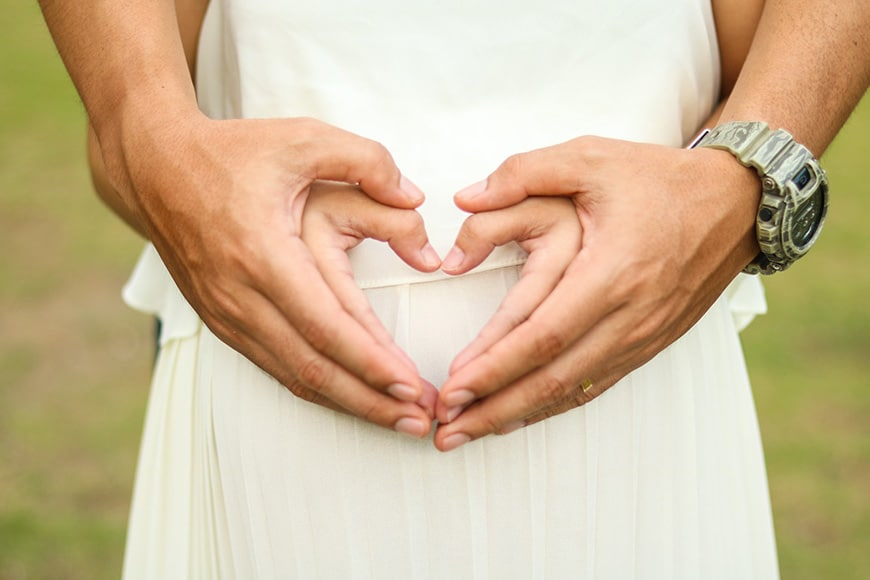
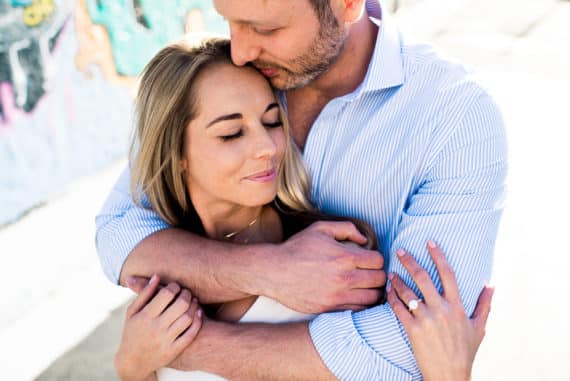
- For maternity photos, put your hands around the baby bump

Credit: Mel Elias
When you’re doing a maternity photoshoot, there’s one part of the body that you want to focus on: the baby bump. That’s why you can easily use the hands to highlight it.
For example, if you place one hand on top and the other one on the bottom, it looks like you’re hugging the baby. You can also place only one hand on it, or ask your partner to hug you and surround the belly with the hands.
One word of caution – when posing couples for engagement photos, be especially careful when the male is hugging the female from behind. The natural tendency is to wrap both arms around, with the hands resting on the female’s tummy… and guess what?! You’ve just turned it into a maternity shoot!
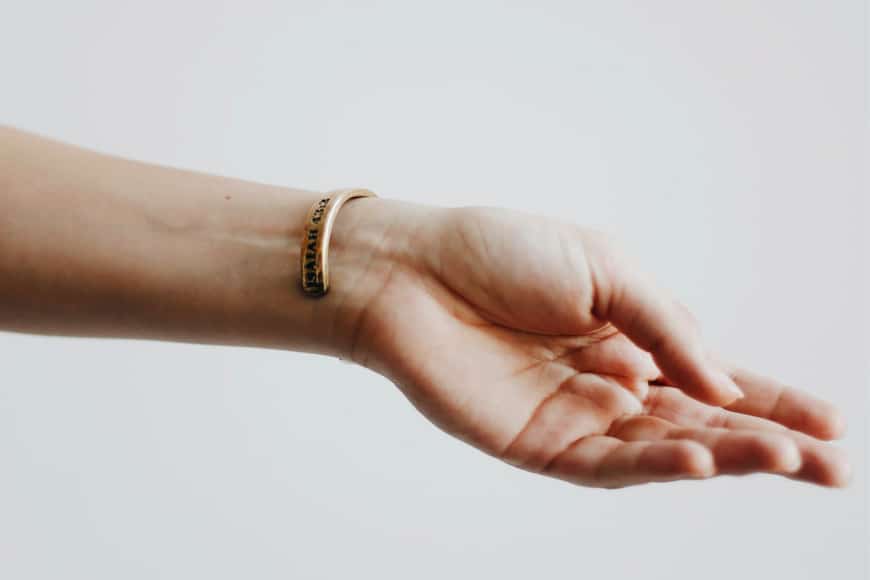
3. Use your clothes
When you want to give the hands something to do but you don’t want to add an extra item in the picture, you can use whatever you already have at your disposal – your wardrobe.
Have you ever been nervous during an interview or presenting in class? In these type of situations where we don’t have anything else to use, we often start to play with a ring or fix our shirts.
You can use the same technique when you’re in front of the camera and your feeling awkward about your hands. Let me give you some examples.
- Hold the collar

Credit: James Balensiefen
This is a very useful hand pose if you want to draw attention to the face without actually touching it.
The hand will be very close to the chin, so you’ll be getting the same effect as I mentioned before with the body parts.
It’s also a versatile hand pose because it can be used by men and women models and different types of tops have collars that can be folded and unfolded. It can be as casual as a hoodie or as formal as a jacket.
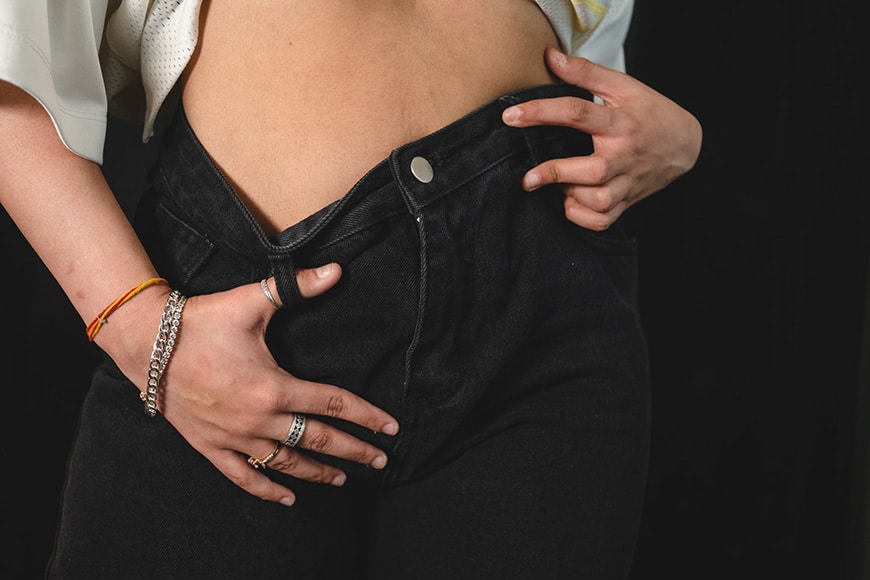
- Put your hands in your pockets

Credit: Tyler Nix
This is another hand posing tip that’s super versatile because you can use the front pockets, the back pockets, the jacket pockets – it can be the whole hand inside, just a finger, it can be casual or formal, for men or women…
I’m telling you, it’s a lifesaver in any portrait photo shoot! Just make sure that you’re not creating any distracting bumps or creases on the clothes.
Another tip is to make sure your model doesn’t push the hips forward too much when placing their hands in their back pockets.
- Fix your sleeves

Credit: Heng Films
Another way to use your clothes if you’re wearing a shirt with long sleeves or a jacket, you can entertain your hands by pretending to fix the sleeves.
This is a popular wedding pose when working with men, especially during the groom’s preparations. Usually, the groom is nervous, so giving the hands something to do here serves a dual purpose.
4. Arms up
- Hands behind the head

Credit: Ayo Ogunseinde
Raising your arms is always flattering for your figure. It also creates dynamic lines to make the photo more interesting.
However, it’s often awkward to find something to do with your hands as this isn’t a very common pose in your day to day life – except for maybe a big yawn in the morning.
So, one way to keep the benefits while solving the problem of the hands is to put them behind your head.
By doing that, your torso will still look slimmer, the arms will guide the viewers towards your face and your hands are tucked away – you can even lean the head back a little into the hands to look more casual and relaxed.
Often these kinds of poses will result in the elbow pointing directly to the camera, which isn’t always flattering, especially for men who tend to have dry skin on their elbows!
Try angling the model into a position whereby the elbow is pointing at a slight angle, or alternatively, smooth things out in post production.
- One hand on the neck

Credit: Matheus Ferrero
If putting both hands on the back of your head is a little too relaxed for the type of portrait you’re doing, try placing only one hand on the neck.
Just make sure the hand remains ‘light’ – not tugging down on the back of the neck, which can introduce unnecessary tension into the body, not to mention feel uncomfortable for the model!
These hand poses are especially good for adding the hands into the photo in a landscape orientation shot, where, typically, the hands would be ‘cut off’.
- Do the dancer’s hands

Credit: David Hofmann
Have you ever noticed that professional dancers use their hands as part of the choreography? They move them with the same flow they do the rest of the body.
Actually, there are some dances where the hands are so essential that they tell a story – for example, Hula dancing and Bollywood dancing.
I’m not saying that you need to learn how to dance, but you can look online for photos of dancers and see how they pose their hands so gracefully and try to imitate that.
Take note especially of the index finger in each photo – typically it’s extended to convey strength and power, or curled and soft to denote frailty or introspection.
- Play with your hair

This is an excellent use of your hands on a portrait, it works particularly well if you have long hair.
This pose ticks many of the hand pose checkboxes: you have your arms up, you’re drawing attention to your face and you’re giving your hands something to do. Make sure you add it to your repertoire or hand poses!
What if the model is bald? Well, you can still ask them to run their hands through imaginary hair – this could have the additional benefit of creating some natural laughter for your portrait shot!
5. Use props
When you’re holding or grabbing an object, you’re giving your hands a role in the picture.
You can stop worrying about how they look because you’re used to holding things – that’s why adding props can be very useful for hand poses.
- Hold a glass

Credit: Eye for Ebony
Giving the hands something to do is always a good solution to make them look natural when you’re posing for a portrait photo.
A glass is great because is an object we use every day, so we feel very comfortable with one on our hands. Plus, it’s so versatile that fits with different types of portraits and moods.
For example, a champagne glass fits well in a portrait with artificial light and an elegant wardrobe; while a cup of coffee-to-go looks very natural in a casual, urban portrait.
- Hold a cigarette

Credit: Caroline Hernandez
This one should be used with judgement because it depends on the age of the model and the final output of the photo.
Also, if you’re doing a book to promote your modelling services, you need to know who’s your target – many brands don’t have a good association with unhealthy habits.
However, as far as hand posing goes, it’s a great prop. Because of its slim shape, it allows you to extend your fingers naturally without overreaching.
Other props with a similar shape are also useful such as a pen or a pencil, it depends on the mood you want to have in your photo.
- Grab a backpack
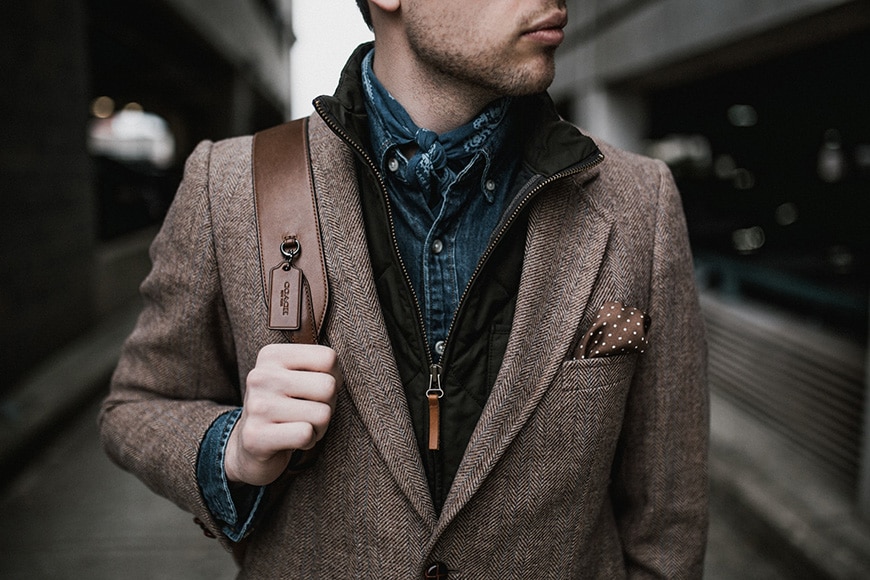
Credit: Andrew Neel
Holding the strap of the backpack is a very natural movement – think about it, especially if you put it on a single shoulder don’t you get a hold of the strap?
Maybe it’s a defence mechanism to avoid theft or prevent it from falling down, either way, we all do it so it won’t create a distraction in the photograph.
If you’re not using a backpack, you can do it with a purse or suspenders – it depends on your outfit.
- Check the time

Credit: Shamim Nakhaei
Another thing to do with your hands while you’re posing for a lifestyle portrait is to check your watch.
(This of course wouldn’t look good for a headshot or a traditional portrait in which you should be looking at the camera.)
However, in scenes where you’re acting natural – as if the camera wasn’t there, this is a perfectly acceptable hand pose.
- Play an instrument

Credit: Daniel Wirtz
If you know how to play an instrument, this is a great way to focus on your hands.
However, if you’re only going to use the instrument as a prop, make sure you study the real hand placement as if you knew how to play.
Otherwise, if any musician sees your photo, the only thing they would be able to think about is how you’re doing it wrong. Of course, this advice applies to any prop that needs special handling.
6. Use your hand for support
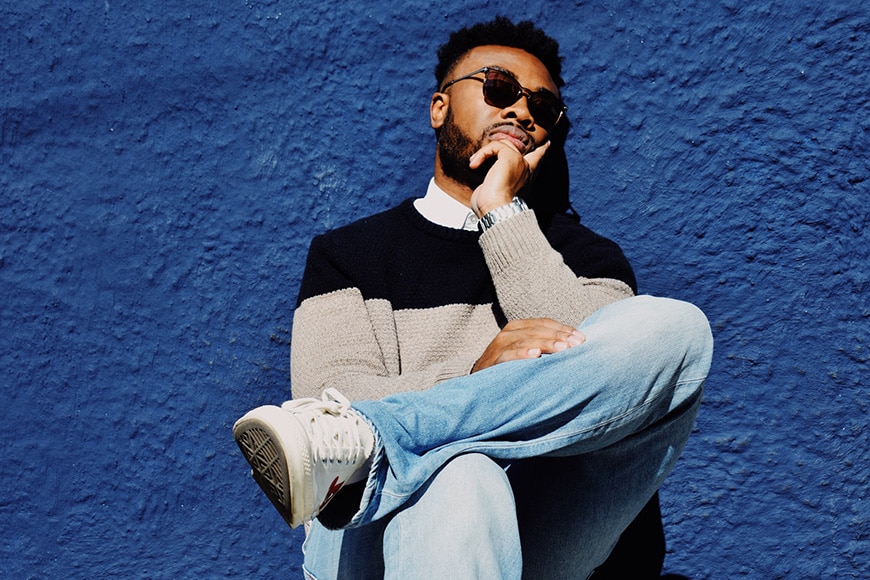
- Lean on a wall

Credit: Eye for Ebony
Leaning into something, whether this is a wall, a column, or your partner is a flattering pose overall.
If you touch it with your hand, without actually putting all your weight into it, it makes a pleasing effect.
- Rest your hand(s) on top of something

Credit: Noah Buscher
Another way to ‘support’ yourself with your hand is to rest them on top of an object, for example, the back of a chair.
If there’s someone else with you, you can place your hand on their shoulder – of course, this depends on the relationship – you wouldn’t do it if it’s a corporate portrait and the other person is your boss. However, it can look great when posing best friends or close family
In any case, by doing this you’ll let the hand muscles relax and curve your fingers in a natural way.
7. General hand photography tips
These tips are more aimed at the photographer than the model. However, models can also benefit from knowing these things and consider them when posing.
- Beware of where you crop

Credit: Jordan Whitfield
The best practice is to either include the hand or not – cropping it in a pleasing way is a bit tricky. If you absolutely have to crop the hand, avoid doing it in any of the junctions.
So, don’t crop at the wrist or the knuckles – in general, if it folds, you shouldn’t crop there.
- Use angles
Credit: Jonathan Sanchez
This advice is taken from posing the body but works in the same way for the hands. When the hand is facing directly towards the camera it will look bulky and can attract too much attention.
Instead, have the hand tilted a little bit in one way or the other to show part of the side, this will give depth and make it more pleasing.
A 45-degree angle is a classic in portrait photography, but you can be more flexible when you’re posing hands.
- Keep the hands far from the camera

Credit: Nadine Shaabana
Anything that’s closer to the camera will look bigger. Unless you’re going for a specific effect where you want to emphasise the hand – for example, signalling to stop – you should avoid having the hands too close to the lens.
- Use the rule of space when pointing

Credit: Eye for Ebony
If one of the hand poses of your model is to extend the index finger – as if it was pointing at something – be careful with the composition.
The rule of space is a composition rule that suggests you should leave enough space in front of a moving subject. While a pointing hand is not exactly a moving subject, it does suggest an imaginary line that the viewer will try to follow.
Just as in real life, if you see someone pointing at the sky – you’ll look up and search for what they are pointing at. The same principle applies in photography.
If the finger is too close to the edge of the frame, it will make a sense of unease in the viewer.
8. Pick your moments for hand shapes
Credit: Germs
Creating shapes with hands and fingers can be very effective or can be a bit cheesy because it’s been done many times.
One of the great things about these hand poses is that you can use them with one, two or multiple models. The important thing is to be creative to give it your own twist to it and of course, pick your moments.
For example, heart hands on a maternity photoshoot can be a beautiful picture if you’re going for a classic look.
To use it on a best friends photo session, maybe use it only on children and young models.
Ideas for Couple Hand Poses
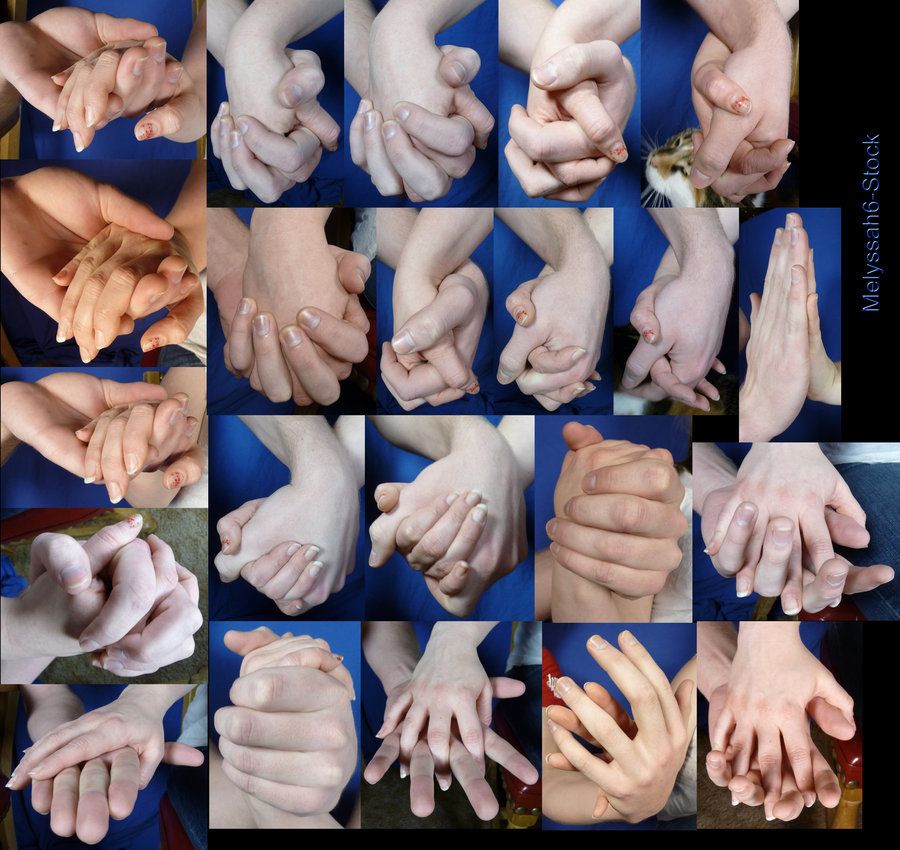
Credit: Melyssah6.stock
If you’re looking for ideas of hand poses to use with couples, the image above is a useful reference.
As you can see, the various placements of the hand and fingers in each hand pose creates a different feeling – some are tender, while others are domineering or playful.
Use it as a guide when posing your subjects for natural-looking portrait photos.
Here’s some more advice for couple’s hand posing.
- Be gentle
Whether you’re holding hands or caressing your partner – make gentle moves and never squeeze too tight. Remember the hands need to be relaxed to look natural.
- Don’t point interlaced fingers toward the camera
I already mentioned before that you should photograph hands at an angle – this becomes especially important if the couple is holding hands with interlaced fingers.
This is because the hands become a heavy element that attracts too much attention and the viewer will start counting fingers because they will seem like too many.
- Interact naturally
One of the best ways to pose your hands in a natural way is to forget about them. When you’re in a couple’s photoshoot, it’s the relationship that should shine in the images.
So, encourage the couple to forget about the camera and just talk, laugh and hug as they usually do. In the meantime, you should be ready to take the photos without being intrusive and interrupting the flow.
- Hand kiss
This is a very romantic pose that you can use for a couple’s photoshoot – it can be an engagement session, wedding photoshoot, maternity, etc.
Either one of them can gently take the other one’s hand and gently kiss it. It’s a pose that allows the hands to be the center of attention and is full of emotion.
- Walk holding hands
Doing things instead of posing is always a winning trick. If you hold hands and stand in front of the camera, you’ll start fixating on what to do and wondering if you should interlace the fingers, or who’s hand should be on top of the other, etc.
If you simply hold hands and start walking as you do in your everyday life, things will come out much more natural.
As a photographer, you can use the burst mode on the camera to capture the best moments when the models are moving.
Final Words on Hand Poses
I know posing hands is one of the hardest parts of making portrait photography. However, there are plenty of ways to solve the problem and get the hands looking great in every shot.
I hope you found this guide useful. If you have any other hand posing tips, tricks or ideas that you want to share with us, please do so in the comments section. We’ll be happy to hear from you!
 23 Male Model Poses & Prompts + Tips for Great Male Poses
 68 Best Instagram Poses in 2023 (Pose Like an Influencer)
 27 Flattering Portrait Poses for Photographers & Models
 31 Boudoir Poses, Ideas & Tips to Make Her Look & Feel Amazing
 48 Natural Couple Poses for Weddings, Instagram, Selfies & More
 21 Fashion Poses, Ideas & Tips for Photographing Models

Ana Mireles is a Mexican researcher that specializes in photography and communications for the arts and culture sector.


WELCOME TO SHOTKIT
Enter your email to be sent
today's Welcome Gift:
19 Photography Tools
🔥 Popular NOW:


Shotkit may earn a commission on affiliate links. Learn more.