


How to Create the Vignette Effect in Photoshop (Two Easy Methods)
Learn how to use Photoshop to add a vignette effect to your image to replicate a retro look or showcase the subject in a photo.
Photoshop | Software | By Judyth Satyn
The vignette effect used to be the bane of photographers, but now it’s sought after for its retro look, showcasing, and mood-inducing capabilities.
The vignette effect is when an image fades into its background without a definite border. It can be either square or circular.
The shaded edges are mood-inducing, used to conjure up a gothic look or replicate a retro vibe.
A vignette helps to highlight a subject by removing distracting backgrounds to draw attention to an area or subject, a useful technique to master if you sell products online.
Adding a vignette using Adobe Photoshop is simple – here are a couple of fast ways to do it yourself.
(Prefer Adobe Lightroom? Here’s how to create a vignette in Lightroom.)

Download the latest version of Adobe Photoshop to follow along with this simple tutorial.
Start a free 7-day trial today
Table of Contents
Two Methods to Create the Vignette Effect in Photoshop
Method 1 – Using the Lens Correction Filter
The Photoshop option to add a vignette effect via the Lens Correction Filter is an instant, quick fix, simple method.
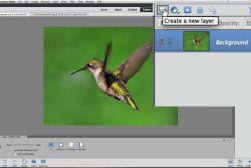
Open the image and check the layers panel to ensure the image is Unlocked.
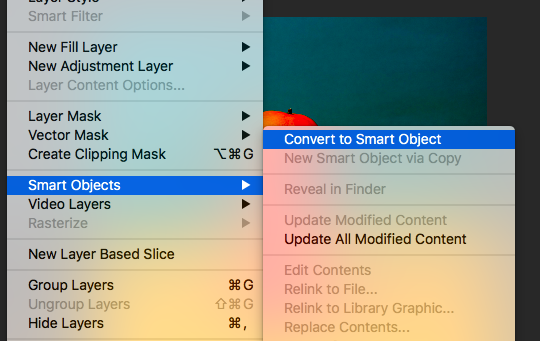
Convert the image to a Smart Layer to give you more control and flexibility over edits.
Navigate to Layer in the drop-down menu and select Smart Objects > Convert to Smart Object.
When the layer is converted to a smart object navigate to Filter > Camera Raw Filter.
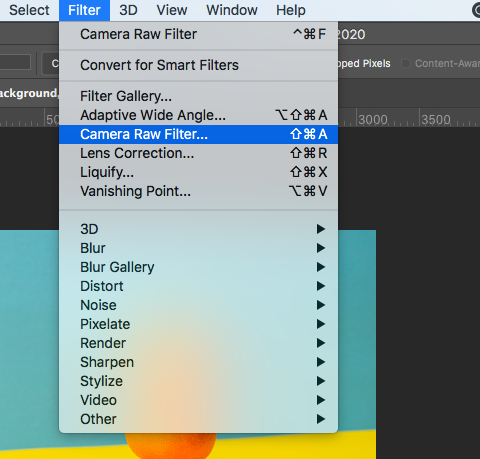
The image will now be displayed in the Camera Raw Window to the left of the window is the Camera Raw Edit Panel.
Select Effects from the Edit Panel, underneath Effects you will find the Vignette Slider.
Slide to the Left to Darken the edges or to the Right to Lighter the edges, or set it to zero to remove the vignette effect.
The Vignette Slider will give a rating for the effect from -100, for the darkest tone to +100, for the brightest shade.
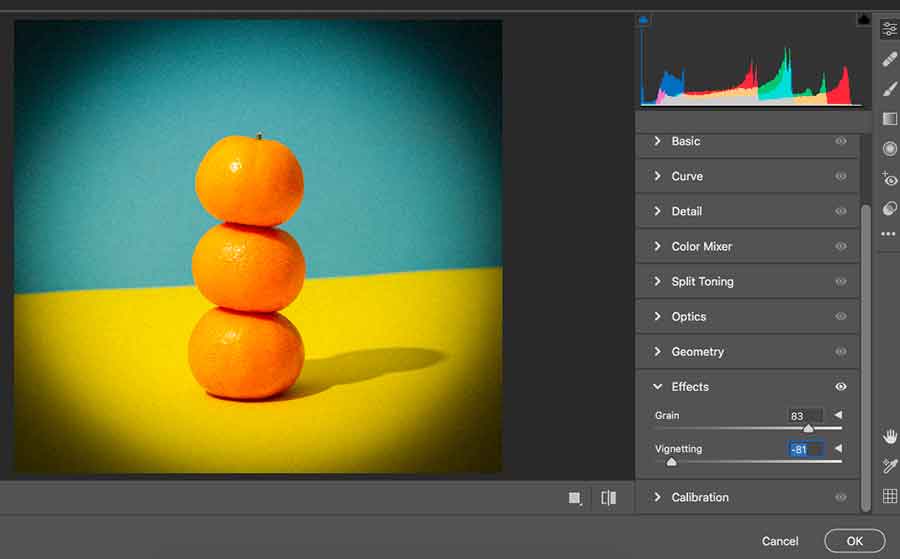
Position the slider for your preferred vignette effect, then hit OK in the bottom right-hand corner of the Edit Panel.
Voilà, like magic you now have a retro-style image with a focus on your centrally placed subject, leading the viewer’s attention directly to your subject.
The quick fix vignette Photoshop option is great for achieving a standardized simple vignette effect, but if you want more versatility try the next method.
Method 2 – Using a Curves Adjustment Layer
This method is versatile allowing you greater control over the position, shade, and color of the vignette effect.
Open the image and check the layer panel to ensure it is Unlocked.
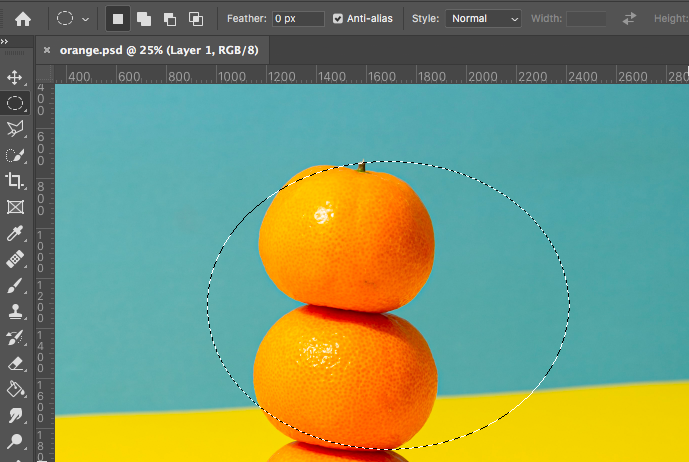
Head to the Toolbar and click on the Marquee Tool.
Choose a shape tool, the Elliptical Marquee Tool for a round vignette effect or the Rectangle Marquee Tool to create a rectangle-shaped vignette effect.
When selected hold down your curser and Drag, Hold and then Release to surround the area or subject with a line of marching ants.
If the oblong circle of marching ants isn’t in the correct position you can move it.
Hover your cursor over the marching ants until an arrow icon appears, Left-Click on the arrow icon, Hold and then Drag to the desired position.
The inside of the oval is now the active selection area, change this to the outer area.
To invert the Selection Area navigate to Select > Inverse.
The edge of your image will now be bordered by marching ants.
In the Top Menu Bar navigate to Select > Modify > Feather.
The Feather Selection Box will appear, you can now enter a Value beside Feather Radius.
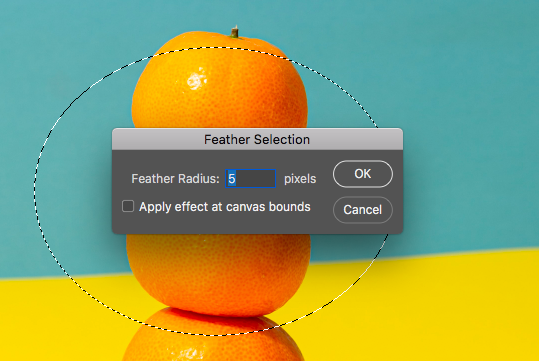
The size of your image and the style of the vignette effect you wish to achieve will determine the value you enter.
Enter a higher number if you want greater blending between the background layer and subject, and enter a lower number if you want less.
Now you will need to create an Adjustment Layer, go to Layer > New Adjustment Layer > Curves.
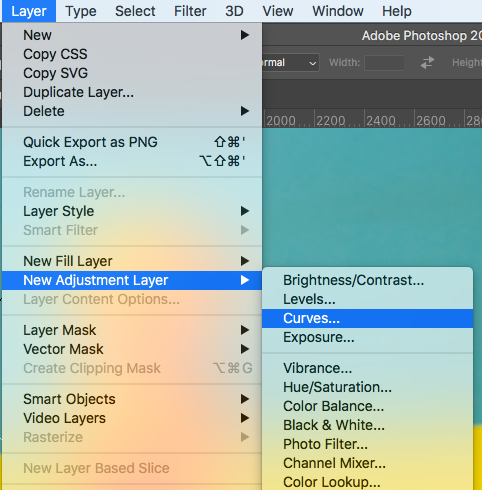
The Adjustment Layer gives you editing freedom, allowing you to return at a later time to change or remove unwanted vignetting, without altering other edits.
Click on the Curve in the Adjustment Layer Window, drag it downwards to darken the edges of the photo, or upwards to lighten.

The corners of your image’s frame will now be darkened (or lightened) leading the viewer’s eye down a visual tunnel toward the subject.
How Can I Change the Color of a Vignette in Photoshop?
To change the color of a vignette in Photoshop, follow these steps:
- Open your image in Photoshop and select the “Vignette” tool from the toolbar on the left side of the screen. This tool is typically located under the “Marquee” and “Lasso” tools.
- With the Vignette tool selected, click and drag around the area of the image that you want to apply the vignette to. You can adjust the size of the vignette by dragging the handles on the edges of the selection.
- Once you have the vignette in place, go to the “Properties” panel on the right side of the screen and click on the color swatch next to the “Color” option. This will bring up the Color Picker dialog box.
- In the Color Picker dialog box, choose the color that you want to use for your vignette. You can use the sliders to adjust the hue, saturation, and brightness of the color, or you can enter the RGB or HSL values for the color directly.
- Once you have chosen the desired color, click “OK” to apply it to the vignette. You can then use the “Opacity” slider in the Properties panel to adjust the transparency of the vignette if needed.
- When you are satisfied with the color and opacity of the vignette, click the “Commit” button in the Properties panel to apply the changes to your image. You can then save the image with the vignette applied or continue editing as required.
Here’s how to change the background color in Photoshop.
How Do I Make a Circle Vignette in Photoshop?
Here’s how you can create a circular vignette in Photoshop.
- Open your image in Photoshop and select the “Elliptical Marquee” tool from the toolbar on the left side of the screen. You’ll find it under the “Marquee” and “Lasso” tools.
- With the Elliptical Marquee tool selected, click and drag around the area of the image where you want to create the vignette. You can adjust the size and shape of the circle by dragging the handles on the edges of the selection.
- Once you have the circular selection in place, go to the “Edit” menu and choose “Feather”. In the Feather dialog box that appears, enter a value for the feather radius. This will soften the edges of the selection and give the vignette a more gradual, subtle transition.
- With the circular selection still active, go to the “Edit” menu and choose “Invert”. This will invert the selection so that everything outside of the circle is selected.
- Go to the “Select” menu and choose “Modify”, then “Contract”. In the Contract Selection dialog box that appears, enter a value for the amount of contraction. This will shrink the selection by the specified amount, creating a border around the center of the circle.
- With the modified selection still active, go to the “Edit” menu and choose “Fill”. In the Fill dialog box that appears, choose “Black” as the color to use for the vignette and click “OK”. This will fill the selected area with black, creating a circular vignette around the center of the image.
- If you want to change the color of the vignette, you can go to the “Image” menu and choose “Adjustments”, then “Hue/Saturation”. In the Hue/Saturation dialog box that appears, use the sliders to adjust the hue, saturation, and lightness of the vignette until you are satisfied with the result.
- When you are finished, click the “Commit” button in the Properties panel to apply the changes to your image. You can then save the image with the vignette applied or continue editing it as needed.
If you want to download Photoshop, check out our article on the best ways to buy Photoshop.
 How to Smooth Edges in Photoshop (Two Methods)
 How to Blur Edges in Photoshop (Quick & Easy Methods)
 How to Draw a Circle in Photoshop (Outline or Fill)
 How to Add a Vignette Effect in Photoshop Elements
 How to Use the Clipping Mask in Photoshop (Complete Guide)
 33 Most Famous Film Photographers in 2023

Judyth is an experienced studio photographer and glass artist. When she isn’t Photoshopping comedians into the bellies of sharks, you can find her cooking delicious treats for her guests.

WELCOME TO SHOTKIT
Enter your email to be sent
today's Welcome Gift:
19 Photography Tools
🔥 Popular NOW:


Shotkit may earn a commission on affiliate links. Learn more.