


Night Mode on iPhone: How to Use It (+ Tips and Tricks)
Everything you ned to know about using Night Mode on your iphone - how to activate it, adjust the exposure time, and tips for taking amazing low-light photos!
iPhone Photography | Learn | By Ashley Darrow
Using your smartphone to take photographs and low light conditions can be tricky, but I’ve got some tips that can help you improve your night-mode iPhone photography.
When I think about the camera that I shoot with the most, I have to be honest and say that it’s simply my iPhone.

Using Night Mode is a basic skill - learn much more exciting secrets to totally transform your iPhone photography with this course!
Tap red button to save 80%
This has made getting to know the iPhone camera settings that much more important for me as a photographer.
This guide is going to shed some light on night mode and help you improve your night photography.
Table of Contents
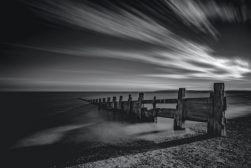
What Does Night Mode Do on iPhones?
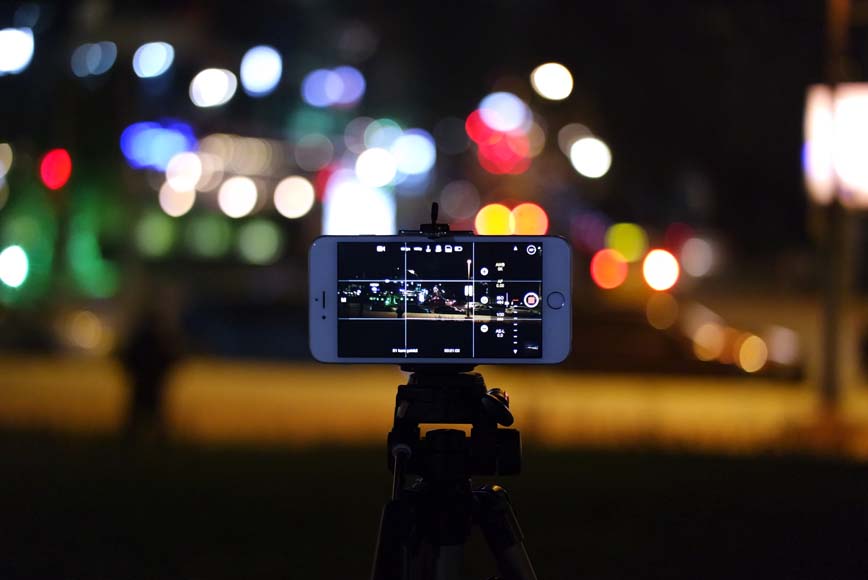
Image Credit: Burak The Weekender
I think that the night mode process on the iPhone camera is actually really interesting.
Traditionally, photographers would take pictures in a low-light environment by adjusting the exposure triangle. Increasing the ISO, exposure time, or choosing a faster aperture would all let in more light and brighten up an image.
Night mode technically increases the exposure time, but it also uses the image processing software inside the iPhone to improve the quality of the image.
Night mode on your iPhone works by taking a series of still images at different exposure lengths. The image processing software then combines those images into an HDR photo that is correctly exposed and balanced for nighttime colors.
How to Activate Night Mode On Your iPhone
Night mode is one of the easiest settings to activate on your iPhone camera, but there is one important quirk of this setting that you need to know.
Step1. Wait for Things to Get Dark
Night mode is fickle and won’t always pop up depending on your available lighting.
Here’s the trick with night mode on the iPhone camera. This menu only appears when the iPhone detects low light situations.
The iPhone will automatically check the ambient light levels and determine if things are dark enough to justify the night photo mode. There is no way to force night mode on the iPhone, which means you’re kind of stuck waiting until night mode turns on.
If you’re shooting in a studio, you can always cut the lights in order to make things dark enough.
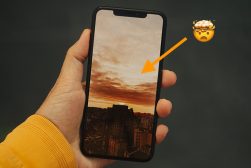
I was able to trigger night mode by simply zooming in on the Shadows that you see in the scene in the screenshot above.
Step 2. Tap the Night Mode Icon
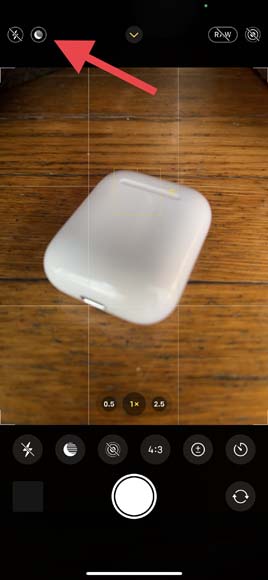
The icon to enable or disable night mode is going to appear in the top left of the screen. It looks like a circle with some lines going through it that’s a little reminiscent of a sunset.
Tapping the yellow night mode icon is the quickest way to turn night mode off if you’re looking to take full manual control of your next night mode photo.
Step 3. Tap the Arrow Icon to Open Your Camera App Settings
Night mode might appear automatically, but there are some custom settings that you can adjust to take some control over this feature.
Tapping the arrow on the top of the screen opens up the menu of the iPhone camera app.
When you have night mode enabled, you’ll see an additional icon in the menu that looks just like the night mode icon in the top left of the screen.
Tapping the night mode icon in the menu allows you to set a custom exposure length for your photograph.
Step 4. Choose Your Exposure Length
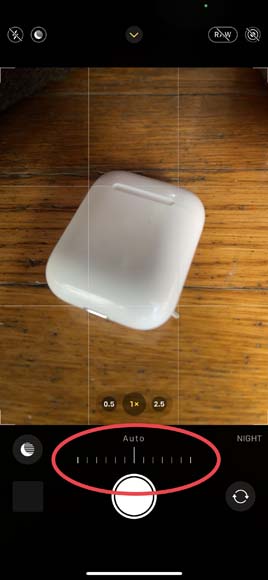
The last step for using night mode is to set your exposure length.
The easiest thing to do is to simply leave it at automatic. The software inside of your iPhone does a pretty good job at setting the exposure for your average night photography session.
However, a custom exposure might be the right decision for you. I prefer to underexpose my images just a little bit which gives me more room when I’m editing them in the Lightroom mobile app.
5 Tips for Using Night Mode On Your iPhone
Tip 1: Keep Your Camera Steady
The longer your exposure time, the more susceptible your images are to camera shake. Once your exposure time gets around a half a second, even the shake from tapping the shutter button is enough to ruin an otherwise amazing shot.
This is why I’m always trying to shoot my night mode photos with a tripod. If I don’t have a tripod on me, I’ll often balance my camera on a stable surface like a mailbox, rock, or even the sidewalk.
This will really help when photographing the moon with your iPhone.
Tip 2: Adjust the Exposure Time
The automatic features of night mode work pretty well, but I still prefer to take control over my exposures.
My biggest piece of advice is to underexpose your images just a little bit. You can always adjust the highlights, shadows, and exposure in post when you’re editing.
However, it’s much harder to save an overexposed digital Image than an underexposed one.
Tip 3: Look for Ambient Light Sources
Ambient light sources are your best friend when you’re doing nighttime photography.
These can be street lights, neon signs, or even a campfire. These light sources are essential for brightening up your image and highlighting your subject.
Tip 4: Try Long Exposures or Time Lapse Videos
Shooting in night mode is a great way to start playing around with longer exposures or even time lapse videos.
A low light environment is an ideal place to explore light trails from cars or even light painting.
Tip 5: Shoot in Black and White
Night Mode photography naturally lends itself to shooting in black and white.
Without getting into the history of orthochromatic and panchromatic black and white film stocks, the color palettes available at night naturally lend themselves to the black and white style.
How to Use Night Mode with Time-Lapse Videos
Night Mode isn’t directly available during time-lapse videos, but you can emulate night mode in the camera app by manually adjusting your exposure.
The first thing that you need to do is enter Time Lapse Mode. You can do this by swiping right through the available camera modes.
Next, you need to open up the exposure settings. Tap the arrow icon at the top of the camera screen.
The exposure settings will appear as a slider menu right above the shutter button. You can slide right to lower the exposure and slide left to increase the exposure.
FAQ
Which iPhone cameras have Night Mode?
Night Mode is available on iPhone 12, 13, and 14 models that have at least the ultra wide (0.5x) camera, wide (1x) camera, and front-facing camera. Night Mode is also available on iPhone 11 models that feature the wide (1x) camera.
Where is Night Mode in settings?
Night Mode will automatically pop up and your iPhone camera settings. If it’s dark enough, you can tap the arrow at the top of the camera app to expand the menu. The settings for night mode will appear at the bottom of the screen with the other settings like the timer.
Does iPhone Night Mode reduce blue light?
Night Mode in the iPhone camera will not reduce blue light. However, the Night Shift feature available in certain models of iPhone adds an amber filter around sunset based on your location. This amber filter has the effect of cutting down the blue light emitted by your iPhone screen.
Final Words
Night mode in the iPhone camera app doesn’t have to be so mysterious. You’ve now got all of the tips and tricks you need to make the most of taking night mode photos on your iPhone.
Taking pictures at night can still be a little challenging. Let me know your tips for taking an amazing night mode photo on your iPhone in the comments.
Using Night Mode is a basic skill - learn much more exciting secrets to totally transform your iPhone photography with this course!
Tap red button to save 80%


Ashley is a photographer, writer, and film critic. When Ashley’s not writing essays on photography, cinema, and theory, he’s out taking pictures with retro film cameras.

WELCOME TO SHOTKIT
Enter your email to be sent
today's Welcome Gift:
19 Photography Tools
🔥 Popular NOW:


Shotkit may earn a commission on affiliate links. Learn more.