


9 Interior Photography Tips (+ Real Estate Secrets)
Want to take stunning photos of an interior? These 9 tips have you covered, from which gear to pack to which settings to use – plus much more.
Learn | Photography Guides | By Ana Mireles
This is a guide to Interior Photography to help make all the rooms in your house look amazing.
In fact, you could even use my interior photography tips to get some work from your local real estate agent.
Interior photography is all about taking photos of indoor spaces – everything from individual rooms of a house to the pieces of furniture in it.
Real estate photography, architectural photography, and interior design photography are all related to the practice of photographing interiors.
(I’ve included plenty of interior design images and other stunning photos of rooms for your inspiration.)
So, how do you take amazing interior photos? Let’s find out!
Table of Contents
9 Pro Tips for Stunning Interior Photography in 2023
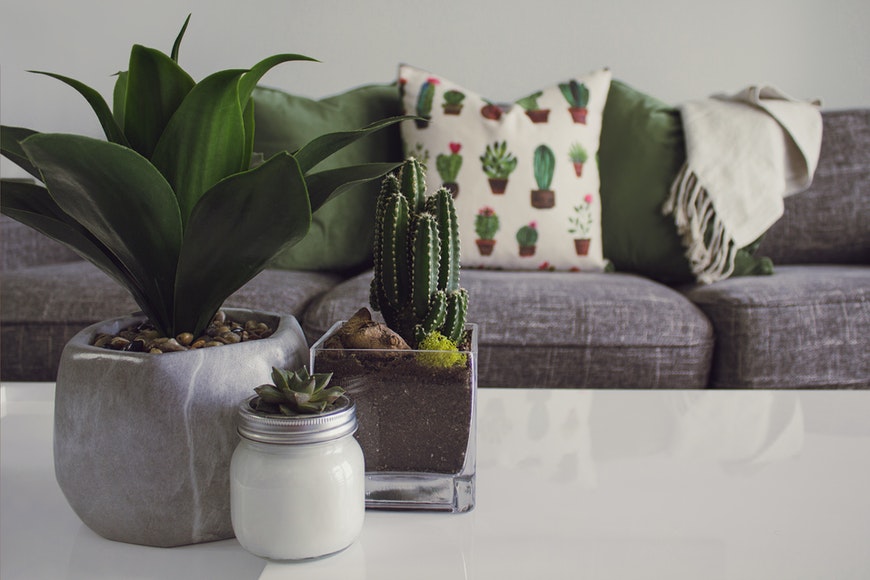
1. Use the right settings for interior photography
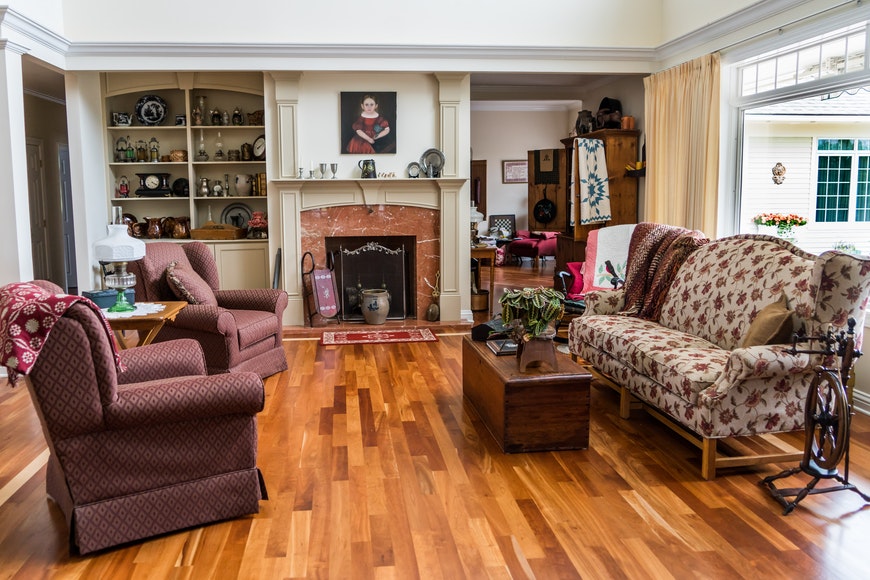
Credit: Pixabay
Sometimes you get lucky, and the room you need to photograph has a big window that lights all of the space. Or, it’s a commercial area with a lighting design that makes things easier for your photography.
However, most of the time, you’ll be shooting interiors with challenging lighting situations. That’s why you must use the right camera settings.
- ISO – Try to keep the ISO as low as possible – ideally 100. This will give you better image quality and avoid noise in the darkest areas.
- Aperture – You’ll want to have the entire room in focus, so, you’ll need a closed aperture. You don’t necessarily have to use the smallest aperture of your lens; simply find the sweet spot to have a deep depth of field and the sharpest image. For most lenses, this means something between f/8 and f/11.
- Shutter Speed – Since you’re using a low ISO and a closed aperture, you’ll need to compensate with a long shutter speed. This means that you’ll need a tripod to avoid any camera shake unless there’s a lot of light – which isn’t the norm for interior photography.
- White Balance – If you’re mixing natural light with artificial light, you’ll have difficulty finding the correct white balance. Try to choose one type of light and set the white balance on your camera to match the color temperature. You can do this with the custom white balance or by inputting the amount of Kelvin Degrees.
- File format – Interior spaces often have contrasting lights between the highlights of the window and the dark shadows. To recover the most possible details while post-processing, it’s better to shoot images in RAW.
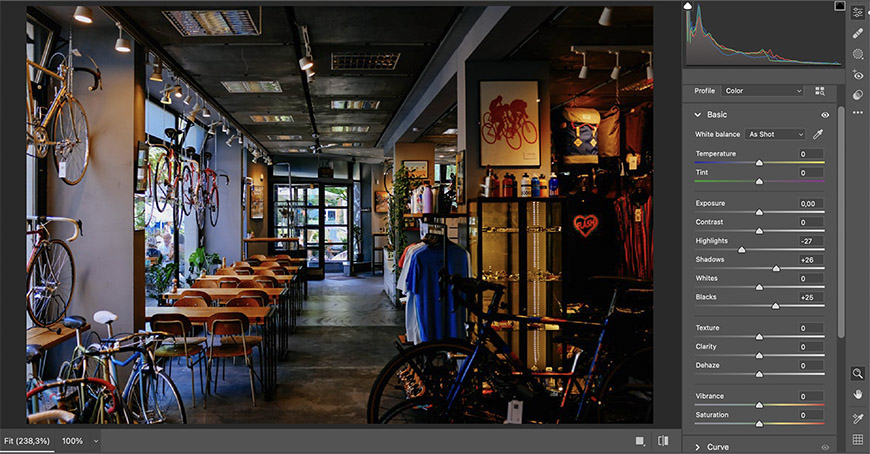
2. Choose the right gear for photographing interiors
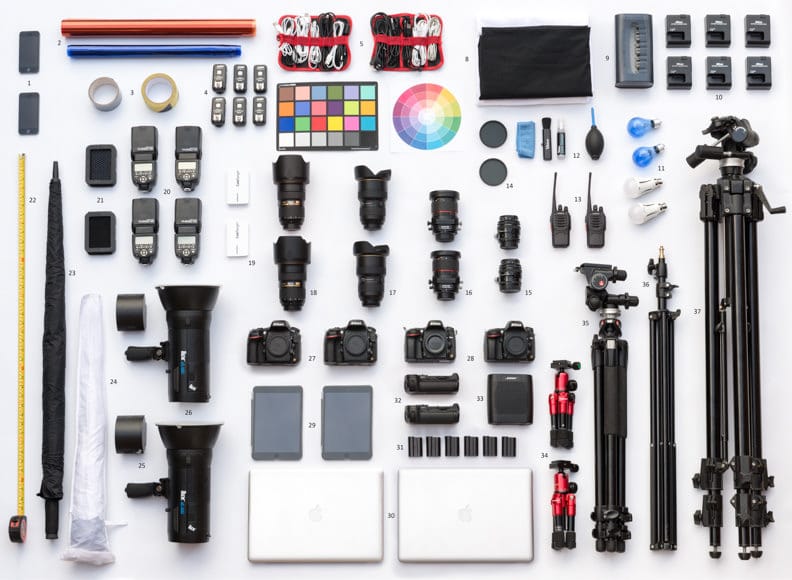
Photography equipment used by architectural photographers Zac and Zac.
Camera
If you’re photographing your own home to put it on sale, you don’t have to go out and buy a super expensive camera. However, if you’re considering becoming a professional photographer, you should invest in a full-frame camera.
Full frame digital cameras are ideal for interior photography and architecture photography because they have a more dynamic range which is better for contrasting light situations.
They also capture light more efficiently and create less noise. This makes them better for low-light situations, which is a common problem to face in interior photography.
Last but not least, there’s no crop factor. So, you’ll be able to use the entire angle of view of a given lens which is crucial for shooting interiors and small spaces.
Can you shoot interiors with an iPhone? Sure, you can do it, but I only recommend it as a last resort since using a dedicated camera will yield better results.
Lens
Interior photographers need to work with wide-angle lenses. The idea is to fit as much of the room as possible into the frame without getting too much distortion.
For wide angle photography, something between 18mm and 24mm should work in most situations – of course, it depends on the place you’re photographing.
A regular wide-angle lens should be more than enough for real estate photography. However, interior design photography or architecture photography requires a lens of higher quality – it’s also one of the reasons why it’s more expensive.
So, if you want to level up your game, you should get a tilt-shift lens. These lenses allow you to change the position of the focal plane in relation to the sensor plane, avoiding any perspective distortion.
See also: best lenses for real estate photography
Tripod
As I mentioned in the camera settings section, you’ll often be using slow shutter speeds in interior photography. So, you’ll need a tripod to avoid camera shake.
Using a tripod is also helpful to properly compose the image and prevent any perspective distortion. It’s definitely a must if you’re using a tilt-shift lens.
Finally, you’ll need a tripod to keep a steady frame if you do HDR images – a technique commonly used by interior photographers.
Any sturdy tripod will do the trick. However, you’ll be better off using one with a pan and tilt head because it gives you more control over minor adjustments.
Flash
Some photographers like to work exclusively with natural light or the interior lights already present in the space. So, a flash isn’t a must.
However, if you prefer, you can use strobes or off-camera flashes.
Drone
Yes, even indoors, a drone can be used if you’re careful with how you fly. It’s often easier to use a mini drone for real estate photography and interiors than carry a ladder with you in order to get some aerial views of rooms with high ceilings.
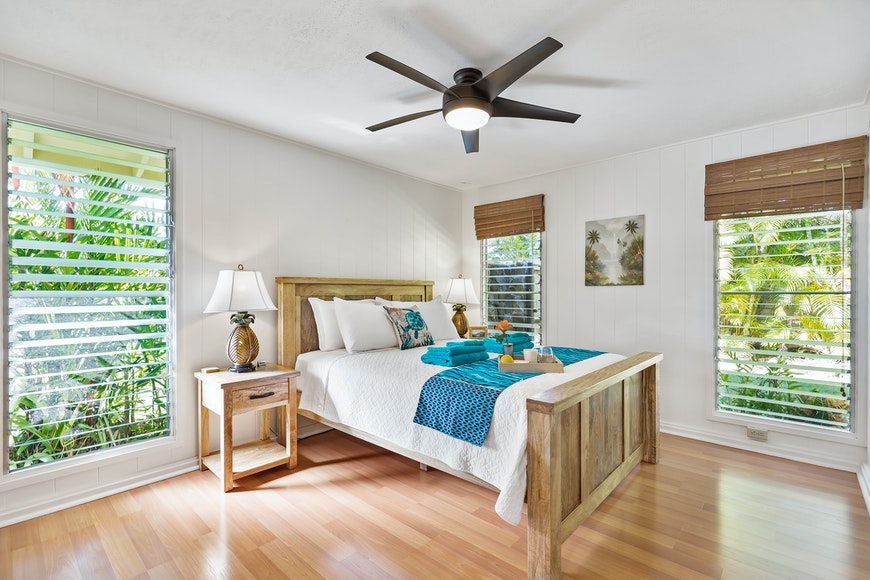
3. Learn how to take sharp pictures indoors

Credit: Vecislavas Popa
If you notice that your interior photography is not as sharp as you’d like, you might be facing some problems related to the low light conditions characteristic of indoor spaces.
- Check that your exposure is correct. If it’s underexposed, you might have blurry images even after you fix them in post-processing.
- Use a tripod and a remote shutter. Blurry photos are often the result of camera shake due to slow shutter speeds.
If this isn’t solving your problem, try any of these:
- Find the sweet spot of your lens. Often we use the smallest aperture to increase the depth of field, but this might result in less sharpness. Try using f/11 or f/8.
- Use a prime lens. Often zoom lenses, especially the ones that come at the lowest budget price, don’t deliver the sharpest images.
4. Tidy up and arrange the interior space
Credit: Jason Boyd
If you’re working with interior designers or your photoshoot is in commercial spaces, things will already be tidy and arranged perfectly.
However, if you’re working on real estate photography or doing personal work, you need to take care of it yourself.
The first and most important step is to tidy up. It doesn’t matter how well you light it and how good your photographic technique is – you can’t create beautiful interior photography in messy or dirty places.
The next step is to arrange the space so it’s picture-perfect. You can do this yourself, or hire an interior designer or home stager.
Of course, hiring someone adds to the budget – so it’s not suitable for all projects. However, it makes a big difference and makes your interior photography look like it’s ready to be featured in Architectural Digest.
5. Plan Ahead
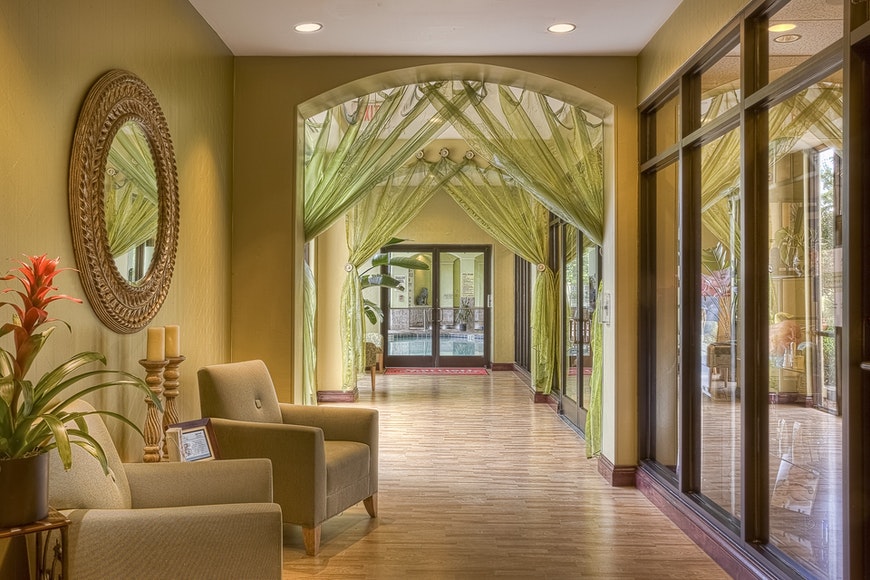
Credit: Pixabay
Before any shooting, it’s essential to make a shot list. This will help you to organize the workflow according to what you need and the available light.
In the case of real estate photography, the photo shoot is relatively short. Having a shot list helps you stay on track without wasting time and achieve all the images your client needs.
On the other hand, for architecture or personal projects where you can dedicate more time, make sure you factor in some time to scout the location or do some online research to understand how the lighting is.
If you’re working with natural light, you’ll need to know how the sun hits at different times of the day. Otherwise, you’ll need to plan how many flashes you’ll need, which modifiers, etc.
Also, if you’re not scouting the location, enquire about the property size to know which focal length you’ll need.
6. Don’t forget about the details
Credit: Designecologist
When you talk about architecture and interior photography, most people think about the whole room, house, or building. However, the details are very important too.
Architectural details such as an arch or staircase often help to define the style and character of the entire building.
The same goes for the interior. Photograph the walls, a well-decorated corner, or a small part of the space to capture the style of the place.
7. Do HDR photography

Credit: Max Vakhtbovych
HDR stands for high dynamic range. This technique is very useful in interior photography due to the intense highlights on windows compared to the low light inside the space.
To do a HDR picture, you need to position the camera on a tripod and make a series of bracketed shots. In other words, take the same photo with varying exposures so that you have at least one where the shadows have details, one where the mid-tones are correctly exposed, and one with details on the highlights.
Once you have your images, you can put them together in post-production. Most photo-editing programs with layers, such as Photoshop, allow you to do HDR. However, there are some more specialized apps such as Luminar HDR merge. You can choose the one that you prefer.
8. Photo compositing
Another post-production technique commonly used in real estate and interior photography is photo compositing. In this case, you also need to mount the camera on a tripod – however, the exposure remains the same.
On each shot, you fire the flash in a different place in the room to achieve the perfect lighting. You can use this technique when there are different color casts due to ambient light, when one light creates odds shadows from the furniture on the opposite side of the room, or when it’s not possible to place multiple lights due to reflections.
Whatever the reason, you’ll have a series of photos where only one part is useful, while on the other, you’ll see the flashes, your assistant, harsh shadows, or other elements you don’t need.
So, you need to open all the images as layers in the same Photoshop canvas. Then, add layer masks to compose the final image.
Remember that, when using layers, anything in black is invisible, and everything in white is visible. This process is non-destructive – so if you make a mistake, you can simply paint over the mask again. All the information in each photo is still there.
9. Edit your pictures
Credit: Adrien Olichon
Whether you’re doing some basic adjustments or advanced post-production techniques, editing is part of the process.
You should, of course, start by adjusting the exposure and color. This means you need to check the white balance, recover details from the shadows and highlights, etc. All the things you usually do for any type of photography.
A very important adjustment to interior photography is correcting the vertical lines. Many people think that perspective distortion only happens when you photograph tall buildings. Unfortunately, it’s something you have to deal with in interior photography too. Depending on the height you position the photo, you’ll have more or less perspective distortion.
Also, you have to correct the lens distortion caused by the wide-angle lens. In most editing programs, there’s a feature to do this that recognizes the lens you used and applies the manufacturer’s corrections so that it gets fixed automatically.
If this doesn’t happen, or you’re using software that doesn’t have this feature, there’s also the option of doing it manually.
What are the Best Hashtags for Interior Design?
Here are some popular hashtags that will help you drive more eyeballs to your interior photography work.
- #interiorphotography
- #architecturephotography
- #interiordesign
- #interiorphotographer
- #realestatephotography
- #interiorphoto
- #archdaily
- #decor
- #interiorarchitecture
- #luxuryhomes
- #propertyphotography
- #homedecor
- #interiordecor
- #interiorstyling
- #housebeautiful
- #interiorinspo
- #interiorphoto
- #hotelphotographer
- #realestate
- #interiormagazine
- #interiorporn
(See one-word Instagram captions.)
Other Useful Tips for Budding Interior Photographers
What kind of interior photos do real estate agents want?
- Wide-angle shots: Wide-angle photos capture the overall layout and flow of a room, providing a sense of space and allowing viewers to understand the room’s size and configuration.
- Well-lit images: Bright and well-lit photos are crucial to showcase the interior space in its best light. Natural light is preferred, so capturing photos during the day when there is ample sunlight or using appropriate lighting techniques can help showcase the space effectively.
- Clear and sharp images: It’s important to ensure that the images are sharp and in focus. Blurry or pixelated images can be off-putting and diminish the perceived quality of the property.
- Clean and decluttered spaces: Real estate agents prefer photos of interiors that are clean, decluttered, and well-staged. Removing personal items, excessive furniture, and unnecessary clutter helps create a more appealing and spacious environment.
- Highlighting key features: Showcase the property’s unique selling points, such as architectural details, upgraded fixtures, modern appliances, or any other attractive features that differentiate the property from others in the market.
- Different angles and perspectives: Capture multiple angles and perspectives of each room to provide a comprehensive view of the space. This allows potential buyers to visualize themselves in the property and get a better sense of the overall layout.
- Emphasize functional spaces: Focus on highlighting functional areas such as kitchens, bathrooms, living rooms, and bedrooms, as these spaces are often important to buyers and can heavily influence their decision-making process.
- Cozy and inviting atmosphere: Use staging techniques to create a warm and inviting ambiance, such as adding tasteful decor, soft furnishings, and appropriate lighting, to help potential buyers envision themselves living in the space.
- Seamless flow between rooms: Capture images that showcase the seamless flow between different rooms, especially in open-concept spaces, to highlight the property’s versatility and ease of movement.
Who are some well-known interior design photographers to follow?
There are several well-known interior design photographers who have made a name for themselves in the industry.
Here are a few notable ones to follow:
- Pieter Estersohn is a renowned interior and architectural photographer known for his elegant and refined style. His work has been featured in prestigious publications like Architectural Digest and Elle Decor.
- William Waldron is a highly respected interior and lifestyle photographer whose portfolio includes work for prominent design magazines such as House Beautiful, Veranda, and Vogue. His photographs often capture the essence of luxurious and tasteful interiors.
- Eric Piasecki is an acclaimed interior and architectural photographer whose work has graced the pages of Architectural Digest, Dwell, and The New York Times. He is known for his keen eye for composition and ability to capture the beauty and detail of interior spaces.
- Miguel Flores-Vianna is a photographer and author who specializes in capturing unique and culturally diverse interiors. His work has been featured in numerous design publications and books, including his own publication titled “Haute Bohemians.”
- Richard Powers is a British photographer known for his striking architectural and interior images. His work has been published in prestigious magazines like Wallpaper*, AD Germany, and Vogue Living, showcasing his talent for capturing spaces with a strong visual impact.
- Simon Upton Simon Upton is an internationally acclaimed interior and architectural photographer. His portfolio includes work for leading design publications such as Architectural Digest, Elle Decor, and House & Garden.
- Paul Raeside Paul Raeside is a British photographer known for his atmospheric and evocative interior images. His work has been featured in numerous magazines, including Vogue Living, House Beautiful, and The World of Interiors.
What’s the difference between interior design photography and interior photography?
Interior design photography and interior photography are two related but distinct disciplines within the realm of architectural photography. While they both focus on capturing images of interior spaces, there are some differences in their goals and approaches:
Interior Design Photography:
- Interior design photography primarily emphasizes showcasing the design elements and aesthetic qualities of a space.
- The main goal is to highlight the interior design features, such as furniture, materials, color schemes, and decor, with the intention of promoting or documenting the design work.
Interior Photography:
- Interior photography has a broader focus, encompassing various aspects of an interior space, including architectural features, layout, functionality, and ambiance.
- The aim is to capture the overall essence and atmosphere of the interior space, providing a comprehensive visual representation.
Final Words
Whether you want to list your properties for sale or rent or become a professional interior photographer – you now have all the information you need to take some beautiful pictures.
Keep in mind that the gear listed here is the ideal setup, but you can start small and upgrade as you keep learning and earning. Most of these tips can help you to get better photos, even with entry-level equipment.
I hope you found this article helpful. Please share with us any other tips, comments, or doubts in the comments section below.
 25 Best Photography Schools in the World in 2023 By Country
 Guide to Real Estate Photography in 2023 (18 PRO Tips!)
 Best Camera for Real Estate Photography
 Family Photography: 18 Tips for FUN Portrait Shoots in 2023

Ana Mireles is a Mexican researcher that specializes in photography and communications for the arts and culture sector.

WELCOME TO SHOTKIT
Enter your email to be sent
today's Welcome Gift:
19 Photography Tools
🔥 Popular NOW:


Shotkit may earn a commission on affiliate links. Learn more.