


How to Make & Upload a YouTube Video in 2023 (For Free)
YouTube is part of our daily vocabulary, but have you ever considered starting your own YouTube Channel? Here's the easiest, cheapest way to get started.
YouTube has been around for years now and it still represents a great place to get your content out there and to start making money as a creator.
I put together this guide for everyone who wants to start a YouTube channel, but who also doesn’t want to spend a lot of money creating high quality content.
The sky’s the limit for how much you can spend to make a YouTube video, but you can actually get started with nothing more than some spare time.
I’ve worked with a variety of popular YouTubers and even put together a channel of my own.
I’m going to show you the ropes based on not just my own experience but what I’ve learned from a few friends who are successful on the platform.
You can start creating content on your YouTube channel today with nothing more than the device that you’re reading this article on.
Table of Contents
How Do You Make a YouTube Video on a Computer or Laptop for Free?
I’m going to walk you through a step-by-step guide for how you can create your first YouTube video on your laptop today.
Don’t have a laptop? Don’t worry about it. I’ll also be covering how you can create a YouTube video for free on your smartphone.
Read this guide first, though. Everything but the editing step is going to be almost the same for creating a YouTube video on your smartphone as it is on a laptop.
Planning Your First Youtube Video
Before you hit that record button, there are a few important things that you need to do first.
Every good YouTube video starts with some basic planning.
Your own YouTube video begins with figuring out what kind of videos you want to make and researching the competition you’re going up against.
You’ll have the easiest job if you identify a niche that hasn’t been filled yet. This is pretty tricky, but it’s a big world full of a lot of information and that means that there are still YouTube niches that aren’t being covered.
If you’re in a popular niche, try coming up with a new ways to approach YouTube video ideas that have already been done before.
You also want to research some keywords so that people can find your video easily. Keywords like “best photography gear” are going to have a lot of competition, while a more specific keyword like “best film photography gear to take to a concert” is naturally going to have less competition.
Now that you’ve identified what you want your video to be about, it’s time to start writing. You could write out a full script or create a bulleted list of points that you want to cover during your YouTube video.
I recommend at least scripting an intro and outro so those can be very consistent throughout your videos. Once you’ve written your first script or outline, it’s time to get your gear ready.
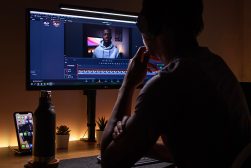
Download Software and Get Your Gear Ready

Image Credit: RODNAE Productions
You won’t be able to make much of a YouTube video without some basic editing software.
Unfortunately, video editing software tends to be very expensive. The good news is I’ve got some free alternatives for you to consider.
Here’s some free software you can use to edit a YouTube video on your laptop.
There are plenty of options with a free trial or basic free features, but I’m going totally no-budget here, so these are video editing programs that offer you a full release for zero dollars.
- iMovie
- OpenShot
- ShotCut
These programs are totally free and you can download them today. They offer an impressive suite of features that are going to give you everything you need to get started editing YouTube videos without any weird gimmicks, watermarks, or features locked behind a paywall.
You should also take the time to get your video and audio equipment ready. Even if it’s just your smartphone with a built-in camera and microphone, you want to make sure everything is fully charged and ready to go.
Also take the time to make a quick test recording. Just spend a few seconds talking into the camera to make sure that it’s recording video and you’ve got all your settings where you want them.
You can also take a moment to make sure that your set and background are looking the way you need them to. Feel free to take your time and reposition things.
You want to make sure that you’re setting yourself up to succeed. This means taking a little bit of extra time to make sure that your setup is exactly where you want it to be.
You can also check out what video editing software popular YouTubers use.
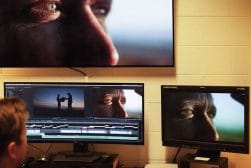
Record Your Intro

Image Credit: Anna Nekrashevich
I strongly recommend recording a scripted intro. Even if it’s something really short and basic, it’s good to have a consistent introduction across your videos.
This will give you videos a sense of professionalism and make them feel a little bit more thought out than videos that are just uploaded as one long take.
If you want to start saving yourself some time in the long run, you can use this recorded intro to create a template for all of your YouTube videos.
Templating saves you a lot of time when we get to editing, but to be honest your first few videos are more about you exploring the format and less about perfecting your workflow.
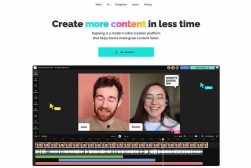
Record Your Video—Keep the Camera Rolling!

Image Credit: Till Daling
Now, it’s finally time to hit the record button and start putting together your first YouTube video.
The most important thing you can do here is to keep recording. As the old saying goes, always be recording.
You don’t have to hit the stop button every time you stumble on your words or make a mistake. It’s an old industry secret, but if you leave that camera rolling, you’re going to save yourself time and get some amazing takes that you might miss out on otherwise.
Part of this is also getting comfortable being on camera. It’s a little awkward to film yourself at first, but after a while, it’ll be second nature and you’ll feel right at home under those bright lights of internet fame.
Think also about filming some B-roll, which is handy to have for voice-over segments, or showing close-ups of products you’re reviewing, for example. You might also need them for some cheeky video montages.
Your final video file is probably going to be way longer than the desired length of your YouTube video. This is a good thing since it gives you plenty of footage to work with when you get around to editing.
Start With Basic Editing
Once you get all of your footage shot, it’s time to edit it down into a presentable YouTube video.
Start with the basics by trimming down your footage and cutting out any bad takes or undesired moments.
It might turn out that you didn’t get the right take for a key part of your video. If that’s the case, all you need to do is go back and reshoot that section.
It’s better to take some extra time for reshoots than to put out a video with a scene that you’re not proud of.
Once you’re done cutting out the bad takes and trimming your video down to the right length, it’s time to start adding in any effects, music, and transitions.
All of the free video editors I mentioned above have built in transitions and some effects that you can use.
You can also drop in your own music files, but remember to lower the volume on the music so that your audience can hear your voice rather than just the tunes.
You should also create a custom thumbnail rather than just using the first video clip that pops up. A custom video thumbnail will help your own videos stand out from the competition.
After all of your edits are done, you need to export your video. You want to export in the highest resolution possible and in a format that YouTube accepts.
How to upload a YouTube Video for Free
Uploading your YouTube video is the easiest step. Here’s a quick guide on how to get it done.
- Log into your YouTube Studio account here http://studio.youtube.com/ (or create one if you don’t already have one)
- In the top right corner, click Create > Upload Videos
- Select the video you want to upload
The only caveat I will make is that long YouTube videos can take an eternity to upload unless you have a fast internet connection. An unreliable internet connection can also ruin your upload and force you to start over again.
If you’ve got a shaky internet connection, I recommend heading to a library, a coffee shop, or even your school and doing your upload there.
Optimize Your Video
If you want more people to see your video, you’re going to have to optimize it. This involves using SEO and YouTube’s built-in tools to bring more viewers to your photography YouTube channel.
These are three basic steps that you can take with your own YouTube videos to improve your overall viewership.
- Create a catchy title—A title like “The Best 35mm Film Stocks for Winter” is more catchy and informative than just “best winter film”
- Use SEO in your description—SEO helps the algorithm pick up your video and share it more wildly. This applies to both YouTube’s internal metrics and for search engines like Google or DuckDuckGo
- Use Tags—YouTube has a built in tool to help your video reach a wider audience called Tags. You can select tags for your videos to help them reach more viewers
Share And Promote On Social Media
You’re not done yet.
The last step in uploading a YouTube video is to share it on your social media channels.
When you release your video, you should be tweeting about it, talking about it on TikTok, and posting the video thumbnail on Instagram.
The more attention your videos get across a wide variety of social platforms, the more viewers you’re going to pick up on YouTube.
See also: What is the correct thumbnail size for YouTube? and what is the best banner size for YouTube?
How Do You Make a YouTube Video on Your Phone for Free?
Creating a YouTube video on your phone for free is going to follow the exact same steps as making one on your laptop.
The only real changes will be made to the overall formula when it comes time to edit and upload your video.
You’re going to need a different set of free video editing software if you’re creating everything on your smartphone.
Here are a few apps that you can download today that are free and allow you to edit video on your phone.
- Adobe Premiere Rush
- Vimeo Create
- YouTube app
- LumaFusion
- InShot
- iMovie
- Film Maker
- Your phone’s native camera app
Editing a YouTube video on your smartphone is going to be a bit more bare-bones than editing on a laptop.
This means that you should plan for a simpler video that doesn’t rely as much on special effects or complicated cuts.
A basic vlog, a head and shoulders interview, or even a simple cooking video or all great ideas for videos that you can film on a smartphone and edit on a smartphone.
How to Upload Videos with your Mobile Phone or Tablet (Android & iOS)
This video will give you a detailed step-by-step guide to creating videos on the mobile app available on Android and iOS.
Here’s the complete guide if you don’t feel like clicking on a video.
- Log into your YouTube account on the YouTube app
- Click the camera icon with the “+” symbol at the top of the app
- Record a new video or select one from your gallery
- You can do some basic edits in the YouTube app if you’d like
- Add a title and description to your video
- Select your video settings and metadata
- Tap upload and your video will appear in your library when ready
All of these features are available in the main YouTube app.
However, you can also use the YouTube Studio app which gives you more options for selecting video and monetization settings.
How do you Make a YouTube Video with Pictures and Songs?

Image Credit: Darlene Alderson
What do you do if you want to start making YouTube videos, but you don’t exactly want to record any video?
This is totally okay. Some of the most successful YouTube channels out there are made with nothing more than stock footage, pictures, music, and voice over.
You never really have to appear on your YouTube channel to break out on this platform.
Most of your steps are going to be the same except you won’t be recording any video. In place of recording video, you’ll have to select free stock images and stock video clips that you can use instead of a new recording.
Here are a few websites you should check out to find some free stock footage that you can add in your own video.
- Pixabay
- Pexels
- Videvo
- Videezy
- Coverr
You’re also going to need some free YouTube music. I’ve got a list of sites where you can pick up royalty free tunes that you can add to your videos.
- YouTube Audio Library
- Free Music Archive
- Bensound
- ccMixter
- Even SoundCloud and BandCamp can have free music for your YouTube channel
Once you find your free images, videos, and music, all you need to do is edit and upload them just like you would with any other YouTube video.
How Do You Make an Intro or Outro for a YouTube Video?

Image Credit: Polina Tankilevitch
Many aspects of your YouTube video are important, but arguably none are as important as the first and last thing your viewers are going to see.
Mastering the intro and outro takes time and revisions, but I’m going to give you some inside tips to get you one step ahead.
Making an Intro for Your YouTube Video
Short. Engaging. Memorable. Those are the three things that your YouTube video intro needs.
The introduction to your YouTube video starts with something called a video bumper. The bumper is a television term for the first 10 or so seconds of a video. This introduces the brand and has memorable graphics and a music jingle.
Think of the title sequence of your favorite TV show—that’s a bumper.
After that, you want to deliver a quick introduction to the subject matter of your YouTube video. Try to keep this under a minute unless you have a lengthy and complicated video ahead of you.
The goal of this introduction is to hook your audience’s attention and start to reel them in to the content of your video.
Making an Outro for Your YouTube Video
The outro of your YouTube video also has to be very attention-grabbing. This is the last thing your audience is going to see, and you want to make it something that they’ll stick around for.
If you’re anything like me, there are plenty of shows that you turn off right before the end. That’s because their outros are unmemorable, and they don’t contain anything worth sticking around for.
Your outro should contain important calls to action, like subscribing to your channel, signing up for your Patreon account, or sharing the video. However, it should also be part of the video and be worth watching in its own right.
Some YouTube creators ditch the intro and outro format altogether. If you’re going for more slice-of-life content, you might not need to make your videos seem so formal.
Even a simple “Hey, everyone! It’s me…” functions as a basic introduction for a vlog. This is your channel, have fun with it!
What Equipment do you Need to Become a YouTuber?

Image Credit: Sebastian Pandelache
I’ve covered the technical details, but what do you need to make YouTube videos?
The gear you use to make a YouTube video is all going to depend on your budget and your goals as a videographer or filmmaker. I’ll break things down into categories and price points to help you get started.
Cameras and Video
- Smartphone, Tablet, or Laptop—Beginners can get started without spending any money by using the camera that’s built into their smartphone, tablet, or laptop. Even if you have a budget device, it should have enough resolution to get you started
- Budget Camera—Cameras like the Sony RX100 IV are some of the best cameras for YouTube videos and give you a huge boost over your smartphone
- DSLR or Mirrorless Camera—Most YouTube videos you watch, even from professional YouTubers, are filmed on DSLR or mirrorless cameras. Brands like Sony, Canon, and Nikon are all great choices
- GoPros and Action Cameras—If your niche is going to take you outdoors or involves sports, you might want to consider adding a GoPro or another action camera into the mix. 360 cameras also make a great choice for these creators as they can add a lot of depth to your videos
- Filmmaking Cameras—The tip of the filmmaking mountain is made of cine lenses and Hollywood filmmaking cameras. These are incredibly expensive, but they will deliver the technology the best possible video—most YouTubers won’t need this much video-making power
Audio Equipment
- Built-in Smartphone Mics—I don’t recommend recording audio with the built-in microphone and your smartphone or laptop, but if you’re truly looking for a zero budget alternative, this is a good place to start
- An External Camera Mic—One of the first things you should do is to stop recording on the microphone that’s built into your camera and grab an external mic. This will create a dramatic improvement for your videos
- Shotgun and Voice Over Mics—Shotgun and voice over mics are going to give you the best possible audio and you can find good options that are relatively affordable. Upgrading your audio is going to make some of the biggest differences in the overall quality of your YouTube videos, and you should consider investing in the best wireless mic that you can afford too.
Lighting
- Natural Lighting—The sun delivers the most flattering possible lighting and, hey, it’s totally free to use as long as you have a window or can shoot outdoors
- Ring Lights—Ring lights have become very popular for the “head and shoulders” style YouTube video since their budget-friendly and create soft lighting
- Light Domes, and Pro Lighting—Upgrading it to pro lighting gear that uses light domes and expensive studio lights will give you total control over your lighting, but this equipment tends to be very expensive
Tripods and Accessories
- Tripods—Tripods are an absolute must and they’re going to be one of the things that you wind up purchasing early in your YouTube career. You can get away with propping your smartphone against a plant or a stack of books, but a tripod makes a world of difference
- Light Stands—Light stands are pretty intuitive and you’ll be using them to hold up your lighting, but there are also great for holding up other things like getting interesting shots with your camera, setting up audio equipment, or even for holding up cue cards and props
- Green Screens—The green screen is the YouTuber’s best friend. However, you may or may not need one depending on the style of videos you’ll be creating, which makes this an optional purchase
FAQs about making video clips for your YouTube Channel
How many views does a YouTube video need to make money?
In order to start earning money on your channel, you’ll need to have at least 1,000 subscribers and have a total of 4,000 watch hours in the past year. How much you can earn depends on a lot of factors, but as a general guideline you can expect to earn roughly $0.18 per view or $18 per 1,000 views.
How much does it cost to hire someone to make a YouTube video?
It can cost anywhere from as low as $30 to as much as thousands of dollars to hire someone to make a YouTube video for you. While you can definitely find someone who can make the video for next to nothing, this is very much a get what you pay for situation.
How do you make a YouTube video your wallpaper on Windows 10?
You can make any YouTube video your wallpaper on Windows 10. All you need to do is download the YouTube video you want to use as a wallpaper, download a video wallpaper app, and set the video as your new wallpaper.
How many views does a YouTube video need to make $100?
The math behind YouTube monetization is fairly complicated and can vary a lot from one YouTuber to the next. You’ll make money based on views, how many people click banner ads, and a variety of other factors. In general, you can make $100 per video when you start hitting 6,000 views, but some people don’t see this much money until they’re in the tens of thousands.
How much money does it cost to make a YouTube video?
You don’t really have to spend any money to start making YouTube videos. You can start making YouTube videos with the smartphone you already own and a free video editing app. You could also start improving your gear by spending hundreds, or thousands, of dollars on camera gear.
How long does it take to make a 10 minute YouTube video?
There’s no set amount of time it takes to make a 10 minute YouTube video. You could spend a few hours putting together an easy video idea or it could take months to create a complex video essay. As a general rule, it’s going to take you about 1 hour to edit every 5 minutes of video.
How To Make A YouTube Videos—Final Thoughts
Now you’re ready to start making YouTube videos without spending a dime. You can start creating YouTube videos on your laptop, or even your smartphone, today. All you need is a good idea that gets your creative juices flowing.
What are your favorite tips as a budding YouTube creator? Let me know down in the comments and make sure to check out my other guides on photography, videography, and everything you need to make it as a creative.
 53 Best Photography Youtube Channels in 2023
 10 Best Video Editing Software Programs for Youtube
 Best Video Editing Software Tools for Movie Making
 Best Video Editing Software for Chromebook (Free and Paid)
 YouTube Vloggers You Should Follow in 2023
 YouTube Banner Size (Dimensions) Guide & 6 Tips for Creating Them

Ashley is a photographer, writer, and film critic. When Ashley’s not writing essays on photography, cinema, and theory, he’s out taking pictures with retro film cameras.

WELCOME TO SHOTKIT
Enter your email to be sent
today's Welcome Gift:
19 Photography Tools
🔥 Popular NOW:


Shotkit may earn a commission on affiliate links. Learn more.