


How to Make a GIF in Photoshop (+ 8 FREE Methods)
Learning how to make a GIF in Photoshop is fun! This step by step tutorial shows you the easy way. (We also include 8 free methods if you don't own Photoshop.)
Photoshop | Software | By Usnea Lebendig
Animated GIFs became hugely popular several years ago, yet never really seem to go out of vogue.
Not just a photo, but not quite a video file either, animated GIFs can be used for everything from memes and humor to marketing.
If you’re a a photographer who like to teach, animated GIFs are especially good for demonstrating brief techniques (like putting up a tripod or assembling a lighting setup) and/or illustrating the before-and-after of some phenomenal post-processing.
If you’re into creating videos, animated GIFs can also be used for attention-grabbing video previews.
There’s also a sort of pleasure in using your own images to create a GIF that expresses feelings that just can’t be described in words or a static image.
Luckily making animated GIFs from a series of photos isn’t that difficult, particularly if you use Photoshop.
This tutorial will focus on how to make an animated GIF in Photoshop, but we’ll also touch on a few other options if you don’t use Adobe products.
Let’s get started.

Download the latest version of Adobe Photoshop to follow along with this simple tutorial.
Start a free 7-day trial today
Table of Contents
How to Make a GIF in Photoshop: Step by Step Tutorial

For this demo I chose a a series of images I took of one of my godsons playing on the beach. The images were taken using the burst mode feature of my camera.
Step 1: Load Your Images into Photoshop
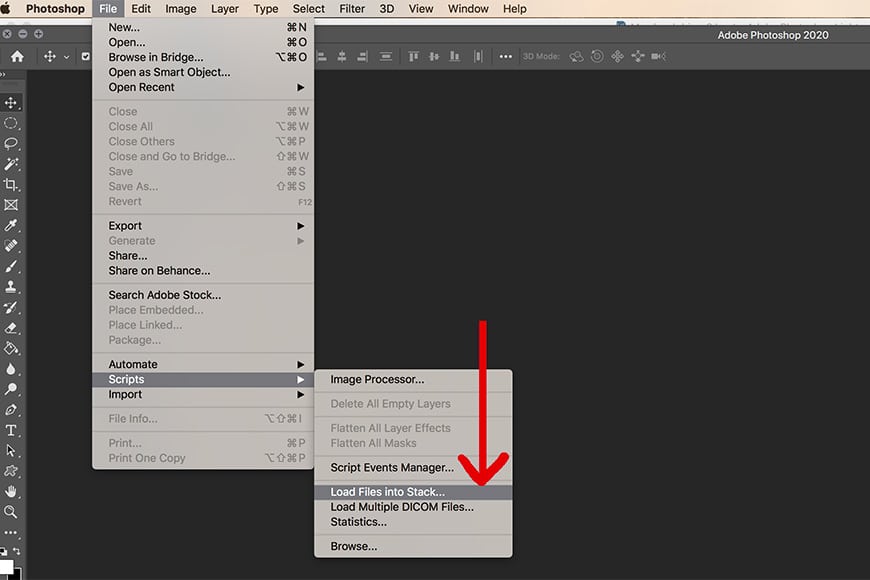
If you have a series of images ready to go, import them into Photoshop via the “Load files into stack” script.
To make a GIF in Photoshop, you’ll need to first have a set of images you want to animate. For most photographers, it’s easiest to finish all the basic post-processing first and then export the photos to their own folder.
Once you have the images ready, open Photoshop and go to File > Scripts > Load Files into Stack.
From there, click Browse, navigate to the folder where the images are, and hold down the Shift key while selecting all the images you want to use. Click Open and then OK.
This tells Photoshop to import all the selected photos into a single file with each image on its own layer. They’ll show up in your layers panel on the right.
You can also opt out of using the default Photoshop import script and create the layers by hand. This is helpful sometimes when creating GIFs with animated or blinking text, banners, etc.
Either way, if you intend on making further changes to any of the images, it’ll be be best to rename each of the layers so you can figure out which layer you’re looking for at a glance.
Also, if file size is an issue for you, the fewer the frames the smaller the overall GIF and vice versa. (I know this is obvious but you’d be surprised how many people space this out!)
Note: If your source material is a video file, you can still use this tutorial. Just import the video via File > Import > Video Frames to Layers.
Step 2: Open the Timeline Window

The timeline window will allow you to animate your frames.
Once you have all of your images imported into Photoshop, you’ll need to make sure Photoshop’s Timeline window is open. This is where the animation will take place.
Since it’s not open by default, you’ll need to go up to Window > Timeline to make it visible. The window will appear at the bottom of your screen.
- Read more: How to edit a PDF file in Photoshop
Step 3: Create Frame Animation
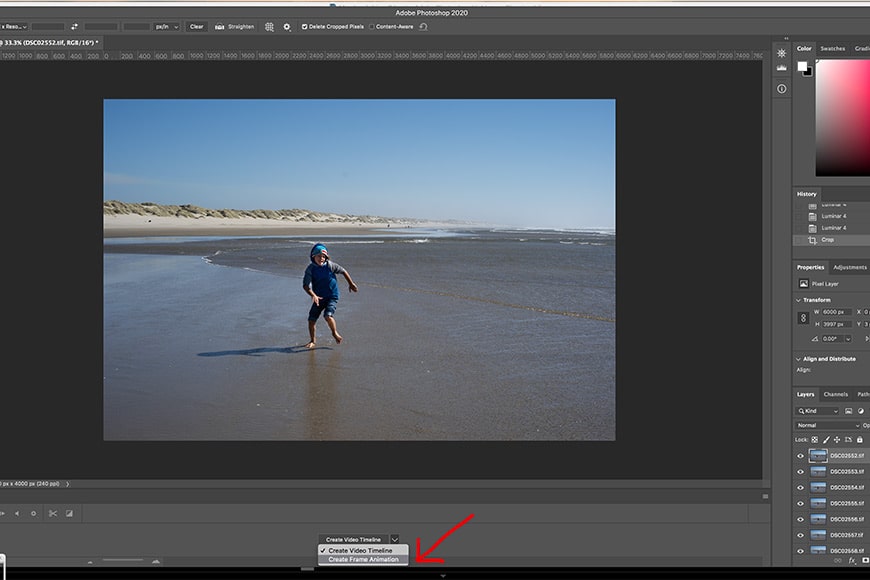
Choosing the frame animation option tells the Timeline to use a frame-by-frame style.
The Timeline window has two animation options: Create Video Timeline and Create Frame Animation.
The quickest and easiest way to make an animated GIF in Photoshop is through Frame Animation, so make sure that’s selected.
(You’ll find both of these options by clicking on the arrow on the button in the middle of the panel.)
Step 4: Convert the Layers into Frames
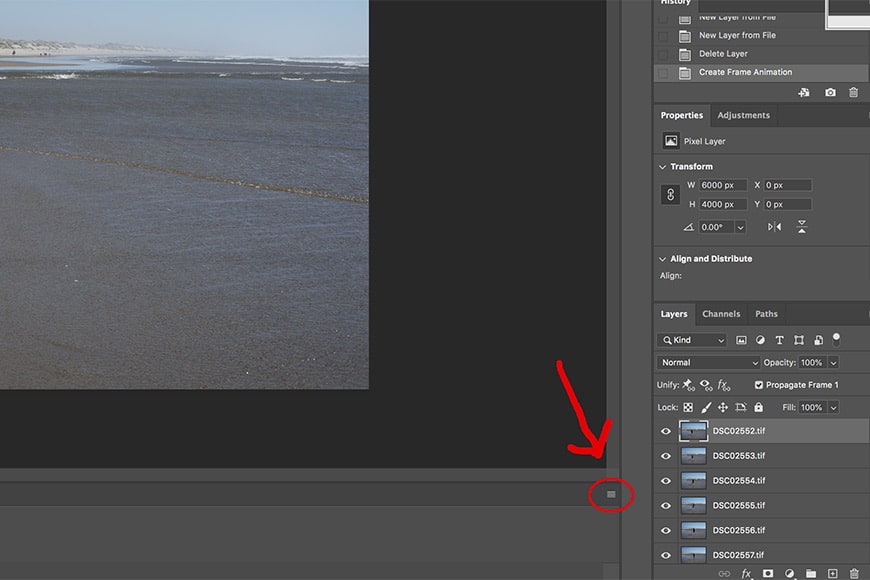
Sometimes the timeline dropdown menu can be hard to see. It’s the little menu icon located at the far right of the timeline.
Now it’s time to convert the layers into frames. Navigate to the tiny menu icon in the upper right corner of the Timeline panel. In the middle of the menu, you’ll see Make Frames From Layers.
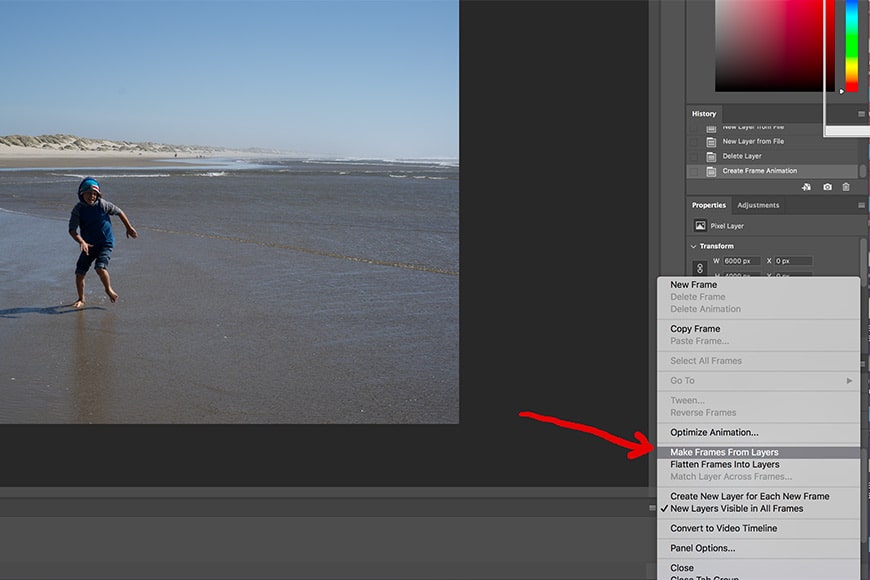
Once you click on the timeline menu icon, a drop-down menu will pop-up. Select “Make Frames From Layers.”
Like magic, all your layers will be converted into individual frames ready for animation.
The magic of Photoshop is that you’ll still be able to edit each individual frame in your Timeline as needed. You can turn layers on and off, move elements around in each of the individual frames, apply filters, rotate text, etc.
Step 5: Preview your GIF
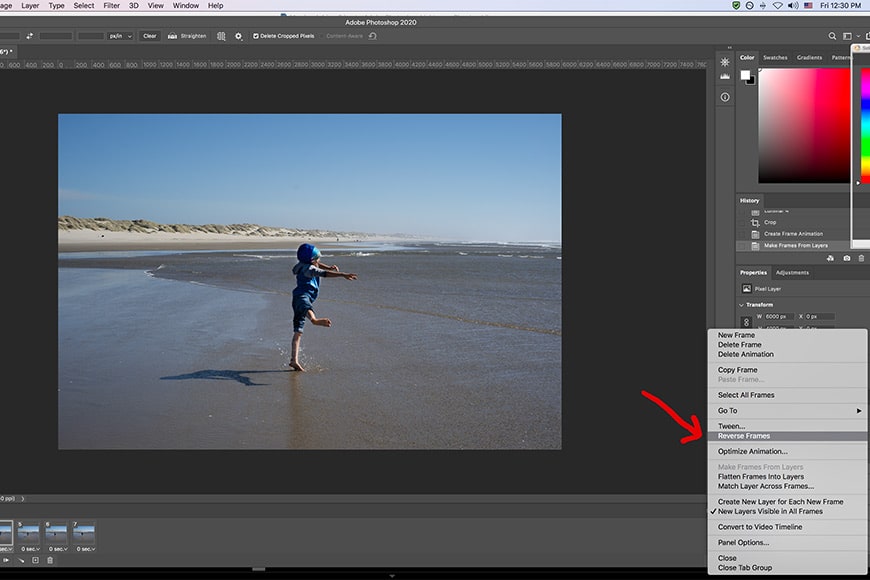
If your frames are playing in reverse, go to the Timeline menu and select Reverse Frames.
Now it’s time to preview your soon-to-be animated GIF.
You can do this by either clicking on the Play icon at the bottom of the Timeline panel or by pressing the spacebar.
Also, depending on the order your images were imported, they might be playing in reverse. If this is true, the fix is simple: just click on the Timeline menu icon and select Reverse Frames.
Step 6: Adjust the Timing and Looping
- Adjusting the Timing (the speed)
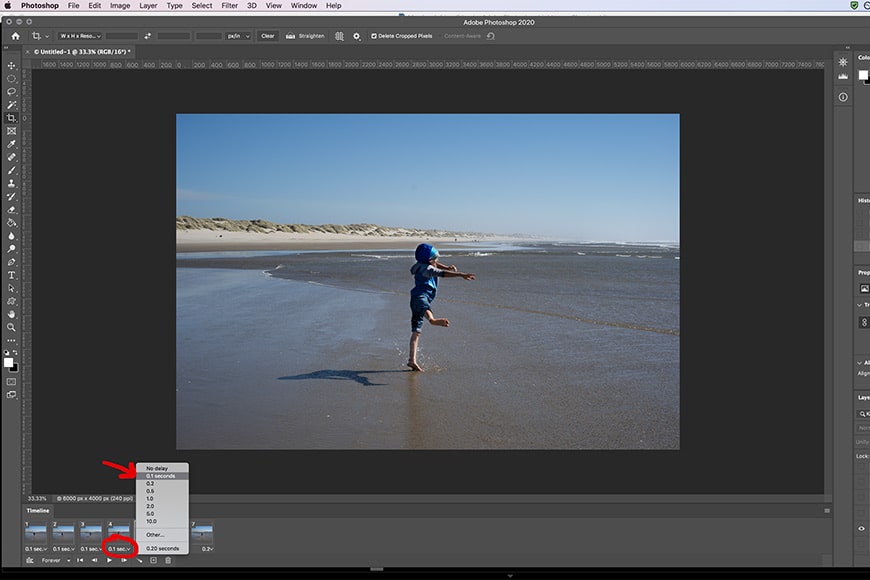
Changing the GIF speed in Photoshop is pretty simple.
Photoshop’s default timing is set with no pause between the frames. Leaving it at that setting isn’t often the best choice. For some reason, the “0” setting for frame timing tends to make things flow strangely or sometimes even not at all.
Changing the timing is pretty easy. Simply click on the frame you wish to adjust, click on the arrow, and then choose a time from the dropdown menu. I’d recommend starting out with either 0.2 or 0.5 seconds.
\You can always change this later. (The frames in the demo GIF above are set to .2 seconds.)
- Looping
Most animated GIFs are set to continually loop as long as they’re open, and that’s what Photoshop’s default is set to. But if you’re wanting the image to just repeat once or three times, etc. Photoshop gives you a few options.
Below the timeline and to the left of the play button, you’ll see Forever and an arrow signifying a dropdown menu. There are a few different looping options as well as the option to customize your own timing.
Remember, of at any time you don’t like the results you can always go back and change the timing and loop options or even the order of the frames.
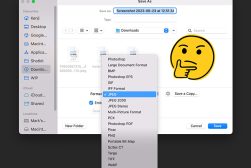
Step 7: Save as an Animated GIF
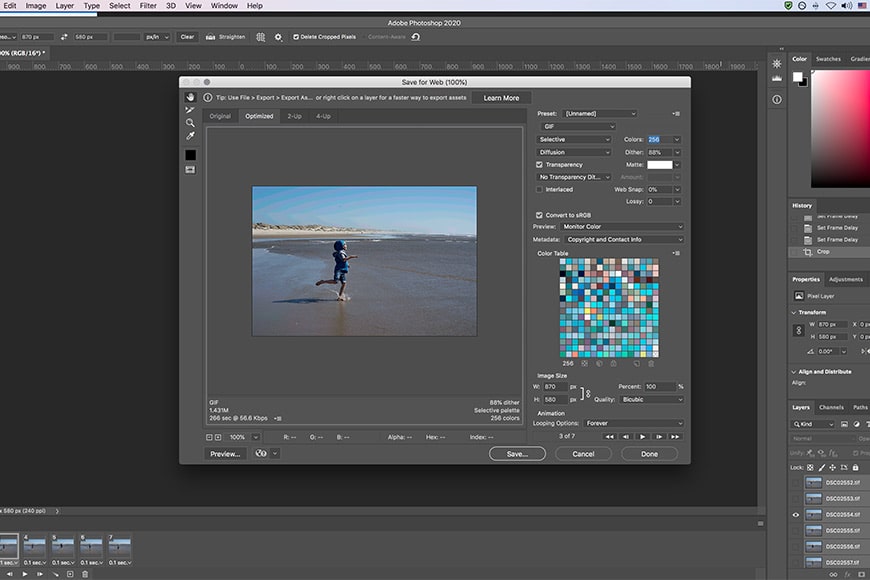
Use Photoshop’s “Save for Web (Legacy)” under the Export menu.
Once you’ve got your settings dialed in and your GIF is moving the way you’d like it to, it’s time to save it and view it on other platforms (to make sure it runs the same outside of Photoshop).
The saving process here is a bit different than with standard images. Instead of hitting Save or Save As, you’ll need to use File > Export > Save for Web (Legacy).
If want to limit the file size of the GIF, you can always change the Height and Width fields in the Image Size options, or change the save quality. (I like to change dimensions before reaching this point, but either way works.)
Once you’re done, hit the Save button.
Once the file has been saved as a GIF, make sure to view it outside of Photoshop in a couple of different places to make sure it runs well. Also, don’t forget to save the parent file as a .psd file too, in case you want to make changes later.
Note that if you plan to host the animated GIF on your own website, you should consider the final file size to ensure it loads quickly for users on slower Internet connections.
This may involve having to experiment with the optimization settings, such as reducing the number of colors or the amount of dither.
As you’ll see in my example at the start of the tutorial, there’s some color banding most noticeable in the sky, due in part to the heavy optimization I chose, in an attempt to reduce the file size – this resulted in a final GIF of 1.5MB.
How to Make a GIF in Photoshop: Video Tutorial
 How to change GIF Speed in Photoshop (Fast or Slow)
 Best Photo Animation Apps of 2023 (Android, iOS, & Web)
 16 Common Image Formats (+ When to Use Them)
 Best Free Photoshop Actions for Photographers
 How To Make a Video or GIF Into a Live Photo on iPhone
 How to Use DaVinci Resolve in 2023: Beginner’s Guide

Usnea Lebendig is an experienced photographer and reviewer who loves to photograph professionally and in moments where the world’s beauty and/or strangeness leaps in front of the lens.


WELCOME TO SHOTKIT
Enter your email to be sent
today's Welcome Gift:
19 Photography Tools
🔥 Popular NOW:


Shotkit may earn a commission on affiliate links. Learn more.