


How to Format SD Card on Mac (3 Simple Ways + Tips)
Choose from 3 simple ways to format your SD cards on a Mac, including one free SD Card Formatter + Learn best practices for safely formatting SD cards.
Learn | Photography Guides | By Teryani Riggs
SD cards are something most of us can’t do without in today’s photography world. We all know what’s like to have taken off for a shoot and found that we either forgot our SD card or it’s not working properly.
That’s why it’s important to make sure your memory cards are formatted correctly and ready to go!
Regular (re)formatting keeps your SD card operating at its best and helps to keep the files from becoming corrupt.
It’s also useful when you want to gift someone one of your old SD cards, but want to make sure it’s been wiped of all your old files.
If you know what device you’ll be using the SD card, it’s best to format it with that device. (Most cameras have that as an option). If your device doesn’t have a format option, however, using your Mac is the next thing.
In this article, I’ll first offer the quickest way to format an SD card on your Mac, then take you through it step by step.
From there we’ll take a look at some free software you can use and how to use the Command Line in Terminal.
Note: Formatting your SD card will erase everything that’s on it. Make sure to copy and save any important data before formatting.
Here’s the quick way to format an SD or MicroSD card on a Mac:
- Insert your SD card into your Mac using its SD card slot or an SD card reader.
- Navigate to the Disk Utility app via Spotlight (by typing “Disk Utility” into the search box). Alternatively, you can find it in the Utilities folder inside the Mac Applications folder.
- Open Disk Utility.
- Select your SD card.
- Navigate to the top menu bar and click Erase.
- Choose the appropriate file system format. (EXFAT for SD cards over 64GB; MS-DOS FAT if it’s 32GB or smaller.)
- Click Erase.
Here’s our ultimate guide to formatting memory cards.
Table of Contents
How to Format SD Card on Mac
Your Mac OS comes with an app called Disk Utility, which can be used to format all kinds of drives (hard drives, USB drives, SD cards, etc.).
Here’s how to use Disk Utility to format your SD card.
1. Connect the SD Card to your Mac
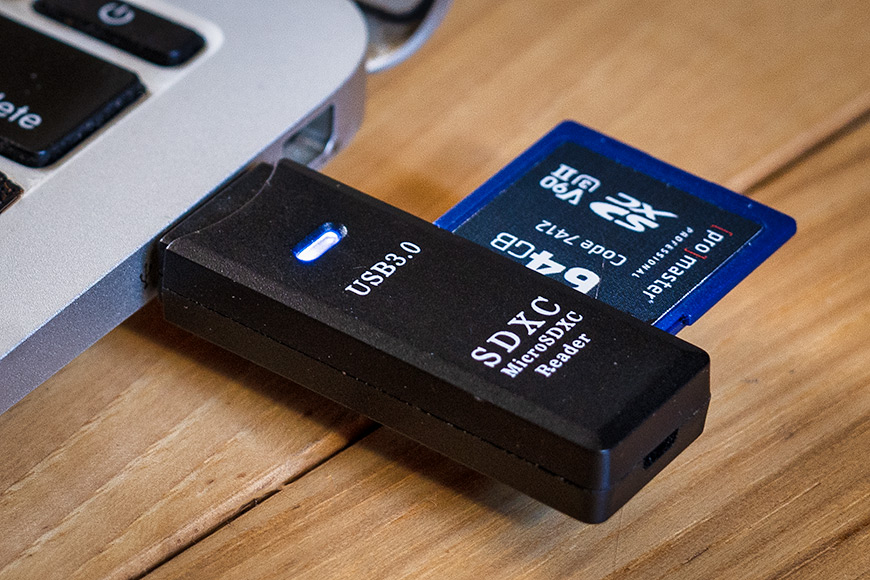
Most USB card readers work with both SD cards and microSD cards.
To start formatting SD card on Mac, connect the SD card to to the Mac. There are a few different ways to get your Mac to talk to your SD card (or micro SD card).
If your Mac came with a built-in SD card slot, then you can insert your SD card directly into it. If it didn’t, you’ll need to buy a USB memory card reader – here are the best ones.
If you’re looking to format a micro SD card, you’ll need to insert it into a larger SD adapter cartridge or use a USB card reader like the one above.
2. Open Disk Utility
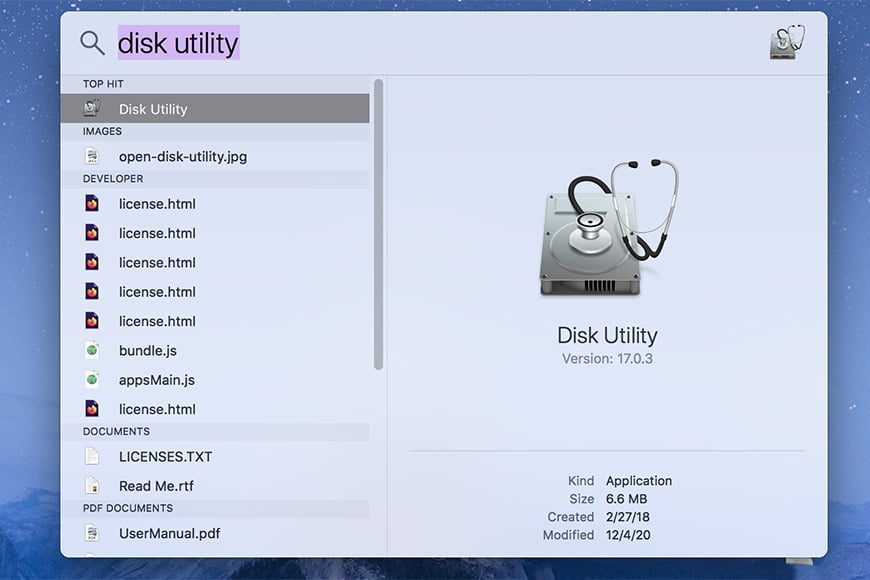
The fastest way to open Disk Utility is to do a Spotlight search for it.
As mentioned before, the Disk Utility app comes with your mac OS operating system. You can get to it a couple of different ways.
Disk Utility is the most convenient solution to format sd card (Mac laptops).
The quickest is to press Command + the Space Bar and type “Disk Utility” into the Spotlight finder. (You can also launch Spotlight by clicking on the magnifying glass icon at the top right of your screen.)
You can also navigate directly to it via Applications > Utilities > Disk Utility.
3. Select your SD Card
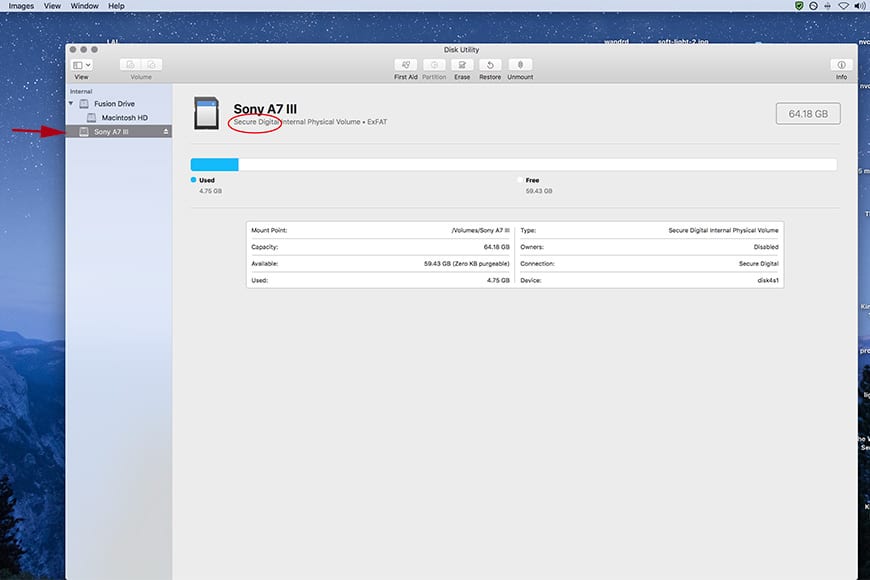
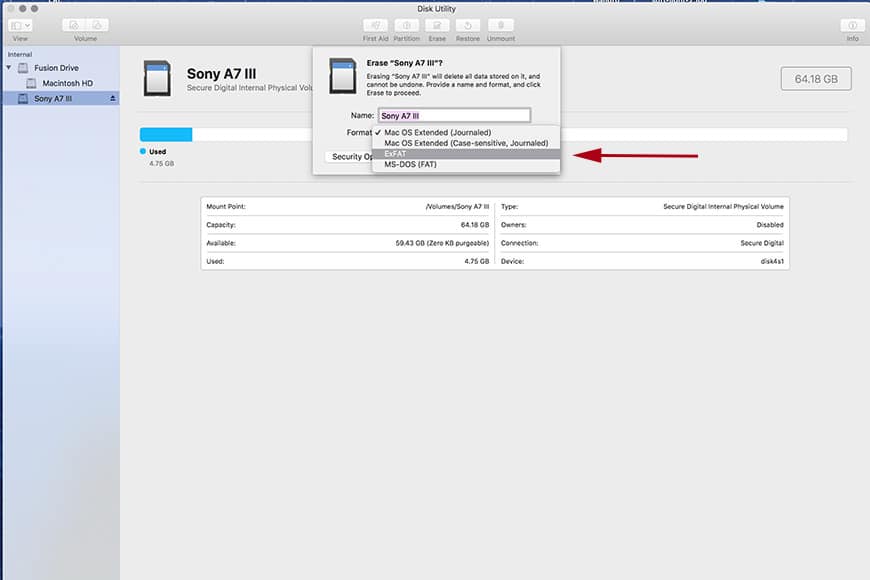
Make sure to choose your SD card, not another drive. An SD Card will have the words “Secure Digital” under its name.
Once you’re in Disk Utility, you’ll see all your connected drives in the left sidebar. Your Mac’s internal drive will be listed under “Fusion Drive”) as well as an external section with any USB or other connected drives.
It’s doubly important to make sure you select the correct drive at this stafe, as you don’t want to accidentally format (and erase!!) anything else.
If your SD card is brand new, it’ll probably say “UNTITLED” or “NO NAME.”
You can make sure you’re clicking on the SD card by checking to see that:
- The words “Secure Digital” are under the name. (Circled in red in the image above.)
- The storage capacity on the right hand of the screen is accurate. (Here it says 64.18 GB, which is correct.)
4. Click on the Erase Button

At the top of the screen you’ll find a set of buttons. Right in the middle of these is the “Erase” option.
Click on “Erase.” Once you do, a popup screen will appear. This should format SD card on mac.
5. Choose the SD Card Name
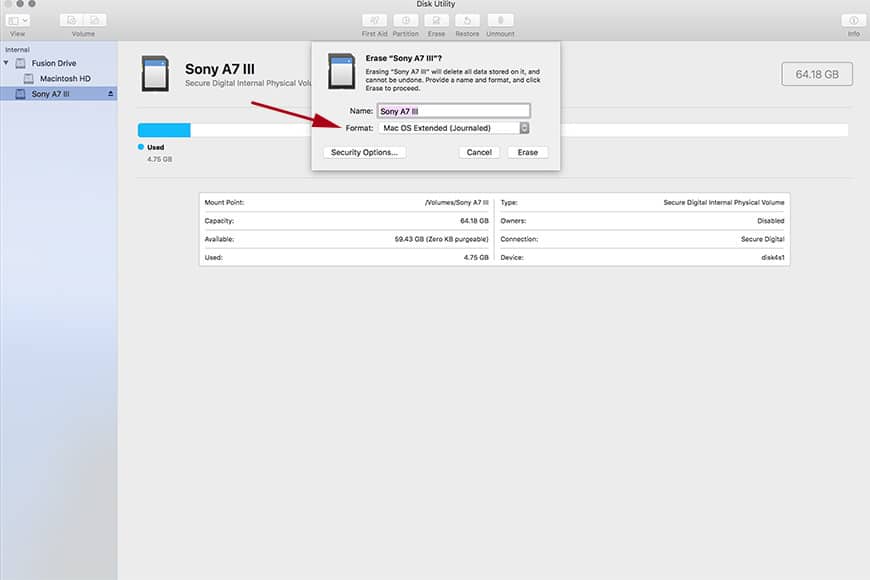
Once you click on Erase, a popup screen will appear giving you the option to change the SD card name and choose the file system format.
Changing the name field is purely optional. The card will work just fine if you leave it as UNTITLED or NO NAME.
That being said, it’s often helpful to have a user-friendly name that will distinguish your SD card from other drives or cards.
I like to choose the name of the camera the SD card will be used with.
6. Choose the FileSystem Format
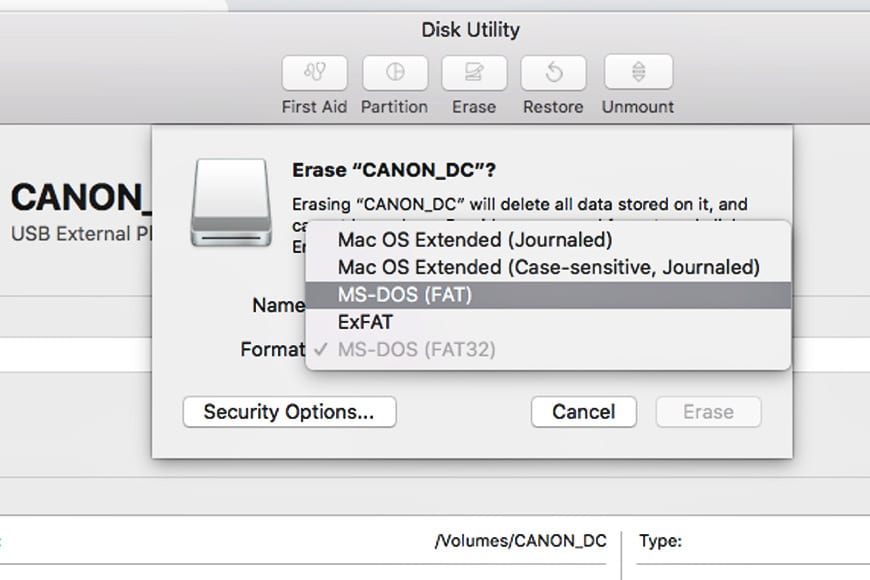
Choose a filesystem format that will work with your card: Exfat for cards 64GB or larger, MS-DOS (Fat) for cards 32GB or smaller.
There are a few different file systems listed in the Format drop-down menu. The default is Mac OS Extended (Journaled), but this won’t work in a digital camera (or drone or another similar device).
For SD cards and microSD cards, you’ll want to choose either ExFat or MS-DOS (Fat). Select ExFat if your SD card is 64GB or larger. Choose MS-DOS (Fat) if it’s 32GB or smaller.
Note: If your SD card has been pre-formatted it might have a grayed-out option that says MS-DOS (Fat32). MS-DOS (Fat) is the same thing, so if you need Fat32, use MS-DOS (Fat).
7. Click Erase
Once you click hit erase, Disk Utility will erase all the data you have stored on the card, format your SD card to the appropriate file system, and restore all the available storage to its optimum capacity. When these steps are carefully followed, you should reformat SD card on Mac smoothly.
Warning: How to reformat sd card without erasing data is still not possible at the time of writing. Be sure to backup your data!
How do I format my SD card to FAT32 on a Mac?
Here is how you how to format an SD card on Mac into Fat 32. You can format an SD card to MS-DOS (Fat 32) by following the instructions above and then selecting MS-DOS (FAT) from the Format dropdown menu.
You can also use the free SD memory card formatter app or a Command Line in Terminal. (Both described below).
Free SD Card Formatter for Mac
Here’s how to reformat sd card on Mac using a free tool.
If you’re worried about choosing the wrong option or accidentally erasing the wrong drive, the SD Association provides a free app that takes all the guesswork out of formatting an SD card. This makes it easy to format memory card on Mac.
The free SD Card Formatter ignores non SD cards and automatically detects and which file format your card needs. It also optimizes the card’s performance and restores everything to SDXC specifications.
Here is how to format an SD card on Mac. The entire process is encapsulated in just a single screen:
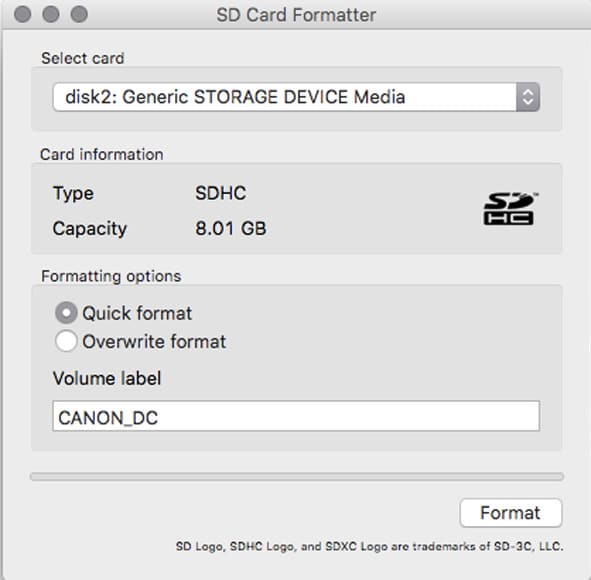
The single screen provides two formatting options:
- Quick frees up space without actually erasing any raw data.
- Overwrite wipes out all the data stored on it, ensuring it can’t ever be recovered.
The Volume label is simply the name on the card, which you can change here.
It’s free and there are versions for both Mac and Windows.
Using Mac Command Line to Format SD Cards
Here is another way to quickly If you’re comfortable using MacOS Terminal, you can also use it to format SD cards. Just make sure you can recognize which disk you’re looking at when you see volume identifers such as disk2.
Not understanding these terms can make it super easy to erase the wrong SD card, so be very careful!
- Open Terminal. (Finding it in a Spotlight search is quickest.)
- With your SD card connected to your Mac, type $ diskutil list
This will list the available drives on your system.
- Select your SD card. (Make sure you’re positive which drive it is!)
- To format your SD card but keep the same file system, use the reformat command: $ diskutil reformat disk2
(In this case, disk2 is the SD card.)
- To format your SD card and change the file system, use the following command: sudo diskutil eraseDisk FAT32 MBRFormat /dev/disk2
Note: This is how to clear sd card on Mac! Be sure to back up your files.
Here FAT32 is the chosen format; MBRFormat tells disk utility to format with a Master Boot Record; and dev/disk2 is the location of the SD card.
- Press Enter.
- Once the process is complete, type in “diskutil list” again to make sure the card was successfully formatted.
A Few Things to Note
- If you’re using a MacOS older than version 10.6.6 (Snow Leopard), it won’t support exFat.
- If you get an “operation failed” notice in Disk Utility or “Cannot format write protected card” in the SD Card Formatter app, check to see if the little switch on your SD card is in the “Read-only” position. To release it, slide the switch towards the end of the card that’s inserted into the computer.
- Again, be extra, extra careful when selecting your SD card in either Disk Utility or Terminal.
Remember, it’s generally best to format your SD cards in the device you’ll be using them in if that option is available.
However, if you need to use your Mac, now you now know how to do it! As you’re an Apple user, check out our guide to the best photo editing software for Macs
Leave any questions in the comments, and best of luck formatting your SD cards.


WELCOME TO SHOTKIT
Enter your email to be sent
today's Welcome Gift:
19 Photography Tools
🔥 Popular NOW:


Shotkit may earn a commission on affiliate links. Learn more.