


What is Exposure Compensation (and How to Use it)
Learn everything you need to know about Exposure Compensation and why it's still the easiest and most practical ways to take control of your photos in 2023.
Learn | Photography Guides | By Andy Day
If you want to have more control over how you expose your images, you might think that you need to use Manual mode and all of the complexities that come with it — but this isn’t true.
Exposure Compensation is a way to tweak your camera’s judgement and get exactly the results that you want.
This guide will explain how exposure compensation works and when you should use it.
We’ll also answer the questions most frequently asked by photography beginners on the topic of using exposure compensation to create better photos.
You’re about to understand why so many professional photographers rarely use Manual mode and rely on Exposure Compensation instead.
So, let’s get started!
Table of Contents
What is Exposure Compensation?
Exposure Compensation is a way of tweaking the exposure that your camera thinks is ‘perfect’.
When you shoot in Program, Aperture Priority mode (Av or A), or Shutter Priority (S or Tv), your camera makes intelligent calculations to figure out which settings to use to get the perfect exposure.
This process is called metering.
In Program mode, the metering looks at the varying amount of light hitting the sensor and figures out what aperture value, shutter speed, and ISO are required in order for the brightness to average out at a specific shade of grey.
This shade of grey is often called “middle grey” or “18% grey” and is used by all manufacturers as the basis of what makes a good exposure — trying to get as close as possible to what you see with your own eyes.
Metering isn’t perfect, however. For example, strong backlighting such as shooting portraits with a setting sun behind, or snowy scenes can confuse the camera, making your photographs too dark.
As a result, your backlit portraits might look like silhouettes, and snowy scenes may end up looking murky.
This is where Exposure Compensation can be useful.
Exposure Compensation allows you to nudge the camera’s judgement slightly, telling it to make everything brighter or darker.
You can use Exposure Compensation to tell the camera to meter a scene based on a shade of grey that is darker or lighter than the 18% grey that it would use normally.
When you increase Exposure Compensation (e.g., +1, +2), your images will become brighter, lifting your shadows.
When you decrease Exposure Compensation (e.g., -1, -2), your images will become darker, protecting your highlights.
Which Camera Modes does Exposure Compensation work in?
Exposure Compensation can be used in almost every mode. It’s useful to know how Exposure Compensation varies in its behaviour depending on which mode you are shooting in.
It’s easiest to begin explaining this by understanding Aperture Priority mode and Shutter Priority mode and to imagine that we are shooting a scene where the light is not changing.
Aperture Priority Mode
In Aperture Priority mode, you set your aperture and your camera automatically selects a shutter speed according to the brightness of the scene.
When you increase your Exposure Compensation by +1 to make your images brighter, your camera will halve the shutter speed in order to let in twice as much light.
For example, if you have chosen an aperture of f/4 and an ISO of 100, let’s say that your metering system has automatically chosen a shutter speed of 1/500th of a second.

If you then increase your Exposure Compensation by +1, your camera will drop the shutter speed to 1/250th. This doubles the amount of light entering reaching the sensor.
If instead, you were to set your Exposure Compensation to -1, your metering system will increase the shutter speed to 1/1000th. This halves the amount of light reaching the sensor.
Shutter Priority Mode
In Shutter Priority mode, you set your shutter speed and your metering system automatically selects an aperture according to the brightness of the scene.
As before, increasing the Exposure Compensation to +1 will make your images brighter, but this time the camera will double the size of the aperture to let in twice as much light.
For example, if you have chosen a shutter speed of 1/500th and an ISO of 100, let’s say that your metering system has automatically chosen an aperture of f/5.6.
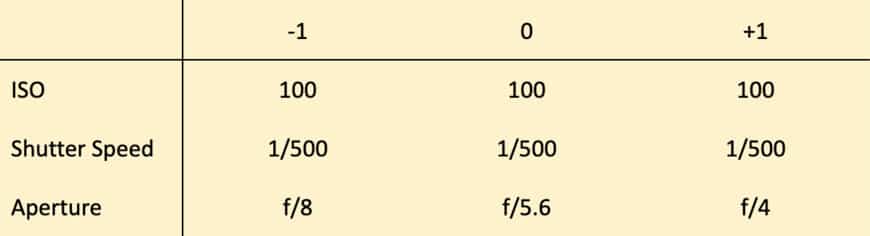
If you then increase your Exposure Compensation by +1, your camera will double the size of the aperture by opening it up to f/4.
Conversely, decreasing the Exposure Compensation by setting it to -1 would cause your camera to halve the size of the aperture by closing it down to f/8.
The shutter speed chart above should help explain this.
Auto ISO
It’s worth noting that most modern cameras allow you to let the metering system set the ISO automatically, regardless of the shooting mode that you’re using.
By default, cameras tend to keep the ISO as low as possible in order to give the best image quality (i.e., the least amount of noise).
For this reason, setting the Exposure Compensation will cause the camera to change the shutter speed or aperture before it decides to change the ISO.
Program Mode
How Exposure Compensation affects the exposure when using Program mode depends on the camera. You might find that it always changes your exposure, or you might find that it does nothing at all.
On some cameras, Exposure Compensation only works in Program mode if you’re not using Auto ISO.
Manual Mode
Because you are setting the variables yourself, Exposure Compensation will not do anything to your image if you try to change it while shooting in Manual mode.
However, if you are in Manual mode and you select Auto ISO, Exposure Compensation will vary the ISO to give different exposures.
How do you set Exposure Compensation in Manual Mode?
In Manual mode, you choose the shutter speed, aperture, and ISO. Because there is no variable that the camera is setting automatically, changes to Exposure Compensation will not have any effect.
However, there is an exception.
Slightly confusingly, the Manual mode on most digital cameras still gives you the option to set the ISO to Auto. This means that the camera is now calculating the right exposure and changing the ISO accordingly.
As a result, Exposure Compensation will have an effect in Manual mode if your ISO is set to Auto.
Increasing the Exposure Compensation to +1 will cause the camera to double the ISO, creating a brighter image.
Decreasing the Exposure Compensation to -1 will cause the camera to halve the ISO, creating a darker image.

How is Exposure Compensation Measured?
Exposure Compensation is measured in relation to Exposure Value, sometimes referred to as “stops” and often divided into thirds.
Exposure Value is a scale that measures the amount of light that is hitting your camera’s sensor. Understanding how it works is not hugely important, so don’t worry too much!
In terms of Exposure Compensation, the exposure that your camera thinks is “normal” is always 0 (zero) and most cameras then allow you to adjust this by increments of 1/3 of a stop, usually to a maximum of 3 stops.
When Should You Adjust Exposure Compensation?

You should use Exposure Compensation in situations when you realise that your camera is not making the best decisions to give you the right exposure.
Of course, the “right” exposure is a personal judgement! You might be making a creative decision to over or underexpose, or you might know that your camera is being fooled and that you need to correct it.
For example, as brilliant as modern cameras are, they can still struggle with snowy scenes, making photos look a bit duller than in reality.
This happens because a camera will try to average out a lot of the snow so that it matches the 18% grey mentioned earlier.
If you’re heading out for a day of photographing in the snow, you might want to set your Exposure Compensation to +1 to take this into consideration.
You might find that something similar happens when photographing someone positioned with their back against a white wall. The camera will often think that the white wall is very bright and choose an exposure that is too dark as a result.
Increasing the Exposure Compensation can correct this.

Cameras can also struggle with strongly backlit subjects. For example, if you’re taking a portrait of someone standing with their back to the setting sun, you might find that you capture a perfectly exposed sky while the person is almost a silhouette.
To address this, you could increase your Exposure Compensation until your subject’s skin becomes more normal in your photographs.
Depending on the mode that you are shooting in, your camera might reduce the shutter speed or open up the aperture in order to allow more light to reach your sensor.

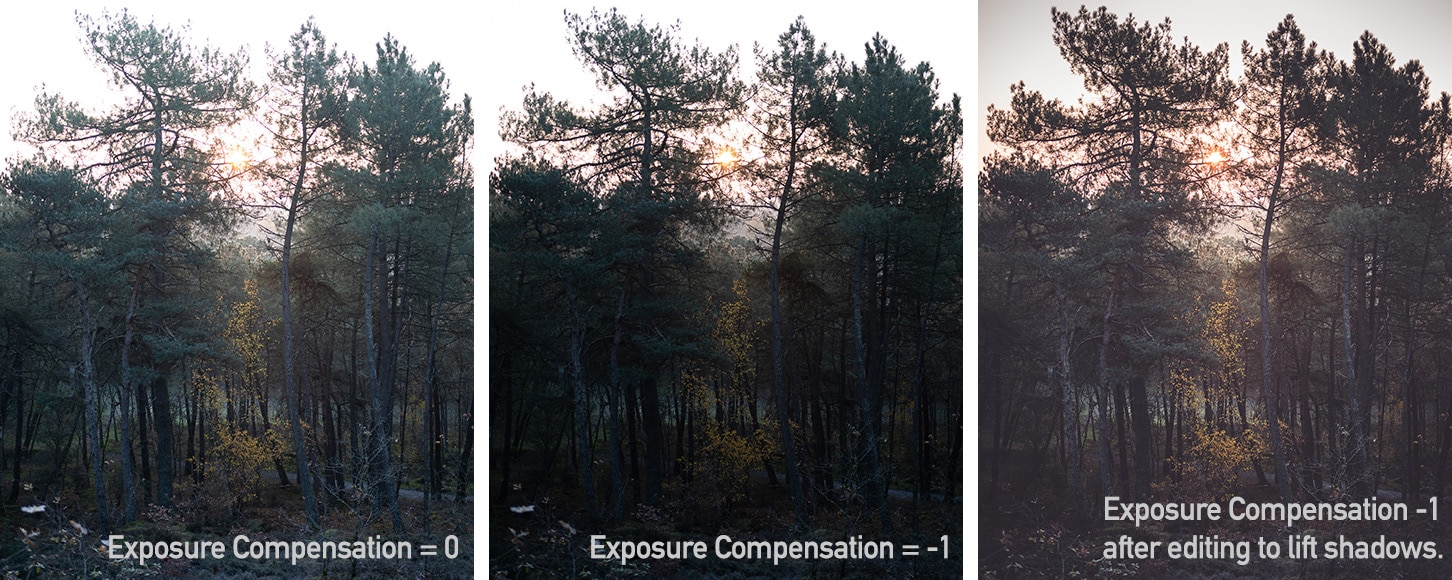
Similarly, you might find yourself shooting in a forest where the camera has decided that the tree trunks need to be nicely exposed.
However, this means that the sunlight coming in through the leaves is very bright and the sky is completely blown out as a result.
You may decide to decrease your Exposure Compensation, allowing you to capture the brightness of the sky, and knowing that you can lift the dark areas of the image (i.e., your tree trunks that are seem underexposed) when you come to edit the photograph later on.
In the example below, I chose to use Exposure Compensation to make the sky slightly darker and protect my highlights. When I set the Exposure Compensation to -1, the camera doubled the shutter speed in order to create a darker exposure.
Understand your histogram
Knowing when to use Exposure Compensation makes understanding your histogram really important, especially when you consider that the image you see on your camera’s LCD can sometimes be misleading.
For example, if you are shooting at night, the LCD viewed in dark conditions can make your photographs look much brighter than they actually are.
If you don’t also check your histogram, you might come home with photographs that are all underexposed, even though they looked fine on the LCD.
By contrast, the histogram is much more consistent. When you understand it, a quick glance will often tell you if you need to use Exposure Compensation.
How do you read a histogram on a camera? You might already know that the histogram that can be viewed on the back of your camera gives you a graphical representation of how an image has been exposed.
Blacks and shadows show up on the left, midtones are in the middle, and highlights and whites appear on the right.

If a photo is underexposed, the graph may be stacked up against the left-hand side of the histogram.
Anything that’s too far to the left to the extent that it’s no longer on the graph is information that is lost and can’t be recovered when you come to editing.
On a DSLR camera, you can see the histogram when viewing your images usually by cycling through the options as a result of pressing “Display” or “Info” depending on the manufacturer.
On a mirrorless camera, as well as viewing the histogram for image that you have taken, you can also have the camera show you a live histogram that you can see through your EVF while you are composing your photograph.
Similarly, an overexposed photograph has a graph that is stacked up on the right, and you may have lost information in the highlights.
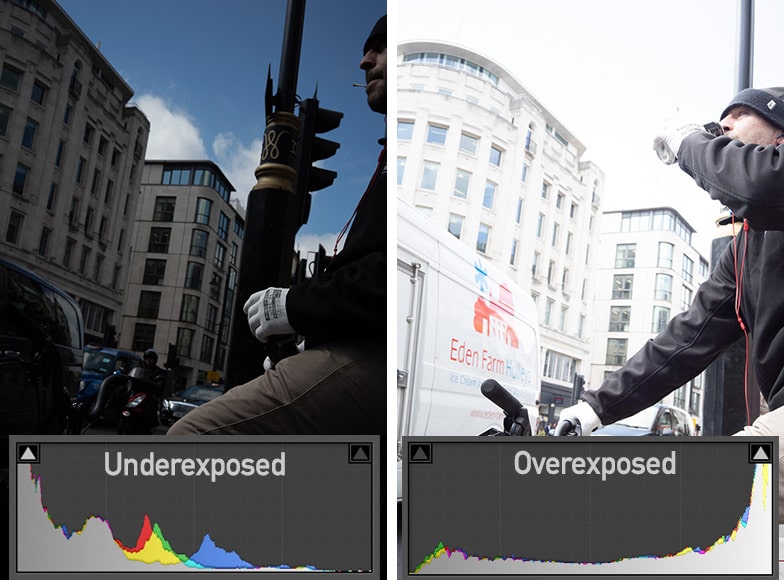
In the example above, look how the “mountains” in the histogram seem to disappear out of the graph to the left on the underexposed photograph, and to the right for the overexposed photograph.
Understanding your histogram means that you’ll have a better idea of when to use Exposure Compensation as you will be able to make a judgement as to whether a photograph is exposed correctly.
If you are worried that the camera is overexposing a scene (perhaps your histogram shows information that’s disappearing out of the right-hand side), you can reduce your Exposure Compensation (for example, -1).
This may help you to “protect the highlights” — i.e., prevent the bright areas of an image from becoming so white that you can’t see any details, even when you come to edit the photograph.
Similarly, if you’re concerned that the camera is underexposing a scene (the histogram shows information that’s being lost to the left-hand side of the graph), you can increase your Exposure Compensation (for example, +1). This will help to avoid losing information in the shadows.
Knowing how much flexibility you have based on your histogram comes through experience of shooting and using exposure compensation.
You will quickly learn how much you can lift shadows or recover highlights when you edit your photographs.
In turn, this will inform your decision-making when you’re out shooting, giving you a good idea of when to use Exposure Compensation.
How do you Set Exposure Compensation?

How you change your Exposure Compensation will depend on your camera. Whether you shoot Canon, Nikon, Sony or any other brand, larger cameras often have a chunky dial that is a design choice carried over from film cameras.
These dials are quicker and nicer to use but it’s very easy to set your Exposure Compensation and then forget to change it back again!

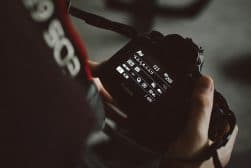
Smaller and less expensive cameras often have a button with plus and minus symbol in a box that you have to hold down while turning a scroll wheel – see what other camera symbols mean.
The button will be placed differently depending on your camera and manufacturer – here’s how to do set exposure compensation on Canon entry-level cameras, and here’s how you might do it on a Nikon camera.
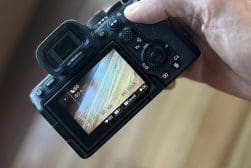
In the above photo, the exposure compensation dial is shown on a Sony mirrorless camera, while in the images below, the button is on a Canon DSLR.

When you hold down this button, the display on the back of the camera (or on top, if your camera has one) will show the changes on a scale that runs from -3 to +3.
You will see a small dot that slides around underneath the scale as you turn the scroll wheel and the example below shows that the Exposure Compensation is set to +1:

Typically, you will also see this scale when you look through the viewfinder of your DSLR or mirrorless camera.
If you change your Exposure Compensation, always try to remember to change it back as it’s easy to forget.
Final Words
Exposure Compensation is a quick way to take control of your exposure.
You might assume that professional photographers all use Manual mode, tweaking each exposure value through intuition.
The reality is that countless experienced photographers use Aperture Priority mode or Shutter Priority mode and then use Exposure Compensation to override their camera whenever they think it might be making the wrong decision.
Learning how to use Exposure Compensation will help you to lift shadows and protect highlights in those moments when the camera isn’t quite smart enough to understand how you want your photographs to be exposed.
Once you get your head around metering and histograms, using Exposure Compensation will become second nature.
Hopefully, this guide has been useful and if you have any questions or additional thoughts, be sure to leave a comment below. Happy shooting!


Andy Day is a British photographer and writing, living and working in France, specialising in adventure, travel, architectural and landscape photography.


WELCOME TO SHOTKIT
Enter your email to be sent
today's Welcome Gift:
19 Photography Tools
🔥 Popular NOW:


Shotkit may earn a commission on affiliate links. Learn more.