


Studio Lights for Photographers: Everything You Should Know
Learn about continuous lighting, strobes, flashes & more in this guide to studio lights for photographers! Includes pros, cons, tips & recommended products.
Learn | Photography Guides | By Ana Mireles
This is a guide to the different types of studio lights available to photographers in 2023.
If you’ve ever asked yourself how do you light a small studio, we’ve got all the answers!
Continuous lighting and other types of studio lights can be expensive and confusing, but we promise to keep the terminology simple if you’re a beginner.
(After all, most beginners don’t have the confidence to build a home photography studio lighting kit from scratch.)
So let’s discover how to build a budget studio lighting setup for your next photoshoot.

Revolutionary lighting simulation software that streamlines studio photography and film making.
Use code SHOTKIT10 to save 10%.
Table of Contents
What Lights do Photographers Use?
There are two different kinds of lights that you can use in photography: natural and artificial.
Natural light comes from the sun or the moon. While this provides you with free lighting, it has its limitations – first of all, timing.
On the other hand, there’s artificial lighting, which covers every other source.
If you’re thinking about dipping your toe into the world of studio photography, you need to learn about artificial light.
Artificial light is divided into many subcategories; the broadest one has to do with duration – it can be flash or continuous lighting.
In addition, each of those has various other options. If you need help understanding their characteristics to determine which lighting equipment to buy, let’s go through each of them.
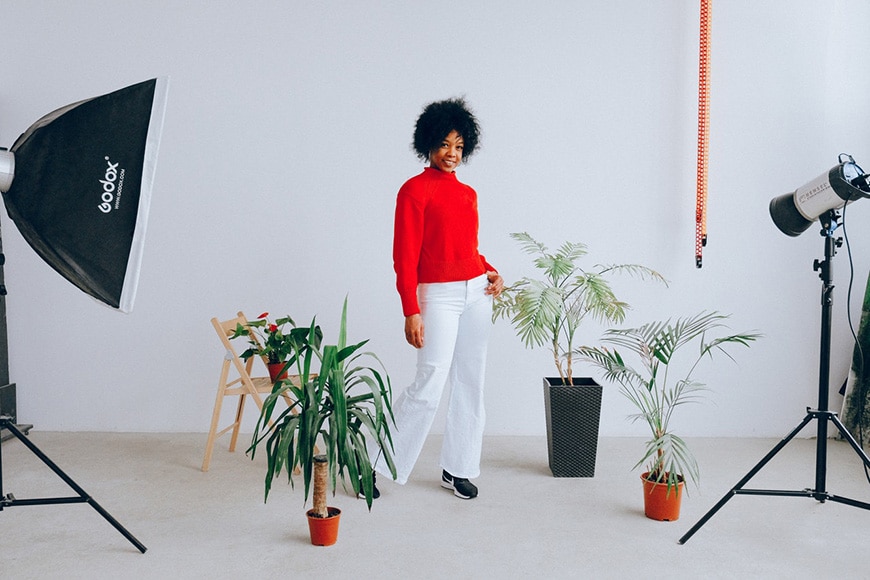
1. Continuous Lighting

Credit: Pamela Sunders
- You can see the lighting effect in real-time
- Easier to manipulate
- Low cost
- You need to set your white balance according to the bulb
- Some of them can overheat
- Cheaper kits only offer a fixed lighting intensity
These types of studio lights work just like a regular house lamp: when you turn on the switch, the light comes on. Then it stays on until you turn off the switch, or the bulb burns out!
Continous lighting equipment is very helpful when you’re lighting a studio because what you see is what you get. If you don’t like a particular shadow or a reflection, you can move the lamp and see the effects in real-time.
There are three types of continuous lighting in photography: fluorescent, LED and tungsten.
An important thing to consider when you’re buying them as studio lights is the CRI (color rendering index).
This number indicates how ‘realistically’ it will reproduce an object’s color compared to a neutral light. In general, incandescent bulbs have a very high CRI.
However, when you’re buying fluorescent or LED lights, you should pay attention to the CRI because it’s more common to find them with lower values.
Most photographers recommend finding continuous lighting equipment that’s above 85, if not 90 – these products, of course, tend to be more expensive.
i) Fluorescent light
You can find fluorescent bulbs in different hues: white, green, yellow and red. They are energy efficient, and they don’t overheat, which makes them a popular choice.
Fluorescent lights are often used in portrait and product photography. To brighten larger areas, you can buy socket stands with multiple sockets.
As a continuous lighting source, these are extremely affordable and can be bought in full kits, single lights with accessories or single sockets.
Here are some recommendations:
- Kit: Impact 3-head fluorescent lighting kit with boom arm.
- Single head with accessories: Impact octa fluorescent kit.
- Single-socket: Raya single LED/fluorescent lamp socket with an umbrella holder.
ii) LED light
LED lights are a very popular type of continuous lighting. They don’t overheat, and they’re not very expensive. However, they’re not as energy-efficient as fluorescent bulbs.
On the plus side, you can change the colour of the light in most LED lamps, making them very flexible for creating different atmospheres, adding creative effects, or matching the white balance when combined with other light sources.
You can buy single LED lights, LED lighting kits and even light sticks suitable for light painting photography.
Recommendations for LED lights include:
- Best lighting kit: GVM 800D-RGB LED studio 3-video light kit.
- Single lamp: Aputure Amaran 100x Bi-color LED light.
- Portable lamp: Yongnuo YN320 variable color studio & on-camera LED light.
- Lightstick: Yongnuo YN360II.
LEDs also usually make the best on camera lights, especially lightweight models with adjustable color temperatures.
iii) Tungsten Light
These bulbs give a warm yellow light that we normally associate with indoor lighting. Most house lamps use this type of light or a mix of tungsten-halogen, which is more energy-efficient.
In a photography studio, tungsten is fairly well used, although it can overheat.
Tungsten studio lights produce a warm, natural color that’s very pleasing for portraits and still life photography.
The color temperature of tungsten lights is about 3200K, so make sure you adjust the white balance settings in your camera.
(You can also correct it in post-production, but I’m a firm believer in getting things as best as possible from the outset.)
A good lighting kit, especially to light a big set for film or video, can cost over $5,000. Fortunately, for a beginner photographer, there are some inexpensive options:
- Best budget lighting kit: ESDDI Adjustable with Accessories.
- Clip-on single light: Smith-Viktor 90-UL economy photoflood adapta-light.
- Single light: CAME-TV Pro 650Watt Fresnel tungsten light with built-in dimmer control.
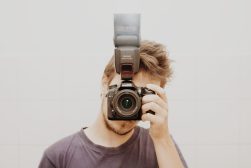
2. Strobes, Flashes & Speedlites

Credit: Donovan Silva
- More power
- Better for freezing a moving subject
- Multiple intensities
- Not suitable for video
- You can’t see it until you take the picture
- Maximum sync speed
There’s a lot of confusion about the difference between strobes and flash. Some people consider flashes to be the small units that hook up to the camera’s hot-shoe and strobes to be the big units used for studio lighting.
Others use both terms interchangeably. As a reference, you can always check retail stores.
For example, the website of B&H – one of the largest, most trustworthy photography stores in the US – uses the following categories: Flashes & On-camera Lighting and Strobe (Flash) Lighting.
The best explanation I’ve found to clear the confusion is that they are both flashes, as none of them emits light continuously. However, some of them have the capacity to fire multiple bursts of light, which makes them a strobe.
Regardless, very few people actually make that technical distinction. So, to make this article as compatible as possible with stores and other literature you might read, I’ll say strobes when I refer to any external studio unit and flash to the small units that can be used on-camera.
Flash lighting needs to be connected to your camera to fire off when you press the shutter button. You can do this via cable or wirelessly. For them to work at their best, you can’t use faster shutter speeds than your camera’s sync speed.
In digital cameras, the sync speed is 1/200 for Canon and 1/250 for Nikon. However, this isn’t usually fast enough for action shots, so you’ll need to use a technique called high-speed sync – you can learn more about how this works in our guide to shutter speed here.
i) Strobes
As I mentioned, I’ll be using this term to refer to the big units used for a photographic studio regardless of their stroboscopic qualities.
These types of studio lights can be self-contained (called monolights) or have the battery separated from the flash head (called power-pack systems).
Monolights are the best lighting choice if you work in a photo studio or an inside location. On the other hand, Power-pack systems are perfect for outdoor locations since you don’t need a power outlet.
Monolights are the most common, probably because they’re also cheaper. There are a few things that you should consider before jumping into the most inexpensive choice, though.
The first thing you need to decide is the strobe’s power, normally expressed in watts per second. An average range is between 200 w/s to 400 w/s depending on the size of your studio.
You can buy a more powerful strobe, but they’re usually more expensive. If you do this, make sure it allows you to turn down the power to the 200-400 w/s range should you wish to use it in a small studio.
If not, you might have difficulty controlling the overpowering light, and you’ll have longer recycling times in-between shots.
Speaking of recycling time, that’s another consideration to make before buying a strobe. This refers to the amount of time it takes to recharge.
Recycling time, combined with the flash duration, is an important factor if you want to photograph moving subjects. For portrait lighting, still-life, food or product photography, it’s not so important.
One more thing – with continuous lighting, what you see is what you get. That’s a great advantage that you lose when you use flash because you can’t actually see the light before taking a photograph.
However, strobes come with a modelling light that’s a continuous bulb, which can really help you build your setup, since the light allows you to see where both the light and the shadows fall on your subject, before using the strobe.
Ok, if you’re sold on getting this type of lighting equipment, here’s a list of recommendations:
- Flashpoint Studio 400 monolight.
- Flashpoint eVOLV 200 TTL modular strobe (Godox AD200 pocket flash).
- Godox DP600III professional flash studio.
- Godox MS300 monolight.
- Flashpoint 160w budget flash with built-in slave.
- Godox E250 mini studio strobe flash lighting lamp head.
Once you decide which product you want, you’ll need to consider how many units to get.
The good thing about buying them individually is that you don’t need to decide right away. It will depend on the type of photography you do and the lighting setups that you prefer.
ii) Flashes
To clarify again, even if monolights and power-pack systems are also flashes, this category is about the small units that can work on and off-camera. They’re also called a hot-shoe flash or flashgun.
Within this category of lighting equipment, you’ll find Nikon’s Speedlight, Canon’s Speedlite and Godox’s Thinklite, amongst other names that vary according to the brand.
Keep in mind that not all flashes are compatible with all cameras, so make sure you’re buying gear that’s compatible with your camera’s brand.
Flashes are commonly used on-camera connected via the hot-shoe. However, you can also put them on stands, connect them via remote triggers, and build a portable studio lighting setup with two or three units.
Some flashes have a TTL function, which is like an Auto-mode. TTL stands for “through the lens” because it gathers the information from the scene in front and adjusts the settings accordingly – it’s extremely useful if you’re shooting in c lighting conditions.
These units are more expensive, as you would expect. If you’re on a budget, you can buy a flash that only has a manual mode.
On top of their on/off camera versatility, flash studio lights are also more portable and often less expensive than strobe flash heads. Here are some recommendations for some of the most popular camera brands.
For Canon:
- Godox TT685C Thinklite TTL flash for Canon
- Neewer NW660 TTL flash for Canon
- Canon Speedlite 470 EX-AI
For Nikon:
- Neewer 750II TTL flash for Nikon
- Godox TT685N Thinklite TTL flash for Nikon
- Nikon SB-500 AF Speedlight
For Sony:
- Godox TT350S Mini Thinklite TTL flash for Sony
- Godox TT685S Thinklite TTL flash for Sony
For more information before you head to the shops, read out guide: What should I look for when buying a camera flash?
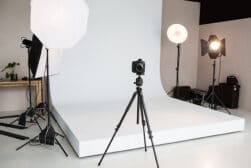
3. Monolight Strobe Lighting Kits
Credit: Anna Shvets
- Price
- They often have tripods and modifiers included
- A great option to start up a studio
- Compatibility issues when you want to expand
- Quantity over quality
- Less flexibility
Whether it’s a strobe, a flash or a continuous light bulb, all studio lights that you get will need a set of accessories – from stands to light modifiers.
Plus, you’ll need more than one if you want to build more complex lighting setups. That’s why they’re often sold in kits.
The most common lighting kits for studio photography are monolight kits.
As with any other set of equipment, strobe lighting kits are often cheaper than buying the pieces separately. They’re a great solution for photographers who are just starting in studio photography.
On the downside, you don’t have as much flexibility as you would have when buying single pieces of lighting equipment and growing only as you need to.
Monolight kits come with two, three, four or five flash heads – each with its own stand. They also have a cable or remote shutter included so that you can connect them to your camera.
Finally, they have a few accessories – some of them have a snoot, others have a softbox, some others may come with a boom arm, and so on.
The price depends on the number of flash heads and accessories, but also the quality. You get what you pay for – some inexpensive kits may lack consistency. This means that either the color temperature, the power, or both can vary from burst to burst, so be careful with that.
Some good budget monolight kits are:
- Elinchrome D-Lite RX 4/4 to go (2 flash heads, stands, square and octagonal softboxes, translucent reflector and beauty ring).
- Godox MS300 D 3-monolight kit (3 flash heads, stands, umbrella, 2 softboxes, reflector, remote trigger).
- Impact EX100A (2 flash heads, stands, 2 softboxes, 2 grid reflectors, 2 sync chords).
- Flashpoint budget studio light monolight flash, 120w portrait kit (2 flash heads, stands, 2 umbrellas).
What is the best studio lighting kit for a beginner?
As you can see, there isn’t one type of studio light that’s perfect for all photographers – you need to find the one that best suits your needs.
Here’s a list of great studio lighting kits with different accessories, as well as different types and numbers of light heads for you to choose from.
- Interfit Honey Badger 320w (2 flash heads, wireless trigger, stands and softboxes).
- GVM P80S LED 4-light kit (4 daylight LED units, 2 umbrellas, 2 softboxes, 4 light stands, 3 backdrops, carrying case).
- Neewer photo studio strobe flash light and softbox lighting kit (2 flash heads, stands, 2 softboxes, wireless trigger, carrying case).
- Neewer continuous lighting kit with a background support system (2 single head holder, 4 fluorescent light bulbs, 4 light stands, 2 umbrellas, 2 softboxes, 3 colored backdrops, 6 backdrop clamps, background support system, 2 carry bags).
- Impact tungsten three floodlight kit with stands
Final Words
I hope this guide cleared up some confusion you may have had about the different types of studio lights and the multiple possibilities you have for a studio lighting setup.
If you need help or have any more questions, you can post them in the comments section.
Also, feel free to share any tips or lighting equipment recommendations for your fellow photographers.
 Expert Guide to On-Camera Flash (How, When & Why to Use)
 Best On Camera Lights in 2023 (Continuous LED Light Panels)
 Best Detachable Camera Flash (Speedlight) for Canon, Nikon & More
 Flash Photography for Beginners (Ideas, Settings and Tips)
 Beginners Guide to Photography Lighting Techniques (+Pro Tips)
 Affordable Camera Gear Guide

Ana Mireles is a Mexican researcher that specializes in photography and communications for the arts and culture sector.


WELCOME TO SHOTKIT
Enter your email to be sent
today's Welcome Gift:
19 Photography Tools
🔥 Popular NOW:


Shotkit may earn a commission on affiliate links. Learn more.