


How To Make a Collage in Photoshop
Learn how to make your own collage in Photoshop. This guide steps you through how to make beautiful photo collages you can share online!
Photoshop | Software | By Ana Mireles
Do you want to make your own photo collage but you don’t know how? Sure, there are apps to make collages, but they can be limiting.
Maybe you want to add more images, use a different size or be more creative with the form and distribution. Perhaps you’re the type of person who likes to do things by themselves to learn how it’s done.
Regardless of the reason, this tutorial will help. Read on, and you’ll learn how to make a collage in Photoshop using Layers.

Download the latest version of Adobe Photoshop to follow along with this simple tutorial.
Start a free 7-day trial today
(Alternatively, learn how to make a collage in Lightroom or use a photo collage app.)
Table of Contents
How to Make a Collage with Photoshop
Step 1: Finding the right images
A photo-collage is a great way to showcase different pictures in a single image. This can be useful for many reasons – and depending on the reason, you can choose the right pictures.
For example, if you’re a photographer, you can put a collage on your website’s landing page to showcase your different projects.
Another idea is to make a collage in Photoshop that then becomes part of a photo album showcasing your latest trip.
You can also use a collage to tell a story in a single social media post – such as on Facebook or Instagram. Once you know how to make a collage in Photoshop, your creativity is the only limit.
Collages are also great when you’re printing them out to be used in picture frames.
So, based on what your Photoshop collage will be used for, select the files that you’re going to need. Make sure your images have something in common to make the collage look harmonious and coherent. It can be the topic, colour scheme, or anything else.
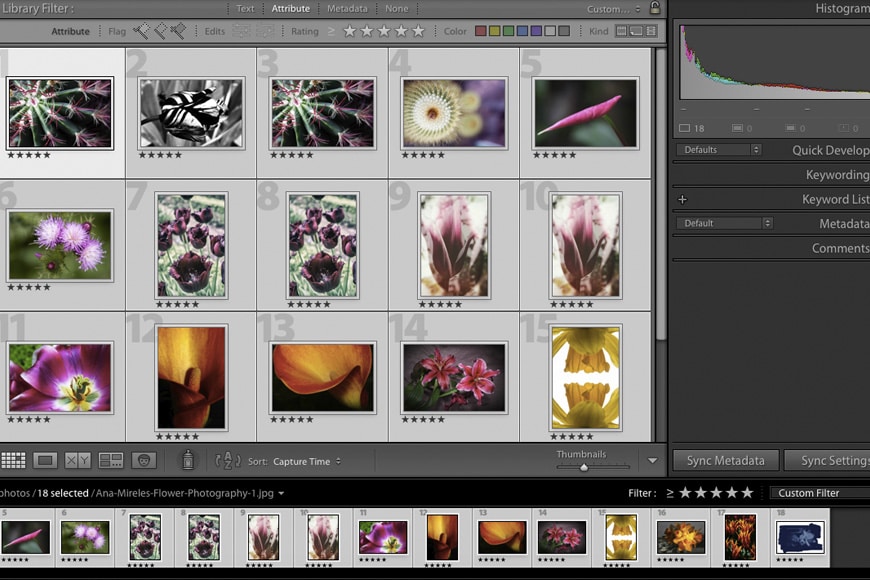
To make this selection, you can use photo management software such as Lightroom. In here you can view, rank and tag your files.
Try to choose a few extra images, this way you’ll have more flexibility to swap elements if something isn’t looking the way you want.
Step 2: Resize your images (optional)
Working with multiple images can create very heavy files that can slow down the workflow. So, if you already know the final collage’s size or destination, you can adjust the images before you start.
For example, if you don’t need to do any more editing on the individual pictures, you can save them as .jpeg. Also, if your Photoshop collage will be for web only, you can work with a resolution of 72 dpi.
Lightroom allows you to do this when you export the selected pictures. In the Export dialog box, you’ll find the sections File Settings and Image Sizing. Here you can make the adjustments you need.
You can also do this in Photoshop, but then you’d have to do each image separately. If you choose to do this, go to File, Open and choose the image you want to adjust.
Then, go to the menu File, Image, Image Size to change your picture’s size and resolution. Use the Save As command if you need to change the file format; if you don’t need to change it use Save.
You can also learn more about resizing images with Photoshop here and how to change DPI here.
Step 3: Create a new document
To create a new document, go to the top menu and choose File, New. A dialog window will open with different preset choices. Otherwise, you can input your own settings on the right-hand side.
I recommend you to make a document that’s bigger than the final size of the collage. This way you’ll have a bigger workspace to move the images around.
This new document will be your background layer.
Step 4: Open your images as layers

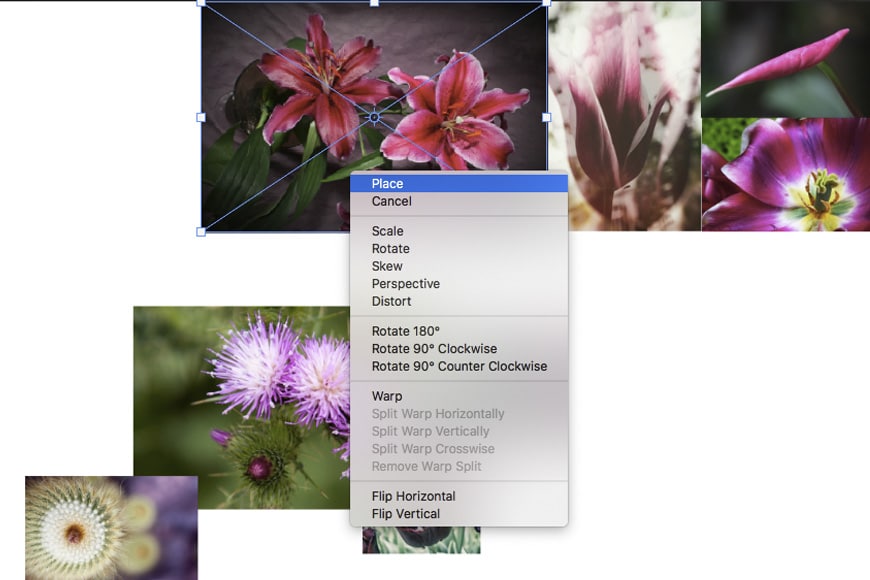
Now, to make your collage in Photoshop you’ll need all the images inside the same document. Each one of them needs to be on a separate layer. You can manually do this by using the command Place.
However, I find much easier to select all your files on your computer and then drag them into Photoshop’s workspace.
Photoshop will automate the process and paste each photo as a separate Smart Object when you do this. Depending on the size and number of images, this can take some time – be patient.
When it’s done, you’ll be able to see in the Layers panel all the documents.
Alternatively, you can use Photoshop’s script Load Files Into Stack. However, this will open the files as normal layers instead of Smart Objects.
Fortunately, you can convert the layers later by right-clicking the layer in the Layers panel. From the menu, choose Convert to Smart Object. Do this if you plan to resize any of them.
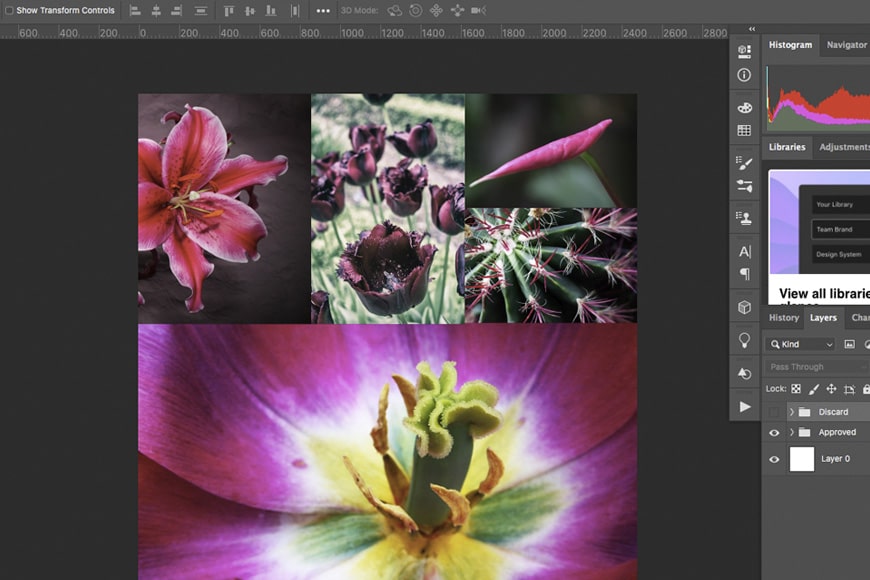
Step 5: Arrange your images.
Now it’s time to make your photo-collage. Select the Move tool from the top of the tools panel. Then click and drag to reposition your images and start organizing the collage.
You can organize all the elements by placing them inside a group. This way, they will be easier to manage. For example, separating them by orientation (portrait and landscape), position (top row and bottom row), etc.
You can click on the eye icon next to each layer (or each group) to toggle the visibility. This way, you can ‘turn off’ the ones that you’re not using.
To create a group, go to the Layers panel and select the layers that you want to group together. Then, use the keyboard shortcut Cmd+G or click on the folder icon at the bottom. You can also rename it for easier management.
The Move tool will move the active layer. If you want to move another one, use the layer panel to activate it and then use the move tool.
You can also enable Auto-Select on the top bar. This will change to a different layer when you click on any part of it. Keep in mind that this option doesn’t work very well with overlapping layers.
The Free Transform tool is also useful when you’re arranging your photo-collage. With it, you can rotate, flip or distort any image.
You can activate it using the keyboard shortcut Cmd+T. This will select the activated layer by adding a frame with handlers around it. You can drag the corners and handlers to transform it free-hand, or you can right-click on it and open the Free Transform menu.
Step 6: Fine-tune your collage
To make sure things are aligned, you can use the guides. When the rulers are active, click and drag on them to pull out a guide.
Then, zoom into the canvas and make the necessary adjustments with the move and free transform tool.
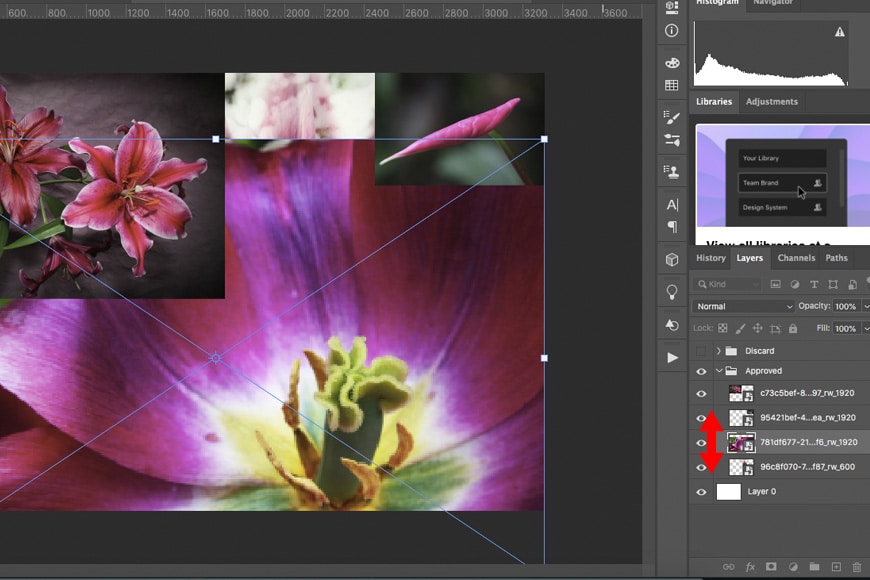
If you want some of the images from your collage to be overlapping, you need to consider the order of the layers.
The top layer in the Layers panel will be blocking the ones below. So, to achieve the look that you want, you need to have the layers organized correctly. If you need to change the order, click the layer and drag it up or down to where you want it.
However, if you need to hide a part of a layer, and you can’t do it by overlapping, you can use a Layer Mask. You can do this by clicking on the Layer Mask icon at the bottom (it’s a rectangle with a hollow circle in the middle).
You won’t notice any difference in the image, but you’ll see a white thumbnail appear next to the selected layer – this is the layer mask.
Here, anything that you paint black will be hidden, and anything you want showing is in the white area.
Step 7: Save your collage
Once you’re happy with your photo-collage, you can crop the extra space and make sure it’s the size that you need. Then, if you’re not going to change it anymore, you can go to the menu Layer, Flatten Image.
This will unite all the layers into one locked background layer. This way the file will be lighter. After that, you can save it in any file format – the most common being JPG.
However, if you want to keep an editable version of the photo-collage, you shouldn’t flatten it. Keep your layers to make all the changes that you want in the future. For this, you should save in PSD, the native file format from Adobe Photoshop.
Tips to Customize your Collage
Now you know the basic steps of how to make a collage in Photoshop.
If you want to get more creative, you can continue to customize your photo collage in Photoshop to make it more visually appealing. Here are a couple of ideas.
You can do any of these once you’re done with step 6.
Add frames

If you want to give your Photoshop photo-collage a vintage look, you can add borders to each of the images. To do this, open the Layers panel and double-click on any of the layers.
This will open the Layer Style dialog box. Here, choose Stroke on the left menu and customize its color and width on the options from the right side.
Of course, you can also play with any of the other choices and find a style that you like. Once you’re happy, click OK.
You’ll notice that the effects are listed on the layer in the Layers panel. Click on them while holding the Alt key and drag them to the next layer to copy them. Repeat the process with every image on your collage.
Add an overlay

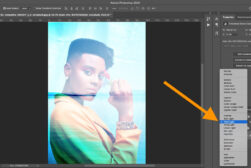
Another creative way to customize your photo-collage is to add an overlay. To do this, you need to add a new layer on top of the others.
This can be a texture, a gradient, a colour, etc. For this example, I used a solid colour by adding an adjustment layer.
After adding your overlay, toggle the blending modes to change how it affects the layers below. You can also use the Opacity slider if you want to make the effect more subtle.
Use a Grid
Using a Grid in Photoshop is a simple way to arrange your images to ensure everything is aligned correctly. The easist way to do this is to turn on Photoshop’s grid overlay.
In the View menu, navigate to Show and then click on Grid. Then adjust the settings by navigating to Preferences > Guides, Grid & Slices.
How To Make a Collage in Photoshop: Final Words
That’s it: you don’t need to limit yourself to simplistic templates or buy premium subscriptions to widen your choices.
As you can see, once you know how to make a collage in Photoshop it’s actually very easy and you can get as creative as you want.
Have you tried making a collage in Photoshop? How did you go? If you have any questions, don’t hesitate to post them in the comments section.
Download the latest version of Adobe Photoshop to follow along with this simple tutorial.
Start a free 7-day trial today


Ana Mireles is a Mexican researcher that specializes in photography and communications for the arts and culture sector.

WELCOME TO SHOTKIT
Enter your email to be sent
today's Welcome Gift:
19 Photography Tools
🔥 Popular NOW:


Shotkit may earn a commission on affiliate links. Learn more.